Configuring the eG Agent to Monitor Microsoft Azure AD Connect Using ARM REST API
To achieve the above, you need to perform the following broad steps:
-
Register an Application with an Azure AD Tenant;
-
Determine the Tenant ID, the Application (Client) ID and Secret Key value associated with the registered Application;
-
Assign the Application to a Subscription and grant 'monitoring' rights to it
If an Azure Subscription is already monitored in your environment, then you can use the same Application you created for Azure Subscription monitoring to monitor Azure AD Connect as well. In this case therefore, you would only need to perform step 3 above. Refer to Granting Monitoring Rights to the Application
However, if an Azure Subscription is not monitored, then you will have to complete all the 3 steps above in order to configure the eG agent to monitor Azure AD Connect. The sub-sections below discuss each of these steps in detail.
Registering an Application with Azure Active Directory (AD)
An Azure AD Application is a digital identity and some associated configuration, which informs Azure AD about how to treat software which uses that digital identity.
The eG agent can pull performance metrics related to an Azure tenant, its services, and its resources, only if it communicates with an Azure AD tenant as an 'Application' with 'monitoring rights'.
If such an Application pre-exists with the target tenant, then you can configure the eG agent with the access credentials of that application. However, if no such application pre-exists, then first register a new Application with Azure AD and obtain the access tokens that Azure AD issues for that application.
To achieve this, do the following:
-
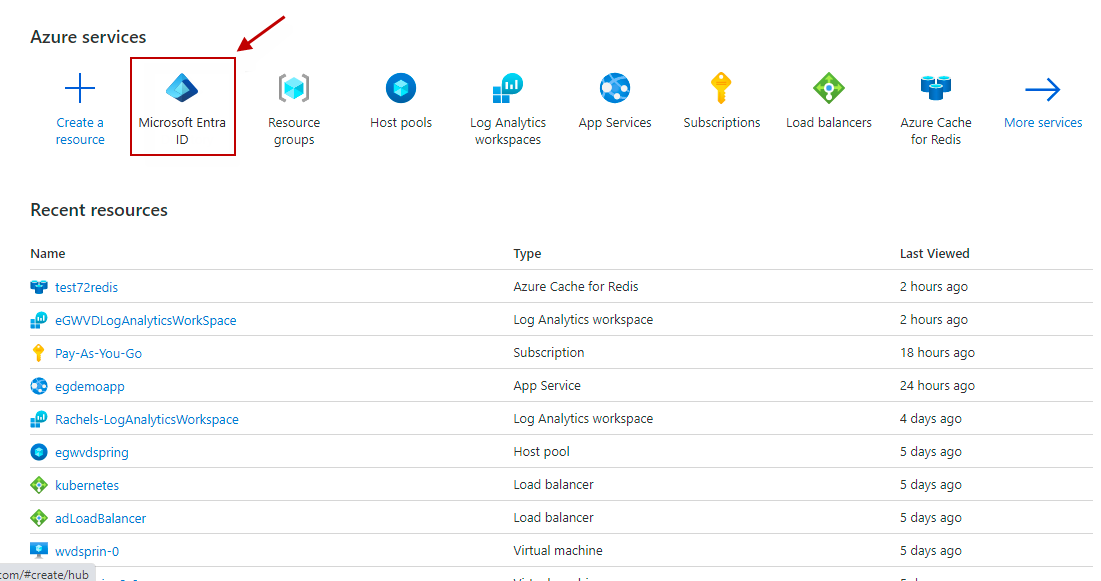
Login to Microsoft Azure portal using https://portal.azure.com with valid credentials.
-
Click on the Azure Active Directory indicated by Figure 1.
-
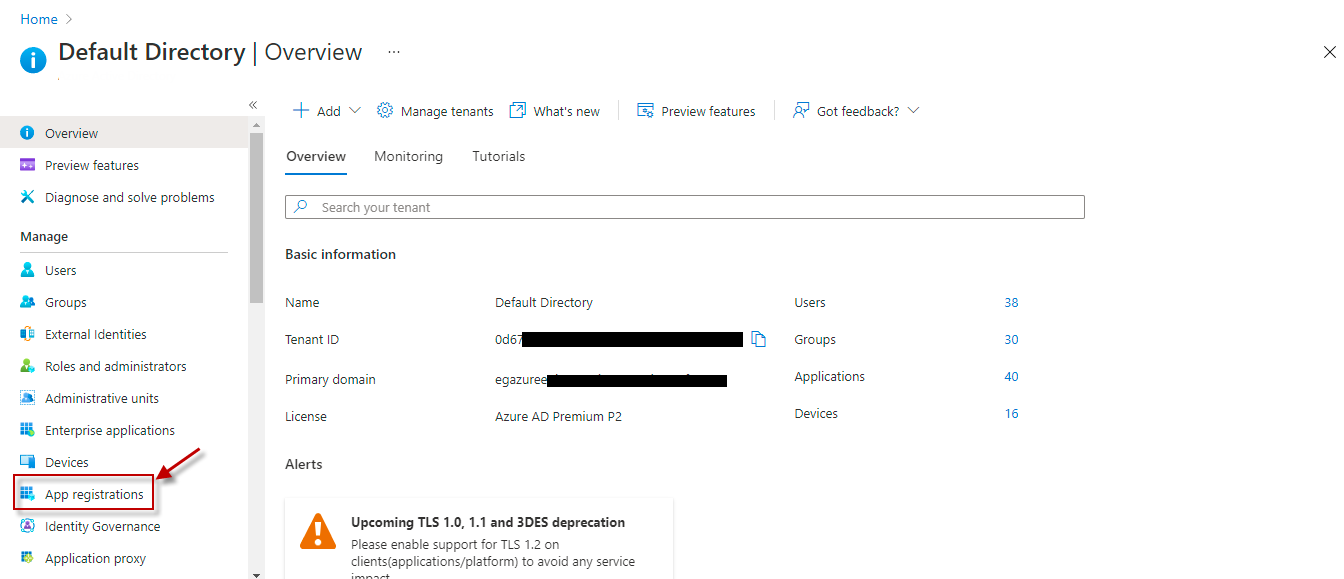
When Figure 2 appears, click on the App Registrations option in its left pane.
-
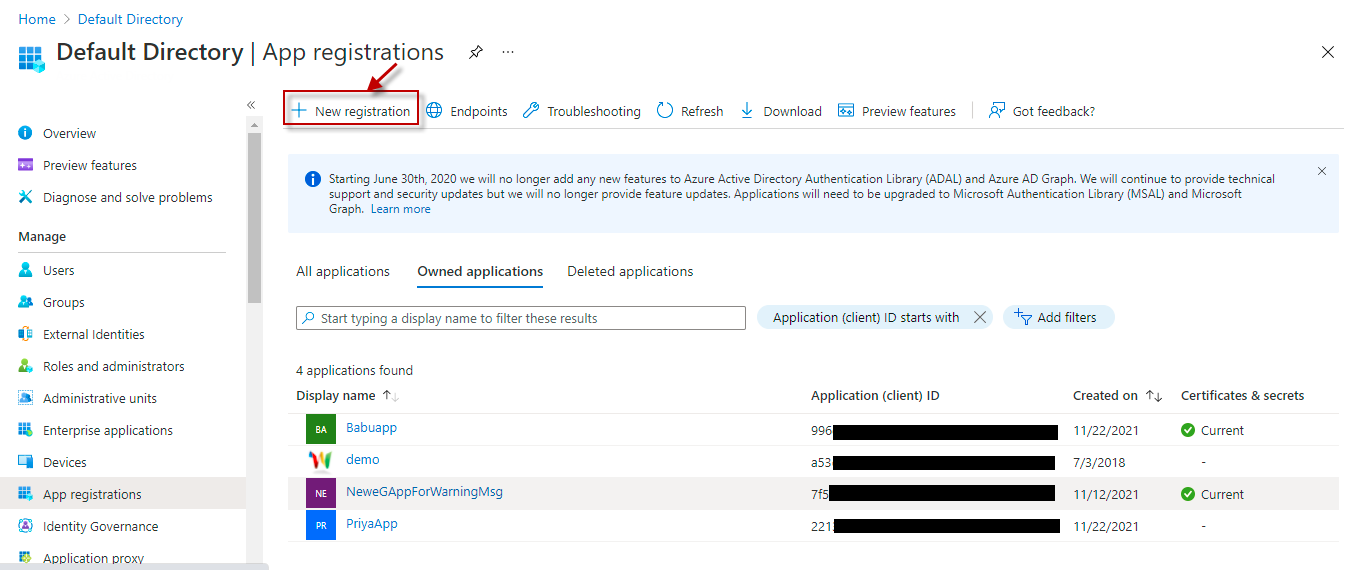
Figure 3 will then appear.
-
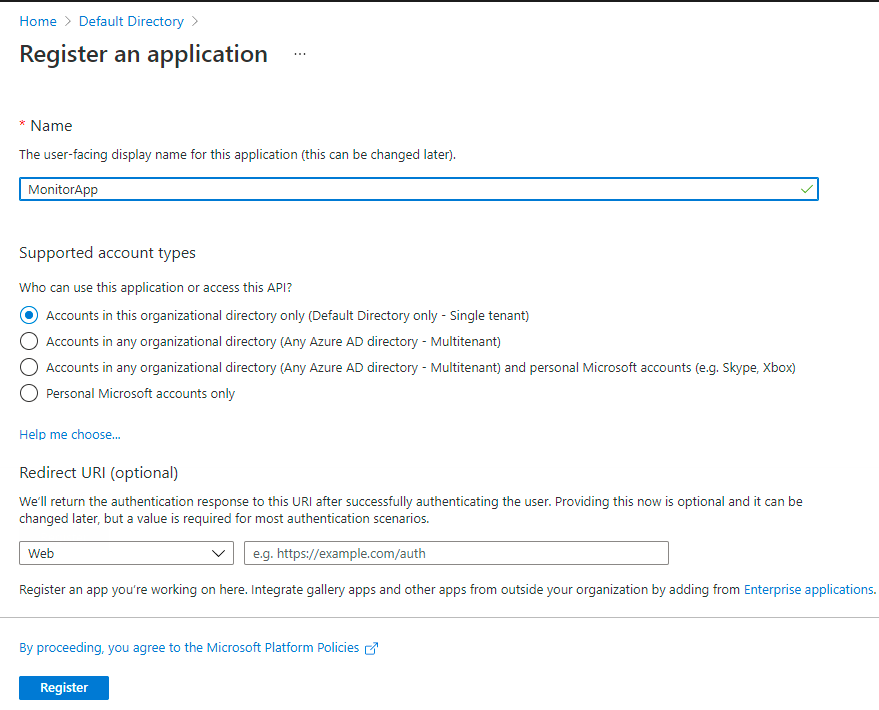
To register a new application, click the New registration option indicated by Figure 3. The Register an application page will then appear as shown by Figure 4.
-
In Figure 4, specify the following:
- The name of the application in the Name text box,
-
Select the type of the account from the Supported account types section.
Supported account types Description Accounts in this organizational directory only
Select this option if you want all user and guest accounts in your directory to use the application or API.
Use this option if your target audience is internal to your organization.
Accounts in any organizational directory
Select this option if you want all users with a work or school account from Microsoft to use this application or API. This includes schools and businesses that use Office 365.
Use this option if your target audience is business or educational customers and to enable multitenancy.
Accounts in any organizational directory and personal Microsoft accounts
Select this option if you want all users with a work or school, or personal Microsoft account to use your application or API. It includes schools and businesses that use Office 365 as well as personal accounts that are used to sign in to services like Xbox and Skype.
Use this option to target the widest set of Microsoft identities and to enable multitenancy.
Personal Microsoft Accounts only
Select this option if you want the application or API to be used by only those users with personal accounts that are used to sign in to services like Xbox and Skype.
- Then, enter the redirect URl (or reply URL) for your application in the Redirect URl text box. Typically, you need to provide the base URL of your app. For example, http://localhost:31544 might be the URL for a web app running on your local machine. Users would use this URL to sign in to a web client application. For public client applications, provide the URL used by Azure AD to return token responses. Enter a value specific to your application, such as https://DocApp.com//auth.
-
Clicking the Register button in Figure 4 will create the Application. Then, Figure 5 will appear displaying the Essentials related to the new Application.
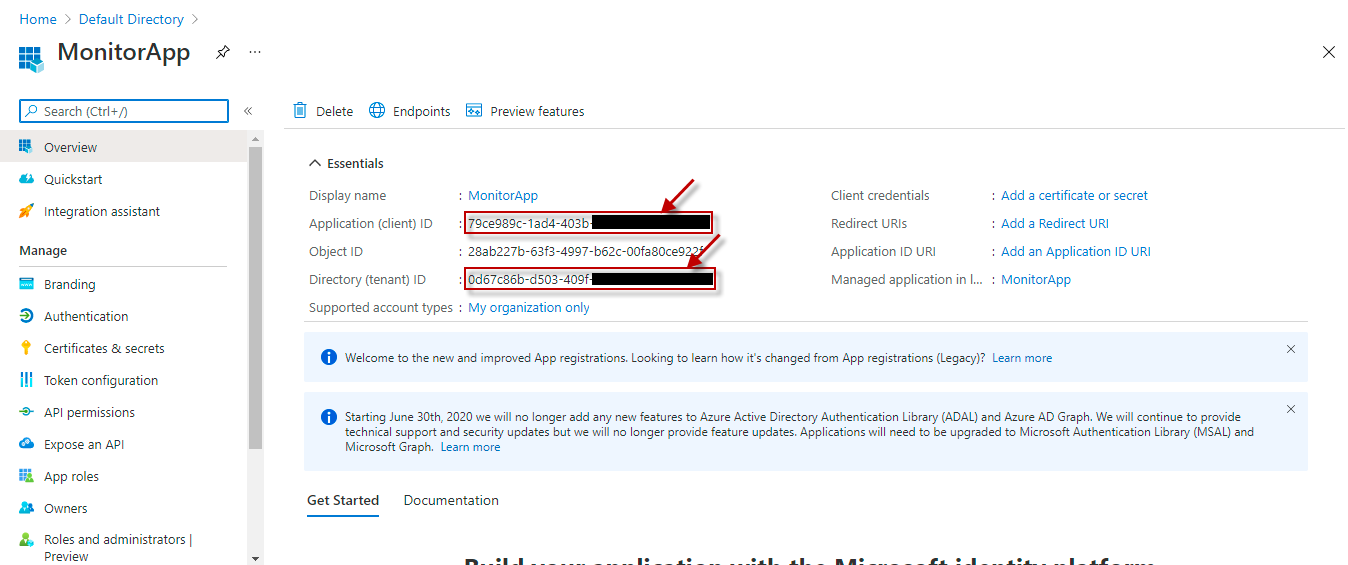
-
From the Essentials, you can obtain the Application ID and Directory ID (see Figure 5). Copy the Application ID and the Directory ID and paste them against the Client ID and TENANT ID text boxes while configuring eG tests for the target Azure component.
Obtaining the Client Secret
For the eG agent to obtain metrics from the target Microsoft Azure component, it is necessary to provide the client secret associated with the registered Application. For this, click on the Certificates & secrets option in the left pane of Figure 5. This will invoke Figure 6.
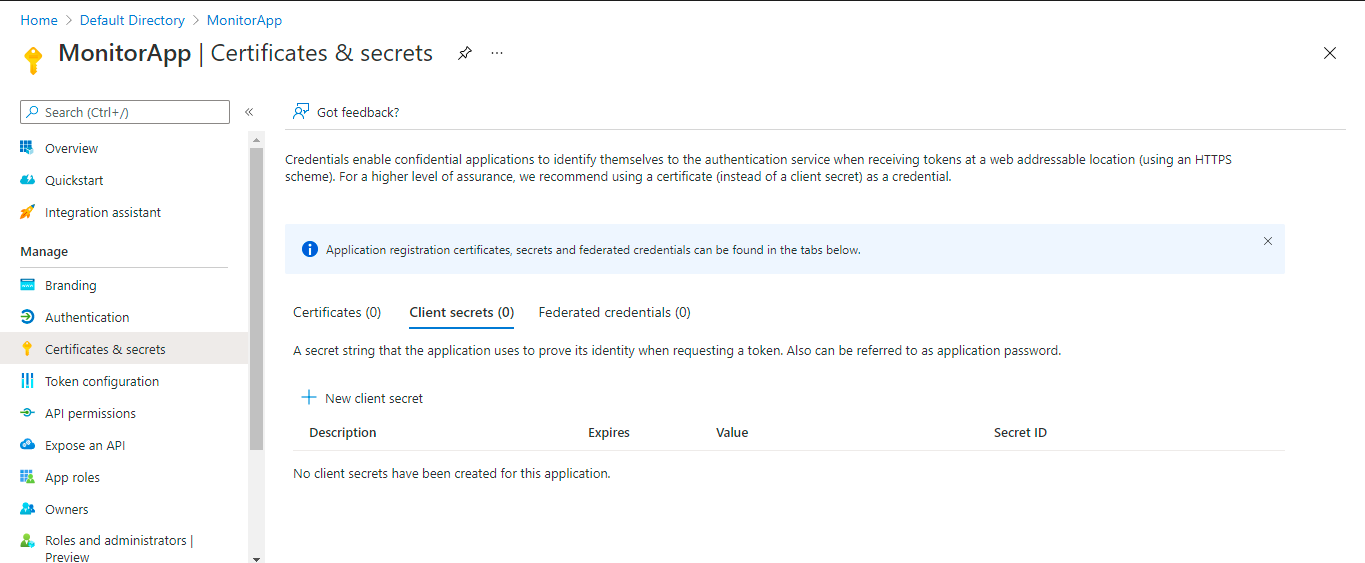
Figure 6 : Creating New Client Secret
Clicking on the New client secret button in the right panel of Figure 6 will invoke Figure 7. Specify the description of the client secret in the Description text box and choose an expiry period from the Expires section as shown in Figure 7.
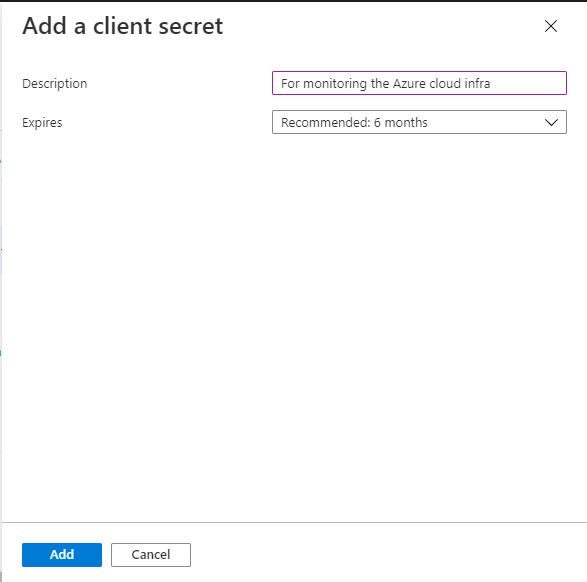
Figure 7 : Adding the client secret
Clicking the Add button in Figure 7 will display a client secret value in the Value column of Figure 8.
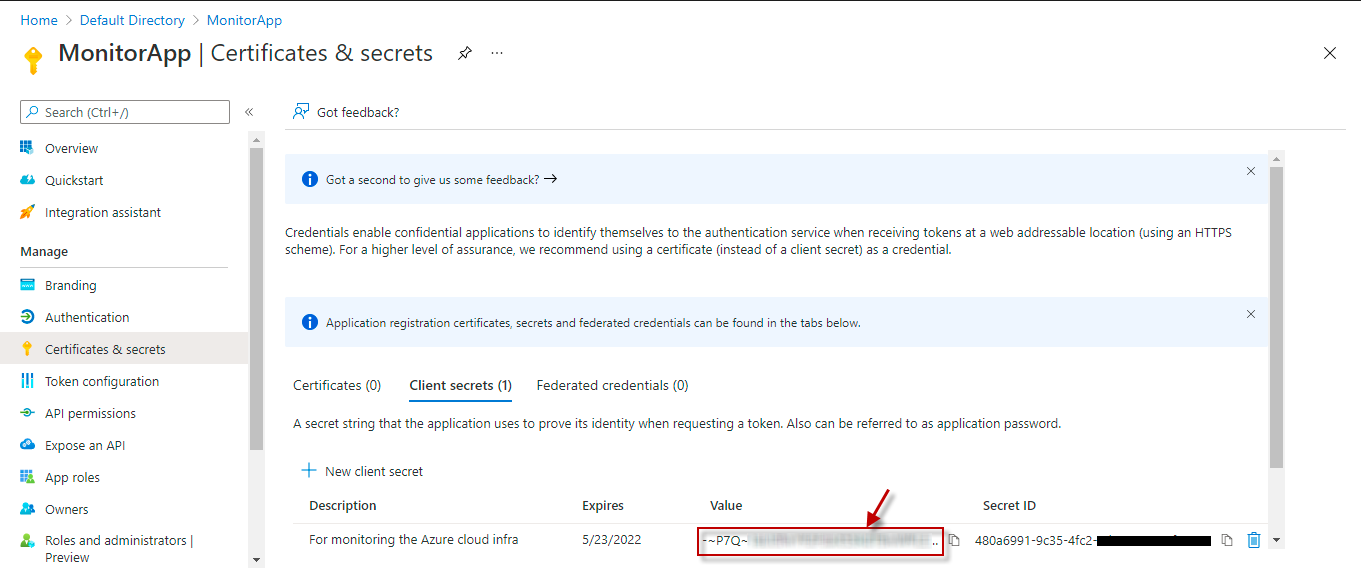
Figure 8 : Generating the client secret value for the application
Note that the Value will disappear once you leave this page, so make sure that you copy the new client secret value in the clipboard by clicking the  icon. Otherwise, you may need to generate a new client secret value. The client secret value has to be specified against the Client password field in the test configuration page.
Granting Monitoring Rights to the Application
Once the application is created option , you need to grant that application monitoring access to all the resources contained within a specific tenant. To achieve this, do the following:
-
In the Azure console, click on the Tenants option and choose the tenant in which the application was created. Then, follow this sequence of options: Azure AD Connect -> AAD Connect -> Connect Sync -> Azure Active Directory Connect Health. Figure 9 will then appear. Select the Role based access control (IAM) option from the left panel of Figure 9. Then, click on Add in the right panel, and pick the Add role assignment option (as indicated by Figure 9).

-
Figure 10 will then appear. From the Job function roles listed in Figure 10, select the Reader role and then click on the Next button.

-
This will activate the Members tab page (see Figure 11). Click on the Select Members button indicated by Figure 11 to assign the role to one/more members. In our case, the chosen Reader role has to be assigned to the application we created previously.

-
Figure 12 will then pop up. To search for the application you created previously, type the name of that application in the text box in Figure 12. The application will then appear in the search results.

Figure 12 : Searching for the application that was created for monitoring purposes
-
Click on the application name in the search results to select it. Then, click on the Select button in Figure 13.

-
Figure 14 will then appear, where you can see that the application has been assigned as a Member of the Reader role. Click on the Review + Assign button here to move on.

-
Figure 15 will then appear. Quickly review the role assignment in Figure 15 and click the Review + Assign button therein to trigger the assignment.

-
Once role assignment is complete, Figure 16 will appear. Expand the Reader role in Figure 16 to check its members. If the application name appears as a member of the Reader role (as depicted by Figure 16), then you can conclude that role assignment was successful.

Figure 16 : Confirming whether/not role assignment was successful
