Component-specific Test Configuration
The user interface also allows for a test to be configured differently for each component.
To configure a test for a specific component of a type, pick the Specific Configuration option from the Tests menu in the Agents tile. Figure 1 will then appear.
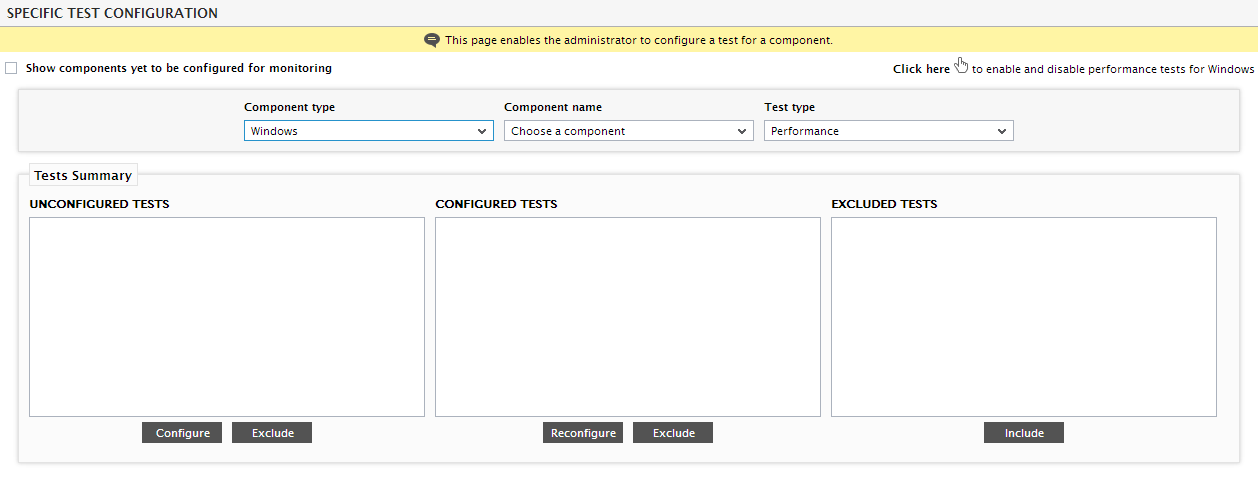
Figure 1 : Viewing the configuration states for all the tests pertaining to specific component
Then, follow the steps given below:
- All components of the chosen Component type will then populate the Component name list. Select the component for which a test is to be configured.
-
First, from the Component type list, choose the type of component. By default, all managed component types will populate the Component type list. You can filter this list (if required) to list only those types of components for which no test has been configured yet. For this, click the Show components yet to be configured for monitoring flag in Figure 1. This will condense the Component type list, thus helping you quickly pick the component for which a test is to be configured.
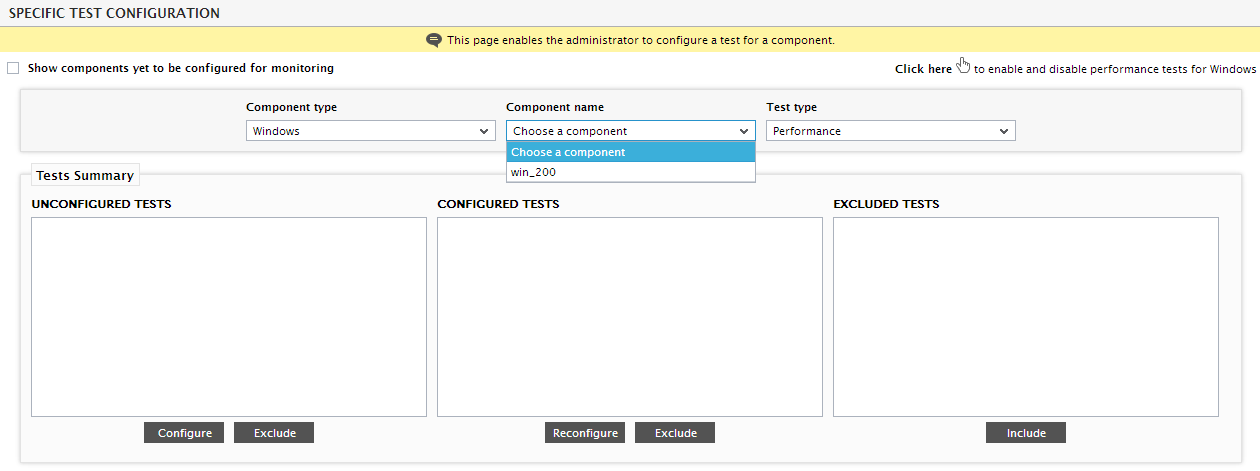
Figure 2 : Selecting a Component type and then a Component
- Then, select the type of test to be configured - i.e., whether a Performance test or a Configuration test. The Configuration option will be available only if the eG license enables the Configuration Management capability.
- Doing so will invoke an agent summary section, using which you can instantly determine which internal agent and external agent is monitoring the chosen Component.
-
Below the agent summary, you will find a list of UNCONFIGURED TESTS, CONFIGURED TESTS, and EXCLUDED TESTS for the chosen Component. The unconfigured tests list displays those tests that have been enabled for the chosen component-type, but are yet to be configured for this component. To configure any of the listed tests, select the test of interest from the unconfigured tests list, and click the Configure button. The parameters of the chosen test will then appear as depicted by Figure 3 will appear.
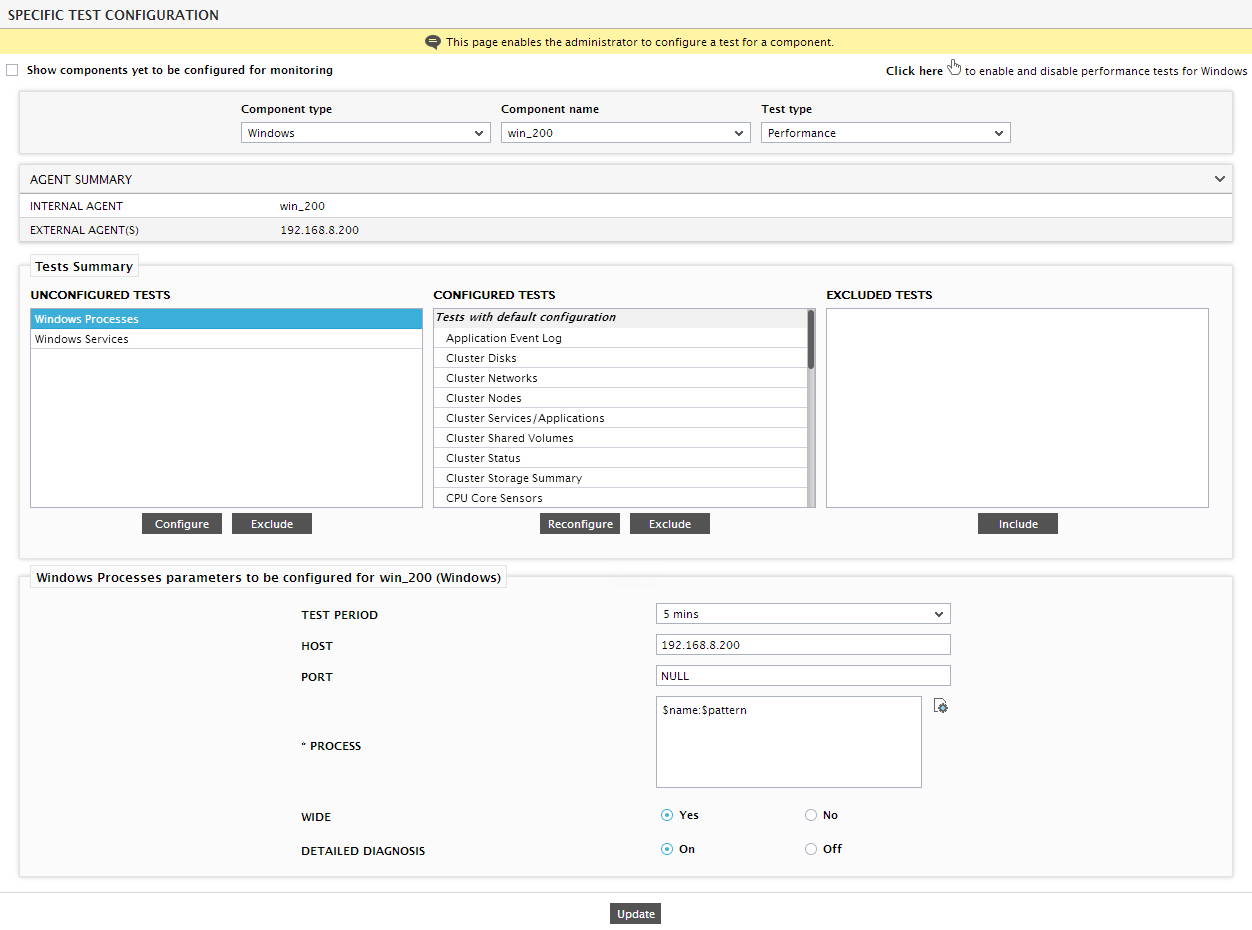
Figure 3 : Configuring an unconfigured test for a specific component
-
Here again, the parameters prefixed by a * (asterisk) denote those parameters that require manual configuration. Once the parameters are configured, click the Update button in Figure 3 to save the changes to the test configuration.
Note:
When changing default configurations of tests, the values with "$" indicate variables that will be replaced by eG Enterprise according to the specific component being managed (e.g., if the URL is "http://$hostName:$port", for a specific web server running on the host www.abc.com on port 80, the URL parameter will be set to "http://www.abc.com:80").
-
If multiple components of the same component type are awaiting configuration, then an Apply to other components button will appear in the test configuration page (see Figure 4). Click on this button if you want the test configuration to be applied to one/more components of the chosen type.
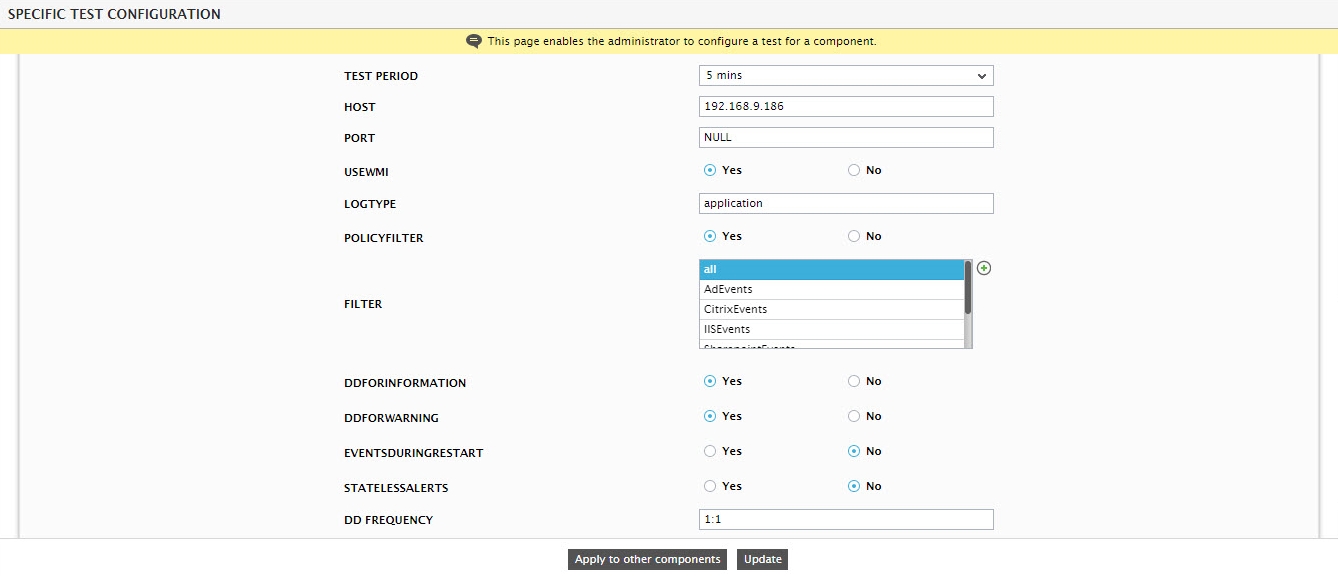
Figure 4 : The parameters associated with the Terminal Authentication test for a specific Microsoft Terminal server
-
Figure 5 will then appear. Using Figure 5, you can choose the Parameters that are to be applied. To apply all the Parameters, select the check box that precedes the column name Param Name. Then, select the components to which the chosen parameters are to be applied from the Existing Components list, and click < button to transfer the selection to the Components to be configured list. Finally, click the Apply button. This ensures that the values passed to the selected parameters are automatically applied to the components in the Components to be configured list. This saves the time and labor involved in repeating the same set of configurations for every component of a particular component type.
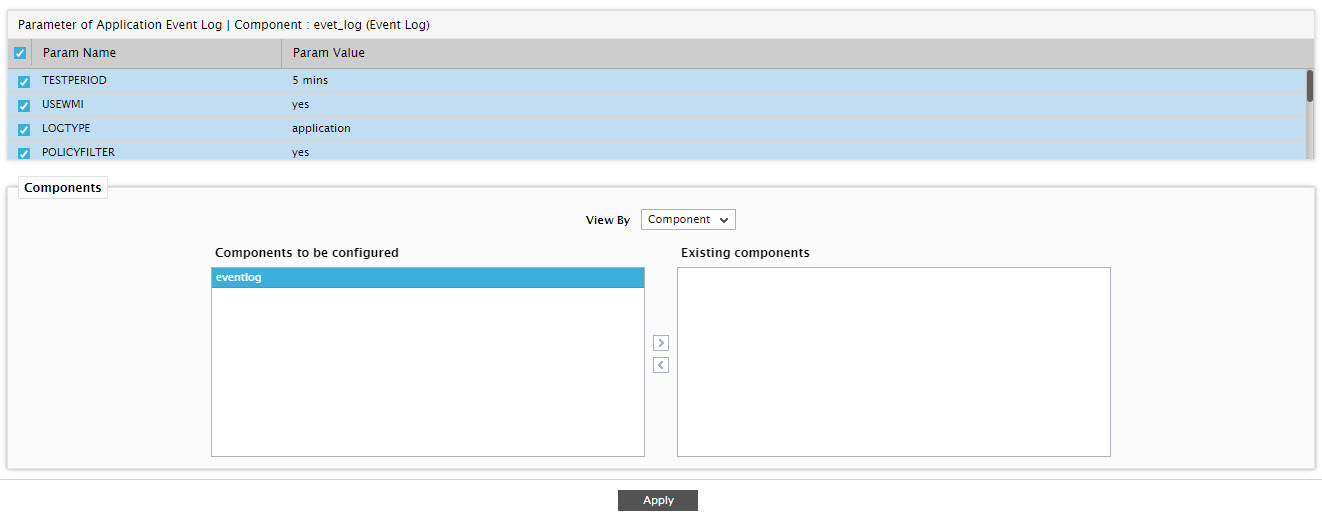
Figure 5 : Choosing the parameters and components to which the configuration is to be applied
- Let us now return to the specific test configuration page of Figure 3 and explore the other options it provides. The configured tests list of Figure 3, displays those tests that have already been configured - such tests are typically of two types - tests that take the default configuration, and tests that have been specifically configured for the chosen Component. Accordingly, the configured tests list box will list tests under two categories - Tests with specific configuration and Tests with default configuration. If required, you can reconfigure any of these tests, by picking the test of interest from the configured tests list and clicking the Reconfigure button. This will once again display the parameters of the chosen test, allowing you to edit the values of any of the parameters.
-
The excluded tests list displays tests that have been excluded for a specific component - i.e., tests that will not execute for a selected Component. To exclude a test that has not yet been configured, pick the test from the unconfigured tests list, and click on the Exclude button. To exclude a test that has already been configured, pick the test from the configured tests list, and click the Exclude button. If more than one component of the chosen type has been managed, then, clicking on the Exclude button will lead you to , using which you can exclude the selected test for the other components of that type as well.
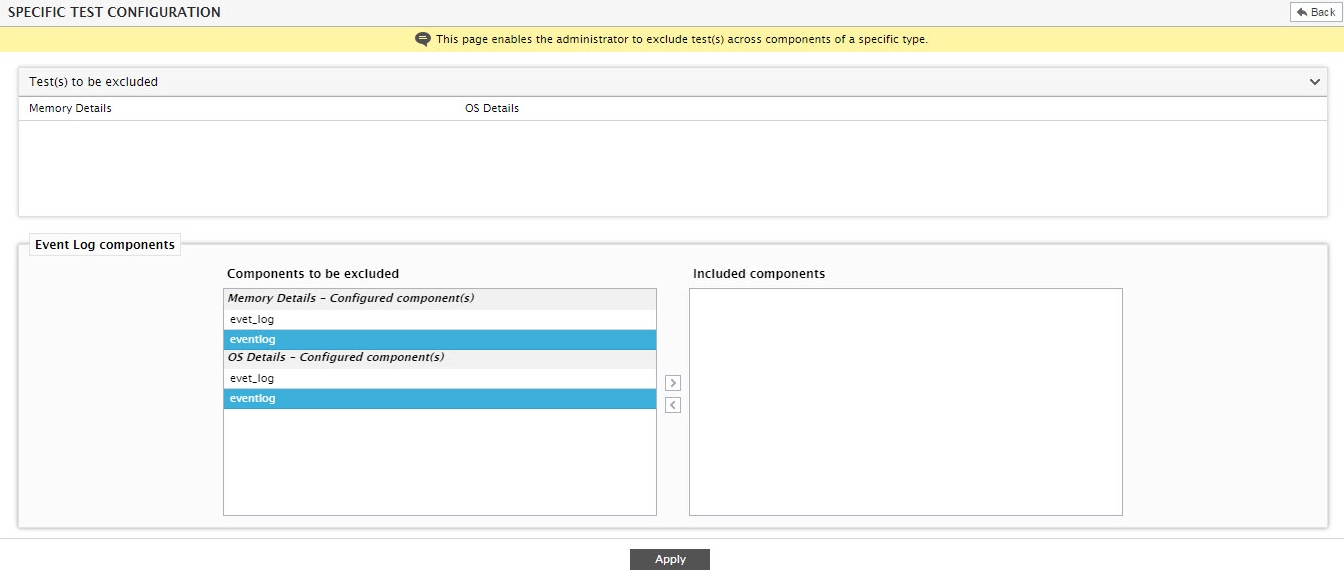
Figure 6 : Excluding a test for more than one component
-
The included components list of will list all the components (of the chosen component type) for which the chosen test is currently available. The components in this list will be grouped according to the state in which the test (chosen for exclusion) exists with respect to a component. For instance, if the test chosen for exclusion is in the unconfigured state for a few components, then such components will be listed under the group <TestName> - Unconfigured component(s) in the included components list. The components to be excluded list on the other hand, will by default display that component for which the test is currently being chosen for exclusion. To exclude the test for the other components, pick them from the included components list regardless of their state and click the << button; this will transfer the selection to the components to be excluded list. If you want to include the test for one/more of the components chosen for exclusion, then, pick the components from the components to be excluded list and click the >> button. Finally, click the Apply button to save the changes. You will then be lead to Figure 7, where you can view the test that you just excluded in the excluded tests list.
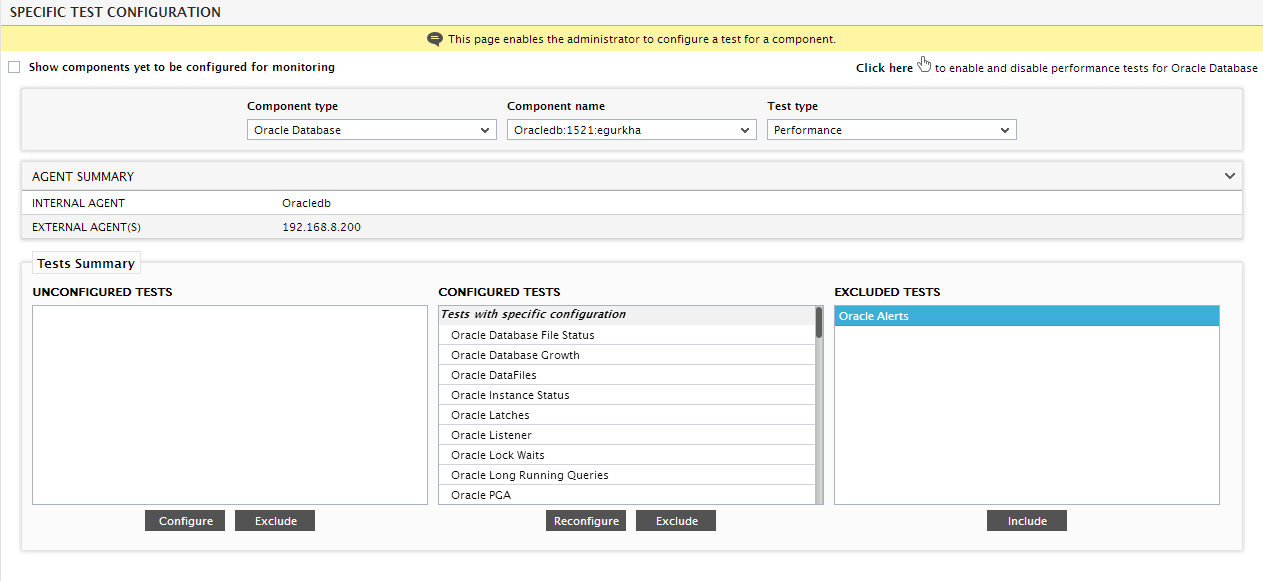
Figure 7 : Selecting the OracleExtents to be included for its execution
-
At any given point in time, you can make sure that an excluded test starts executing on a component, by including that test. For that, select the test from the excluded tests list, and click the Include button. If the chosen test was previously excluded for more than one component of the chosen type, then, clicking the Include button will lead you to Figure 8, using which you can include the chosen test for all such components at one shot. While the components to be included list will display that component for which the test has just now been chosen for inclusion, the excluded components list will list all those components (of the chosen type) for which the test was previously excluded. The components in the excluded components list will be grouped according to the state in which the test (chosen for exclusion) exists with respect to a component. For instance, if the test chosen for exclusion is in the unconfigured state for a few components, then such components will be listed under the group <TestName> - Unconfigured component(s) in the excluded components list. To include the test for one/more excluded components, select the components of interest from the excluded components list and click the << button. To make sure that the test stays excluded for any component, pick the component from the components to be included list and click the >> button. Finally, click the Apply button to save the changes.
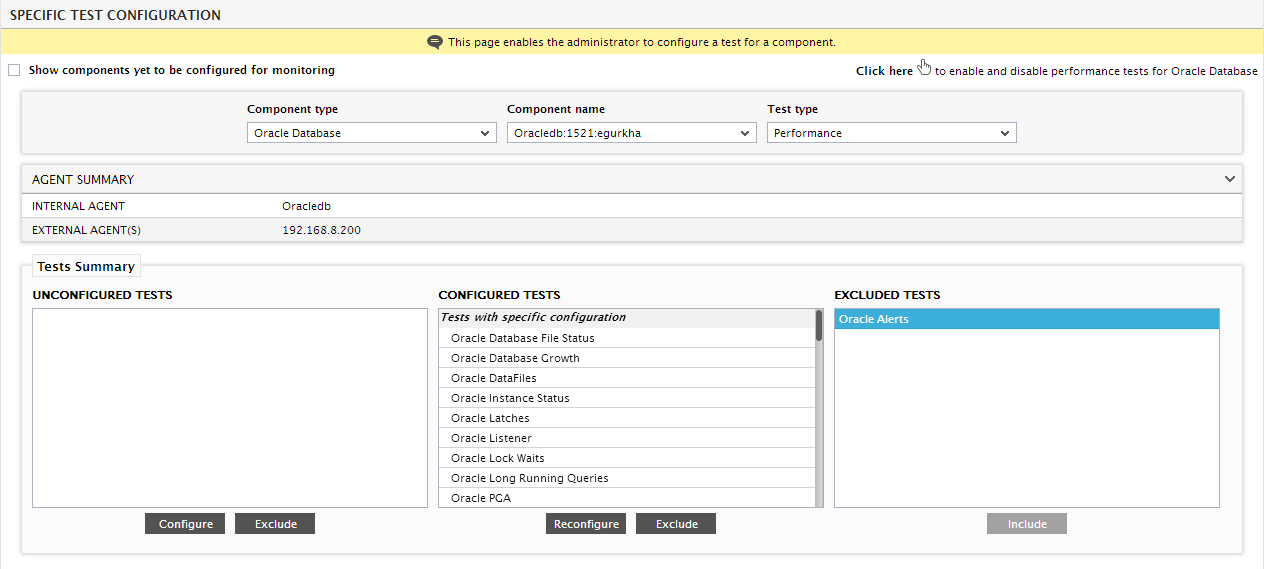
Figure 8 : Selecting the components for which the chosen test is to be excluded
Note:
- If a specific test configuration has been applied to a component, the default parameter values will no longer apply. The user has to change the parameters manually. By excluding and then including the component, the user can re-ensure that the default parameters apply for a component.
-
Normally, a few/all the tests associated with a component share the same set of parameters. To ensure that administrators do not perform the redundant task of configuring each such test separately, you can configure the eG Enterprise system in such a way that if one of these tests is configured, the other related tests get configured automatically. For instance, take the case of the FnSessionTest and the FnHaStatusTest that the eG external agent executes on a Fortigate Firewall. These two tests support the same parameters as the FnSystemTest. To ensure that these two tests are automatically configured, as soon as the FnSystemTest is configured, do the following:
In order to do this:
- Navigate to the directory <eg_install_dir>\manager\config directory and edit the eg_testparam.ini file.
- Go to the [TEST_RELATIONS] section, where entries for tests that are related to one another pre-exist.
-
To set a relationship between the Fortigate Firewall tests in our example, append the following entry to the [test_relations] section:
FnSystemTest=FnSessionTest, FnHaStatusTest
This ensures that, once you configure the FnSystemTest in the administrative console, values provided for the FnSystemTest parameters, are automatically applied to the FnSessionTest and FnHaStatusTest, configuring those two tests as well. However, such a test relationship will not affect the testperiod parameter. If for some reason, different tests executing on a component are set to execute at a different testperiod, then, even if an entry exists for such tests in the [test_relations] section, the testperiod for the tests will continue to be different. On the contrary, if you also want the testperiod of one test to be automatically applied to the other tests executing on the same component, you will have to follow the steps given below:
- Edit the eg_testparam.ini file.
-
In the [COMMON_TEST_RELATIONS] section of the file, provide an entry for all the tests that will share the same set of parameters, including the testperioD.This specification should be in the following format.
<Comma-separated list of related tests>=None
For instance, for the Fortigate Firewall example above, the entry would be:
FnSessionTest,FnSystemTest,FnHaStatusTest=None
This means that if any one of the three tests specified is configured, then all the parameters (including testperiod) of the configured test will be automatically applied to the other two tests, thereby configuring those two tests also.