Configuring a WebSphere Application Server 8.x to Work with the eG Agent
To monitor a WebSphere Application server 8.x (and above), a specific WebSphere monitoring eG component has to be installed on it. If the WebSphere server to be monitored uses a SOAP connector port for its internal communications, then the egurkha6.ear component will have to be installed on the server. On the other hand, if the target WebSphere server uses an RMI port for communicating internally, then the egurkha6rmi.ear component should be installed on the server. Before installing either of these components on a WebSphere server, do the following:
-
Copy the egurkha6.ear (or egurkha6rmi.ear) file from the <EG_INSTALL_DIR>\lib directoy (on Windows; on Unix, this will be /opt/egurkha/lib) to any temporary location on the eG agent host.
-
Rename the file in the temporary folder as egurkha.ear.
-
Copy the egurkha.ear file back to the <EG_INSTALL_DIR>\lib directoy (on Windows; on Unix, this will be /opt/egurkha/lib).
Then, follow the steps given below to perform the installation.
-
Login to the WebSphere Administrative Console by first accessing the URL: http://<IP/hostname of the WebSphere server>:<WebSpherePort>/, and then providing a valid User ID and Password.
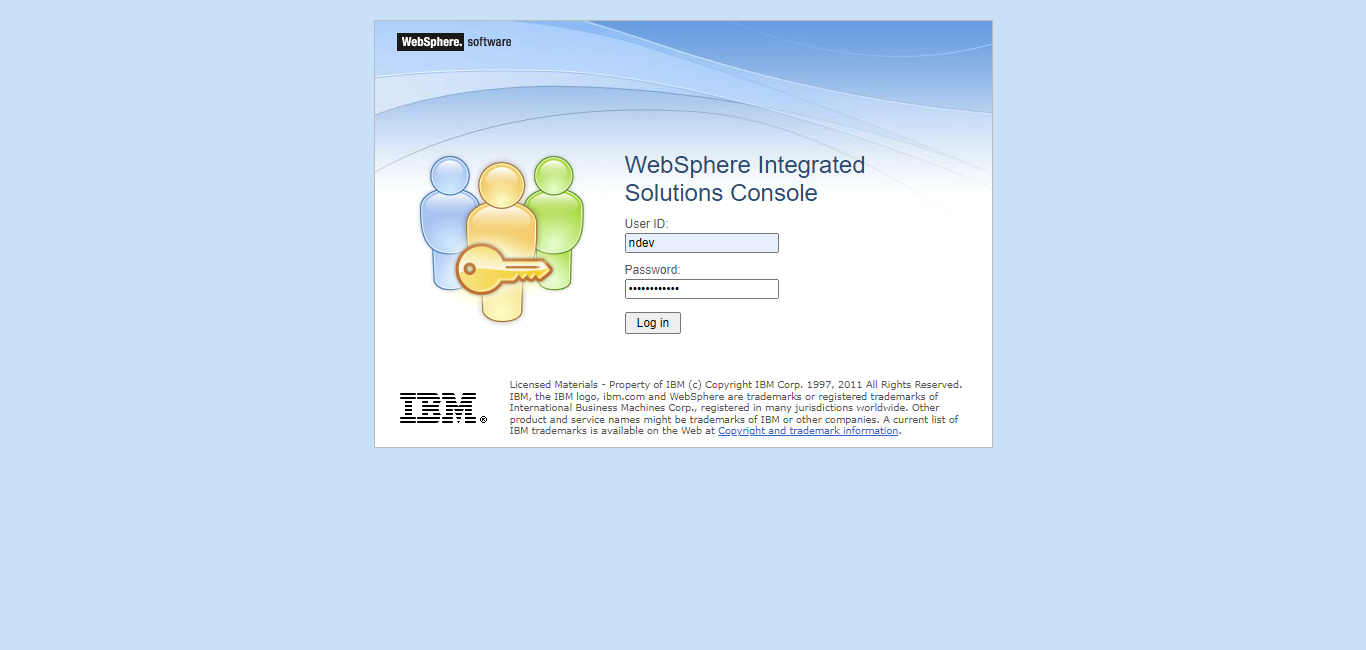
Figure 1 : Logging into the WebSphere administrative console
-
The WebSphere Administrative Console will then appear as depicted by Figure 2.

-
The first step towards installation is to ensure that the user installing the WebSphere monitoring eG component belongs to the Federated Repositories or an external LDAP directory i.e., Standalone LDAP registry. For this, expand the Security node in the tree-structure in the left panel of Figure 2. Clicking the Global Security option will reveal Figure 3.
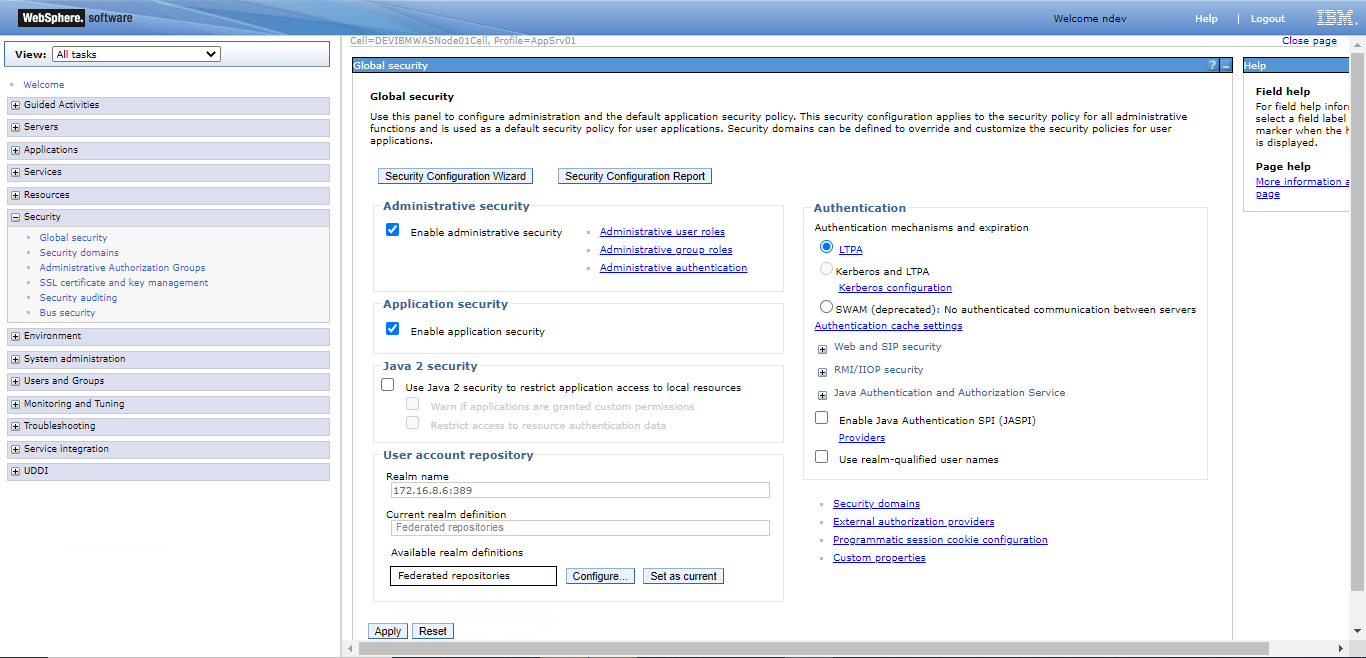
Figure 3 : Identifying if the user belongs to Federated repositories
If the user belongs to Federated Repositories (see Figure 3) i.e., if Federated reporsitories option is listed in the Current realm definition text box, then, you can directly proceed to step 4 to install the WebSphere monitoring eG component. If the user belongs to an external LDAP directory i.e., Standalone LDAP registry (see Figure 4), then, in order to collect the metrics, the user should posses Monitor role.
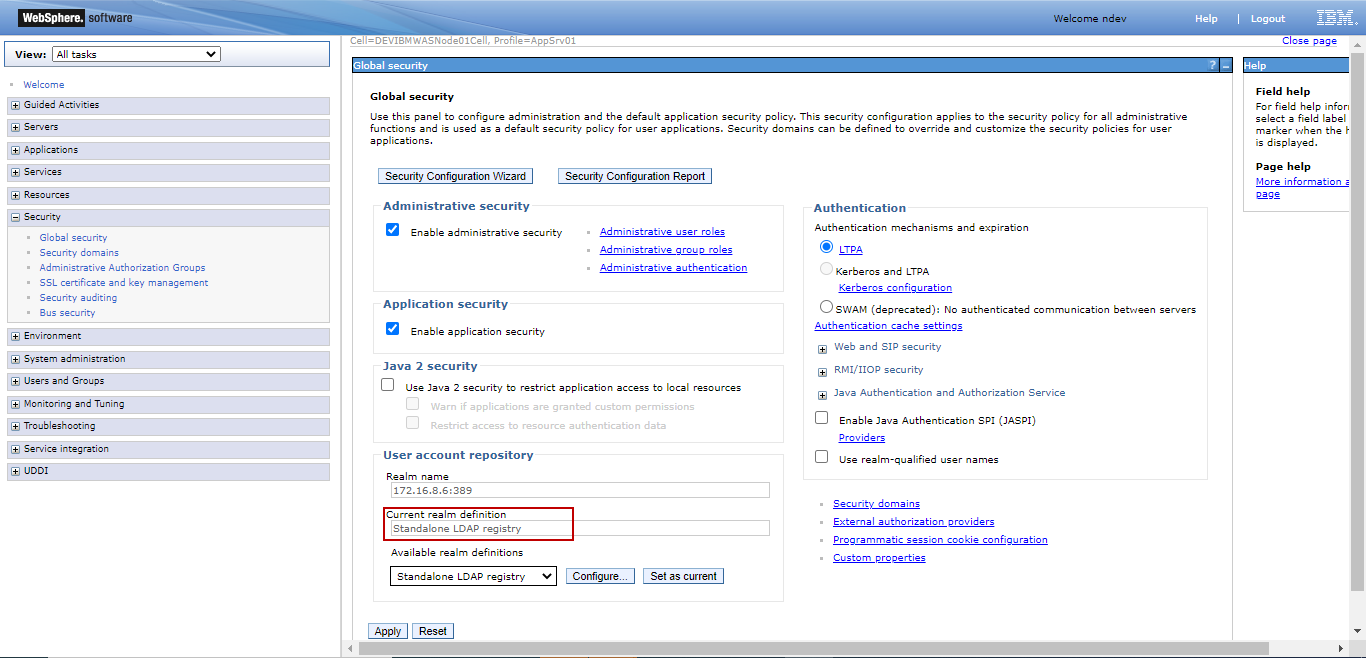
Figure 4 : Identifying if the user belongs to Standalone LDAP registry
Clicking on the Administrative user roles in Figure 4 will reveal Figure 16 using which you can ensure if the user is indeed assigned Monitor role.
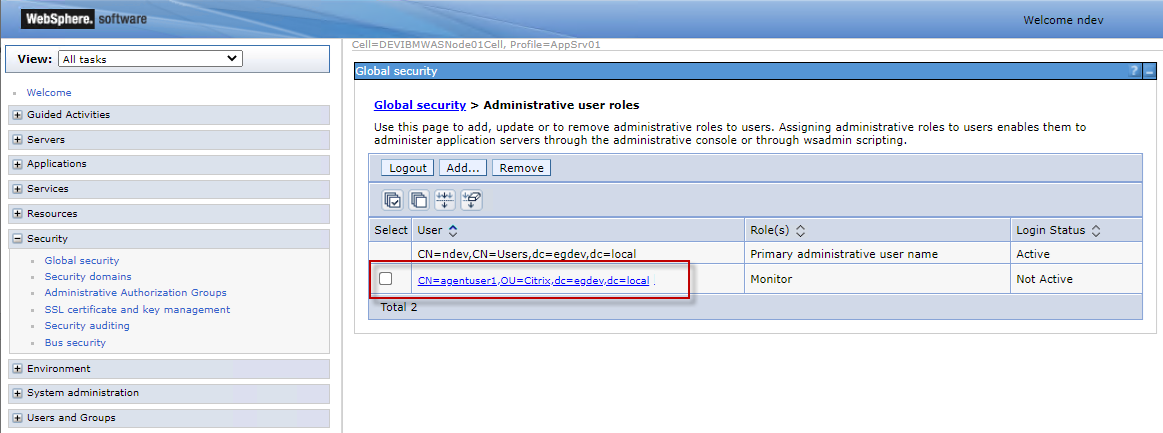
Figure 5 : Ensuring if the Standalone LDAP registry user is assigned Monitor role
If the Monitor role has not been assigned to the user, then, a primary administrator can assign the Monitor role to the user by clicking the Add... button in Figure 16. Note that this user should be specified against the USER parameter while configuring the tests.
-
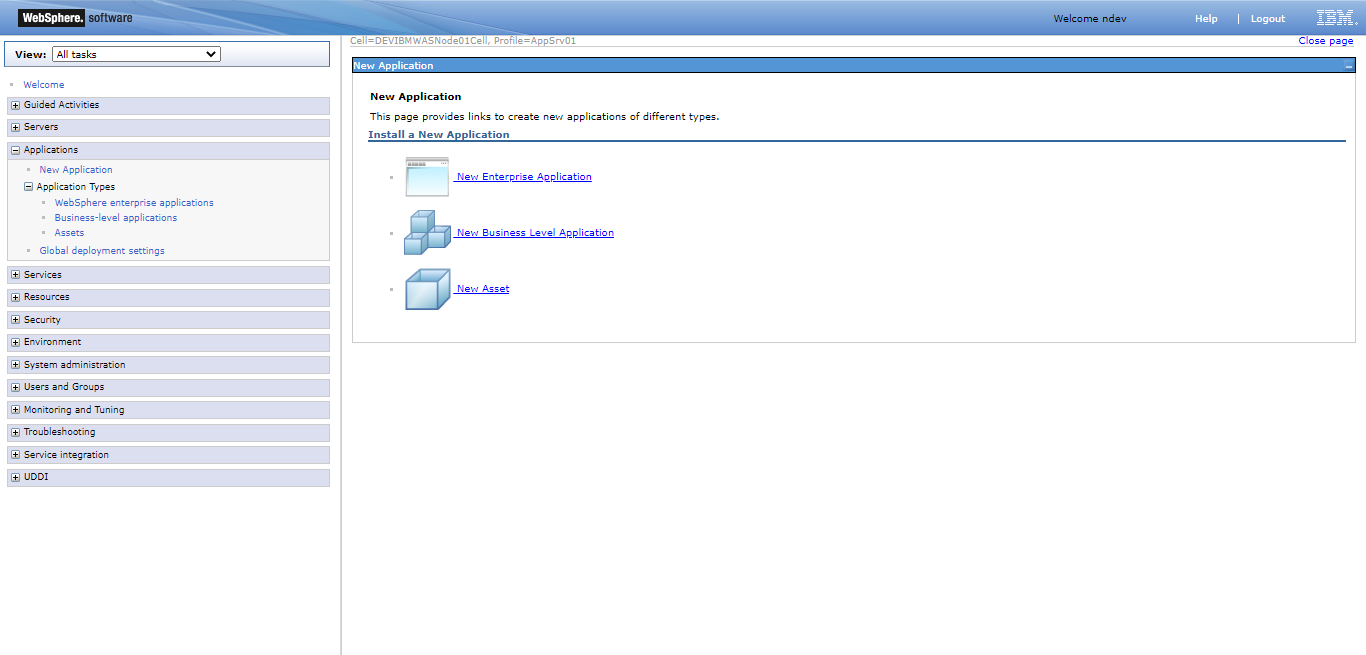
Now, to begin the installation, expand the Applications node in the tree-structure in the left pane of Figure 6, and then click on the New Application sub-node within. Then, from the list of links displayed in the right panel, pick the New Enterprise Application link.
-
Figure 7 will then appear. If the egurkha.ear file to be deployed is on the local host, then, select the Local file system option, and then specify the full path to the egurkha.ear application in the Full path text box. On the other hand, if the egurkha.ear file is available on a remote host in the environment, then, pick the Remote file system option and specify the full path to the remote egurkha.ear file in the Full path text box below. Typically, the 'ear' file will be available in the /opt/egurkha/lib directory (on Unix; on Windows, it will be the <EG_INSTALL_DIR>\lib directory). Then, click the Next button in Figure 7.
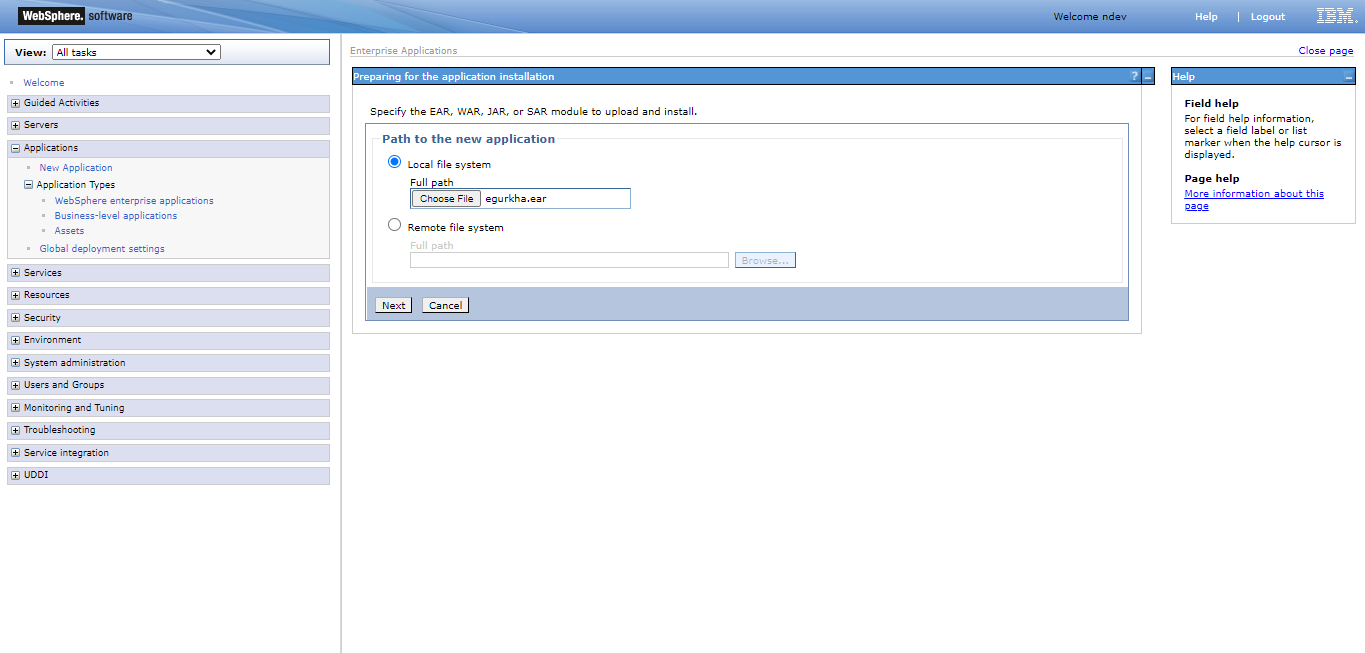
Figure 7 : Specifying the full path to the 'egurkha.ear' file
-
When Figure 8 appears, select the Fast Path option, and click the Next button.
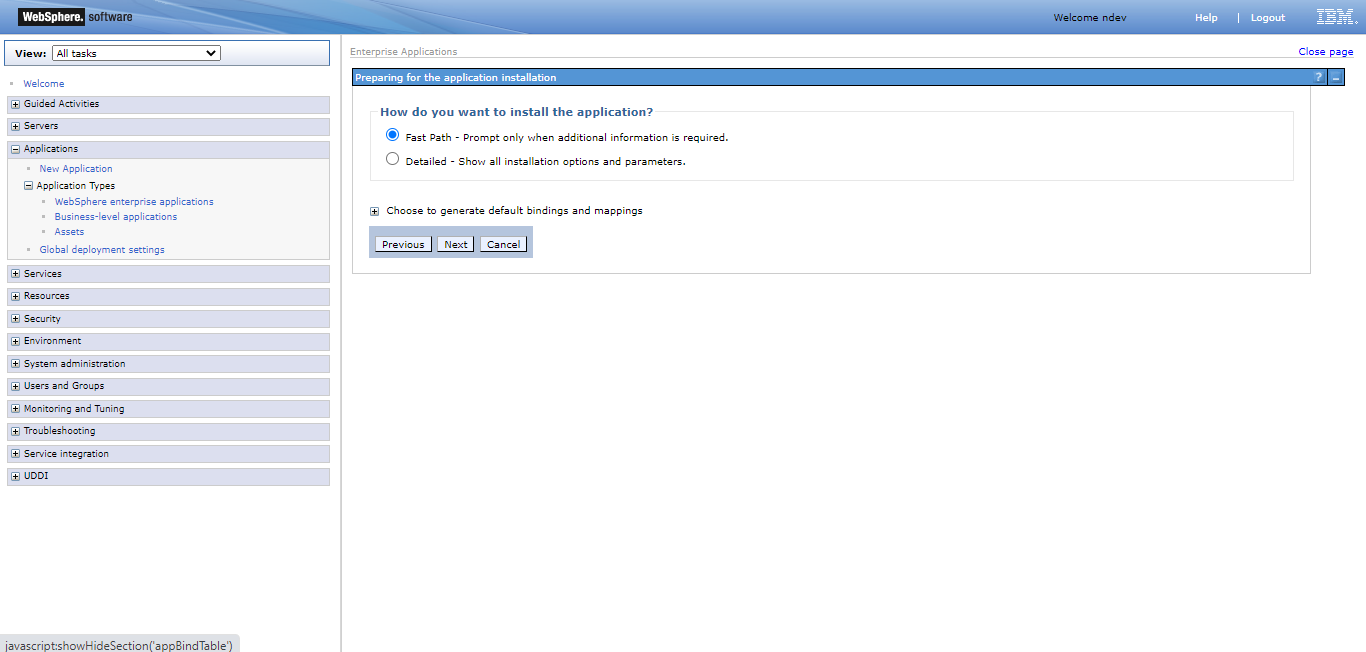
Figure 8 : Indicating how to install the egurkha application
-
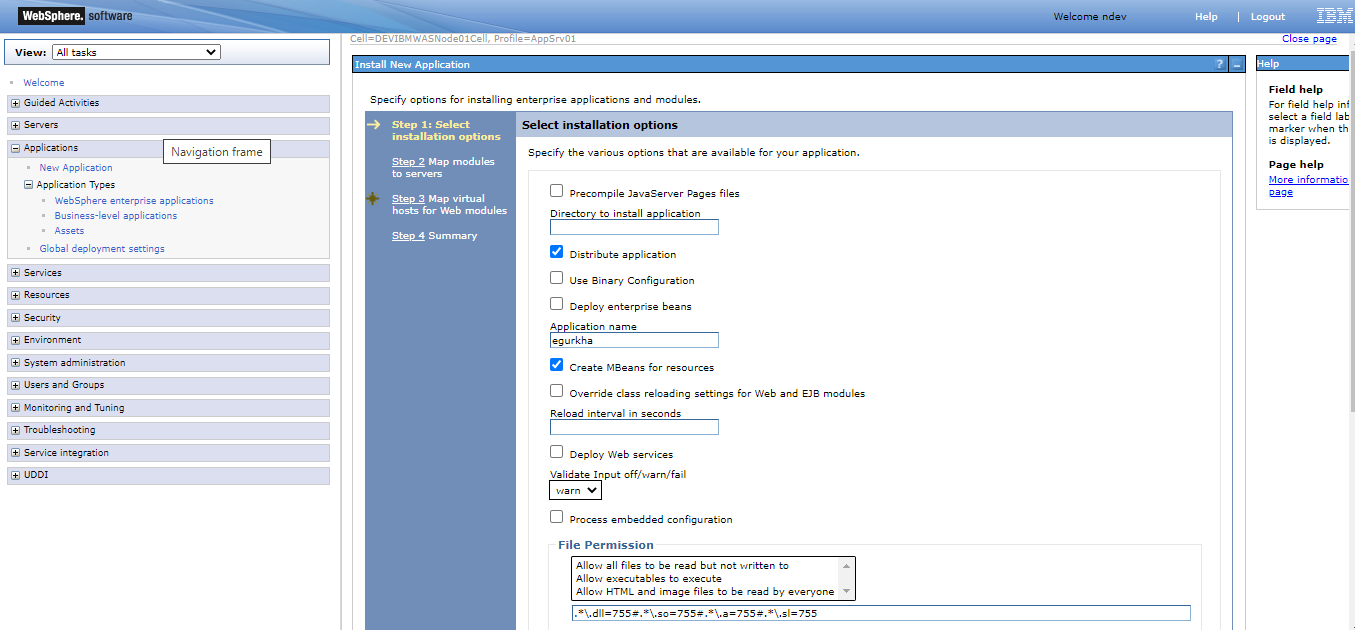
Using Figure 9 that appears next, view the Installation Options, and select the options that you want to enable for your application deployment. Since the default installation settings apply to the egurkha.ear deployment, you need not enable/disable any additional options in this page. Therefore, simply scroll down the page and click the Next button therein.
-
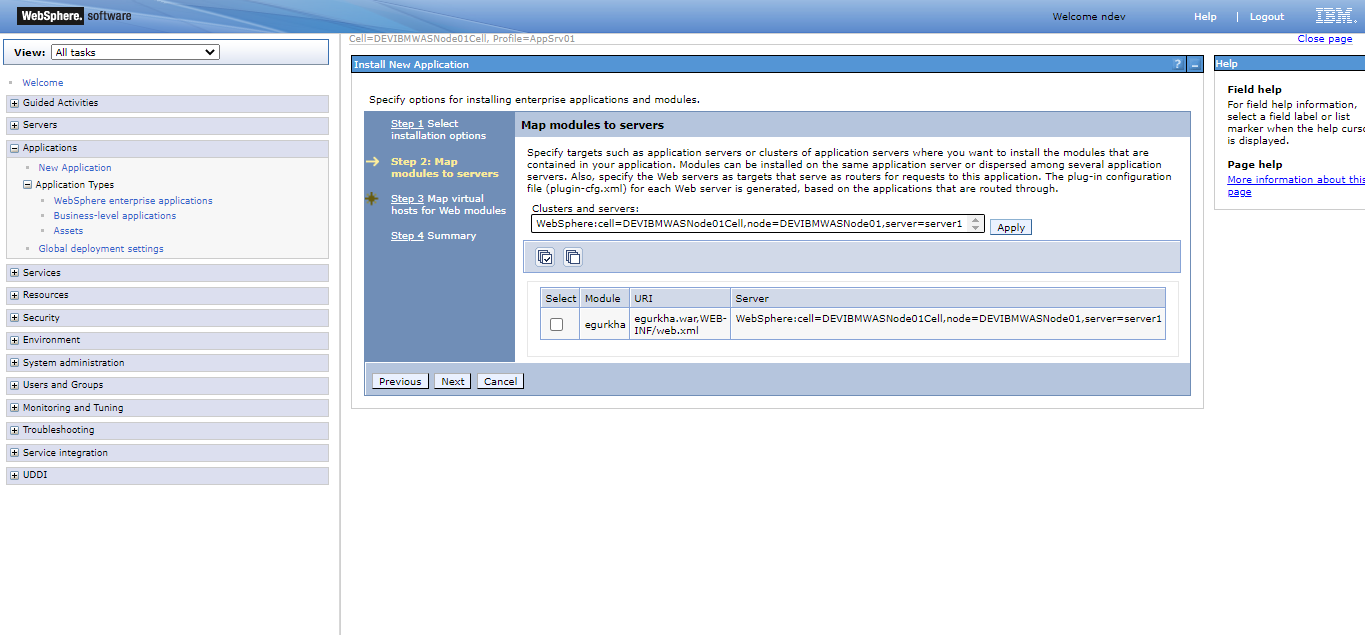
When Figure 10 appears, map the egurkha module to the displayed Server, by selecting the check box corresponding to the egurkha module and clicking the Next button.
-
Then, to map the egurkha web module to the default selection in the Virtual Host drop-down, select the check box corresponding to the egurkha module in Figure 11, and click the Next button. This will ensure that the egurkha web module is installed on the default virtual host.
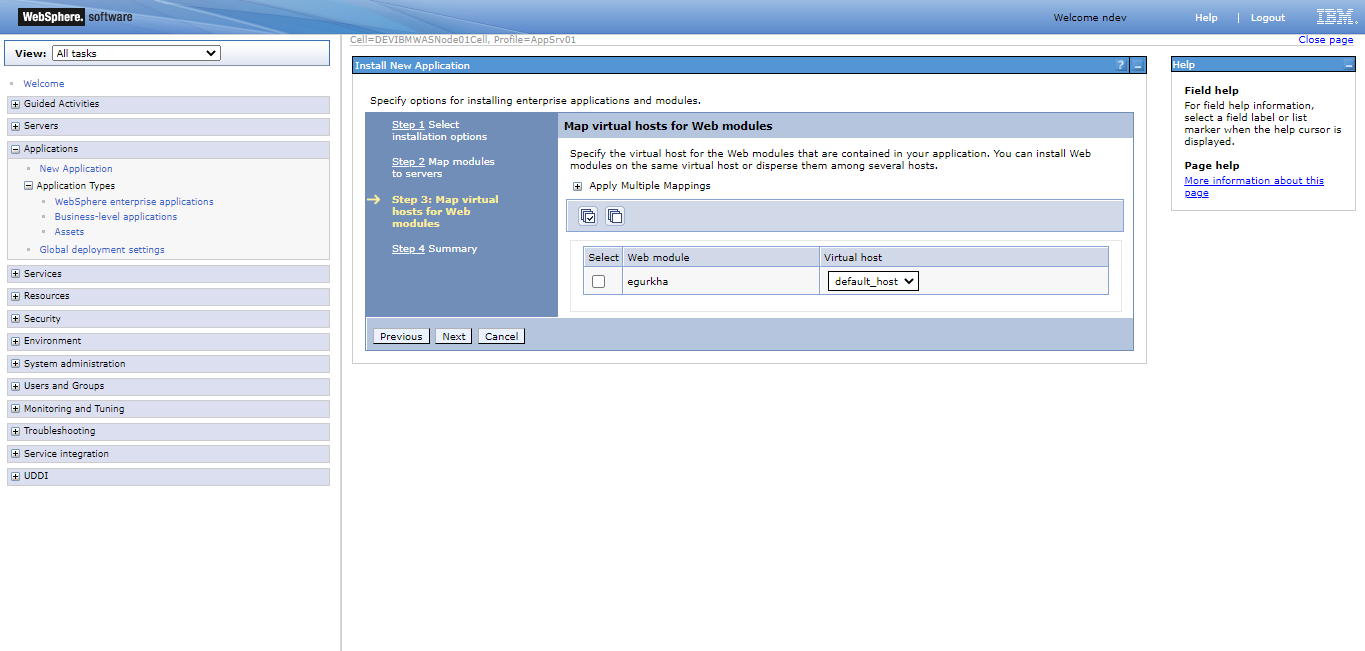
Figure 11 : Mapping the egurkha web module with a virtual host
-
Next, a summary of your specifications for egurkha.ear deployment will appear (see Figure 12). Scroll down the summary to click the Finish button (see Figure 13).
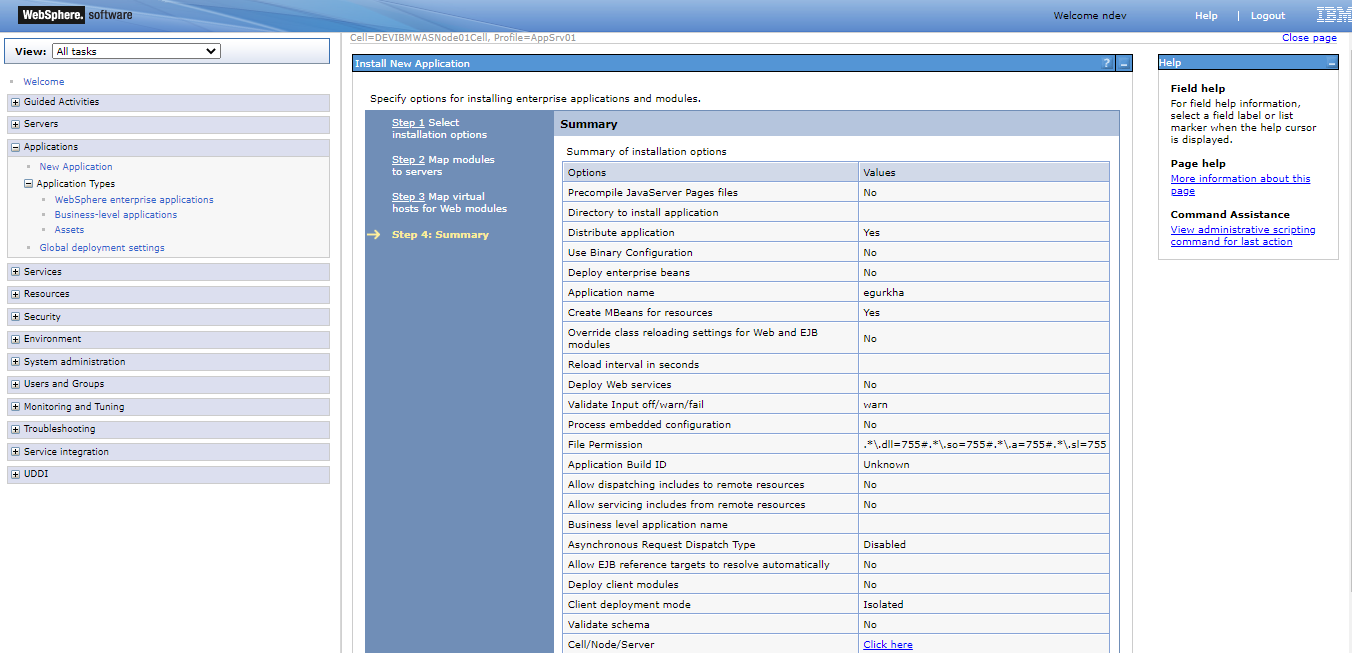
Figure 12 : Viewing a summary of your installation specifications
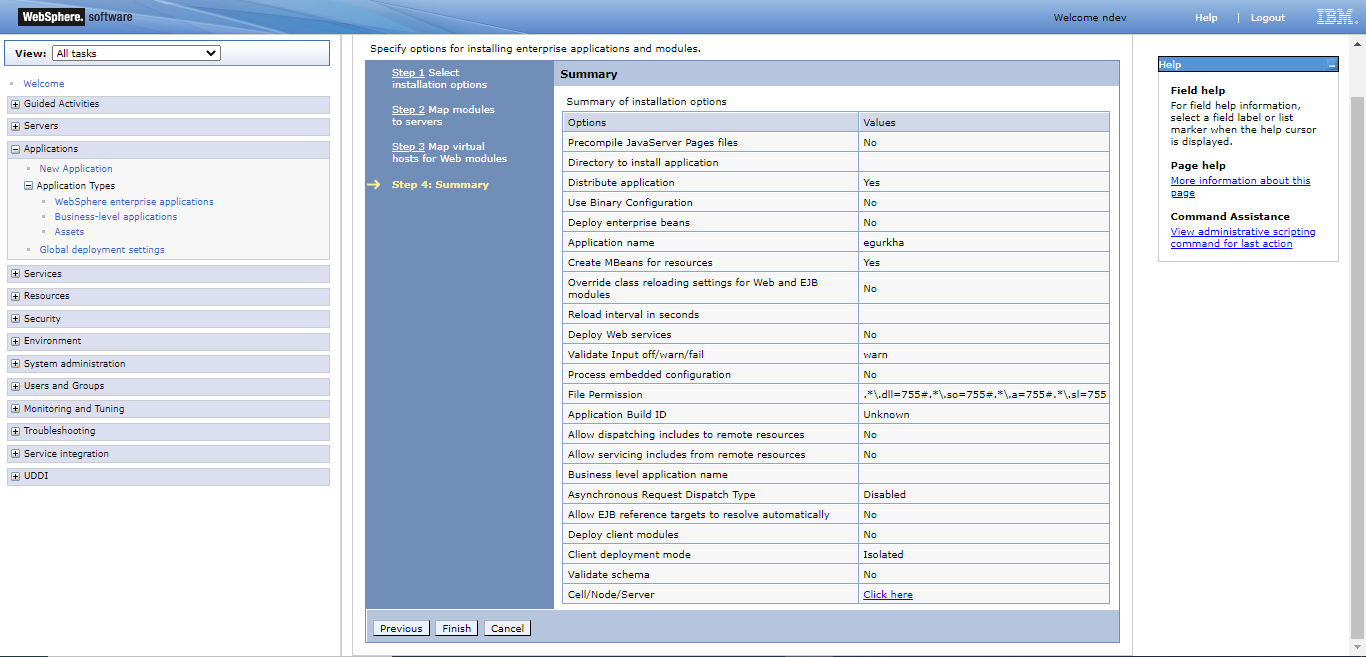
Figure 13 : Scrolling down the summary and clicking the Next button
-
This will trigger the deployment of the egurkha application. Figure 14 then appears indicating the progress of the installation. Scroll down Figure 14 to determine whether the egurkha application was successfully deployed or not. If application deployment is successful, a message to that effect will appear here.
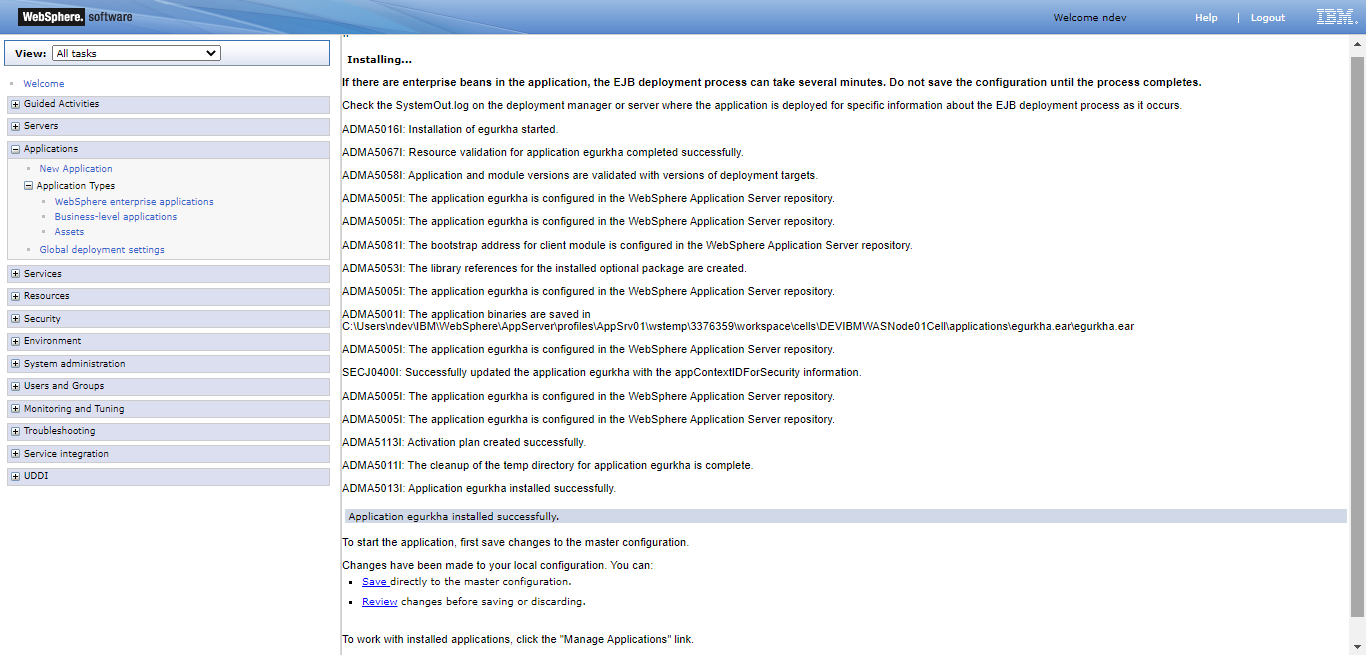
- Then, proceed to save the egurkha application. The first step towards this is to save the changes to the master configuration. Before saving the master configuration, you may want to review the changes effected on it. For this, click the Review link in Figure 14.
-
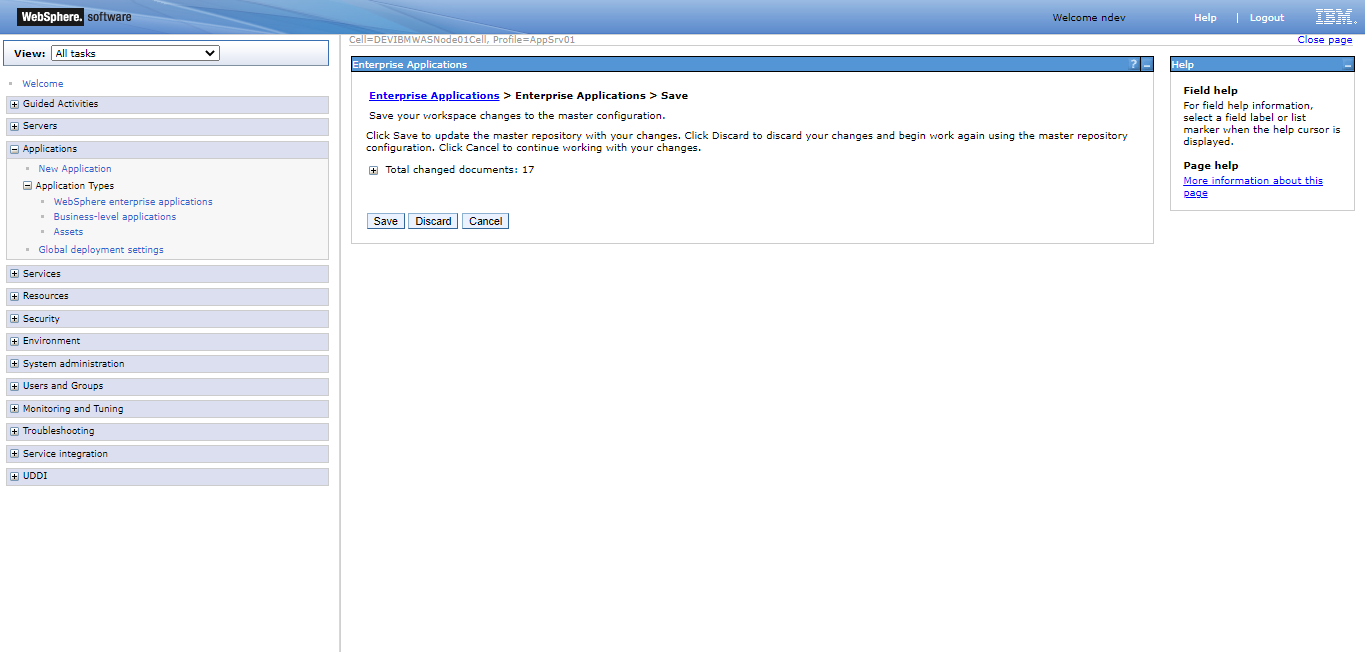
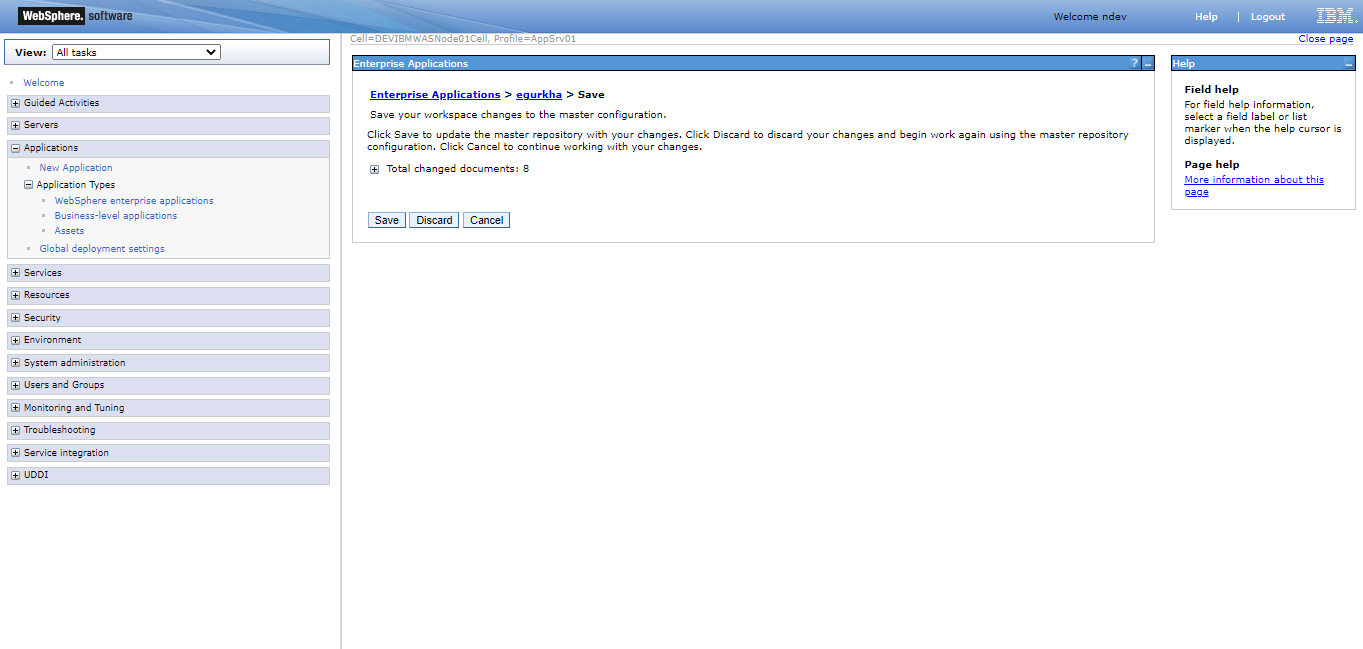
Figure 15 will then appear displaying the Total number of changed documents. To view the list of documents that changed, expand the Total changed documents node. To proceed with saving the application, click the Save button in Figure 15.
-
If the user installing the WebSphere monitoring eG component i.e., the egurkha application belongs to Federated Repositories, then, proceed to start the egurkha application as mentioned in step 23.
-
Alternately,if the user installing the WebSphere monitoring eG component i.e., egurkha application belongs to a Standalone LDAP registry, then, administrators have to ensure that the user is mapped to the egurkha application before attempting to start the application. For this, follow the Applications -> Application Types -> WebSphere enterprise applications node sequence in the tree-structure in the left panel of Figure 15. From the list of installed applications that appear in the right panel, click the egurkha application. Figure 16 will then appear displaying the configuration of the egurkha application.
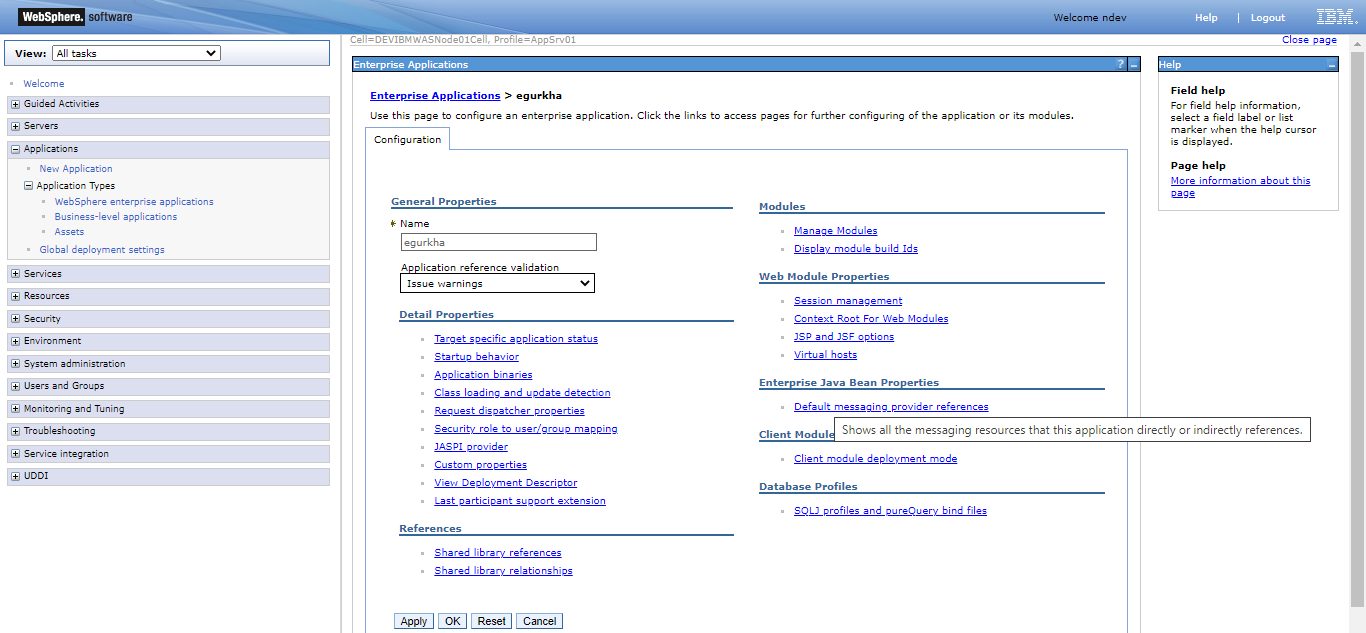
Figure 16 : Displaying the Configuration of the egurkha application
-
Clicking the Security role to user/group mapping link in Figure 16 will reveal Figure 17 where the Role associated with the application will be listed.
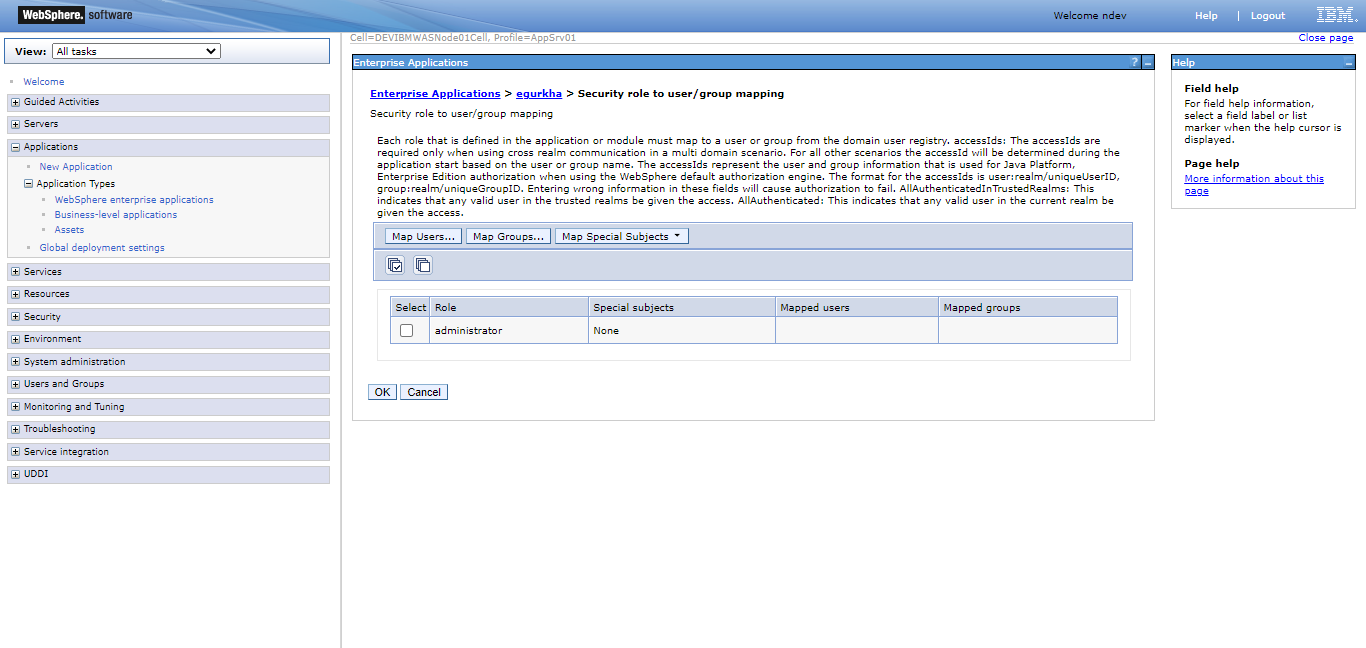
Figure 17 : Viewing the Role associated with the egurkha application
-
Select the check box preceding the role for which you wish to map the user and click the Map Users... button in Figure 17. Figure 18 will then appear.
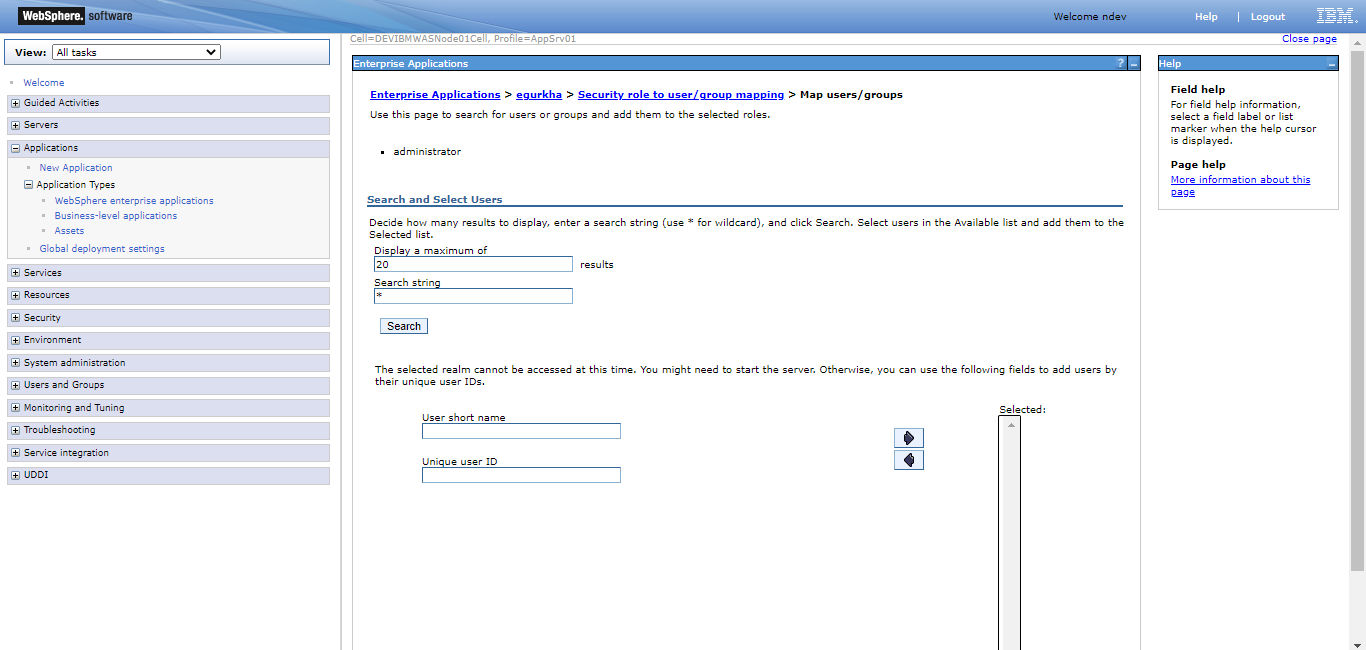
-
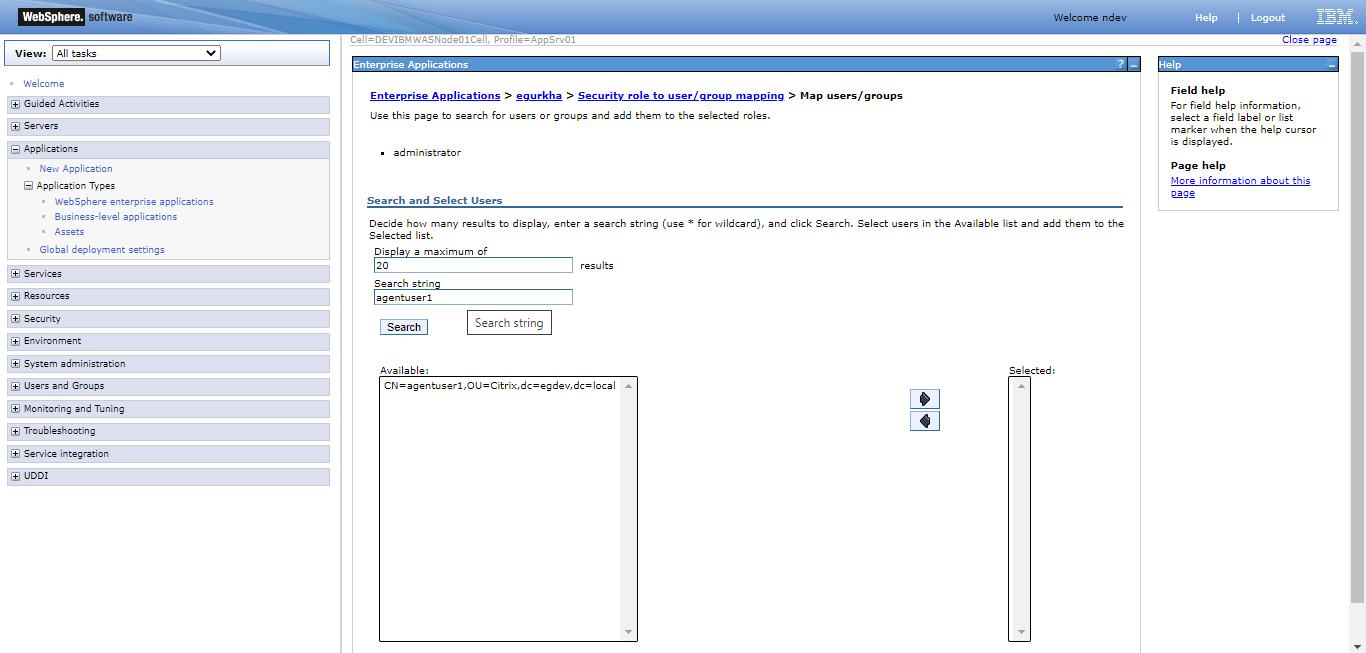
You can Search for the user you wish to map with the role by keying in the user name or a partial search string in the Search string text box. The users will then be listed in the Available text box as shown in Figure 19.
-
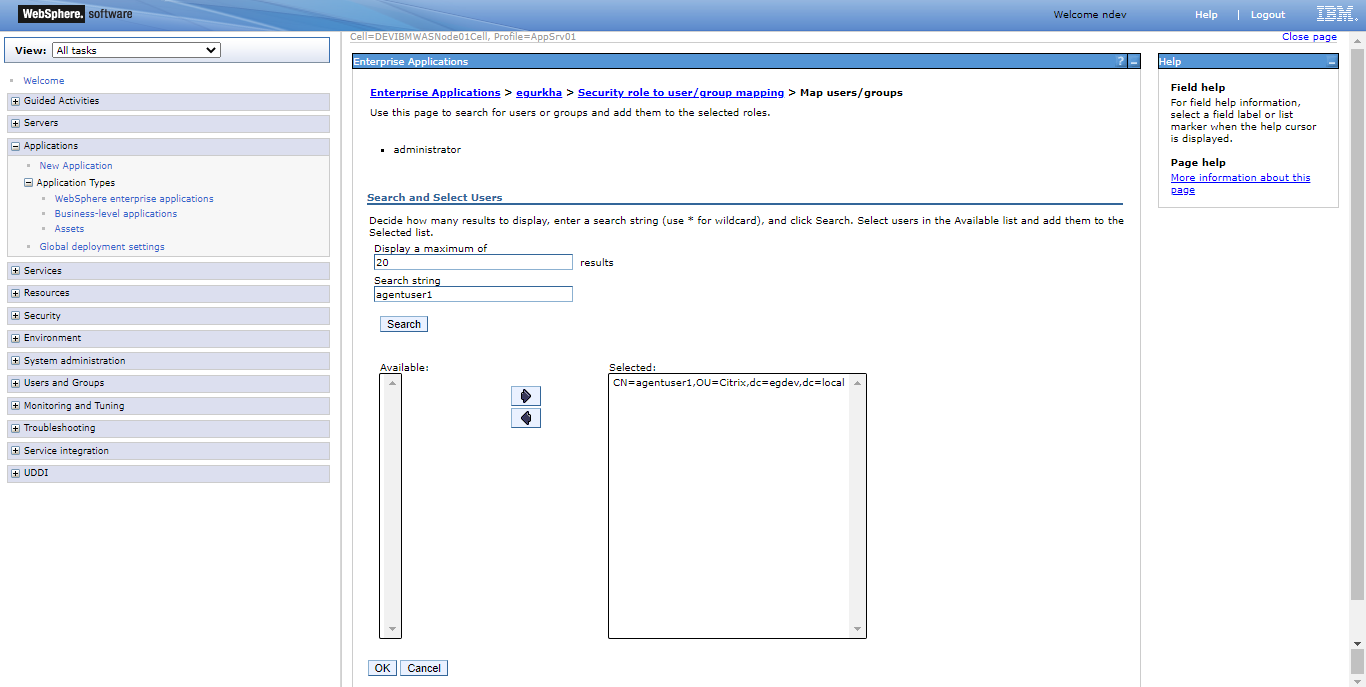
Now, select the user and move your selection to the Selected list box as shown in Figure 20 and then click the OK button.
-
You will now be redirected to Figure 21 where the role is mapped to the chosen user.

Figure 21 : Viewing the Role associated with the chosen user
-
Clicking the OK button will reveal Figure 22 which will prompt you to save the changes made to the master configuration. Before saving the master configuration, you may want to review the changes effected on it. For this, click the Review link in Figure 22.
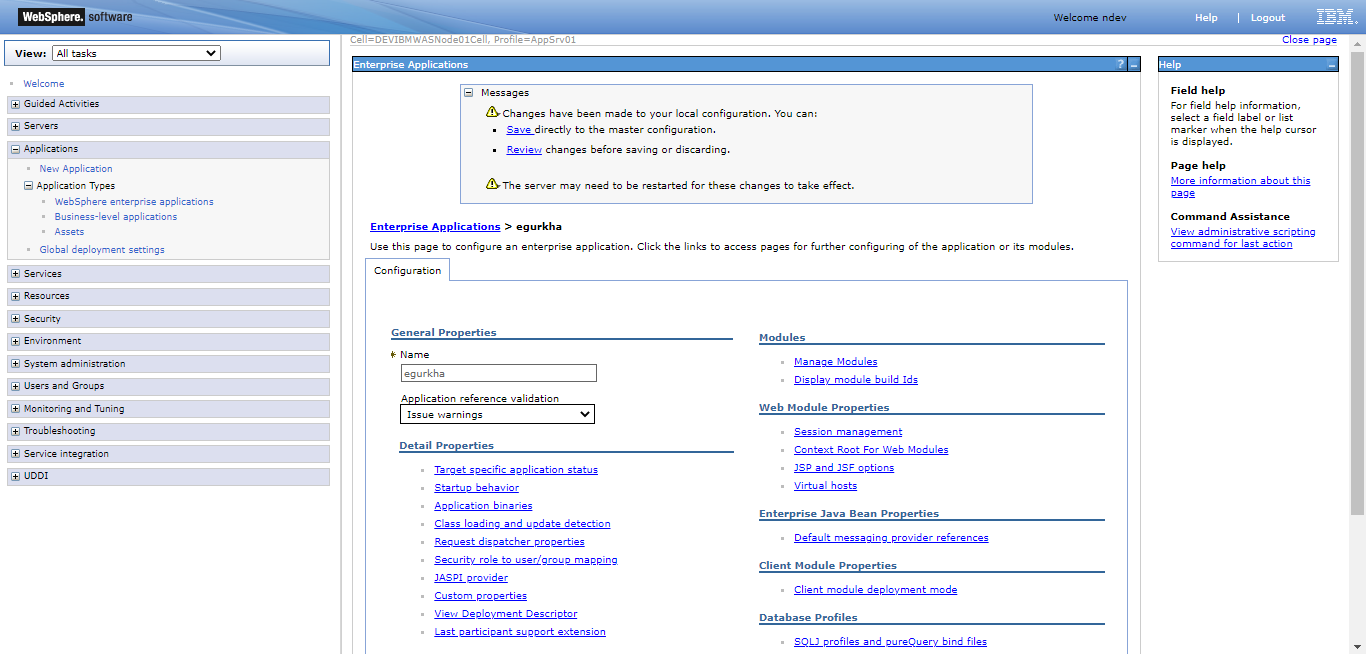
Figure 22 : Viewing the master configuration of the application
-
Figure 23 will then appear displaying the Total number of changed documents. To view the list of documents that changed, expand the Total changed documents node. To proceed with saving the application, click the Save button in Figure 23.
-
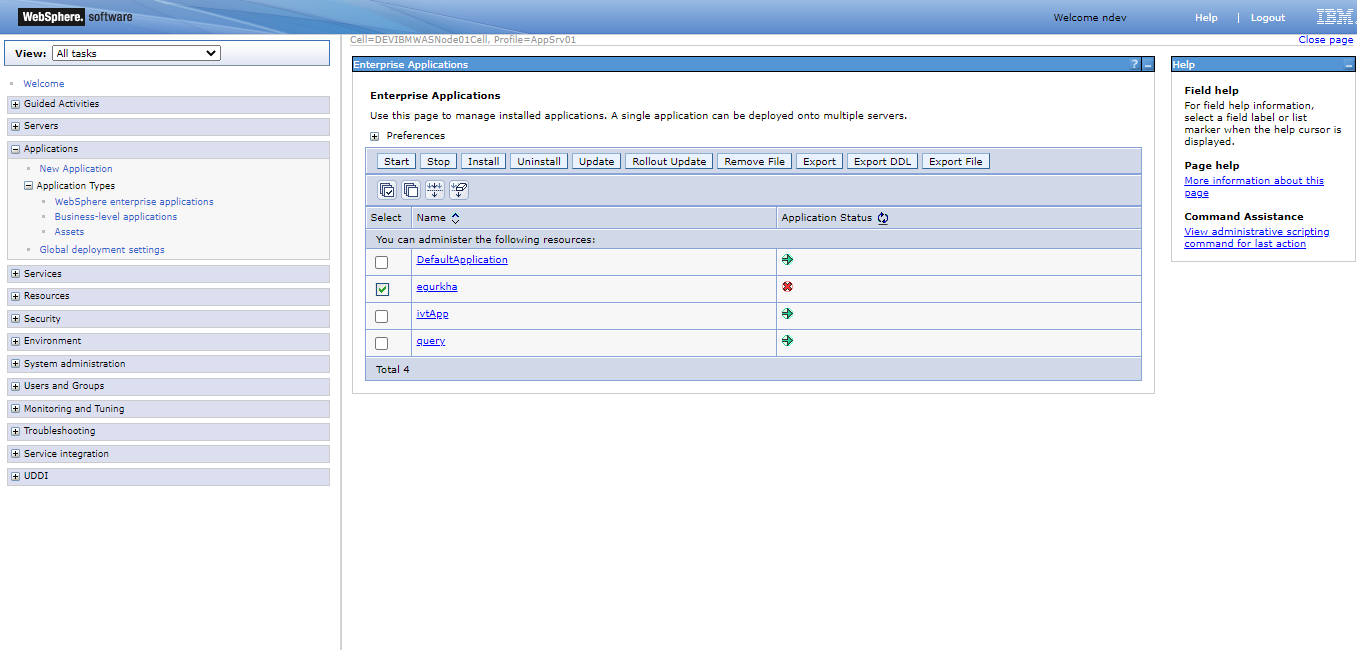
Now, proceed to start the egurkha application. For that, follow the Applications -> Application Types -> WebSphere enterprise applications node sequence in the tree-structure in the left panel of Figure 15. The list of installed applications will then appear in the right panel. Select the check box corresponding to the egurkha application and click the Start button therein to start it (see Figure 24).
-
Once the application is started, a message to that effect will appear as depicted by Figure 25 below.
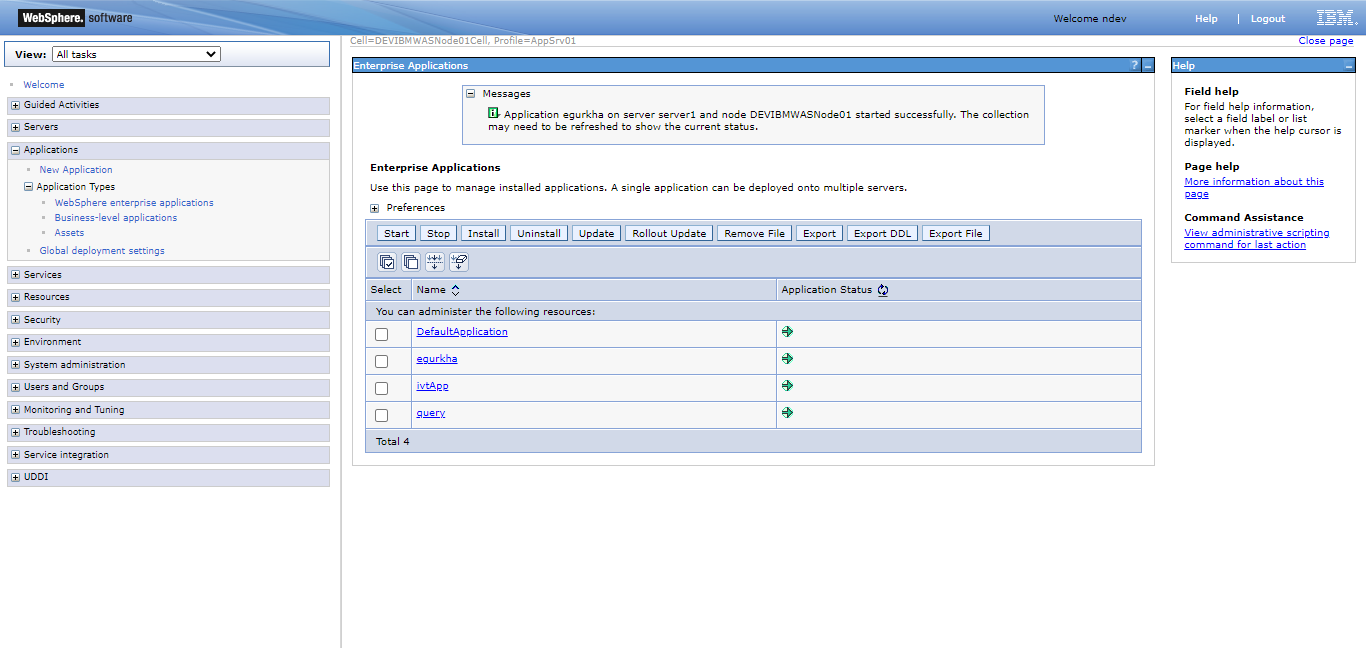
Figure 25 : A message indicating that the egurkha application has started successfully