Configuring Windows Virtual Machines to Support the Inside View without the eG VM Agent
For the "inside" view, by default, the eG agent communicates remotely with the virtual machines on the Hyper-V server and collects metrics. To establish this remote connection with Windows VMs, eG Enterprise requires that the eG remote agent (on Windows) be configured with domain administrator privileges. Besides, the inside view using flag of all “inside view” tests should be set to Remote connection to a VM (Windows).
In addition, the admin$ share will have to be available on the Windows guests.
If the ADMIN$ share is not available on any Windows-based virtual guest, create the share using the procedure detailed below:
-
Open the Windows Explorer on the virtual machine, browse for the corresponding Windows directory in the C drive, right-click on it, and select the Sharing option from the shortcut menu.
-
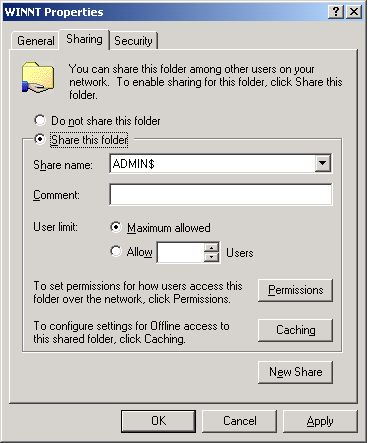
If the admin$ share does not pre-exist on the Windows guest, then Figure 353 appears indicating the same.

-
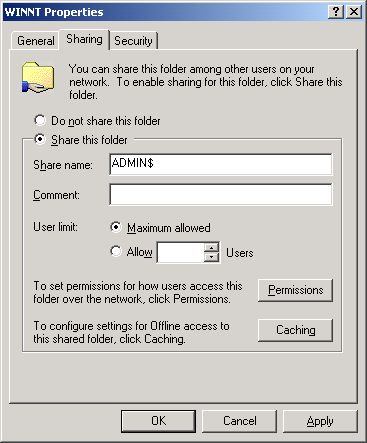
On the other hand, if the admin$ share pre-exists, Figure 354 appears. In such a case, first, remove the admin$ share by selecting the Do not share this folder option from Figure 354 and clicking the Apply and ok buttons. After this, you will have to repeat step 1 of this procedure to open Figure 353. Then, proceed as indicated by step 3 onwards.
-
To create (or re-create) the admin$ share, select the Share this folder option from Figure 354, and provide admin$ share against the Share name text box (see Figure 355).
-
Next, to enable the eG agent to communicate effectively with the Windows guest, you need to ensure that the permission to access the admin$ share is granted to an administrative user (domain); also, the credentials of this user should be passed while configuring the eG monitoring capabilities - i.e., while configuring the Hyper-V tests. To grant the access permissions, click on the Permissions button in Figure 355.
-
By default, the admin$ share can be accessed by Everyone (see Figure 356). To grant access rights to a specific domain administratoar, select the Add button in Figure 356. When Figure 357 appears, select the domain to search from the Look in list. The valid user accounts configured on the chosen domain then appear in the box below. From this box, choose the administrator's account and click on the Add button to add the chosen user account to the box below the Add button.
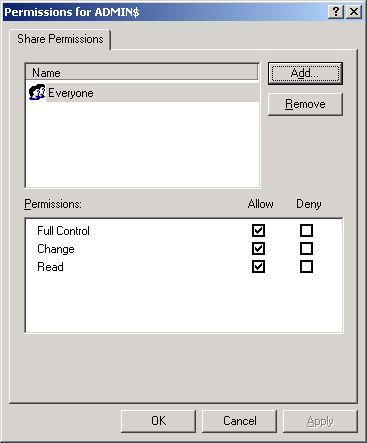
Figure 356 : Clicking the Add button

Figure 357 : Selecting the administrative user to whom access rights are to be granted
-
Finally, click the ok button. You will then return to Figure 356, where the newly added administrator account will appear (see Figure 358).
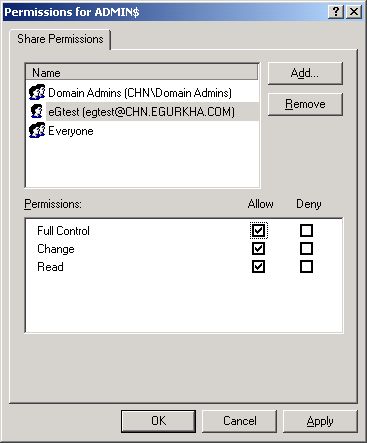
Figure 358 : The administrator account granted access permissions
-
Select the newly added administrator account from Figure 358, and then, using the Permissions section, grant the administrator Full Control, Change, and Read permissions.
-
Finally, click the Apply and ok buttons in Figure 358 to register the changes.
-
Once you return to Figure 358, click on the Security tab (see Figure 359) to define the security settings for the admin$ share.
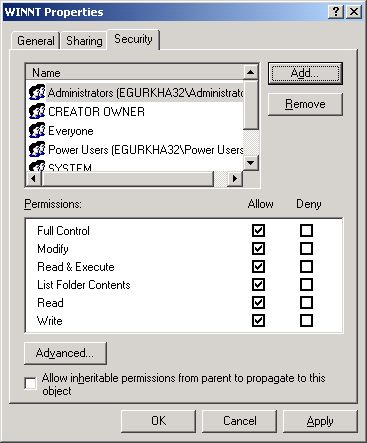
Figure 359 : Defining the Security settings for the ADMIN$ share
-
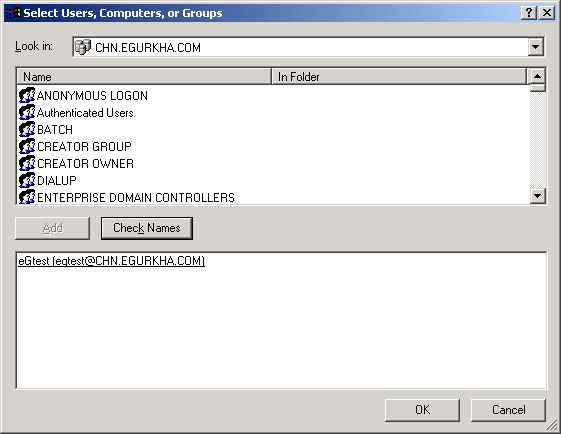
Here again, you need to add the same administrator account, which was granted access permissions earlier. To do so, click the Add button in Figure 359, pick a domain from the Look in list of Figure 360, select the said administrator account from the domain users list below, and click the Add button (in Figure 360) to add the chosen account. Then, click the ok button in Figure 360.
-
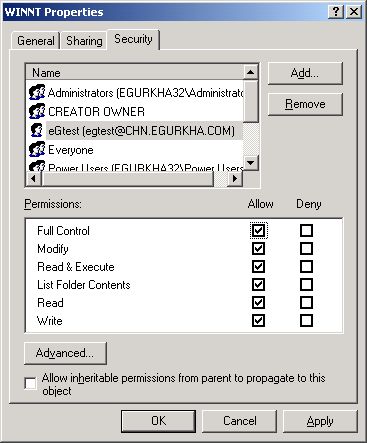
This will bring you back to Figure 359, but this time, the newly added domain administrator account will be listed therein as indicated by Figure 361.
-
Finally, click the Apply and ok buttons in Figure 361.
