Automatically Fulfilling Pre-requisites For Monitoring Microsoft Office 365 Environments
To ensure that the pre-requisites discussed in Pre-requisites for Monitoring Microsoft Office 365 Environments are fulfilled without a glitch, eG Enterprise provides a proprietary PowerShell script. By running this script, you can have these requirements automatically fulfilled. This way, you can eliminate the effort and time involved, and minimize the likelihood of errors in getting Office 365 monitoring up and running.
To run the script, do the following:
-
Login to the eG agent host.
-
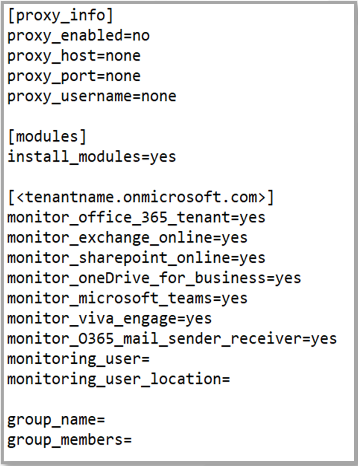
Edit the O365SetupConfig.ini file in the <EG_AGENT_INSTALL_DIR>\agent\config directory. What you see in Figure 1 below are sample contents of the O365SetupConfig.ini file:
-
The O365SetupConfig.ini file is where you need to configure the inputs for the pre-requisites script that you will be running later. Provide the following entries in this file:
-
proxy_enabled: Set this flag to yes if the eG agent needs to connect to the O365 control plane for monitoring, via a proxy server.
-
proxy_host: If a proxy server is to be used, then specify the IP address or host name of the proxy server here. By default, this flag is set to none.
-
proxy_port: If a proxy server is to be used, then specify the port number at which the proxy server listens. By default, this flag is set to none.
-
proxy_username: If a proxy server is to be used and that server requires authentication, then you need to configure eG agent with valid access credentials. For that, specify the username alone here. The pre-requisites script, upon execution, will prompt for the password.
-
install_modules: Set this flag to yes if O365 PowerShell modules need to be installed on the agent system.
-
Then, a section specific to the tenant being monitored will follow. This section will be named [tenantname.onmicrosoft.com], where tenantname represents the initial O365 domain. Under this section, you need to indicate which O365 components need to be monitored for the given tenant. For instance, to monitor the Microsoft Exchange Online component, set the monitor_exchange_online flag to yes. Similarly, you can enable / disable monitoring for Microsoft O365 Tenant, Microsoft Sharepoint Online, Microsoft OneDrive for Business, Microsoft Teams, Microsoft Viva Engage, and Microsoft O365 Mail Sender and Receiver components.
-
To monitor O365, the eG agent needs to be configured with the credentials of a user with a valid O365 license and certain essential monitoring permissions. Specify the name of such a user against the monitoring_user parameter.The format of your specification should be as follows: username@domainname.com - say, john@czartek.com.
If the specified monitoring_user pre-exists, then at run time, the pre-requisites script will assign the required monitoring permissions and license to that user. On the other hand, if the monitoring_user does not exist, then the script will automatically create that user, and assign the required monitoring permissions and license to that user.
Additionally, using the user details provided, the script also creates a Microsoft Graph App on Microsoft Entra with a prescribed set of application and delegated permissions.
-
If the monitoring_user you specified is new, then provide the monitoring_location of that user. The location specification should be a 2-letter code, representing the country to which the user belongs. Some common location codes are listed below:
Location Code
Country
UK
United Kingdom
US
United States of America
DE
Germany
NL
Netherlands
KR
Korea
SG
Singapore
FR
France
IN
India
-
group_name, group_members: These parameters are applicable only if the monitoring_O365_mail_sender_receiver parameter is set to yes.
A couple of the application permissions granted to the MS Graph App allow the app unrestricted access to all mailboxes in an organization on Exchange Online. For instance, the Mail.Read.Write permission granted to the MS Graph app allows the app to read mails from and write mails to any mailbox in the organization, without even signing in as a valid Office 365 user.
To protect mailboxes and the Exchange Online ecosystem from abuse by malicious users, it is recommended that the MS Graph App's mailbox access be restricted - i.e., it is recommended that the Graph app be allowed to access only specific mailboxes on Exchange Online and not all of them.
For this, first specify the name of the Mail Security Group, which the MS Graph App should be allowed to access, against group_name. You can either specify the name of a new Mail Security Group here, or that of an existing group.
If you specify the name of a new Mail Security Group against group_name, then, against group_members, provide the fully-qualified names of the users who need to be added as the members of this group, as a comma-separated list.
-
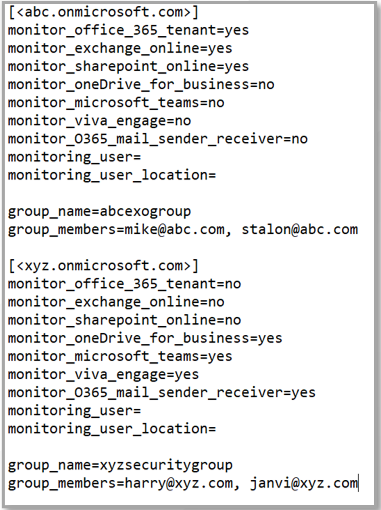
If you want multiple O365 tenants monitored, then copy the [tenantname.onmicrosoft.com] section and its contents for every tenant you want monitored (see Figure 2). Remember to change the tenantname in the section heading - [tenantname.onmicrosoft.com] - to reflect the initial domain name of the tenant to be monitored.
-
Finally, save the file.
-
-
Then, proceed to run the pre-requisites script. For that, open the Windows PowerShell ISE in elevated mode.
-
Then, run the O365_setup_prerequisites.ps1 script from the <EG_AGENT_INSTALL_DIR>\lib directory.
-
If you have chosen to install the O365 PowerShell modules required for monitoring by setting the install_modules flag in the O365SetupConfig.ini file to yes, then the pre-requisites script will begin to install the modules automatically. In the process, the script will attempt to install the Microsoft Teams Network Assessment Tool. Figure 3 will hence appear.
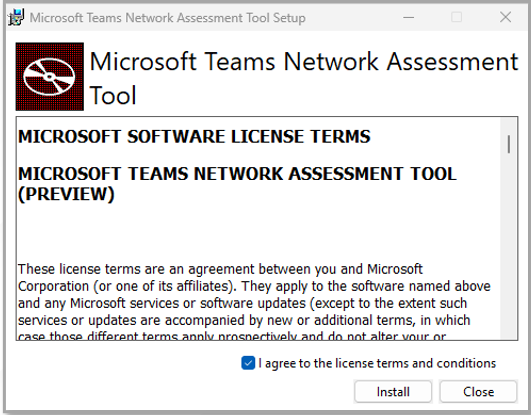
Figure 3 : License terms for installing Microsoft Teams Network Assessment Tool
-
Click on the Install button in Figure 3 to proceed with installing the tool. Upon successful installation, Figure 4 will appear. Click on the Finish button in Figure 4 to move on.
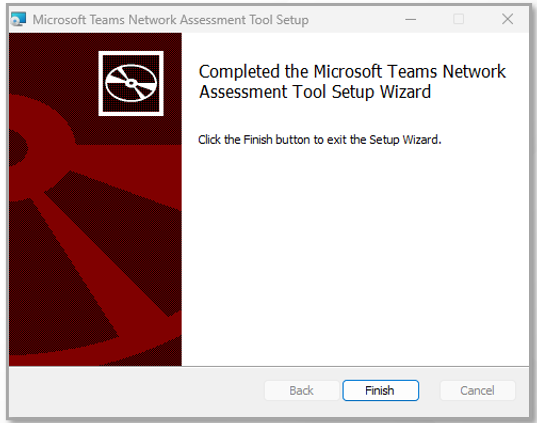
Figure 4 : Completing installation of the Microsoft Teams Network Assessment Tool
-
Similarly, all other modules required for monitoring Office 365 (depending upon the O365 components that you have chosen for monitoring in the O365SetupConfig.ini file) will be automatically installed.
-
Figure 5 will then appear. Login to O365 using a Global Administrator's credentials.
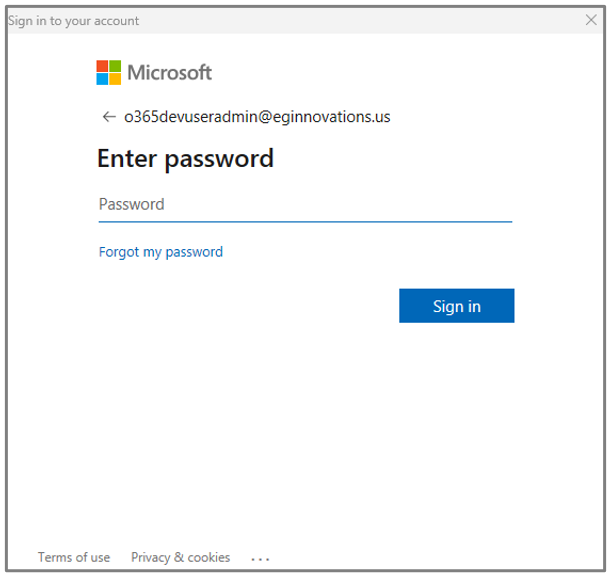
Figure 5 : Logging into O365 as a user with Global Administrator credentials
-
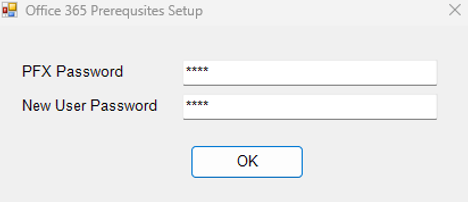
Figure 6 will be invoked. Certificate-based authentication requires that a certificate file be created on eG agent host in the .cer or .PFX form and for that file to be protected using a secure password. To enable the creation of such a certificate file, set a secure password for that file using the PFX File Password text box in Figure 6.
-
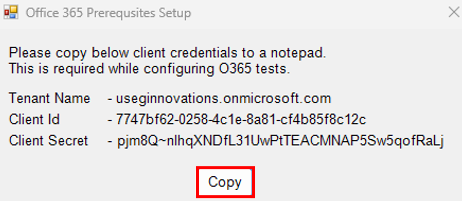
When Figure 7 appears, click on the Copy button to copy the Client ID and Client Secret you see therein to notepad. You will need these when configuring O365 tests in eG Enterprise.
-
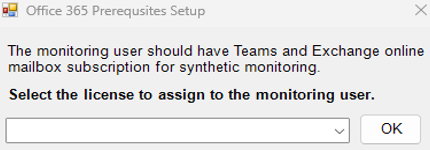
The new user that the script creates or the existing user that the script has been configured to use (as the case may be) (see Figure 6), should hold a valid O365 license with the Microsoft Teams and Exchange Online Mailbox subscription. Without such a license, some eG tests will not run. This is why, Figure 8 that appears next prompts you to assign such a license to the new/existing user. Select the license from the Assign license to user drop-down and click the OK button in Figure 9 to proceed.
-
Once the Entra application and the monitoring_user with required monitoring permissions are created, a message to that effect will appear (see Figure 9). If certificate creation is successful, the message will also indicate the same. Additionally, the message will remind you that for the permissions granted to the Entra application to take effect, admin consent is imperative.
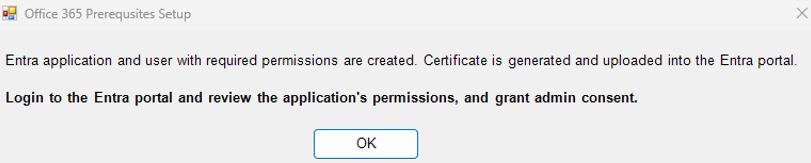
Figure 9 : A message indicating the successful fulfillment of pre-requisites and the need to grant admin consent
Click on the OK button in Figure 9 to login to the O365 portal, review the application permissions, and grant admin consent.
-
Next, proceed to login to the O365 portal as a user with Global Administrator permissions. Once you login, click on the Tile icon and pick the Admin option from the menu that pops out.

Figure 10 : Picking the Admin option from the O365 portal
-
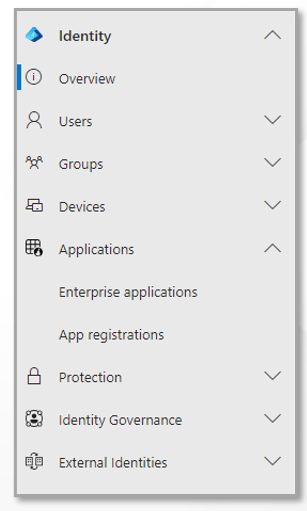
Figure 11 will then appear. Pick Identity from the Admin Centers page of Figure 11, expand the Applications menu within, and select App Registrations.
-
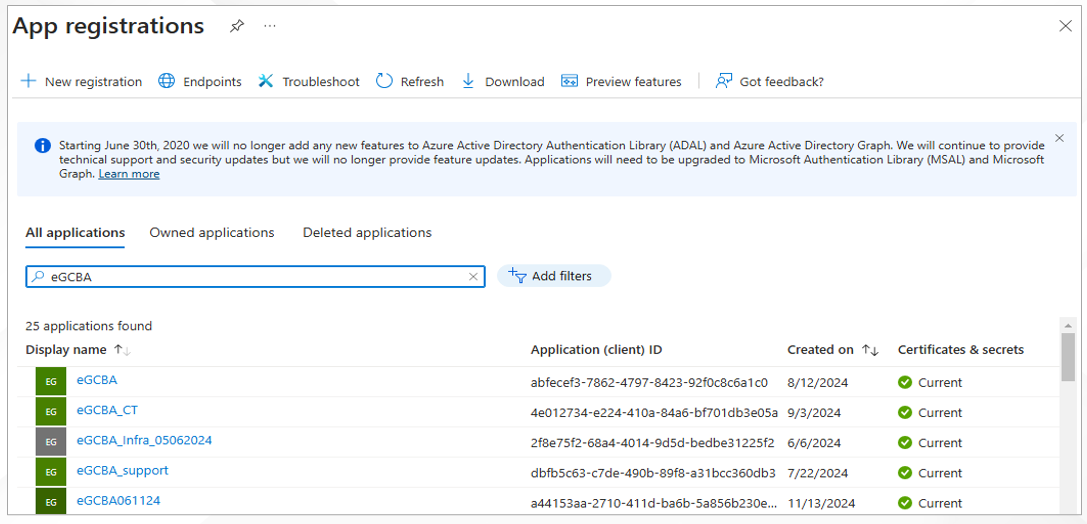
When Figure 12 appears, click on the All applications tab. Then, in the Search text box (the text box with a 'magnifying glass icon' within), type 'eGCBA' and press the Enter key on your keyboard. All applications with names that embed the string 'eGCBA' will then appear (see Figure 12). Pick the application that is exactly named 'eGCBA' and click on it.
-
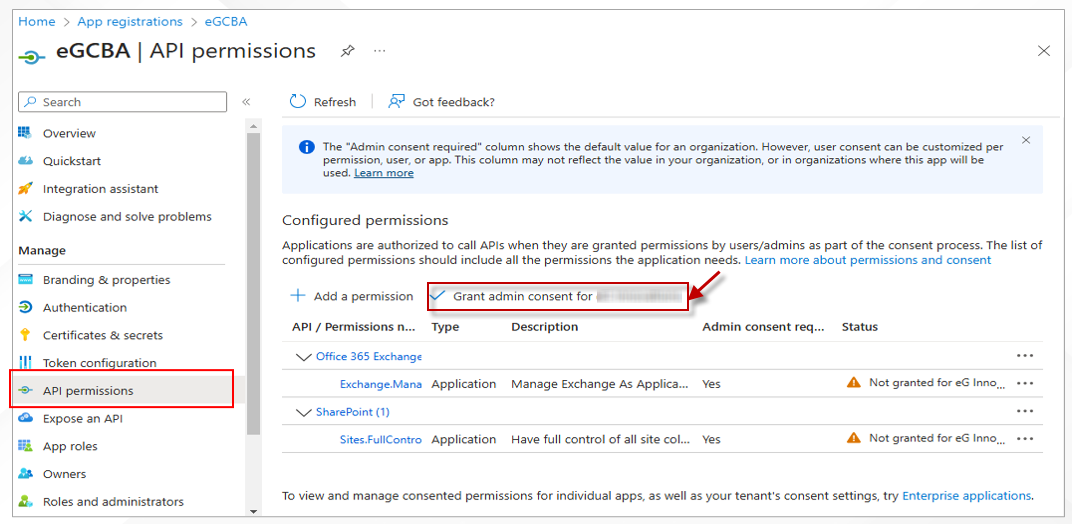
Once the chosen application's properties are visible, click on the API Permissions option in the left panel (see Figure 13). Review the API permissions you see in the right panel. If the permissions are in order, then proceed to grant admin consent. For that, click on the Grant admin consent for option in the right panel.
-
Figure 14 will then appear prompting you to confirm whether/not to grant admin consent. Click the Yes button in Figure 14 to grant consent.
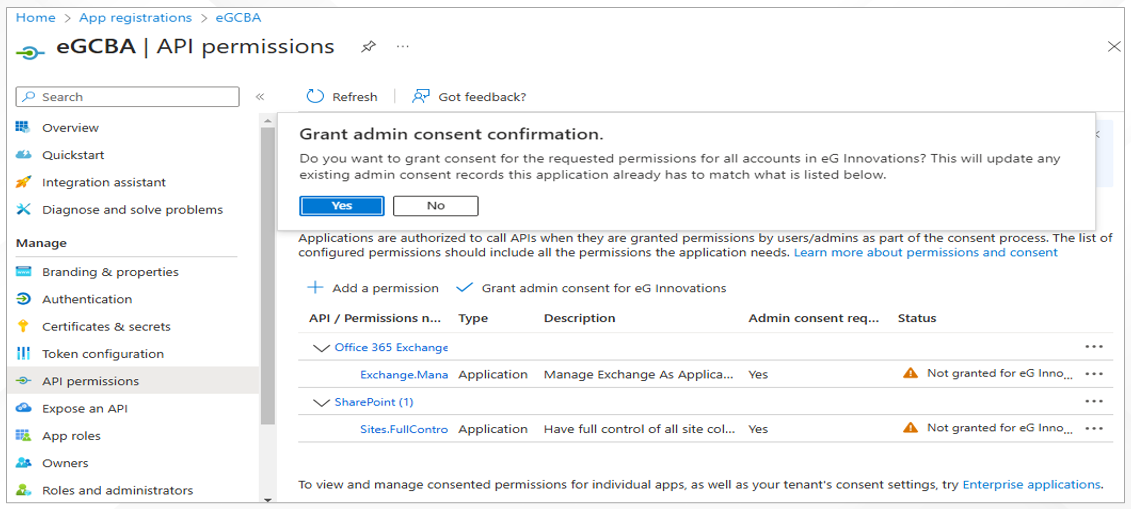
Figure 14 : Granting admin consent for API permissions of 'eGCBA' application
-
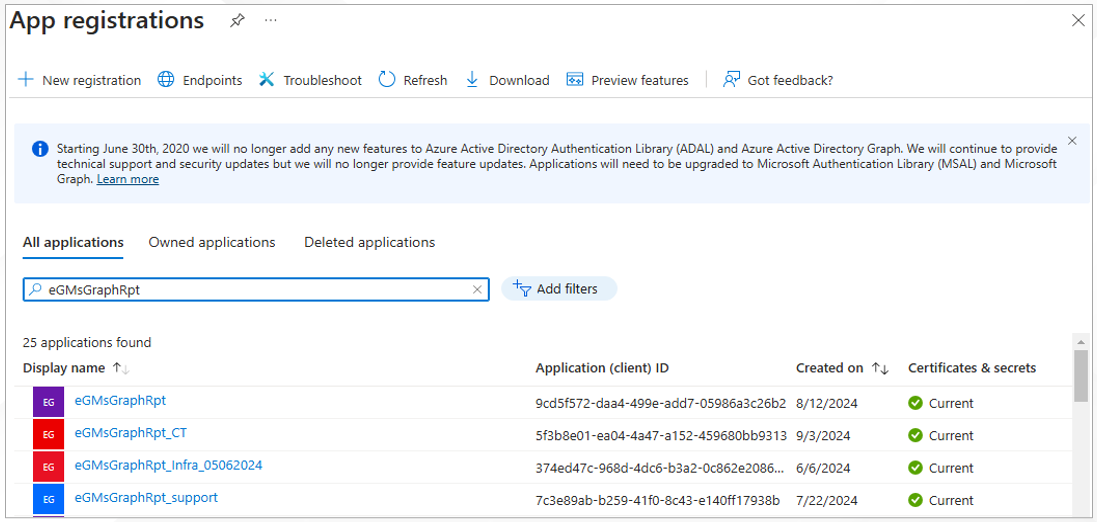
Next, click on the All applications tab page (see Figure 12) once again, and this time, search for the 'eGMsGraphRpt' application. Once you see that application in the search results (see Figure 15), click on it.
-
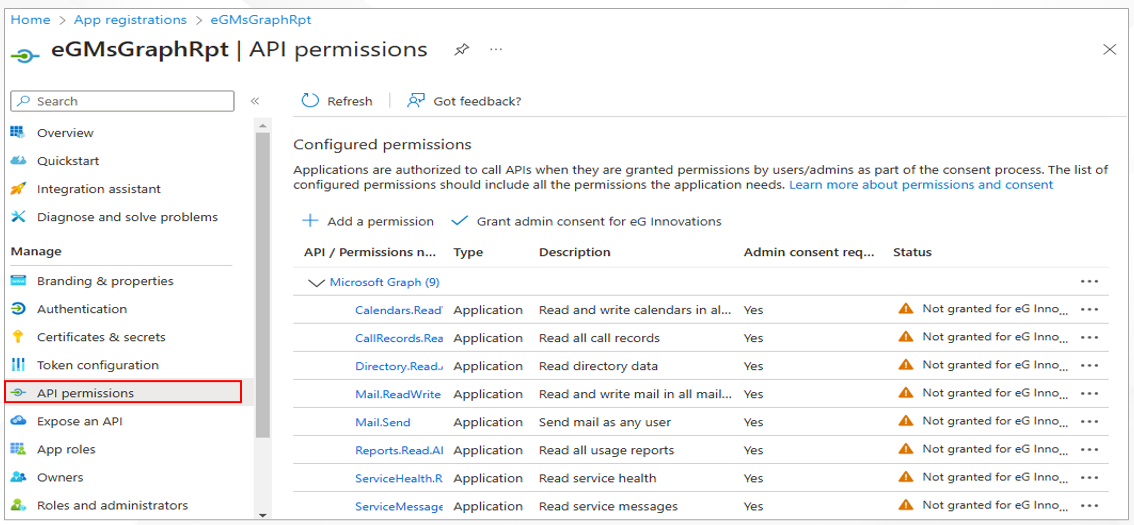
When Figure 16 appears, click on API permissions in the left panel, review the permissions of the 'eGMsGraphRpt' application in the right panel, and click the Grand admin consent for option therein.
-
Figure 17 will then appear. Click on the Yes button in Figure 17 to grant admin consent.
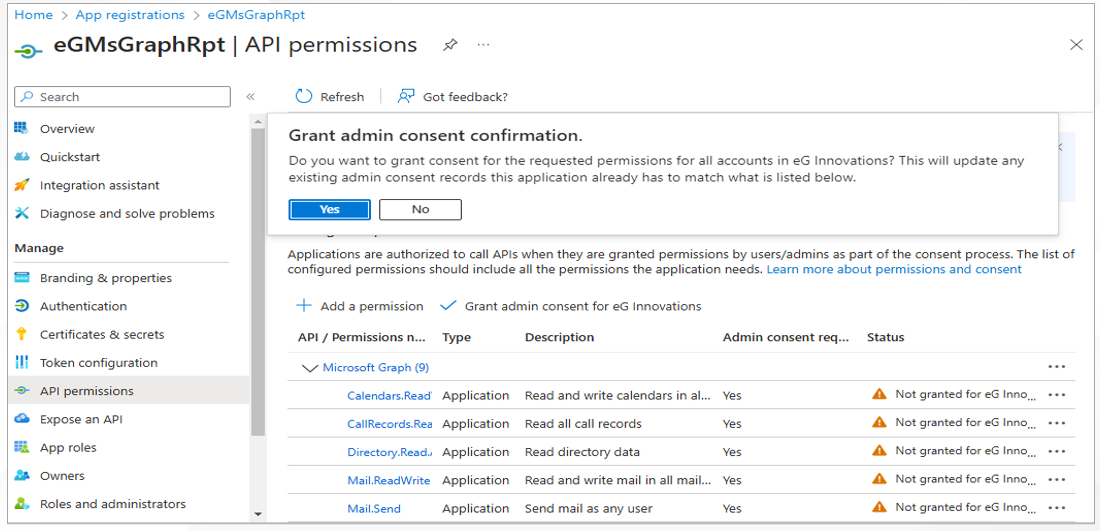
Figure 17 : Granting admin consent for API permissions of 'eGMsGraphRpt' application
-
In summary, the script automatically performs the following tasks:
-
Installs the required PowerShell modules in the agent system to monitor O365 suite
-
Installs Microsoft Teams Network Assessment Tool
- Creates a new application on Microsoft Entra for the purpose of enabling certificate-based authentication;
- Creates a self-signed PFX certificate file in the <EG_AGENT_INSTALL_DIR>\agent\O365\AppInfo directory on the eG agent host;
- Uploads the certificate to the Office 365 cloud for secure communication;
- Installs the certificate on the system hosting the eG agent
-
Registers an Microsoft Graph App with Microsoft Entra, and auto-assigns all the permissions required for monitoring to that app.
-
Creates a new user with Teams Communication Support Engineer permissions on Office 365 , and assigns a license to that user for the Microsoft Teams and Exchange Online Mailbox subscriptions, (OR)
Assigns the aforesaid license to an existing user with Teams Communication Support Engineer permissions.
-
Limits the Microsoft Graph App's mailbox access
-