Enabling JVM Monitoring for a Multi-server SAP Web Application Server Instance
In a multi-server environment, two/more Java server processes run within a single SAP WAS instance. For the eG agent to perform JVM monitoring of the SAP WAS multi-server instance, you need to enable JMX support for each Java server process in the instance, separately.
Note:
Ensure that the JDK version of the J2EE Engine VM is version 1.5 and above.
The steps for enabling JMX support for a multi-server SAP WAS instance are as follows:
-
Connect to the SAP NetWeaver administrator tool by providing the URL: http://<IP_address_of_tool>:<Port_number_of_tool>/nwa/sysinfo
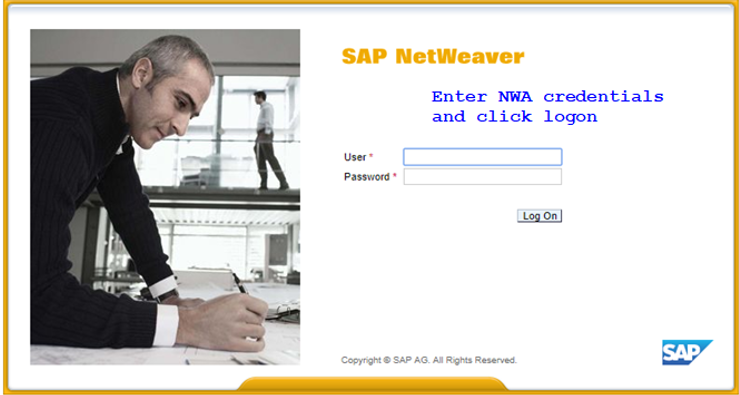
Figure 1 : The login page of the SAP NetWeaver administrator tool
-
A login screen then appears (see Figure 1). Login to the system information application using administrator or j2ee_admin credentials. Upon successful login, Figure 2 will appear.

Figure 2 : Selecting the SA WAS instance in the cluster for which JMX support needs to be enabled
- From the list of Instances in the System Information tab page (of Figure 2), select the instance for which JMX support is to be enabled.
-
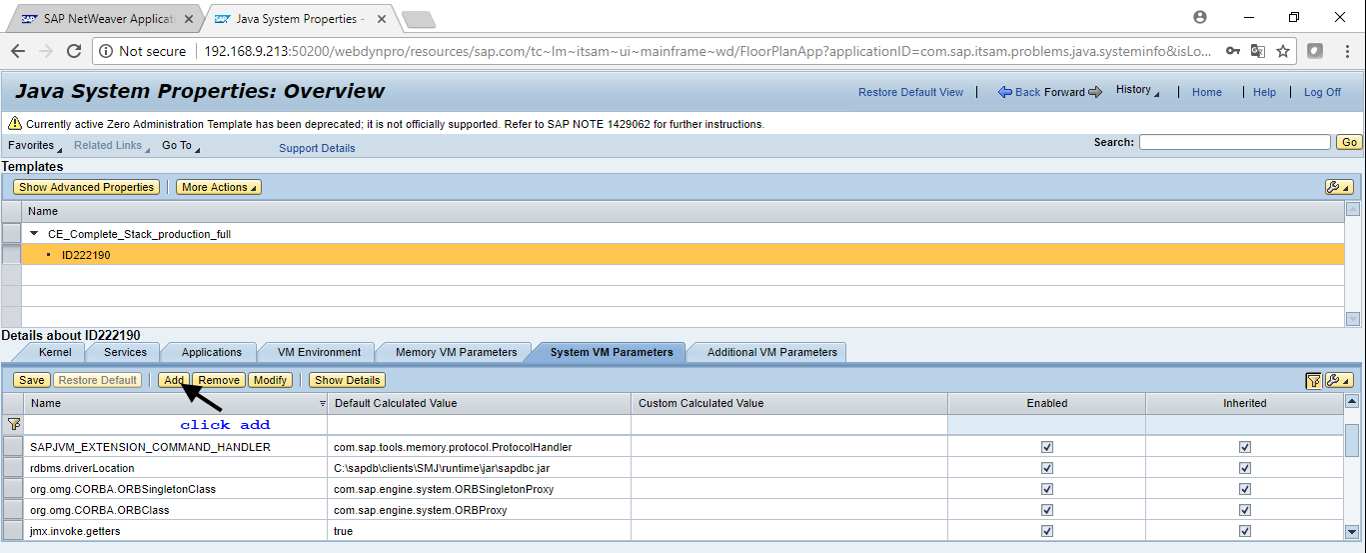
Then, click the VM System Parameters link at the bottom of the System Information tab page. Figure 3 will then appear.
-
Click the System VM Parameters tab page in the Java System Properties page (see Figure 3). Then, click the Add button therein to add a new Java parameter. This will open Figure 4.
-
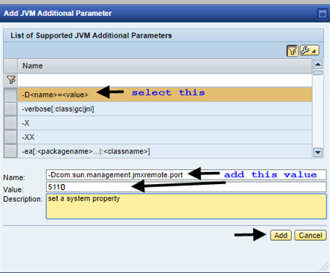
Start by adding the JMX port JVM parameter. This parameter specifies the port at which JMX listens. To add the parameter, first select -D<name>=<value>, and specify the following in the Name text box:
-Dcom.sun.management.jmxremote.port
-
Next, in the Value text box, set any random number as the JMX port. This serves just as a 'placeholder' for the actual JMX port. Typically, if multiple Java server processes operate within a single instance, you will have to configure a separate JMX port for each server process. However, the port number specified in the Value text box applies to the entire instance - not to specific Java server processes. This is why, its best to configure a random number here. After enabling JMX support for the instance, you should make configuration changes to the instance offline using the Config Tool. In the process, you should configure a 'custom port format' for use by the individual Java server processes. SAP WAS auto-assigns a port number to each Java server process, based on the configured format. Steps 16-25 of this procedure detail how to use this tool to specify the format. For now however, click the Add button in Figure 4 to add the JMX port parameter with the random number.
-
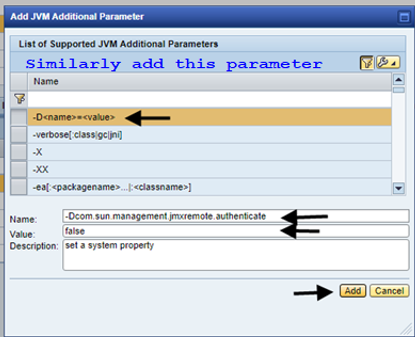
Now, proceed to add the JMX authentication parameter. This parameter dictates whether/not JMX requires authentication. To add this parameter, once again click the Add button in Figure 3. Figure 5 will appear:
-
Select -D<name>=<value> from the list box in Figure 5 and specify the following in the Name text box:
-Dcom.sun.management.jmxremote.authenticate
- Next, in the Value text box, type false. This implies that JMX does not require authentication. Finally, click the Add button in Figure 5 to add the new parameter.
-
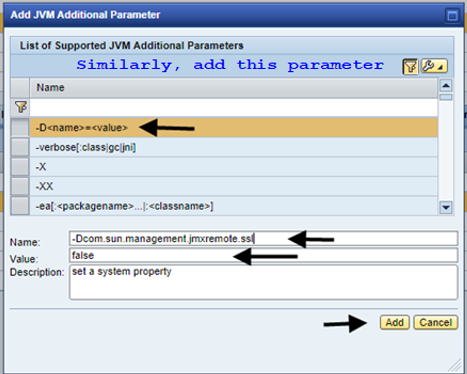
Now, proceed to add the JMX SSL parameter. This parameter governs whether JMX is SSL-enabled or not. To add this parameter, once again click the Add button in Figure 3. Figure 6 will appear:
-
From the list box in Figure 6, select -D<name>=<value> and specify the following in the Name text box
-Dcom.sun.management.jmxremote.ssl
- Next, in the Value text box, type false. This implies that JMX is not SSL-enabled. Finally, click the Add button in Figure 6 to add the new parameter.
-
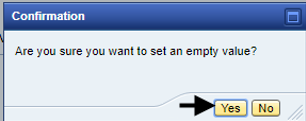
All the parameters you added will then appear in Figure 3 with their default values. Now, browse the parameters list in the System VM Parameters tab page for the javax.management.builder.initial parameter. To modify the value of this parameter, first select the parameter and click the Modify button in Figure 3. Figure 7 will then appear. Here, replace the default value of the parameter with an empty string. Then, when prompted for confirmation to set an empty value for the parameter (see Figure 8), click Yes .
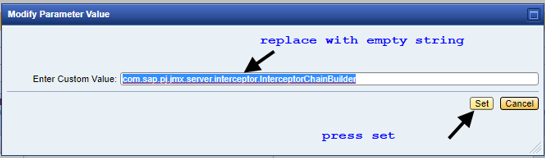
Figure 7 : Modifying the value of a parameter
-
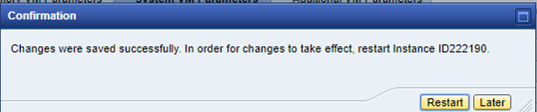
Clicking Yes in Figure 8 will take you back to Figure 3. Click the Save button in Figure 3 to save the changes. Figure 9 will then appear confirming the successful application of the changes. For the changes to take effect, click Later to restart the instance later.
- Next, proceed to start the Config Tool. For that, first open the command prompt of the server host.
-
To start the config tool on a Windows installation of the SAP WAS server, follow the steps below:
- Switch to the <SAP_WAS_INSTALL_DIR>\<SYSTEM_NAME>\<INSTANCE_NAME>\j2ee\configtool directory.
-
Run the following command:
configtool.bat
-
To start the config tool on a Unix installation of the SAP WAS server, follow the steps below:
- Switch to the <SAP_WAS_INSTALL_DIR>/<SYSTEM_NAME>/<INSTANCE_NAME>\j2ee\configtool directory.
-
Run the following command:
./configtool.sh
-
Figure 10 will then appear. Click the
 button at the right, top corner of Figure 10 to switch to the Edit mode.
-
Next, follow this node-sequence on the tree-structure in Figure 10:
Configurations -> cluster_config->instances -> <Name of instance to be modified> -> cfg -> jvm_params -> sap
Under the sap node, expand the node that corresponds to the CPU of the SAP system being monitored. Then, double-click on Propertysheet system node within.
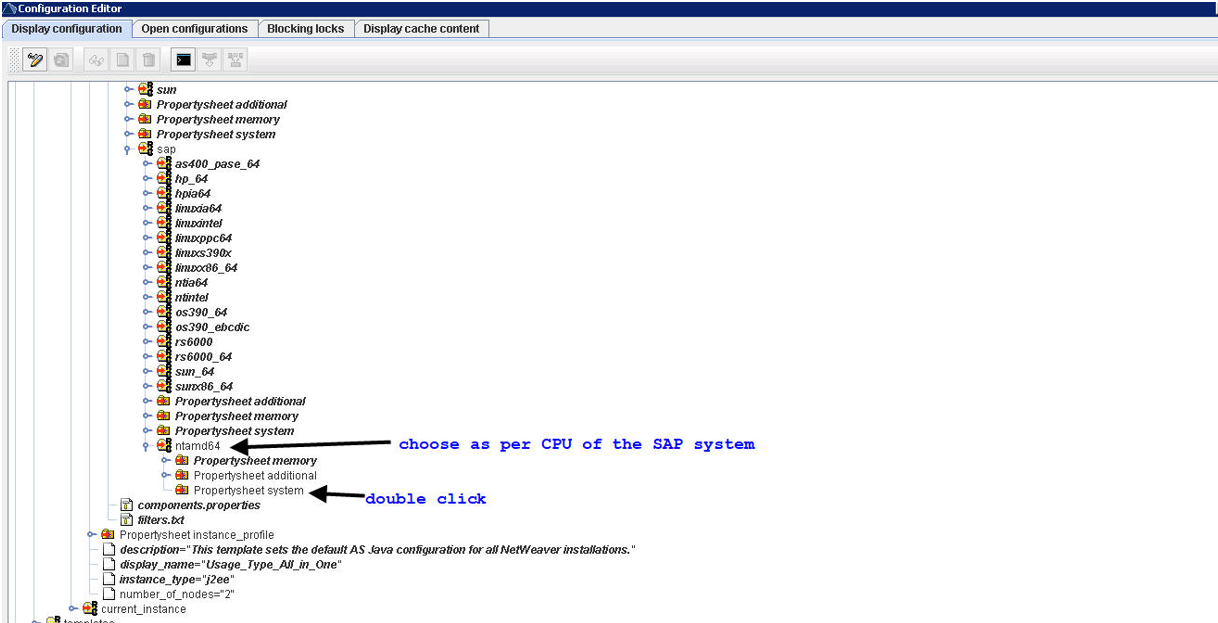
Figure 11 : Clicking on the Propertysheet system node
-
Figure 12 will then appear.
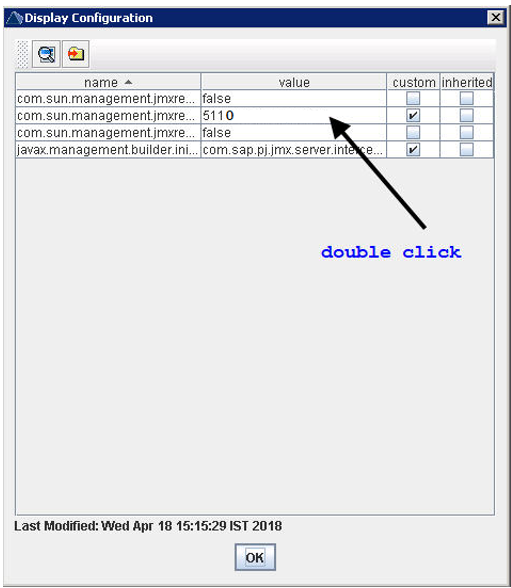
-
From the list of JVM parameters in Figure 12, double-click on the JMX port parameter to edit its value. This will invoke Figure 13.
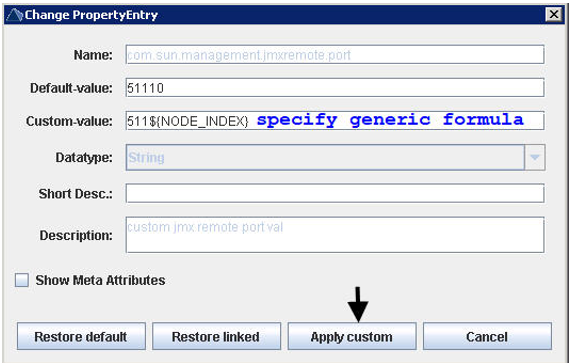
Figure 13 : Providing a custom value for the JMX port parameter
-
In Figure 13, specify a 'custom port format' against Custom Value. SAP WAS uses this format specification to auto-generate the JMX port numbers and distribute them to each Java server process in the cluster.
Typically, each Java server process in a multi-server SAP WAS instance is assigned a node index - eg., the node index for server0 is 0, for server1 is 1, for server2 is 2, and so on. When configuring a JMX port for a server process, its recommended that the node index of that server process be set as the last digit of the JMX port number. It is also recommended that a static value, common to all server processes, precede this last digit, to form the complete port number. The format of your JMX port specification should therefore be: <Static_value>${NODE_INDEX}, where <Static_value> is an 'absolute' value, which will not change with Java server process. The JMX port number of every Java server process in the instance will begin with this <Static_value> only. ${NODE_INDEX} is the 'variable' representing the node index of each Java server process. If this format is specified against Custom Value, then SAP WAS will auto-generate JMX ports according to this format and will distribute them to the Java server processes in the instance. For instance, assume that the Custom Value specification is 511${NODE_INDEX}. This specification implies that the JMX port number of every server process in the cluster will begin with '511'. This value will be followed by the node index of the corresponding Java server process. Based on this format, the JMX port number of server0 will be 5110, server1 will be 5111, server2 will be 5112, and so on.
- Then, click the Apply custom button in Figure 13 to apply the custom port format.
- Finally, restart the SAP WAS server instance.
To monitor a multi-server SAP WAS instance, each server process in the instance should be added as a separate Java Application Server component in eG Enterprise. Then, when configuring the JVM tests for each such component, you need to make sure that the JMX port of the corresponding server process is correctly configured. Knowing the custom port format will help you determine the JMX port that you need to configure for a server process. You can use the Config Tool to view the custom port format specification and then figure out what JMX port you need to configure the JMX tests with. For instance, if the Custom Value specification as per Figure 13 is '458${NODE_INDEX}', and your are configuring a JVM test for the server process server9, then the JMX port specification will be 4589.