Troubleshooting
Troubleshooting the Failure of the eG Agent to Report Measures for a Citri Hypervisor
If the eG agent is not reporting any measures for a hypervisor, then do the following:
-
Check the version of the hypervisor being monitored; if the target hypervisor is of version 5 (or above), then, do the following:
- Edit the eg_tests.ini file (in the <EG_INSTALL_DIR>\manager\config directory).
- In the [agent_settings] section of the file, the XenPerfFromXml flag is set to Yes by default. This implies that, by default, the eG agent collects metrics from the hypervisor by establishing an HTTP/HTTPS connection with the server. Sometimes, the eG agent may be unable to access the hypervisor via HTTP/HTTPS - say, owing to access restrictions imposed by a firewall configuration. In such cases, set this flag to No, so that the eG agent uses the hypervisor API instead to collect the required metrics.
- Then, login to the hypervisor as root user.
-
Run the following command on the console of the hypervisor:
xe host-list
The above command will print the host details of the hypervisor. Look for the UUID value. This is required in the next step. If your hypervisor is part of a pool, the above command will list the details for all the servers in the pool. Look for the details of the current hypervisor and find its UUID value.
-
Next, run the following command on the console of the hypervisor by specifying the UUID determined in the previous step:
xe host-param-set uuid=<UUID acquired in the step above> other-config:rrd_update_interval=2
Note that the rrd_update_interval can hold any of the below-mentioned values:
- never-this is default, meaning no periodic polling is performed
- 1 - Polling is performed every 5 seconds.
- 2 - Polling is performed every minute (we recommend this value for monitoring purposes).
-
Then, restart the XenAPI by issuing the following command from the /opt/xensource/bin directory(on Linux; on Windows, this will be: <xen_install_dir>\xensource\bindirectory):
xe-toolstack-restart
- Now, restart the eG agent and verify whether it is able to collect the metrics.
- If the aforesaid steps do not produce the desired results, then check whether the hypervisor has been configured to use SSL. If so, switch on the ssl flag of all tests to Yes.
-
If the tests still do not work, then, check whether the hypervisor is using its default SSL certificate or has been configured to use a self-signed certificate. If a self-signed certificate is in use, then follow the broad steps below to make sure the eG agent communicates with the hypervisor using this cerficate:
- Obtain the server-certificate for the hypervisor
- Import the server-certificate into the local certificate store of the eG agent
The sections to come will discuss each of these steps in detail.
Obtaining the Server-Certificate for the hypervisor
To obtain a certificate, you can login to the hypervisor as any user with access privileges to the server, and copy the certificate directly from the server to the agent host.
If the agent is deployed on the control domain of the server, then follow the steps detailed below to obtain the server-certificate:
- Login to the hypervisor as a user with access rights to the server. If you have created a special user, then the credentials of that user can be supplied while logging into the server.
- Since the certificate needs to be stored on the agent host, create a directory on the hypervisor itself for storing the certificate.
- Next, copy the certificate file (with the extension, .pem) from the /etc/xensource directory on the server to the directory that you created at step 2, using a unique filename (preferably, a name that suggests that the file contains an SSL certificate - say, sslcert).
If you intend to monitor the virtualized environment in an ‘agentless’ manner, then the eG agent will be deployed on a remote Windows host. In such a case, you first need to copy the certificate from the hypervisor to the remote agent’s host. In such a case, follow the steps detailed below to obtain the certificate from the hypervisor:
- Open the Internet Explorer on the remote agent’s host.
- Connect to the hypervisor using the HTTPS protocol: https:// <Xen_server_IP>.
-
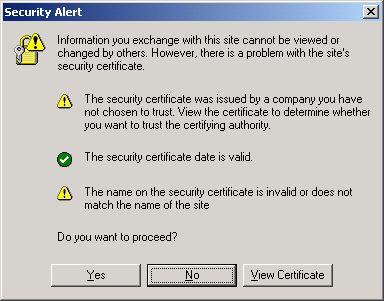
A Security Alert message displays a warning regarding the certificate’s certifying authority (see Figure 1).
-
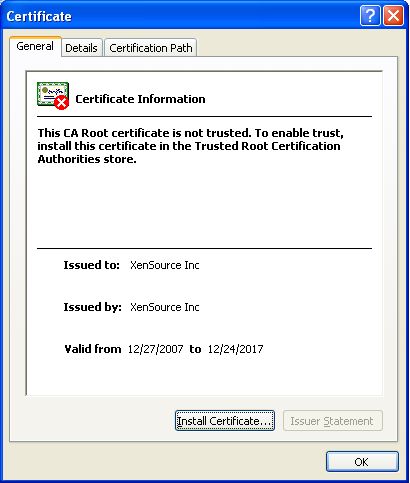
Click on View Certificate in Figure 1 to open the Certificate properties page (see Figure 2).
-
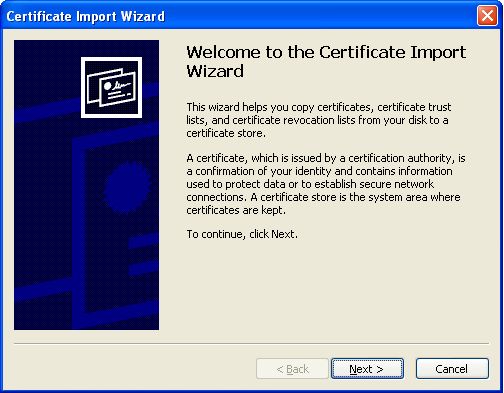
Click Install Certificate in Figure 2 to launch the Certificate Import Wizard (see Figure 3).
-
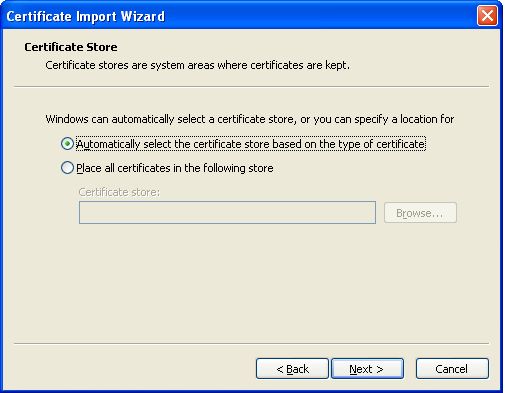
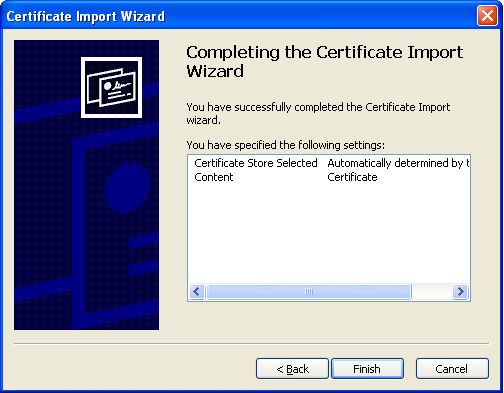
In the Welcome screen, click Next to proceed (see Figure 3). In the next step (see Figure 4), keep the default setting, Automatically select the certificate store based on the type of certificate, and click Next to continue.
-
Next, click Finish to complete the import (see Figure 5).
-
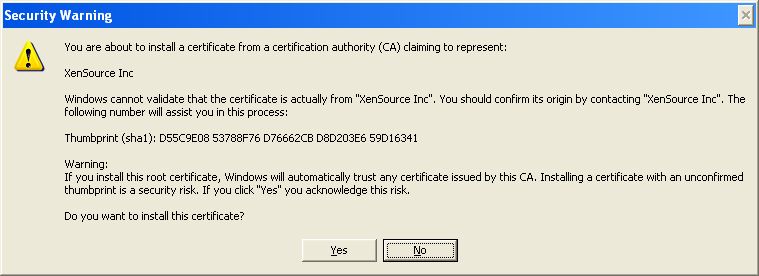
A Root Certificate Store alert message then appears, providing a summary of the details of the certificate that you imported (see Figure 6).
-
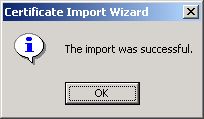
Click Yes in Figure 6 to continue with the certificate installation. Upon a successful import, the following message appears (see Figure 7).
-
Click OK to dismiss the success message (see Figure 7). The Certificate properties page becomes active again (see Figure 8).
-
Click OK in the Certificate dialog box of Figure 8 to continue. The Security Alert Message reappears.
- Click Yes in the Security Alert message of Figure 9 to continue with the original HTTPS request for the server. The server Welcome page then appears. This indicates that the Certificate has been installed in Internet Explorer’s certificate cache. You now need to export the certificate to the local Windows host. For that, first, follow the Tools -> Internet Options menu sequence on the web browser.
-
In the Internet Options dialog box that appears (see Figure 10), select the Content tab, and click on the Certificates button within.

-
Select the Trusted Root Certification Authorities tab (see Figure 11) in the Certificates dialog box that appears, select the certificate that you imported from the list below, and click the Export button to export the certificate to the local host.
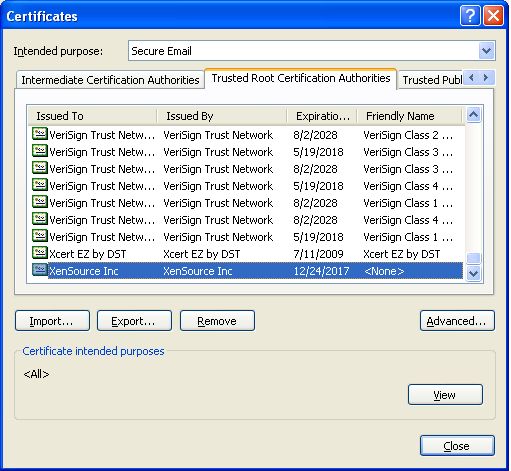
Figure 11 : Viewing the Trusted Root Certification Authorities
-
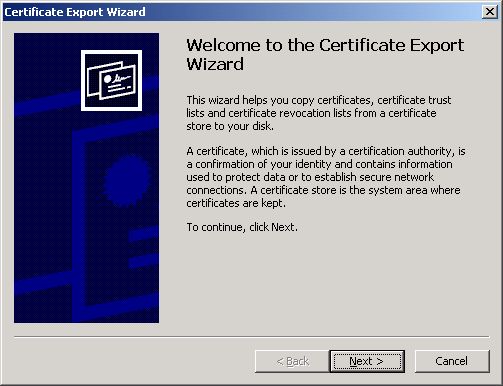
The Certificate Export Wizard is then invoked (see Figure 12). Click Next to continue.
-
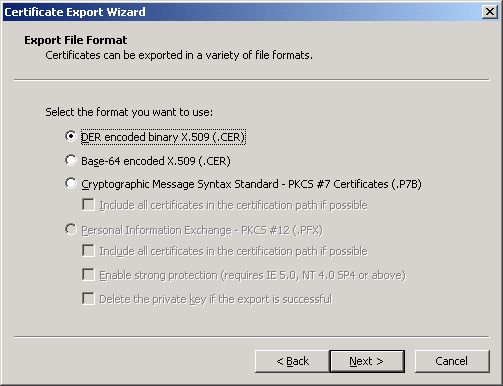
When prompted to select an export file format, simply go with the default settings. Therefore, just click the Next button to continue (see Figure 13).
-
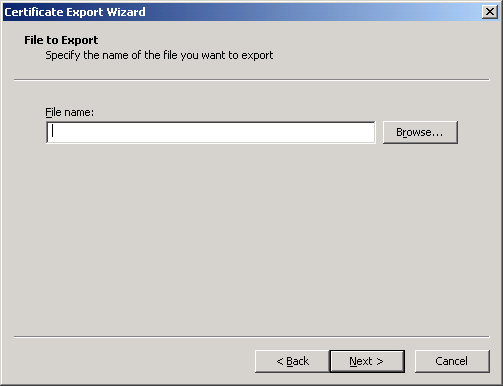
Next, in the File name text box (see Figure 14), specify the full path to the file (on the local host) to which the certificate is to be exported. You can even click on the Browse button to browse for the location.
-
In the Save As dialog box (see Figure 15) that appears upon clicking the Browse button, indicate the directory on the local host to which the certificate is to be exported, and also provide a name for the file. Then, click the Save button. The certificate file will be saved with the extension, .cer.
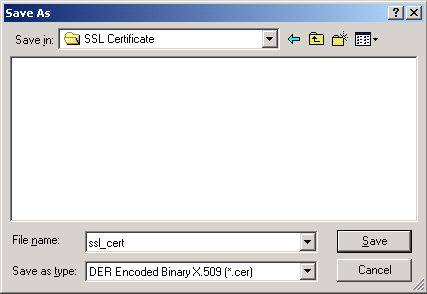
Figure 15 : Saving the certificate in a directory on the local host
-
The chosen location and specified file name will then appear against the File name text box (see ). Click Next in to continue.
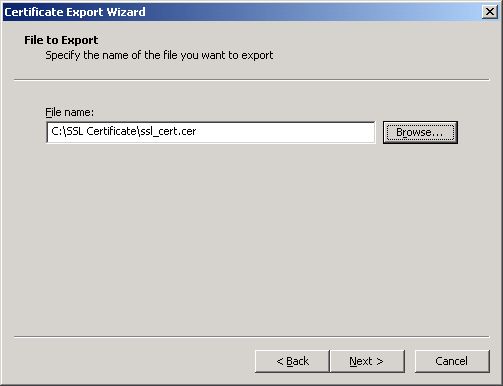
Figure 16 : The chosen location appears
-
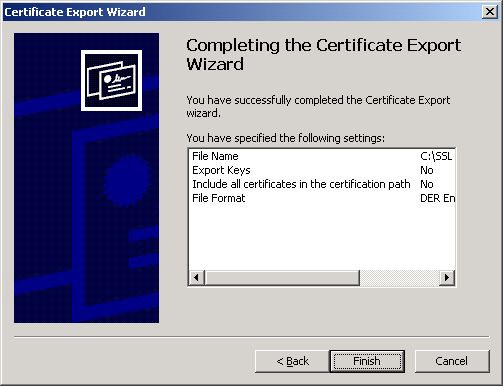
Click Finish in Figure 17 to end the export.
Importing the Server Certificate to the Local Certificate Store of the eG Agent
The next step towards SSL-enabling the eG agent-hypervisor comnmunication is to import the server certificate to the eG agent’s certificate store. To do this, follow the steps given below:
-
If the eG agent is installed on the hypervisor’s control domain, then follow the steps given below to import the server certificate:
- Login to the hypervisor as a user with access rights to the server.
- Open the Linux shell command.
- Then, set the path variable appropriately i.e., PATH = /opt/egurkha/jre/bin:$PATH
-
Then, using the keytool command, import the hypervisor certificate to the agent host. A sample command has been given below:
keytool -import -file /tmp/cert/ssl_cert.cer -alias egcert -keystore /opt/egurkha/jre/lib/security/cacerts
The parameters expected by this command are:
-alias : an alias name for the certificate being imported
-file : the full path to the certificate file being imported
-keystore : the certificate file that the JVM used by the agent checks for trusted certificates
-
This command, upon execution, will request for the keystore password. The default keystore password provided by Java is changeit. Provide this password and click Enter.
Enter keystore password: changeit
-
Finally, the command will request your confirmation to make the imported certificate a trusted one. Enter yes to trust the certificate.
Trust this certificate? [no]:
-
If the processing was successful, then the following message will appear.
Certificate was added to keystore
- Finally, start the agent.
-
If the eG agent is deployed on a remote Windows host, then follow the steps given below to import the certificate:
- Login to the remote agent’s host.
- Open the command prompt
- Set the path to <EG_INSTALL_DIR>\jre\bin;%path%, using the command: set path=<EG_INSTALL_DIR>\jre\bin;%path%
-
Then, using the keytool command, import the hypervisor certificate to the agent host. A sample command has been given below:
keytool -import -file \tmp\cert\ssl_cert.cer -alias egcert -keystore <EG_INSTALL_DIR>\jre\lib\security\cacerts
The parameters expected by this command are:
-alias :an alias name for the certificate being imported
-file :the full path to the certificate file being imported
-keystore : the certificate file that the JVM used by the agent checks for trusted certificates
-
This command, upon execution, will request for the keystore password. The default keystore password provided by Java is changeit. Provide this password and click Enter.
Enter keystore password: changeit
-
Finally, the command will request your confirmation to make the imported certificate a trusted one. Enter yes to trust the certificate.
Trust this certificate? [no]:
-
If the processing was successful, then the following message will appear.
Certificate was added to keystore
- Finally, start the agent.