How to Monitor Kubernetes Namespace Using eG Enterprise?
The eG Enterprise cannot automatically discover a Kubernetes Namespace. This implies that you need to manually add the component for monitoring. Only the namespaces that are part of the existing Kubernetes/OpenShift cluster component managed on eG Enterpise can be monitored.The steps for manually adding a Kubernetes Namespace are detailed below:
- Login to the eG admin interface.
-
Follow the Infrastructure -> Discovery menu sequence.
-
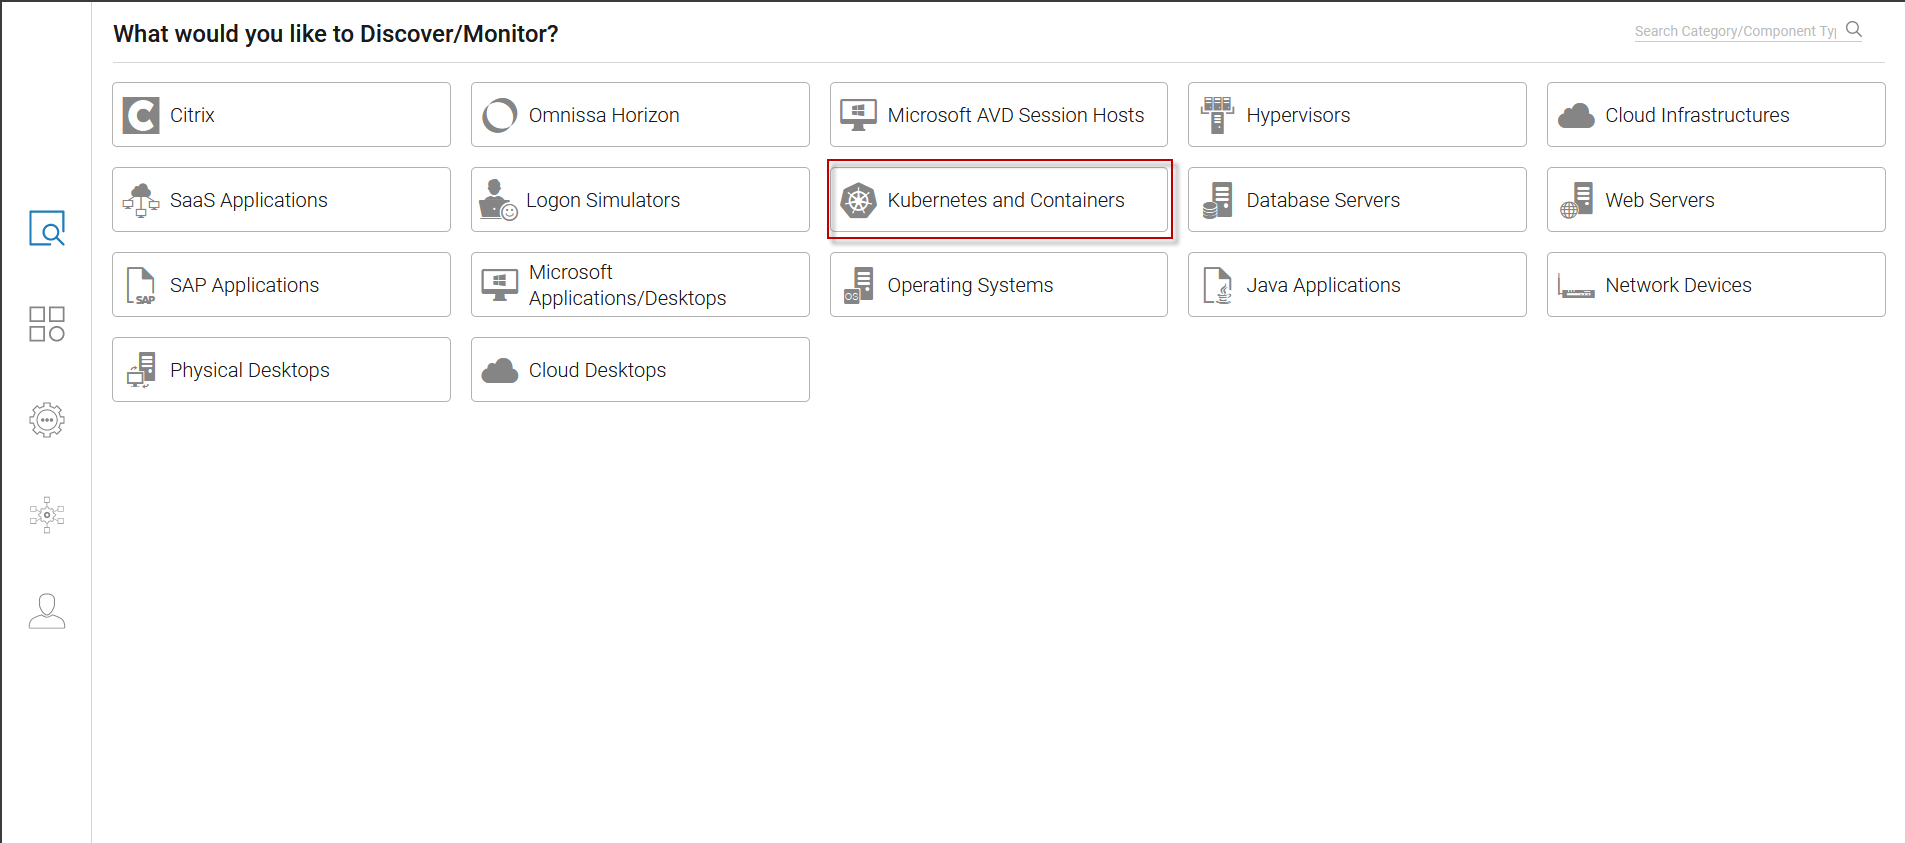
Figure 1 then appears prompting you to pick what you want to monitor. Select Kubernetes and Containers from Figure 1.
-
Figure 2 then appears. Here, click the Kubernetes, Openshift, EKS, AKS tile.
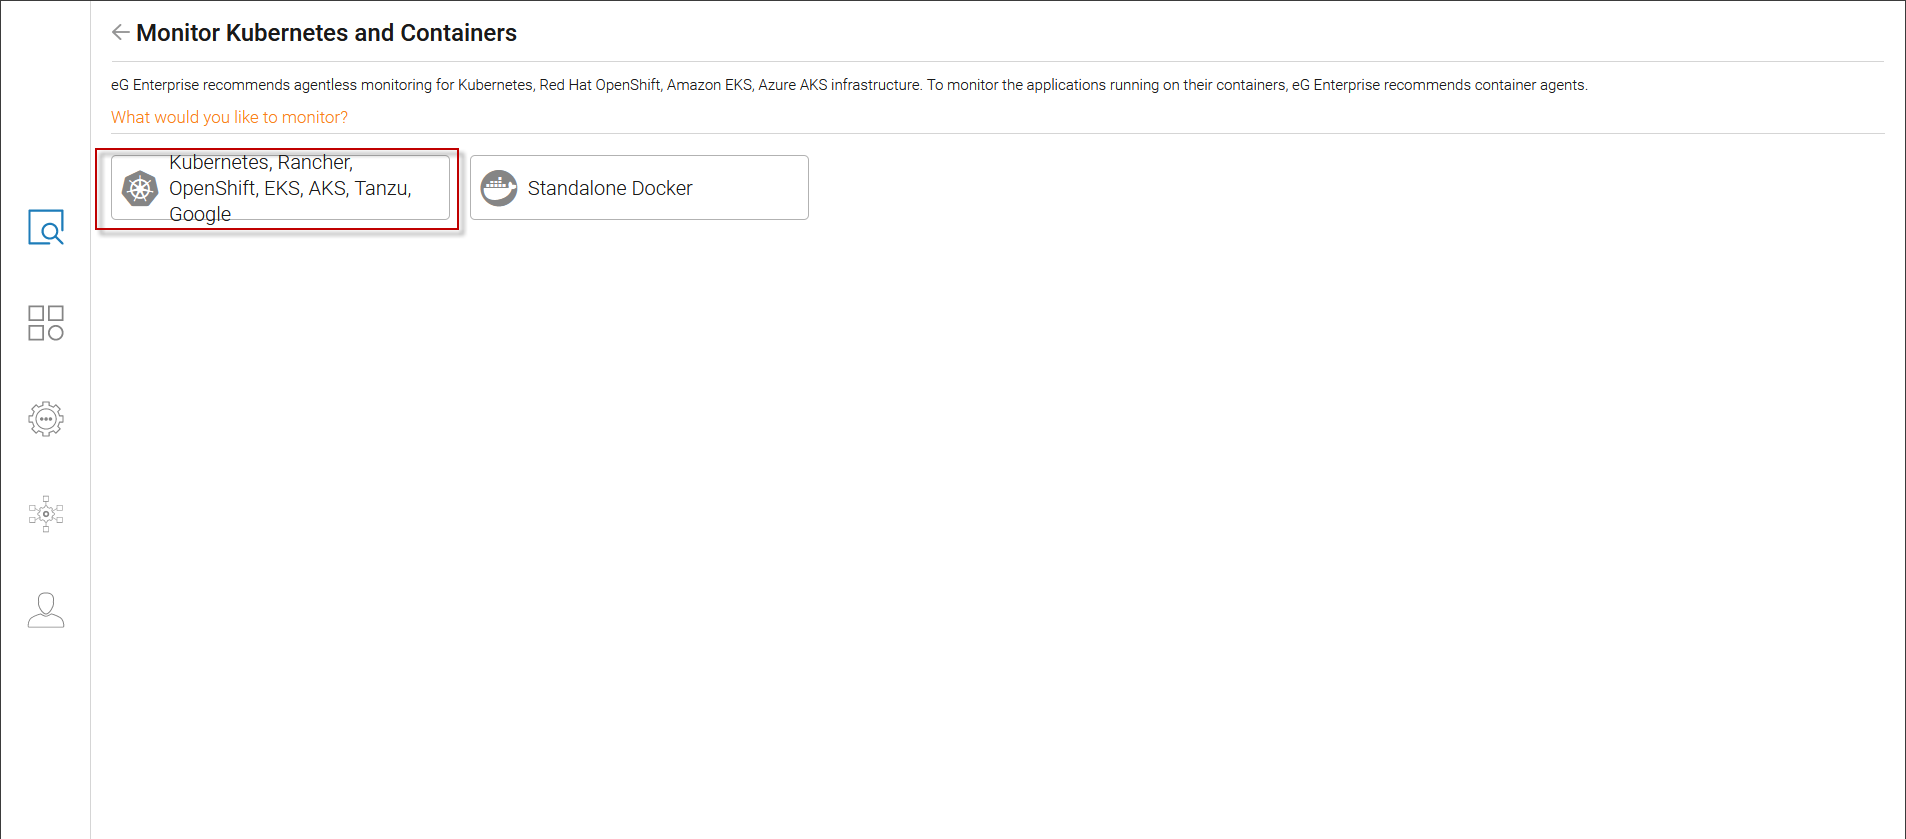
Figure 2 : Choosing to monitor Kubernetes, Openshift, EKS, AKS infrastructures
-
Figure 3 then appears. Here, choose Kubernetes Namespace tile.

-
This will invoke Figure 4, using which you can configure the details of the Kubernetes Namespace you want to monitor.
-
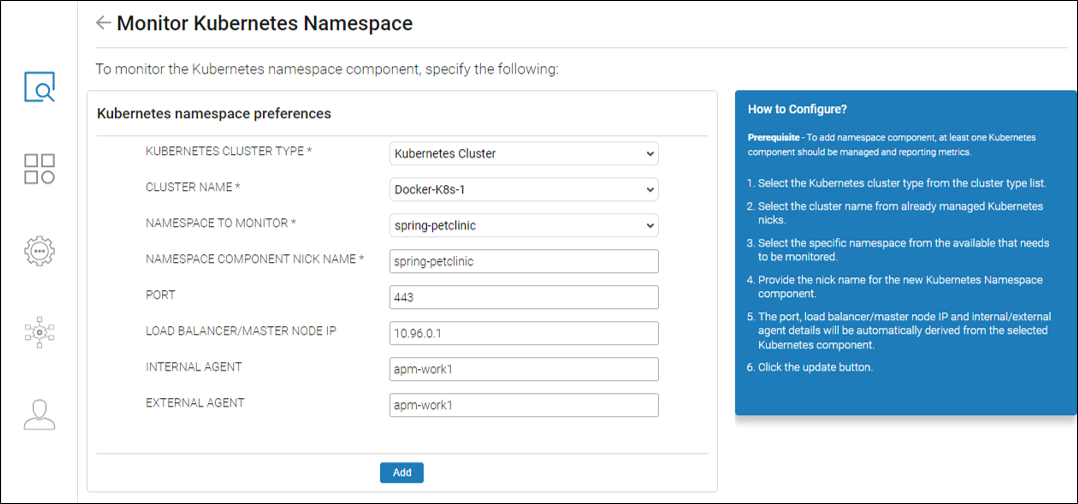
In Figure 4, specify the following:
-
Kubernetes Cluster Type:Select the Kubernetes Cluster from the Kubernetes Cluster type drop down list.
-
Cluster Name:Choose the cluster name from the Cluster Name dropdown, which lists the already managed clusters.
-
Namespace to Monitor:In the Namespace to Monitor field, select the name of the namespace you want to monitor from the available namespaces.
-
Namespace Component Nickname:In the Namespace Component Nick Name field, provide a recognizable name for the namespace.
-
The Port, Load Balancer/Master Node IP, Internal Agent, and External Agent fields will be automatically configured based on the selected, already existing Kubernetes Cluster.
-
Now Click the Add button to add the Kubernetes Namespace component to eG Enterprise.
This will automatically configure all the unconfigured tests for the Kubernetes Namespace component with the details of the already existing Kubernetes Cluster.
-