Configuring User Name and Business Context
As part of detailed diagnosis, eG BTM displays two columns, namely - User Name and Business Context. By default, these two columns will not display any values. This has been done so that administrators can use these columns to display any additional information that they deem useful for troubleshooting transaction slowness. For instance, administrators can configure eG Enterprise to capture the name of the user who initiated each transaction and display the same in the User Name column for every transaction URL in the Detailed Diagnosis page. Likewise, administrators can also tweak eG Enterprise to capture and display business-critical information such as transaction ID, product name, customer ID etc., into Business Context. Such custom information can also be captured for specific transaction URLs or URL patterns alone.
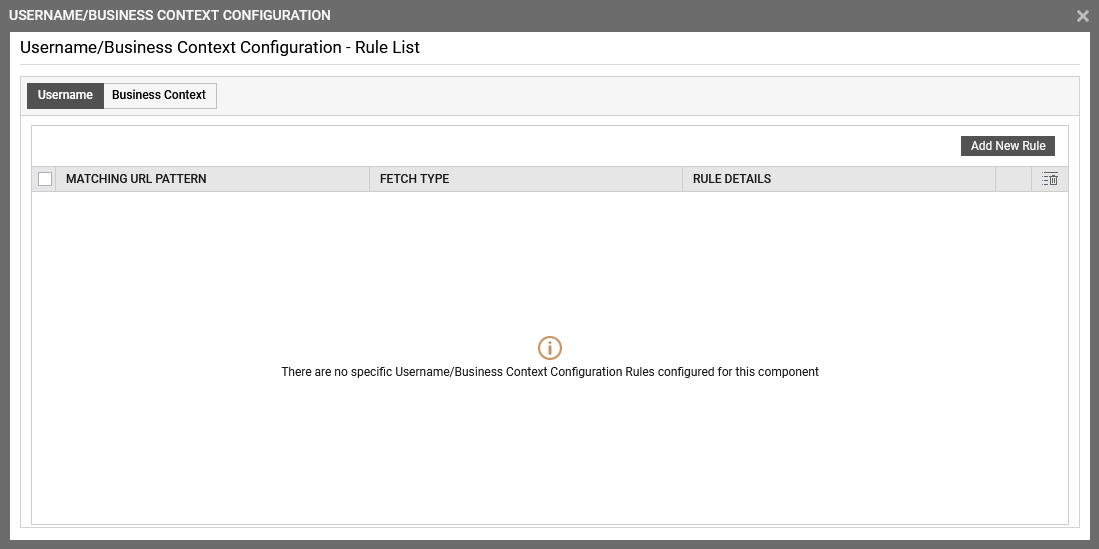
To achieve this, click the  icon against the USERNAME/BUSINESS CONTEXT CONFIGURATION parameter of the Node.js Business Transactions test.Figure 1 will then appear. By default, the Username tab page will open as indicated by Figure 1. Using this tab page, you can configure rules for capturing user names for different URLs/URL patterns. To configure business context rules, click on the Business Context tab page.
The procedure for creating a rule is the same, whether it is for capturing a user name, or it is for capturing a business context. The only difference is the tab page used for the purpose.
The procedure below details how to capture a user name into detailed diagnosis.
-
First, click on the Username tab page, Figure 1 will appear listing rules that pre-exist for capturing a user name. To add a new rule, click the Add New Rule button in Figure 1.
-
Figure 2 will then appear. Use Figure 2 to create a new rule for capturing user names.
-
Begin by providing an Entry Description. This can be a text string or a keyword that uniquely identifies the URL/URL pattern to which the rule applies. For instance, if you are configuring a rule for the URL pattern, */sports*, then you can configure sports as the Entry Description.
-
Next, against Matching URL Pattern, specify a comma-separated list of URLs or URL patterns for which the user name as to be captured and displayed as part of detailed diagnosis. The URL patterns can include wild card patterns - eg., */WebPoc*,*Web*.
-
Then, select a Fetch Type. This refers to the approach using which you want to capture the user name for a transaction URL/URL pattern. eG Enterprise prescribes four approaches to capturing the same:
-
Function Argument or parameter - If you have written a Node.js function that takes input arguments/parameter for capturing the user name, then use the Function Argument or parameter approach.
The key limitations of the Function Argument or parameter approach are as follows:
- Not possible to get the argument values of predefined functions.
- Not possible to capture all the argument values of a function.
-
Static Function - A Static function belongs to the class and not to the object(instance). A static function can access only static data. It cannot access non-static data (instance variables). A static function can call only other static functions and can not call a non-static function from it. If you have written a static Node.js function for retrieving the user name, then use this approach.
The key limitations of the Static Function approach are as follows:
- Not possible to get the return value of private static functions.
- Not possible to get the output of static functions that have more than one parameter.
-
Request Property - If the user name is available as a session attribute, then you can configure the eG agent to access that session attribute and retrieve the required information.
The key limitation of the Request Property approach is as follows:
-
Not possible to get the session value if the response is committed at the end of the transaction.
-
- Request Parameters - If the user name is passed as the value of a request parameter key in the specified URL/URL pattern, then select this option.
- JSON Web Token - If the user name is passed as the value of a JSON Web Token in the specified URL/URL pattern, then select this option.
-
-
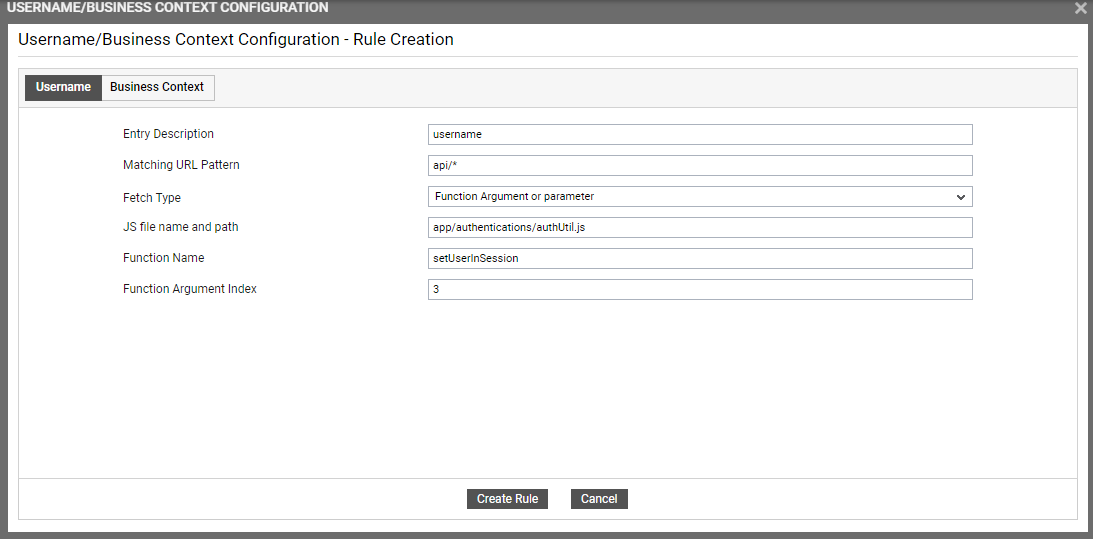
If you select the Function Argument or parameter option, then the options you see in Figure 3 will appear.
Figure 3 : Configuring a rule for capturing user name using the Function Argument or parameter Fetch Type
Use the options in Figure 3, as indicated below, to configure a rule that captures the user name from a function argument/parameter.:
-
First, against JS file name and path, specify the name of the file that contains the function definitions for fetching the user name. If an application file path is to be used, then specify the fully qualified file path name - e.g., app/authentications/authUtil.js. If the file exists in the root path of the application, then simply specify the file name - e.g., authUtil.js
- Specify the Function Name to be used for capturing the user name.
- In the Function Argument Index text box, you need to define at what position of the function invocation call, the information you need - i.e., the user name - resides. For instance, if the function invocation call is Function1(int userID, string userName), then to fetch the user name, the Function Argument be 2. This is because, the second argument, string userName, is the one that fetches the user name information.
- Finally, click the Create Rule button to create the new rule.
-
-
If you select the Static Function option, then the options you see in Figure 4 will appear.
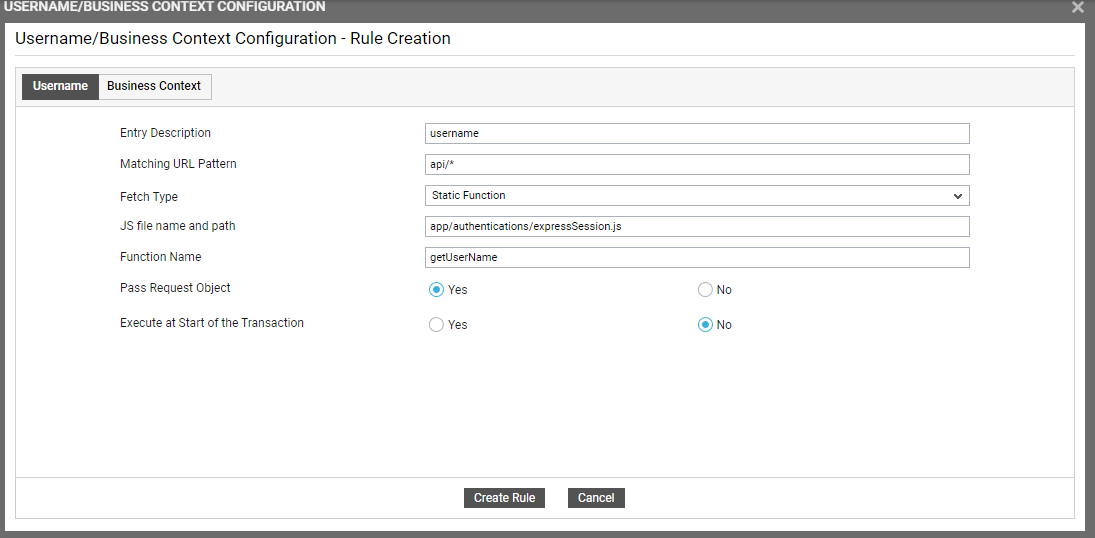
Figure 4 : Configuring a rule for capturing user name using a Static Function
Use the options in Figure 4, as indicated below, to create a rule that captures the user name using a static function.
-
First, against JS file name and path, specify the name of the file that contains the function definitions for fetching the user name. If an application file path is to be used, then specify the fully qualified file path name - e.g., app/authentications/authUtil.js. If the file exists in the root path of the application, then simply specify the file name - e.g., authUtil.js
- Specify the Function Name to be used for capturing the user name.
- If the specified static function passes a request object to retrieve the user name, then set the Pass Request Object flag to Yes. On the other hand, if the static function does not pass any request object, but retrieves the user name by implementing a different programming logic in its body, then set the Pass Request Object flag to No.
- If the configured function captures the user name only when the transaction is in progress (and not when it begins), then set the Execute at Start of the Transaction flag to No. On the other hand, if the function captures the user name at the beginning of the transaction, set this flag to Yes.
- Finally, click the Create Rule button to create the new rule.
-
-
If you select the Request Property option from the Fetch Type list, then the options you see in Figure 5 will appear.
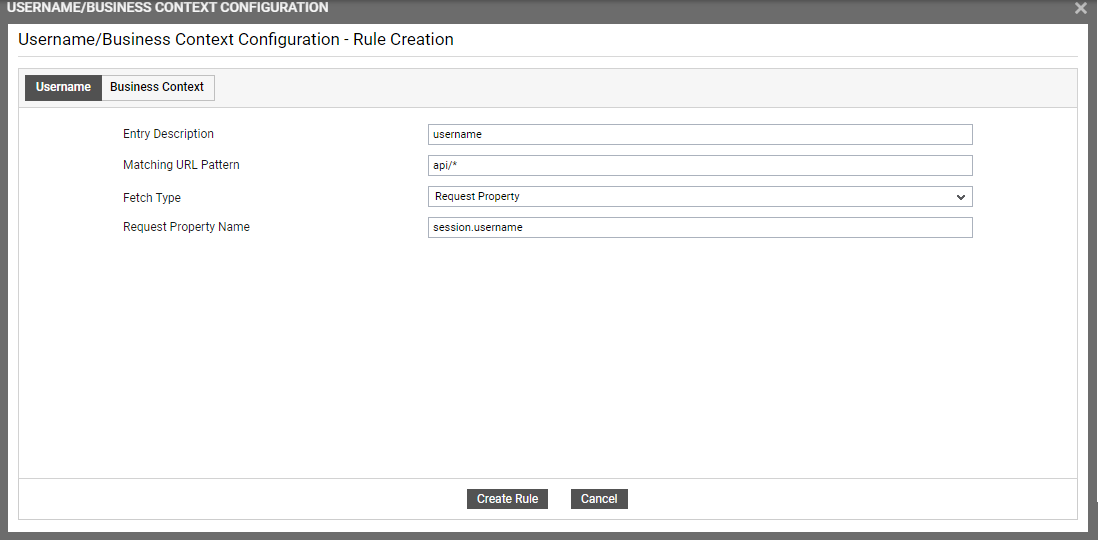
Figure 5 : Configuring a rule for capturing user name from a Request Property
Use the options in Figure 5, as indicated below, to configure a rule that reads the user name from the value of a request property:
-
Specify the Request Property Name that the eG Node.js BTM should read the user name value from.
-
Then, click the Create Rule button to create the new rule.
-
-
If you select the Request Parameter Name option, then the options you see in Figure 6 will appear,
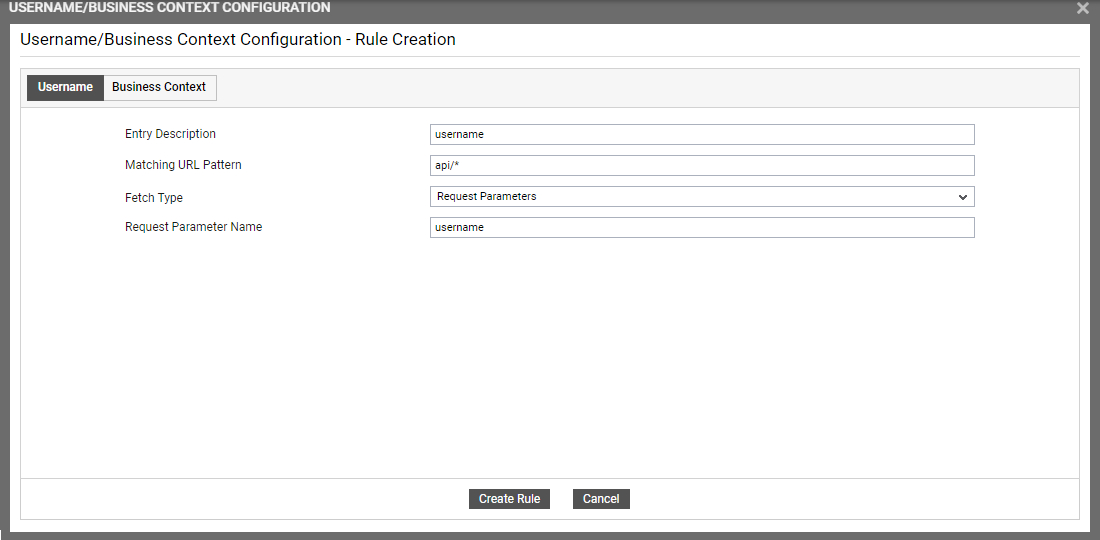
Figure 6 : Configuring a rule for capturing user name from a Request Parameter
Use the options in Figure 6, as indicated below, to configure a rule that retrieves the user name from the value of a request parameter key:
- Specify the Request Parameter Name that eG Node.js BTM should read the user name value from. For instance, say, username.
- Finally, click the Create Rule button to create the new rule.
-
If you select the JSON Web Token option, then the options you see in Figure 7 will appear.
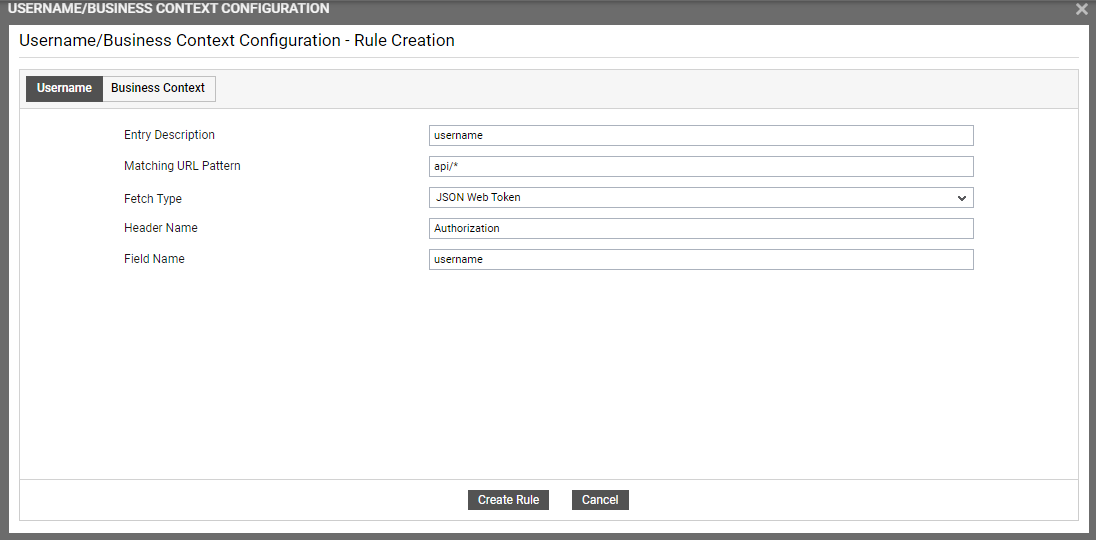
Figure 7 : Configuring a rule for capturing user name from a JSON Web Token
Use the options in Figure 7, as indicated below, to configure a rule that retrieves the user name from the header of a JSON Web Token:
- Specify the Header Name that should be read from the JSON Web Token. For instance, say, Authorization.
- Specify the Field Name that the eG Node.js BTM should read the user name value from.
- Finally, click the Create Rule button to create the new rule.
-
Similarly, multiple rules can be created for capturing user name.
As stated earlier, to capture a business context into detailed diagnosis, click on the Business Context tab page. Figure 8 will then appear, where you can view the business context rules that pre-exist (if any).
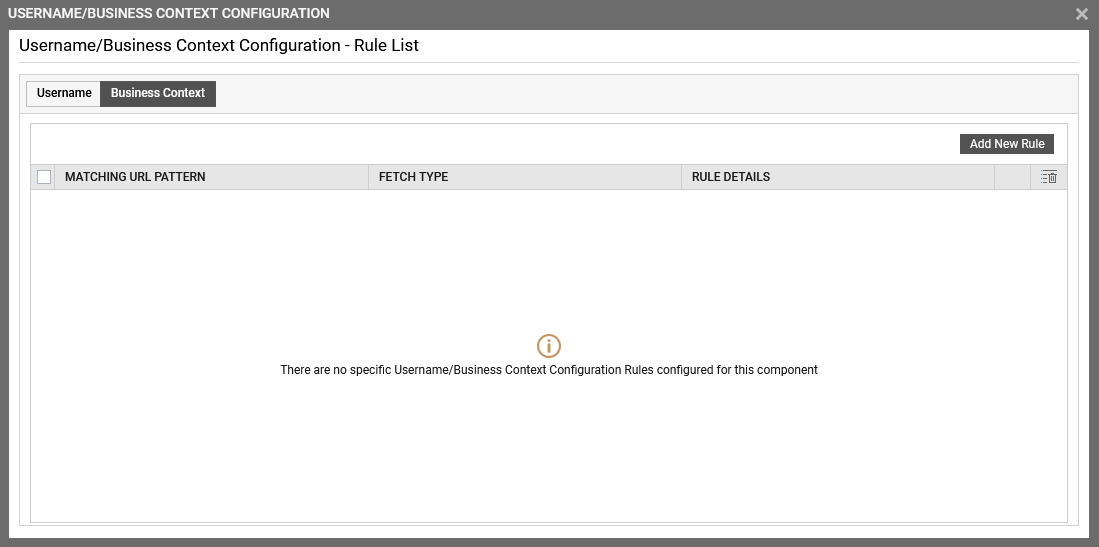
Figure 8 : List of rules that pre-exist for capturing business context
To add a new rule, click on the Add New Rule button in Figure 8. Figure 9 will then appear.
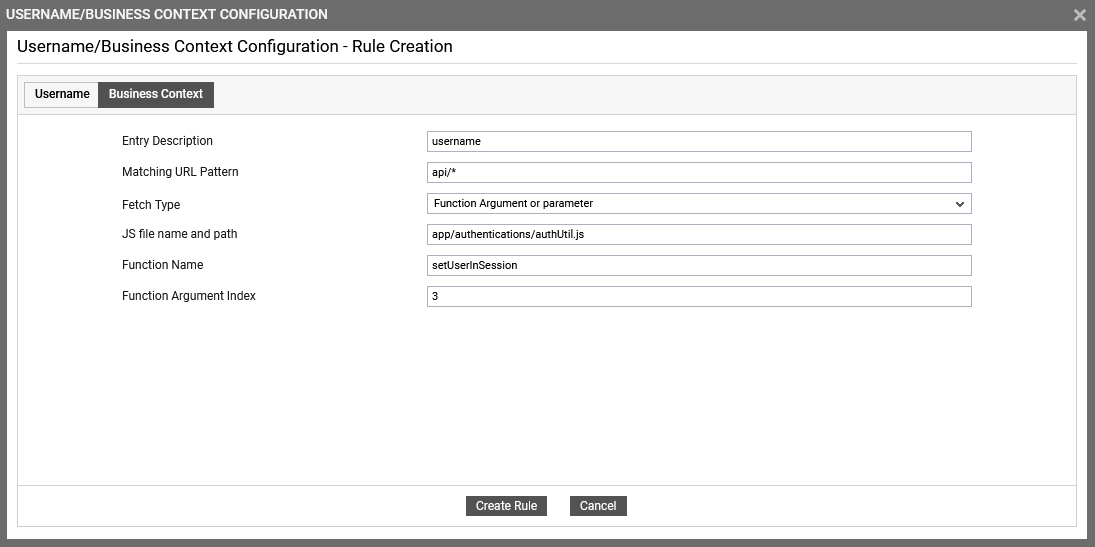
Figure 9 : Configuring a rule for capturing business context into detailed diagnosis
Use the options in Figure 9 to configure a new rule for capturing the business context into detailed diagnosis. Follow the steps 2-10 above to understand what these options are and how to use them.