Configuring Multiple Web Service Operations For Monitoring
The Web Services test enables you to not only monitor multiple web services running on a Tomcat server, but also specific operations that one can perform using each web service. For this test to run, you first need to configure which web services and operations you want to monitor. To know how to configure the web services, refer to Configuring Multiple WSDL URLs for Monitoring . For configuring the operations on the other hand, do the following:
-
In the Web Services test configuration page, after you configure the WSDL URLs you want monitored, proceed to configure the operations that you want to monitor per URL. For that, first click on the encircled '+' button corresponding to he Operations parameter (see Figure 413).

Figure 413 : Clicking on the encircled '+' button against the Operations parameter
-
Figure 414 will then appear. From the WSDL URL drop-down, pick the URL for which you want to configure operations.
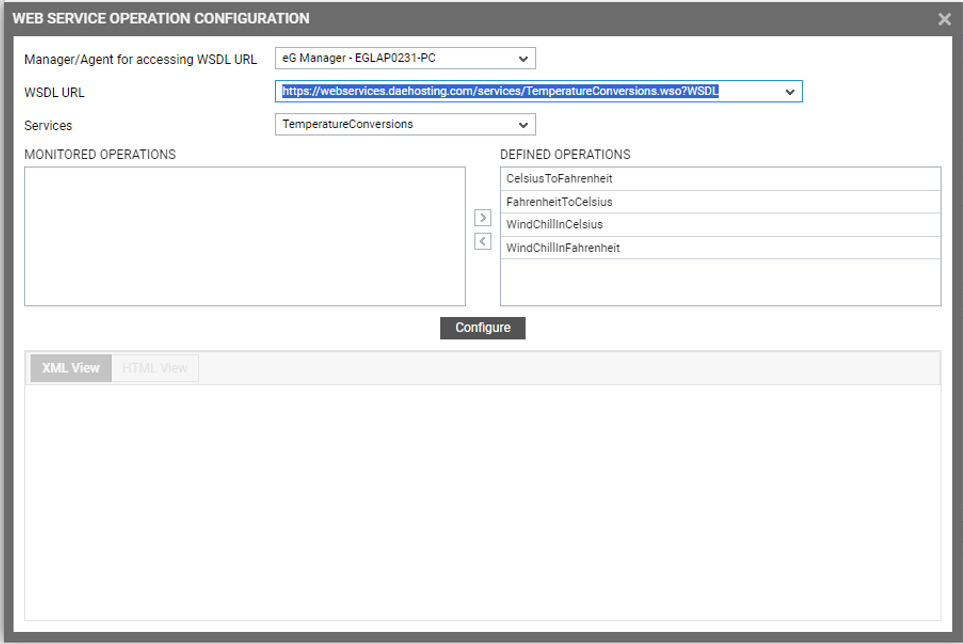
Figure 414 : Viewing the operations associated with a chosen Web Service
-
The web services supported by the chosen WSDL URL will then automatically populate the Services drop-down. From this drop-down, select the service for which you want to configure operations.
-
The operations supported by the chosen service will then be listed in the DEFINED OPERATIONs list box. Select the operations you want to monitor from the Defined Operations list box and click on the < button to transfer the selection to the MONITORED OPERATIONS list box (see Figure 415).
-
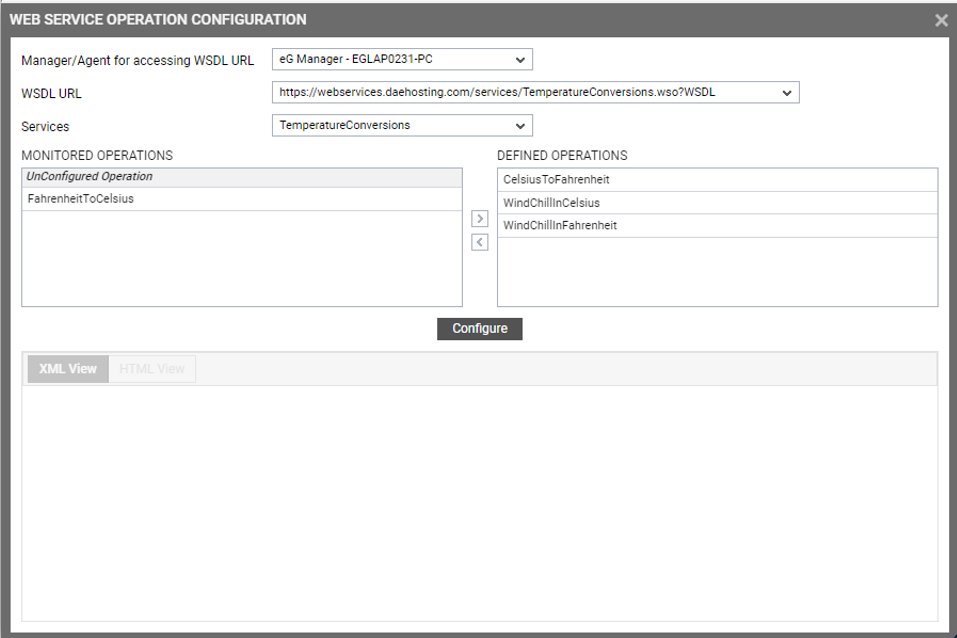
Once the operations that require monitoring are identified, you can now proceed to configure / simulate requests to each operation, so that the Web Services test can validate and measure their response. For that, select an operation from the MONITORED OPERATIONS list box and click the Configure button (see Figure 415). A SOAP request message template option will then appear (see Figure 416).
-
Using the SOAP request message template option, you can select the template using which the test should emulate requests to the chosen operation. If you choose the Pre-defined option, then you can emulate the request using a template that pre-exists. For instance, say, the operation you have chosen to monitor converts a Fahrenheit temperature value to Celsius. Assume that the request that you want the test to emulate accepts a Fahrenheit value, converts it into Celsius, and in the process, measures the validity and latency of the response. In some environments, the template for simulating such a request may pre-exist. In this case, use the Pre-defined option. A Pre-defined template can be in the XML format or in the HTML format.
Either way, the test automatically discovers the existing template (from the WSDL URL) and displays it in the XML View and/or HTML View tab pages, respectively. If you want to leverage the HTML template for the purpose of the emulation, then click on the HTML View tab page (see Figure 417). The pre-defined HTML template will now become visible. In our example, this template accepts a Fahrenheit value for conversion. Provide such a value and click the Send Request button.
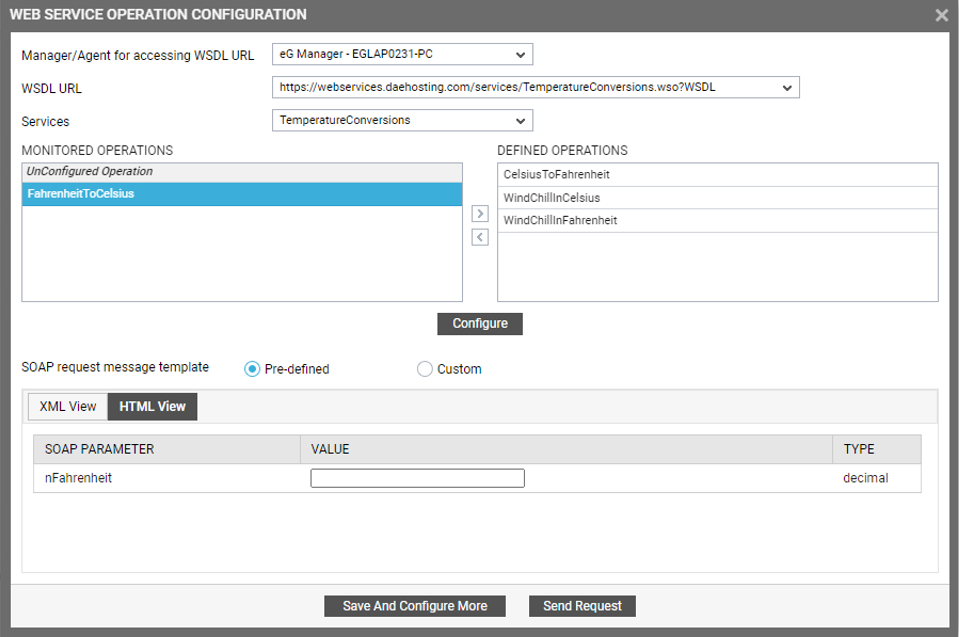
Figure 417 : Using a pre-defined HTML template for emulating a request for an operation
-
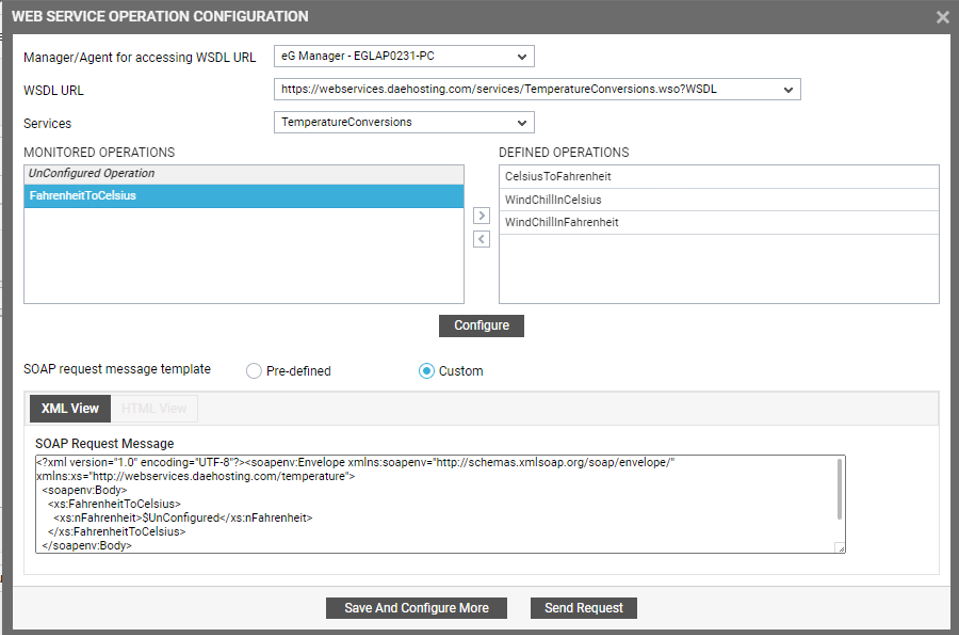
Alternatively, you can use a custom template for emulating the request. Such a template can only be defined in the XML format. In this case therefore, first set the SOAP request message template flag to Custom, and then click on the XML View tab page (see Figure 418).
Figure 418 : Configuring a custom XML template for emulating a request for an operation
-
In the SOAP Request Message text area (see Figure 418), configure the XML code for emulating the request and click the Send Request button.
-
This way, using steps 5-8, you can configure request templates for each operation you wish to monitor.