Installing and Configuring the .NET Profiler on an IIS Web Server
To install the .NET profiler on the IIS web server, follow the steps below:
- Login to the target IIS web server.
- From the command-prompt, switch to the <EG_AGENT_INSTALL_DIR>\lib directory.
-
Now, execute the following command from that location:
SetupDotNetProfiler.bat
-
Once the batch file begins execution, the following messages will appear:
--------------------------------------------------------------------
*** Setting up Registry values for the Profiler ***
--------------------------------------------------------------------
Modifying the W3SVC service's Environment variables
Modifying the WAS service's Environment variables
-
If setup detects that a profiler (this can be an eG;s .NET profiler or any third-party profiler such as NewRelic) pre-exists on the host, then the following message will appear:
There is another profiler found in registry
------------------------------------------------------------
COR_PROFILER=<71DA0A04-7777-4EC6-9643-7D28B46A8A41>
------------------------------------------------------------
Setup will then prompt you to confirm whether you want to proceed with the installation or not.
Do you wish to continue setup <yes/no> : yes
If you specify yes here, then setup will try to overwrite the GUID presently registered with the COR_PROFILER registry key with the GUID of the eG Enterprise profiler. If the GUID is overwritten successfully, then a message to that effect will appear.
-----------------------------------------------------
RegValues are modified Successfully ***
-----------------------------------------------------
-
If setup is successful, then the following messages will appear:
Registering the Profiler.
Installing assembly in Cache...
Helper assemblies Installation Successful
Applying required permissions for eGurkha directory.
-
Finally, restart the IIS web server by issuing the iisreset command at the prompt. This will restart all the web sites and web applications on that IIS web server. If you would rather have the monitored web sites / web applications alone to be restarted, do the following:
-
Open the Internet Information Services (IIS) Manager (see Figure 1).

-
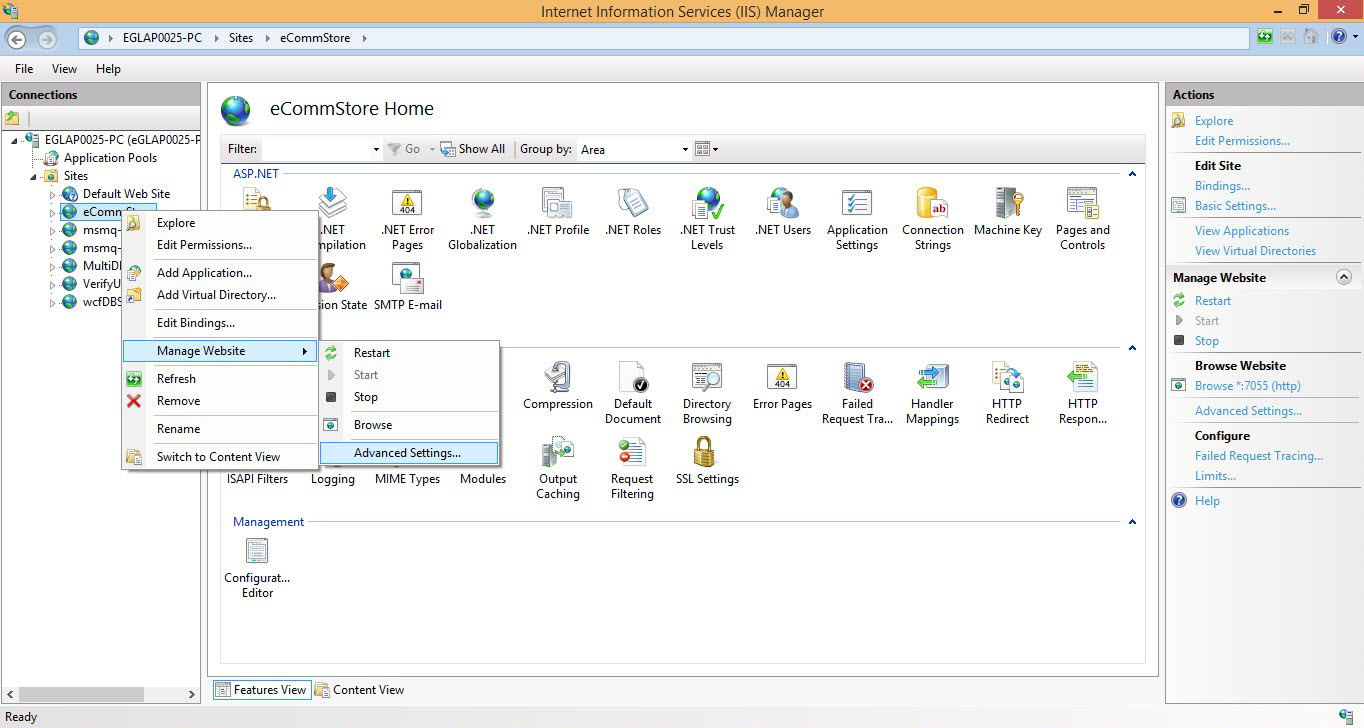
Expand the Sites node in the tree-structure in the left panel of Figure 1, and select the sub-node representing the web site / web application you are monitoring. Right-click on that sub-node, move your mouse pointer over Manage Website in the shortcut menu that appears, and pick the Advanced Settings option (see Figure 2).
-
Figure 3 will then appear. From Figure 3, you can figure out which Application Pool manages the target web site / web application.
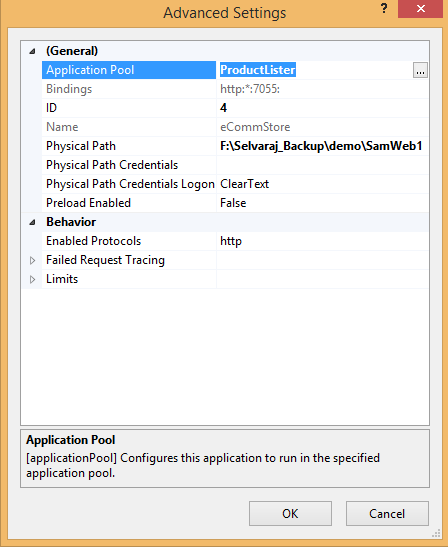
- Then, click the Cancel button in Figure 3 to return to the IIS Manager console.
-
Next, click the Application Pools node in the tree-structure in the left panel of the IIS Manager console (see Figure 4). The right panel will then display all the Application Pools on that IIS web server. Browse the list to locate the Application Pool to which the target web site / web application belongs - i.e., the Application Pool displayed in Figure 3.
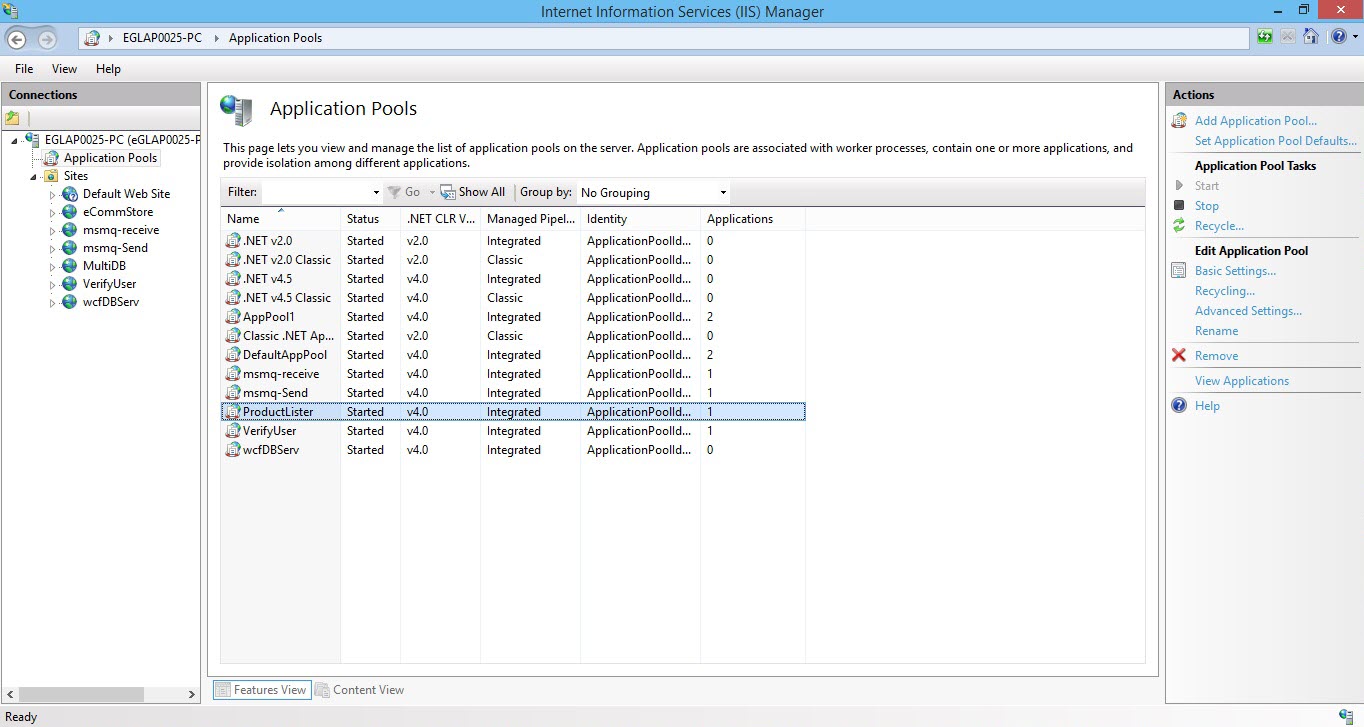
Figure 4 : Locating the Application Pool to which the target web site/web application belongs
-
Right-click on that Application Pool and select the Recycle option from the short-cut menu that appears (see Figure 5). Doing so will restart only those web sites / web applications managed by that application pool.
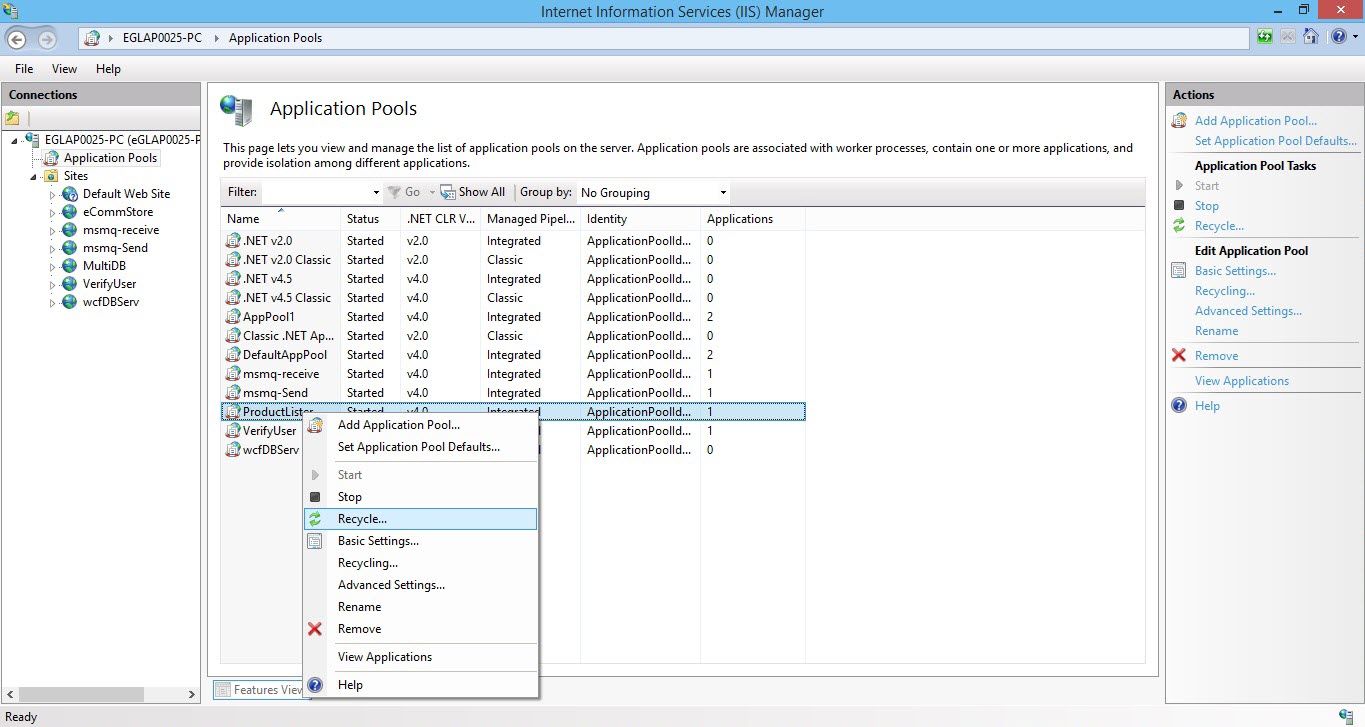
Figure 5 : Recycling the application pool to which the target web site/web application belongs
-