How does eG Enterprise monitor ActiveMQ Server?
eG Enterprise is capable of monitoring the ActiveMQ server in both agent-based and agentless manners. However, eG Enterprise recommends monitoring the ActiveMQ server in an agent-based manner. In case of the agentless approach, the remote agent used to monitor the server should be deployed on a remote Windows host in the environment. Before start monitoring the server, you need to fulfill the pre-requisites explained in the following section.
Pre-requisites for Monitoring ActiveMQ Server
By default, the eG agent uses JMX for monitoring the ActiveMQ Server, and this JMX requires authentication only (and not security). Therefore, every test to be executed by the eG agent should be configured with the credentials of a valid user to JMX, with read-write rights. The steps for creating such a user are detailed below:
-
Login to the application host. If the application being monitored is on a Windows host, then login as a local/domain administrator to the host.
-
Go to the <JAVA_HOME>\conf folder used by the target application to view the following files:
-
activemq-env.sh or activemq-env.ps1
-
jmxremote.access
-
jmxremote.password.template
-
-
Copy the jmxremote.password.template file to a different location, rename it as jmxremote.password, and copy it back to the <JAVA_HOME>\conf folder.
-
Open the jmxremote.password file and scroll down to the end of the file. By default, you will find the commented entries indicated by Figure 1 below:
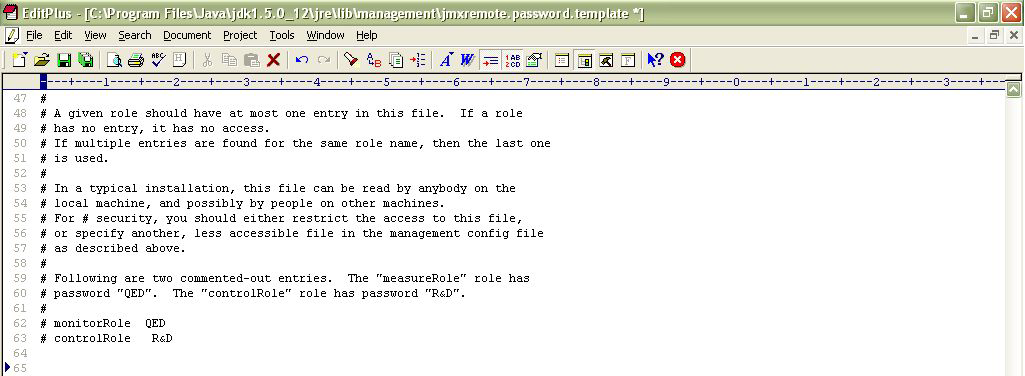
Figure 1 : Scrolling down the jmxremote.password file to view 2 commented entries
-
The two entries indicated by Figure 1 are sample username password pairs with access to JMX. For instance, in the first sample entry of Figure 1, monitorRole is the username and QED is the password corresponding to monitorRole. Likewise, in the second line, the controlRole user takes the password R&D.
-
If you want to use one of these pre-defined username password pairs during test configuration, then simply uncomment the corresponding entry by removing the # symbol preceding that entry. However, prior to that, you need to determine what privileges have been granted to both these users. For that, open the jmxremote.access file in the editor.
-
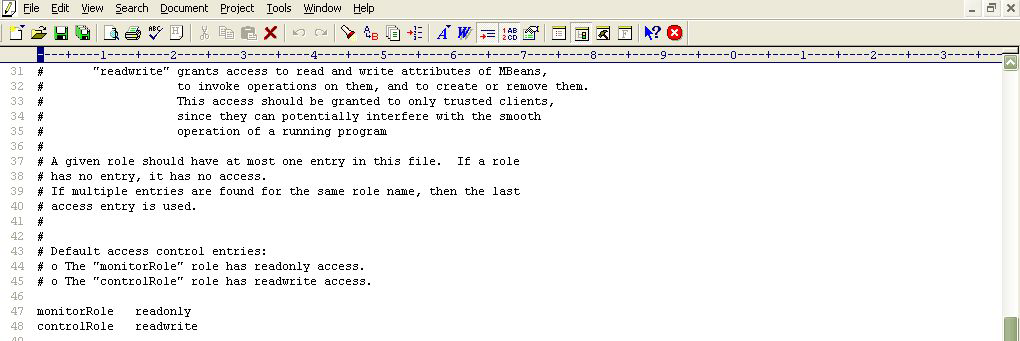
Scrolling down the file (as indicated byFigure 2) will reveal 2 lines, each corresponding to the sample username available in the jmxremote.password file. Each line denotes the access rights of the corresponding user. As is evident from Figure 2, the user monitorRole has only readonly rights, while user controlRole has readwrite rights. Since the eG agent requires readwrite rights to be able to pull out key JVM-related statistics using JMX, we will have to configure the test with the credentials of the user controlRole.
-
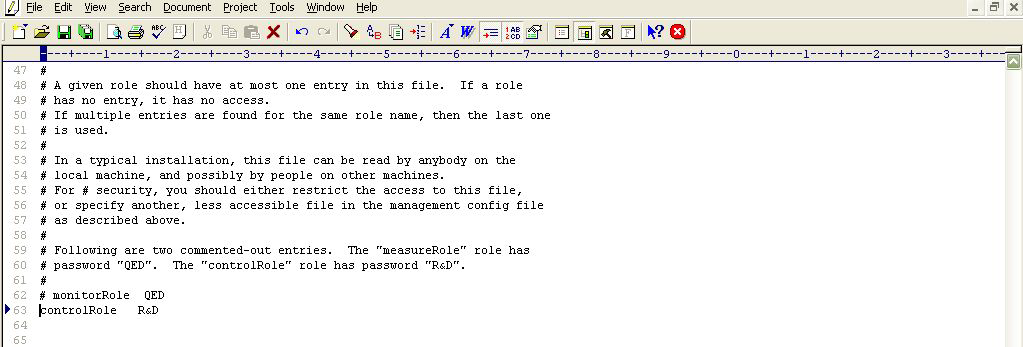
For that, first, edit the jmxremote.password file and uncomment the controlRole <password> line as depicted by Figure 3.
-
Then, save the file. You can now proceed to configure the tests with the user name controlRole and password R&D.
-
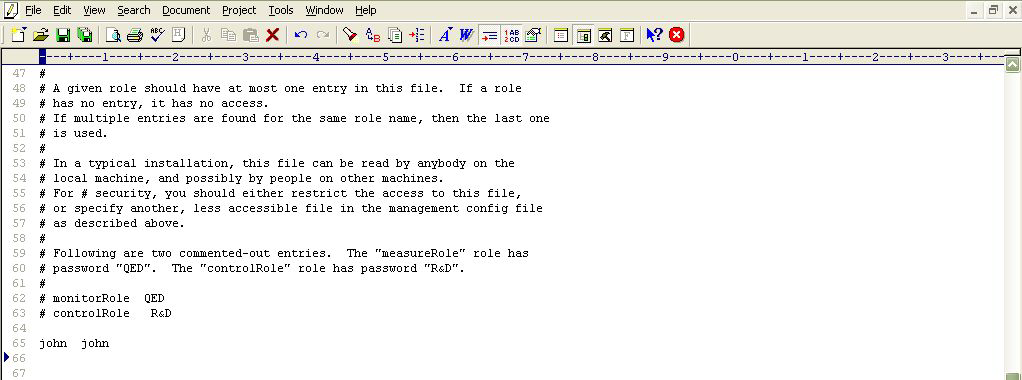
Alternatively, instead of going with these default credentials, you can create a new username password pair in the jmxremote.password file, assign readwrite rights to this user in the jmxremote.access file, and then configure the eG tests with the credentials of this new user. For instance, let us create a user john with password john and assign readwrite rights to john.
-
For this purpose, first, edit the jmxremote.password file, and append the following line (seeFigure 4) to it:
-
Save the jmxremote.password file.
-
Then, edit the jmxremote.access file, and append the following line (see Figure 5) to it:
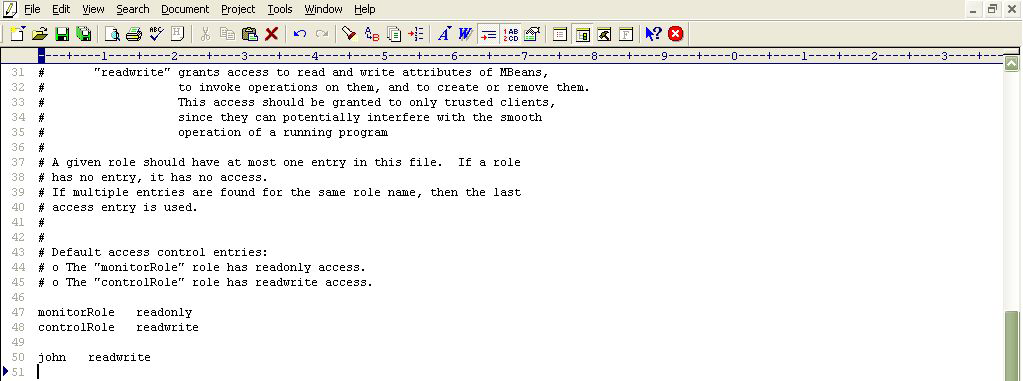
Figure 5 : Assigning rights to the new user in the jmxremote.access file
-
Then, save the jmxremote.access file.
-
Finally, proceed to configure the tests with the user name and password, john and john, respectively.
Once the pre-requisites are fulfilled, add an ActiveMQ component for monitoring using eG Admin interface. The steps for adding a component are explained in the Adding an ActiveMQ Server Component