Administration Policy
By default, any user with administrative rights to the eG Enterprise system can login to the eG admin interface and make configuration changes, regardless of where he/she is coming from.
High security environments may consider this a vulnerability, as any user on the internet who can hack the login credentials of an administrative user, can gain access to the eG admin interface and make unauthorized changes to the eG Enterprise system! To protect admin user accesses from such security risks, eG Enterprise allows strict administration policies to be configured and enforced.
Using an administration policy, you can ensure that admin user access is allowed only for those users who connect to the eG management console from 'known' / 'reliable' / 'safe' locations. These 'secure locations' are indicated by an IP address, a range of IP addresses, or IP address patterns.
Where an administration policy is set, eG Enterprise allows a user to login to the eG admin interface only if:
- The user has 'administrative' rights to the eG Enterprise system, and;
- The IP address from which the user is connecting belongs to the list of IP addresses configured under an administration policy.
To configure an administration policy, do the following:
- Login to the eG admin interface.
- Follow the Settings -> Manager menu sequence.
-
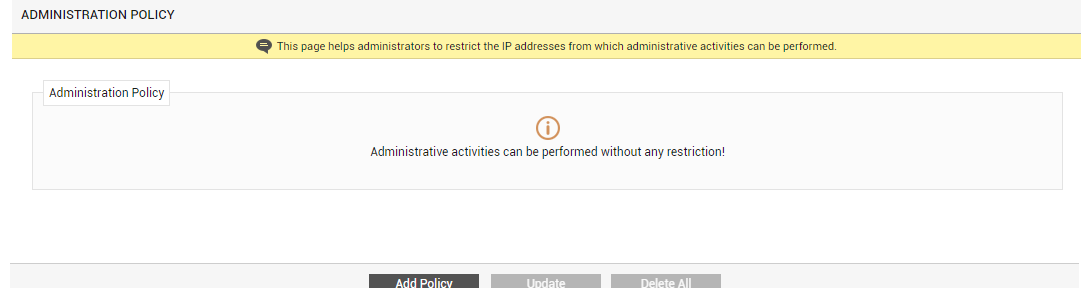
Figure 1 will then appear listing the policies that pre-exist (if any). To create a new policy, click the Add Policy button in Figure 1.
-
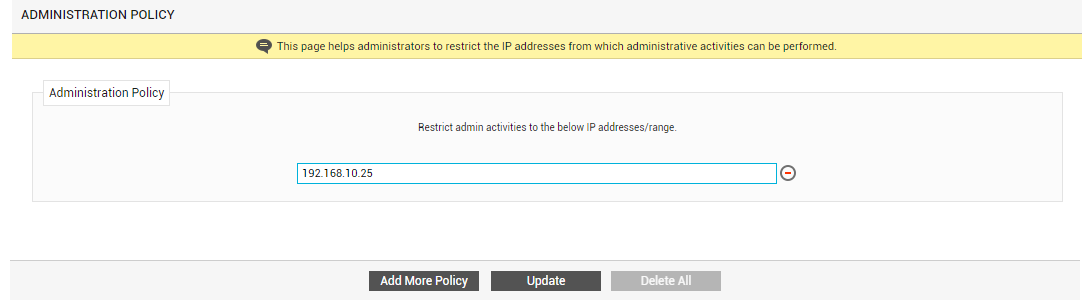
Figure 2 will then appear. Here, you can provide the IP addresses that are to be allowed admin access. This specification can contain any of the following:
- An IP address - e.g., 192.168.10.35;
- A range of IP addresses - e.g., 192.168.10.20-192.168.1.30;
- An IP address pattern - e.g., 192.168.8.*
-
Then, click the Add More Policy button to add one more administration policy. This way, you can add multiple policies (see Figure 3).
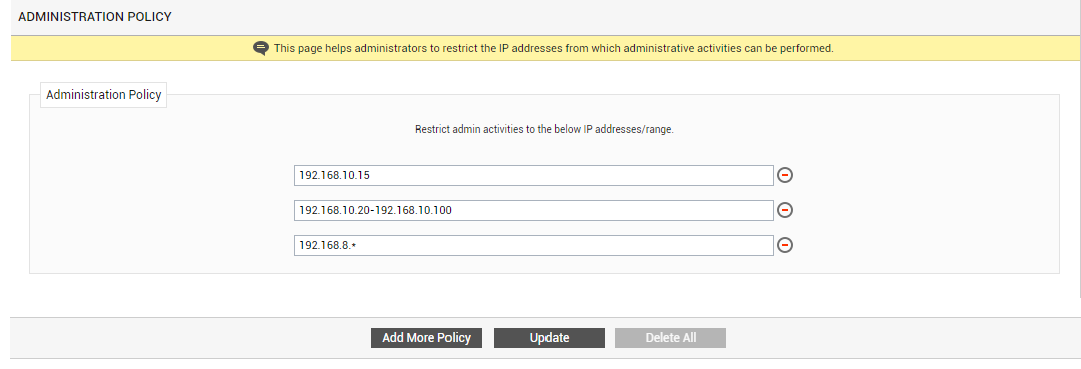
- At any given point in time, you can delete a policy by clicking the encircled '-' icon adjacent to it. To delete all policies, click the Delete All button.
- After you are done configuring the policies, save them by clicking the Update button.