Cloning an Existing User's Profile
In large environments characterized by numerous users, you may have many users who play the same role or shoulder the same responsibilities in the organization; such users may also require that they be assigned more or less the same monitoring rights and privileges to the eG Enterprise system. In such circumstances, instead of repeatedly performing the redundant exercise of configuring a separate profile for each user, administrators can quickly 'clone' or 'copy' the monitoring settings of a particular user to create another profile. This saves administrators the time and effort involved in manually configuring and registering multiple user profiles with similar monitoring preferences.
To 'clone' a specific user's profile, do the following:
- Select the Clone User option from the User Management tile.
-
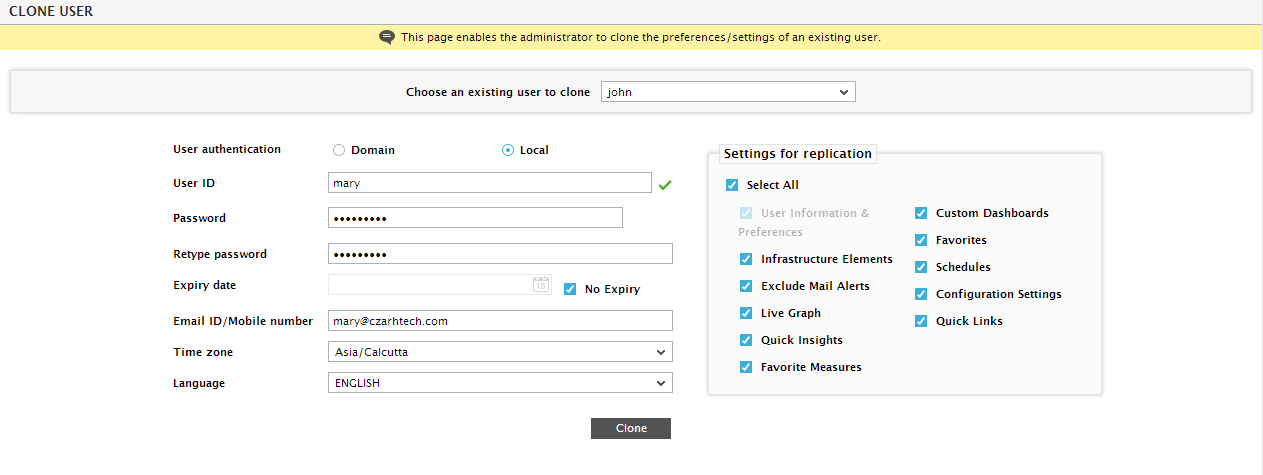
In that then appears, Choose an existing user to clone.
-
Then, proceed to provide the settings that are specific to the new user. The first in that list is the User authentication mode. Here, indicate whether the user being created is a Domain user or a Local user. By default, the Local option is chosen. In this case, proceed as discussed below:
- Specify the User ID.
- Enter the Password of the user.
- Retype the Password.
- Against Expiry date, indicate the date on which the user account will expire. Alternatively, you can select the No expiry check box if the user account being created should never expire.
-
To configure the new user to receive email/SMS alerts of problem conditions in the environment, provide a comma-separated list of mail IDs and/or mobile numbers against the Email ID / Mobile number text box. If no Email ID / Mobile number is provided here, then alarm information will not be sent as emails/SMS to this user.
Note:
Even if the original user has not been configured to receive email/SMS alerts of issues, the 'clone' can be configured to receive the same. In this case therefore, the 'clone' will by default receive email/SMS notifications of issues, regardless of their priority - i.e., the 'clone' will be alerted to Critical, Major, and Minor problems via email/SMS.
On the other hand, if the original user is configured to receive email/SMS alerts of issues, then, all the settings related to these alerts (with the exception of the email IDs and mobile numbers to which the alarms are to be sent) will apply to the clone as well, by default. These settings include the following:
- The email IDs to which the email alerts are to be copied (Cc and Bcc)
- The alarm priorities for which email/SMS alerts are to be sent
- The Mail Sender ID
- The Escalation Mail ID/Mobile number (if any)
- The Type of notification (New or Complete List)
- The Message Mode (html or Text)
- Whether or not to Include measure details in mail alerts
- Whether or not to Include detailed diagnosis in mail alerts
- Time Zone configuration
- Email/SMS alerts and escalation alerts during shift periods (if specified)
- By default, the original user's Time Zone will be chosen here. You can, if you need, set a different Time Zone for the clone.
- By default, the original user's choice of Language will be chosen here. If needed, you can pick a different language from this list for the clone.
-
If the User authentication mode is set to Domain on the other hand, you will have to proceed as described below:
-
Pick the Domain to which the user belongs. If, at the time of registering that domain with the eG Enterprise system, you had set the Save Domain User Password to the eG Enterprise Systemto No, then, upon selecting the Domain here, you will be prompted to re-enter the Domain User Password. Without this password, the eG manager will not be able to connect to the domain server and validate domain user accounts. Provide the password and click the Submit button in to proceed.
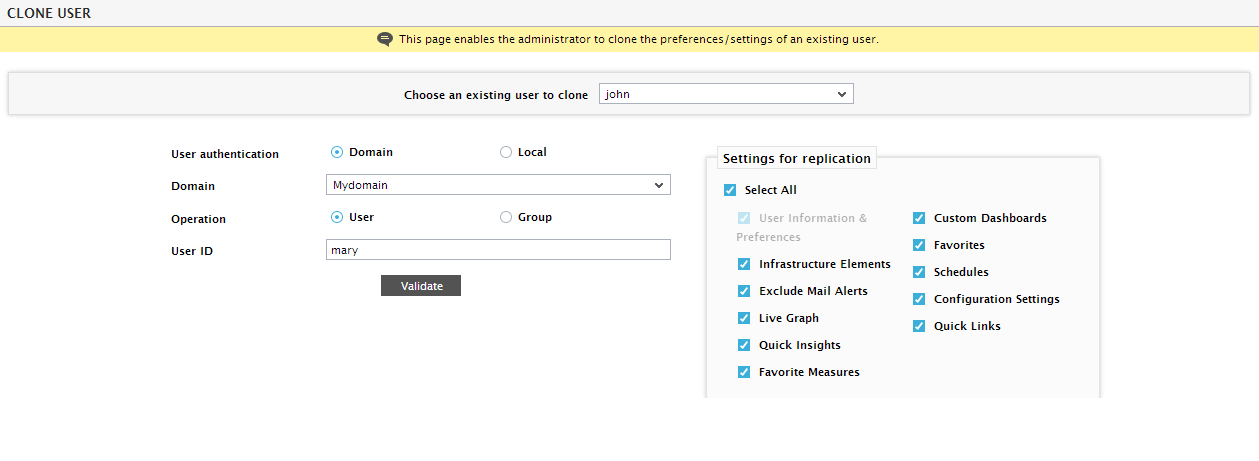
- Then, select an Operation to indicate what you want to create - a domain User or a domain Group.
-
Specify the User ID of the new user/group, and click the Validate button to validate that user/group with the AD server. If the User ID is successfully validated, additional options will appear in the clone user page as indicated by Figure 3.
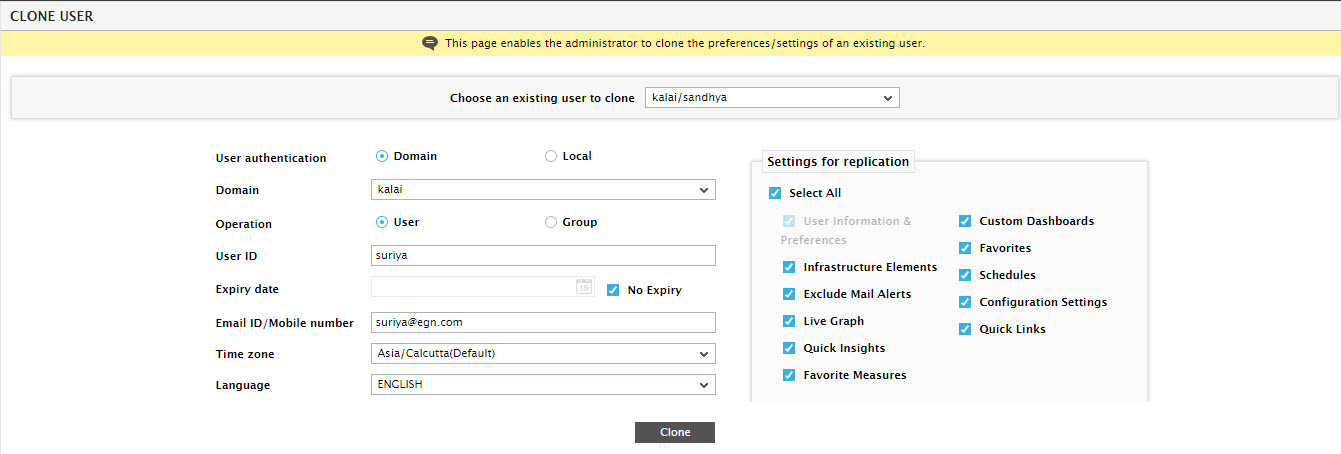
Figure 3 : Options that appear after validating a cloned domain user
- Against Expiry date, indicate the date on which the user account will expire. Alternatively, you can select the No expiry check box if the user account being created should never expire.
-
To configure the new user to receive email/SMS alerts of problem conditions in the environment, provide a comma-separated list of mail IDs and/or mobile numbers against the Email ID / Mobile number text box. If no Email ID / Mobile number is provided here, then alarm information will not be sent as emails/SMS to this user.
Note:
Even if the original user has not been configured to receive email/SMS alerts of issues, the 'clone' can be configured to receive the same. In this case therefore, the 'clone' will by default receive email/SMS notifications of issues, regardless of their priority - i.e., the 'clone' will be alerted to Critical, Major, and Minor problems via email/SMS.
On the other hand, if the original user is configured to receive email/SMS alerts of issues, then, all the settings related to these alerts (with the exception of the email IDs and mobile numbers to which the alarms are to be sent) will apply to the clone as well, by default. These settings include the following:
- The email IDs to which the email alerts are to be copied (Cc and Bcc)
- The alarm priorities for which email/SMS alerts are to be sent
- The Mail Sender ID
- The Escalation Mail ID/Mobile number (if any)
- The Type of notification (New or Complete List)
- The Message Mode (html or Text)
- Whether or not to Include measure details in mail alerts
- Whether or not to Include detailed diagnosis in mail alerts
- Time Zone configuration
- Email/SMS alerts and escalation alerts during shift periods (if specified)
- By default, the original user's Time Zone will be chosen here. You can, if you need, set a different Time Zone for the clone.
- By default, the original user’s choice of Language will be chosen here. If needed, you can pick a different language from this list for the clone.
-
-
Then, to indicate which settings of the original user need to be replicated to the new user, select the relevant check boxes from the Settings for replication section. To replicate all settings, select the Select All check box.
Note:
- If you choose to replicate the Live Graphs, Quick Insight views, and Favorite reports to the new user, then this implies that those live graphs, quick insight views, and favorites that have been created by the original user and those that are shared (by other users) with the original user, will now be available to the clone as well.
- By default, the User Information & Preferences check box is selected. You cannot deselect it. This means that the following settings of the original user are automatically replicated to the clone:
- The User role
- The Maximum Timeline for Reports
- The Skins chosen for the Admin, Reporter, Monitor, and Configuration Management modules
- The Monitor Home Page setting
- The Refresh Frequency
- Whether to Allow alarm deletion or not
- Whether to Allow alarm acknowledgement or not
- The Alarm display
- Enabling/disabling Remote control; if enabled, the Remote command execution setting
- Finally, click the Clone button to clone the chosen user.