Configuring Logo/Messages
The Logo / Messages menu option in the Settings tile, provides administrators with options to configure a logo on the right hand side of the eG login, Monitor, Reporter, and Configuration Management interfaces, and to configure audible alerts and custom messages.
Note:
You can include a logo in the Reporter and configuration management interfaces, only if your eG license enables the eG Reporter and Configuration Management capabilities (respectively).
-
To configure a custom logo to be displayed in the eG login screen, click on the Login Screen option in the Logo & Messages panel to the left of Figure 1. The right panel will then change to display a login screen page.
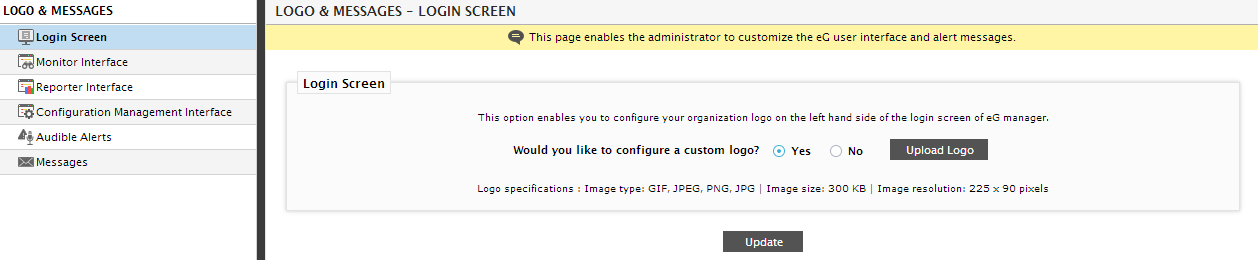
- Then, set the Would you like to configure a custom logo for the eG login interface? to Yes. Next, proceed to upload the logo by clicking the Upload Logo button. Note that the logo you upload should fulfill the Logo specifications displayed in Figure 1.
-
Clicking on the Upload Logo button will invoke Figure 1. Specify the full path to the image file to be uploaded using the Browse button therein and click the Upload button. Once you return to Figure 1, click the Update button.

Figure 2 : Specifying the path for the Logo to be uploaded in the monitor interface
-
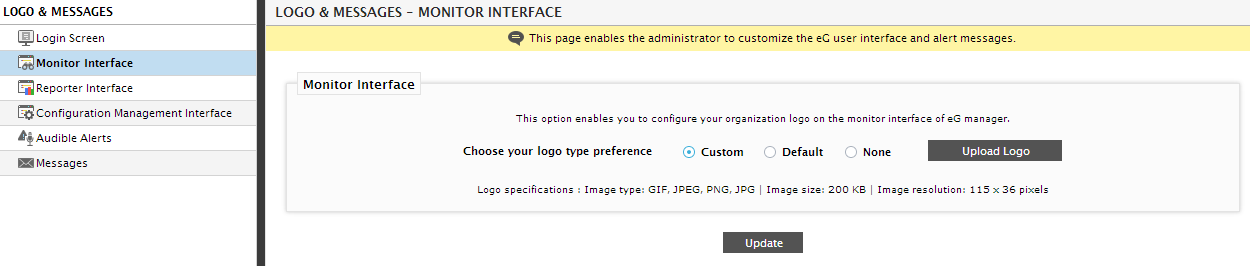
To configure a logo for the Monitor interface, click on the Monitor Interface option in the logo & messages panel to the left of Figure 1. Then, from the right panel, Choose the logo type preferences. If you want to proceed with the Default image, set this flag to Default. If you do not wish to configure a custom logo for the monitor interface, set this flag to None. To define a custom logo, set this flag to Custom and click the Upload Logo button. In the window that pops up (see Figure 2), specify the full path to the image file and click the Upload button. Once you return to Figure 3, click the Update button.
-
For configuring a custom logo for the reporter interface, click on the Reporter Interface option in the logo & messages panel to the left of Figure 1. Then, from the right panel, Choose your logo type preferences. If you want to proceed with the Default image, set this flag to Default. If you do not wish to configure a custom logo for the reporter interface, set this flag to None. To define a custom logo, set this flag to Custom and click the Upload Logo button. In the window that pops up (see Figure 4), specify the full path to the image file and click the Upload button. Once you return to Figure 4, click the Update button.
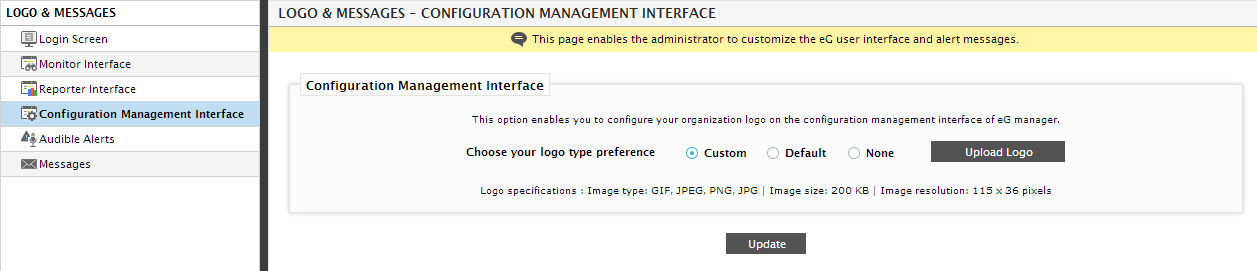
Figure 4 : Configuring a custom logo for the Configuration Management interface
-
For configuring a custom logo for the configuration management interface, click on the Configuration Management Interface option in the logo & messages panel to the left of Figure 1. Then, from the right panel, Choose your logo type preferences. If you want to proceed with the Default image, set this flag to Default. If you do not wish to configure a custom logo for the configuration management interface, set this flag to None. To define a custom logo, set this flag to Custom and click the Upload Logo button. In the window that pops up (see Figure 2), specify the full path to the image file and click the Upload button. Once you return to Figure 5, click the Update button.
Figure 5 : Configuring a custom logo for the Configuration Management interface
-
You can also associate audio files of your choice with alarms. To achieve this, first, click on the Audible Alerts option in the logo & messages panel to the left of Figure 1.

-
From the audible alerts page (see Figure 6) that appears in the right panel, Choose your preference for audit alerts. If you want to proceed with the Default audio, set this flag to Default. If you do not wish to configure any audio files, set this flag to None. To associate an audio file with the alarms, set this flag to Custom and click the Upload Sound Files button. In the window that pops up (see Figure 7), use the Browse button to specify the full path to the audio files to be associated with Critical, Major, and Minor alarms. Then, click the Upload button.
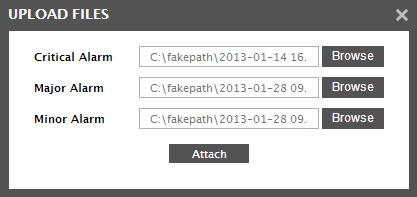
- Once you return to Figure 7, click the Update button.
-
The messages page (see Figure 8) that appears when the Messages option in the logo & messages panel is clicked enables the administrator to display customized messages.
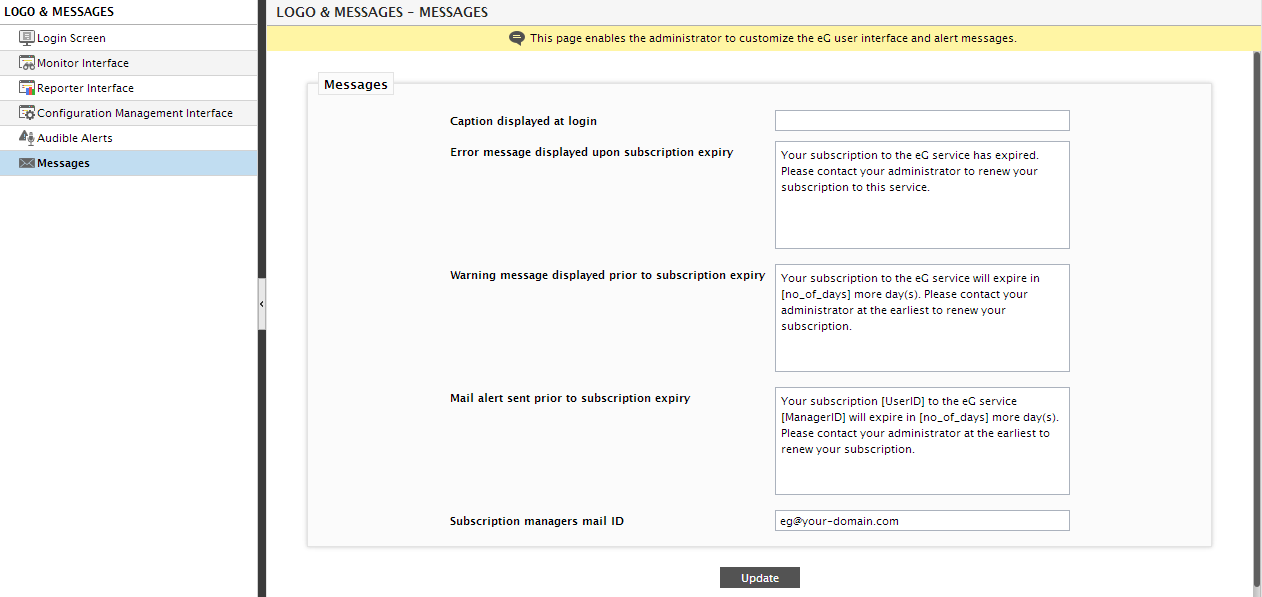
- This page enables administrators to specify a custom caption to be displayed in the login screen. This caption can be specified in the Caption displayed at login text box. The Error message displayed upon subscription expiry text box contains the default message that would appear upon expiry of a subscription. The contents of this text box can be changed if required. The Warning message displayed prior to subscription expiry text box contains the warning message that would appear prior to the subscription expiry. As you can see, this message contains a variable [no_of_days]. This variable indicates the number of days left for the subscription to expire and hence should remain unchanged. In order to alert the user about the impending subscription expiry without him/her having to login to the user interface, eG sends an email to the user ID. The body of this email can be customized using the Mail alert sent prior to subscription expiry text box as depicted in the Figure 8. In the default contents of this text box, the variable [UserID] refers to the ID of the user whose subscription is about to expire, [ManagerID] refers to the ID of the manager that is being used by the user, and [no_of_days] refers to the number of days left for the subscription to expire. The Subscription manager's mail ID field indicates the mail ID from which the warning messages prior to the subscription expiry are sent to different users. If you wish to specify a custom message in a report that is generated in PDF format, you can do so using the PDF footer message in Reporter module text box. The message that you specify in this text box will be displayed in the footer of the PDF file.
- Finally, click the Update button.