Configuring Service Groups
Large organizations may have multiple services grouped under different business units. There may hence be a need to represent groups of services as an entity. To address this requirement, eG Enterprise allows the configuration of service groups in the eG admin interface, and represents the real-time state of the service groups in the eG monitoring interface.
To configure a service group, do the following:
- Follow the menu sequence, Service -> Groups in the Infrastructure tile.
-
If no service groups pre-exist, then, a message to that effect will be appear in Figure 1. If groups pre-exist, then the groups will be listed as depicted by Figure 1.

- The configuration of an existing service group can be modified using the Modify icon (represented by the ‘pencil’) corresponding to it. To delete a service group, just click the Delete icon (i.e., the trash can) corresponding to it. If more than one service group is to be deleted, mark the groups for deletion by selecting the check boxes corresponding to them. Then, click on the Delete Selected icon at the right, top corner of the page. To mark all the displayed groups for deletion, click on the check box corresponding to the Service Group Name column label in Figure 1, and then click the Delete Selected icon. If a large number of groups have been configured, locating the group to be modified/deleted would become quiet a challenge. This page therefore allows you to quickly search for a service group, by first specifying the whole/part of the group name in the Search text box, and then clicking the ‘magnifying glass’ icon next to the text box. All service groups with names that embed the specified string will then appear.
-
Clicking on the Add New Service Group button in Figure 1 will invoke Figure 2. Here, specify the Service group name. Then, the list of all configured services across the infrastructure will be displayed in the EXISTING SERVICES list box in Figure 2. From this list box, select the services that are to be grouped under the new service group.
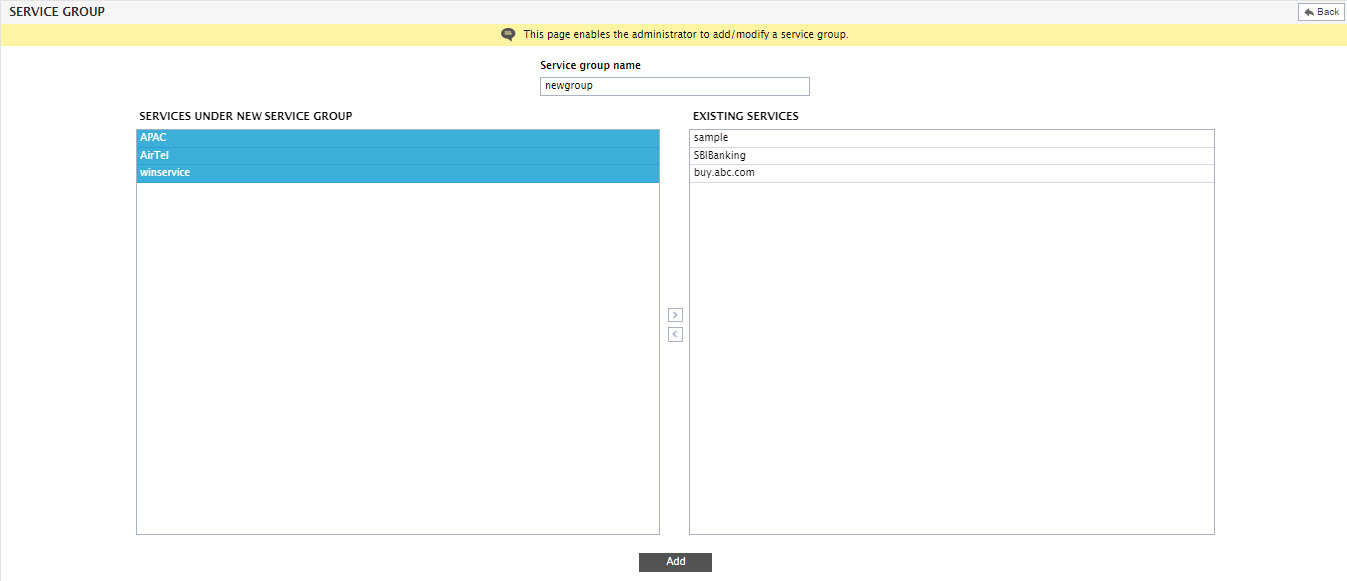
- Next, click on the < button to add the chosen services to the new group. This will result in the display of the selected services in the Services Under new Service Group list box (see Figure 2).
- To remove the service from the service group, select the services from the Services Under new Service Group list box and click on the > button as shown in Figure 2.
- This in turn will shift the selected services back to the EXISTING SERVICES list box.
-
Finally, click on the Add button to add the service group.
Note:
A single service can be added to multiple service groups.