Creating an Aggregate Component Using Any Managed Component of a Type in the Target Environment
By default, the Components node is chosen from the tree in the left panel of Figure 1. With the Components node chosen, you can create aggregate components using any of the managed components from across the environment. This is why, by default, the Aggregate component type list in the right panel of Figure 1 will display all the aggregate component types that were dynamically created by the eG Enterprise system whenever components of the corresponding 'non-aggregate' types were added/managed using the eG administrative interface (see ).
Note:
If you have created a new component type using the Integration Console plugin of eG, then, once you add a component of this new type, then eG Enterprise will dynamically create an aggregate component type that corresponds to the new type as well. Moreover, the Aggregate component type list in the right panel of Figure 1 will include new type. This means that you will be able to create an aggregate component of even custom component types using Figure 7.
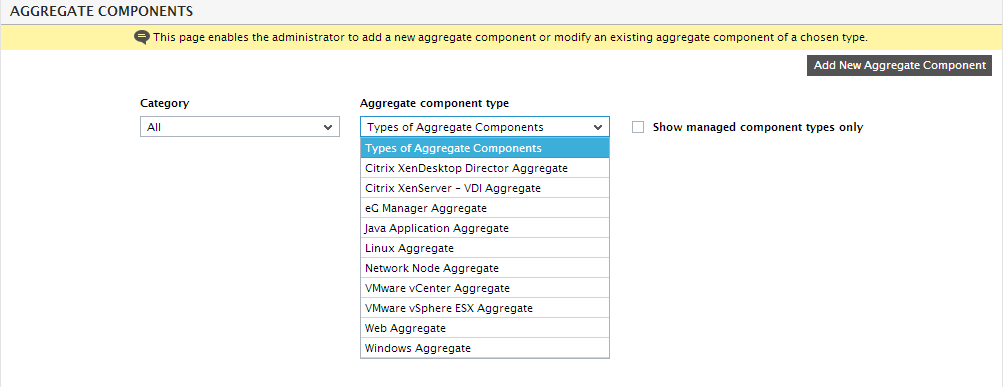
Figure 1 : Viewing the component types that are available for selection in the Aggregate typelist
In other words, if an Active Directory server was added/managed using the eG administrative interface, it would have resulted in the automatic creation of an Active Directory Aggregate component-type; this aggregate component type will be available for selection in the Aggregate component type list in the right panel of .
To begin creating an aggregate component, do the following:
- Pick a Category from the right panel of Figure 2.
- Pick an Aggregate component type. If too many components of various types are managed in an environment, then the Aggregate type list in such environment will be very long; this is because, for every 'non-aggregate' component-type that is managed, a corresponding Aggregate type will be automatically created. Selecting an Aggregate type from this long list will obviously be difficult. To condense this list, you can choose to view in the list only those Aggregate component types for which at least a single aggregate component has already been created/managed. For this, select the Show managed component types only check box in Figure 2.
-
Once an Aggregate component type is selected, all the aggregate components of that type will be displayed therein. If no such components pre-exist, then a message to that effect will appear (see Figure 2).
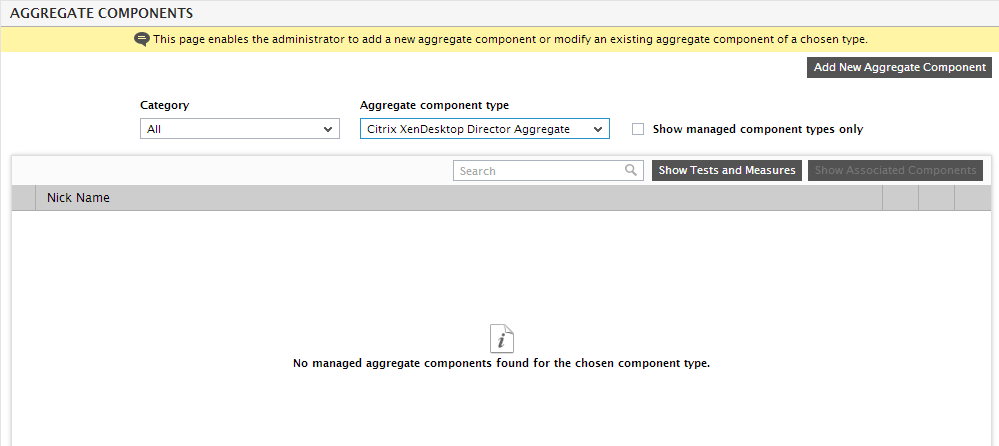
Figure 2 : The message that appears when no components of a chosen aggregate type pre-exist
- To add a new aggregate component of the chosen type, click on the Add New Aggregate Component button in Figure 2. This will invoke Figure 3, where you can provide the details of the new aggregate component.
- Since an aggregate component is just a logical component and not a physical one, you need not assign an IP address to that component. Therefore, just assign a Nick name to the component (see Figure 3).
- The metric aggregation can be performed either by an external agent or a remote agent. If you have chosen the External option (the default type of agent for metric aggregation) against the Agents for aggregate components flag in the ADVANCED SETTINGS page that appears when you follow the menu sequence: Admin -> Settings -> Manager -> Manager Settings -> Advanced Settings, then, choose the External agent that needs to be assigned to the aggregate component being added. Alternately, if you have chosen Remote against the Agents for aggregate component flag, then, choose the Remote agent to be assigned to the aggregate component being added.
- If web servers are aggregated, then an additional Site Support flag will appear in Figure 3. By default, this flag is set to No. You can set the flag to Yes, if you want to create an aggregated web site using the web aggregate component being created. To know more about creating aggregated web sites, refer to Configuring an Aggregated Web Site.
-
By default, the available components list in Figure 3 will display all the individual components that are candidates for inclusion as member components of the Aggregate component type chosen. For instance, when creating an IIS Web Aggregate component, all managed components of type IIS Web will be displayed by default in the available components list. If one/more of these individual components are included in a service, segment, zone, or component group, an additional Filter by list will be available (as indicated by Selecting the components to be aggregated ). By selecting an option from the Filter by drop-down, you can filter the available components list, so that it displays only those individual components that belong to a selected Segment, Service, Zone, or component Group. To associate one/more of these individual components with the aggregate component being added, select them from the available components list, and click the < button in Figure 3. This will transfer the selection to the associated components list (see Figure 4) On the other hand, to disassociate any of the member components of an aggregate component, select them from the associated components list and click the > button.
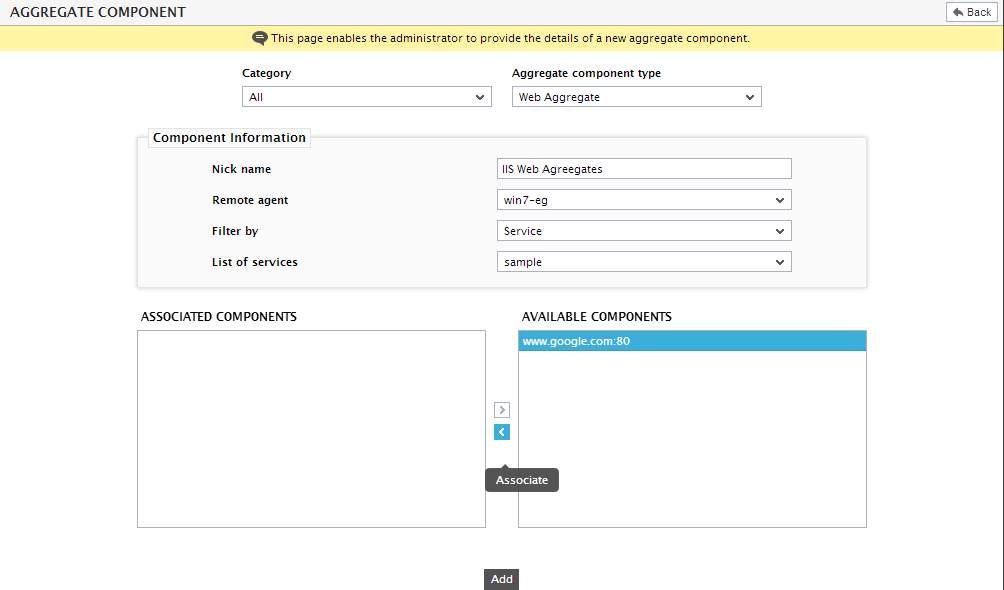
Figure 3 : Selecting the components to be aggregated
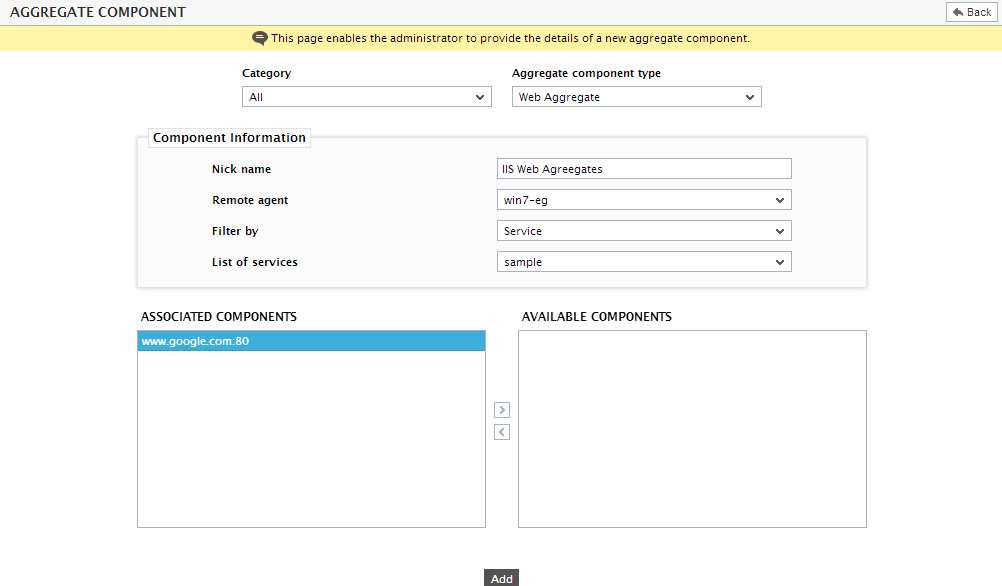
Figure 4 : Associated components with an aggregate component type
-
To add the newly created aggregate component, click the Add button in Figure 4. Figure 5 will then appear displaying the aggregate component that was just created.
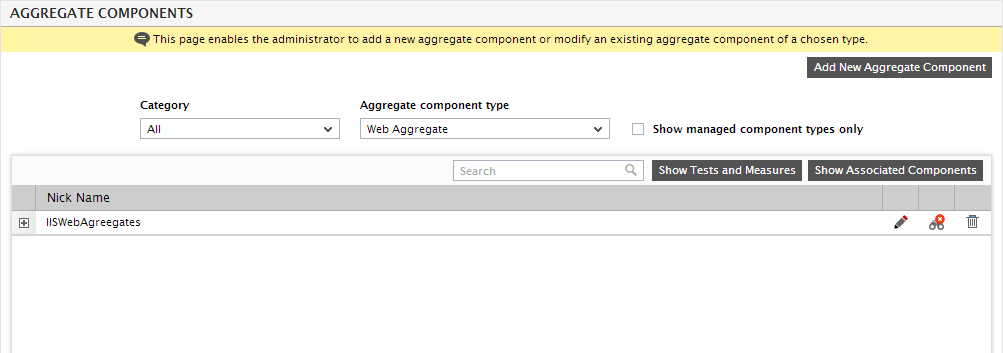
Figure 5 : The aggregate component that was newly created being listed
- In the same way, multiple aggregate components of a type can be added.
- You can modify the details of the new component by clicking the Modify icon (i.e., the ‘pencil’ icon) against that component in The aggregate component that was newly created being listed. Likewise, you can delete the newly added component by clicking the Delete icon (i.e., the trash can icon) against it. You can even unmanage an aggregate component by clicking the Unmanage icon corresponding to that component in Figure 5. This will lead you the aggregate components – manage/unmanage page, using which you can unmanage that aggregate component.
-
Every aggregate component type so created is automatically associated with a default set of tests. To view the tests that are available by default for a particular aggregate component type and the measures they report, click on the Show Tests and Measures button in Figure 5. Figure 6 will then appear.
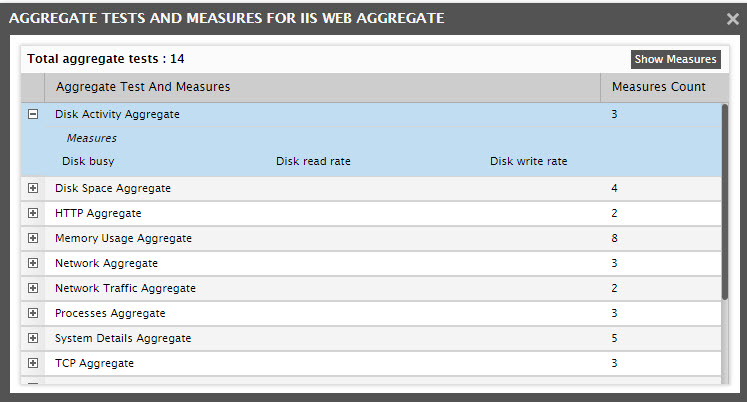
Figure 6 : Viewing the tests that are available by default for a particular aggregate component type
-
To view the measures that will be reported by a particular test mapped to an aggregate component type, expand the test node as indicated by Figure 6. To view all the measures that will be reported by all tests mapped to an aggregate component type, click the Show Measures button in Figure 6. Figure 7 will then appear.
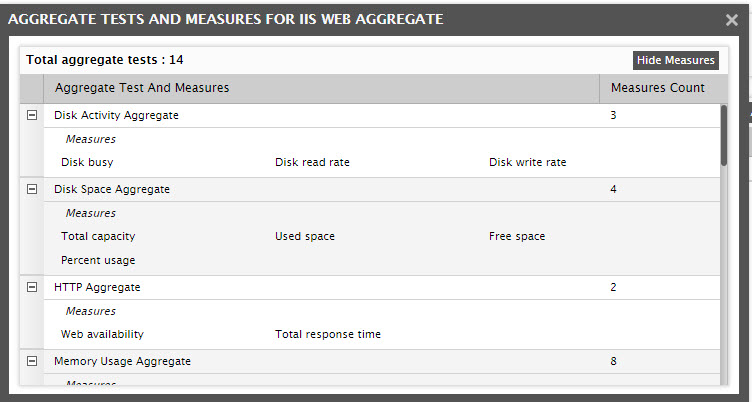
Figure 7 : Measures of all aggregate tests mapped to an aggregate component type displayed