Discovering EMC XtremIO Clusters Using XMS Management Server
eG Enterprise is capable of automatically discovering the EMC XtremIO storage systems managed by an XMS Management Server. To enable this auto-discovery, you first need to enable the eG manager to connect to an XMS Management Server in the target environment, The Storage Discovery option under the Settings sub-node of the Manager Discovery node in the Discovery tree can be used for this purpose.
Once you click the Storage Discovery sub-node, the EMC XtremIO 4x option will be chosen by default from the Choose a storage platform to discover list (see Figure 1).
Then, select the Add new XMS option from the What action would you like to perform? drop down list of Figure 1.
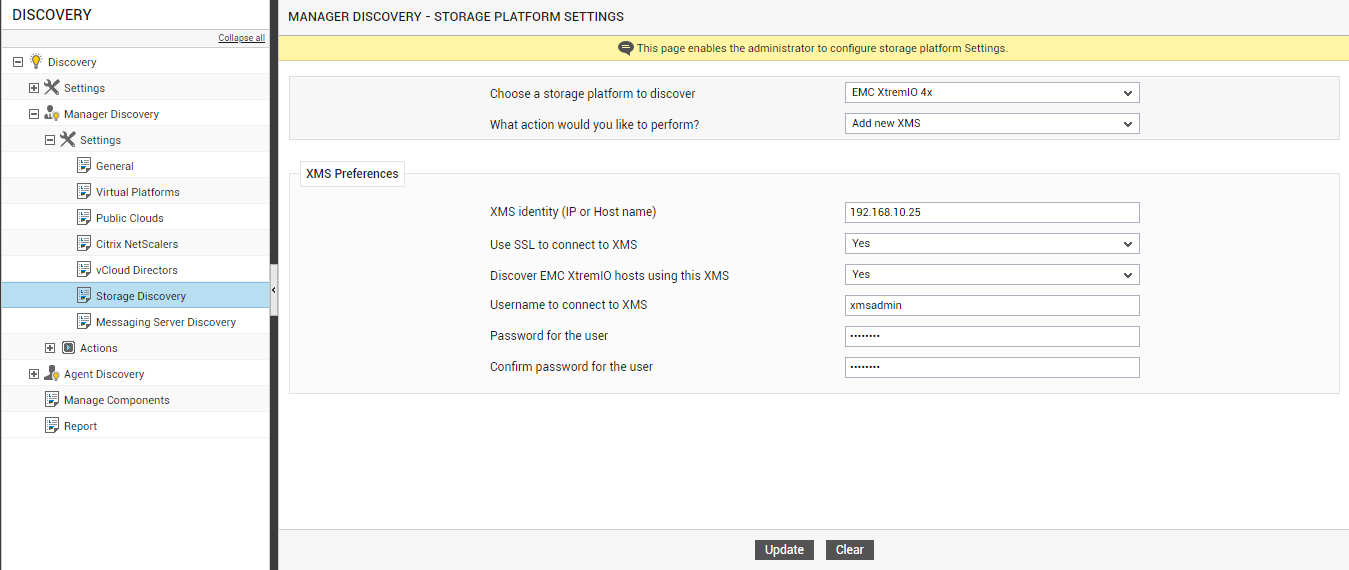
Figure 1 : Discovering EMC XtremIO storage systems using an XMS Management Server
To configure a new XMS Management Server, specify the following in the XMS Preferences section of Figure 1:
- Specify the IP or host name of the XMS Management Server in the XMS Identity (IP or Host name) text box.
- Then, indicate whether the eG manager is to connect to the XMS Management Server using SSL or not by selecting the Yes or No option from the Use SSL to connect to XMS list. By default, this list is set to Yes.
- An IT environment may consist of multiple XMS Management Servers, each managing a different set of EMC XtremIO storage systems. To enable the eG manager to automatically discover those EMC XtremIO systems that are managed using the XMS Management Server being added, set the Discover EMC XtremIO hosts using this XMS flag to Yes. If not, set this flag to No.
- In order to be able to discover the EMC XtremIO hosts using the XMS Management Server, the eG manager needs to connect to the XMS Management Server using the credentials of a valid user to the XMS Management Server. Provide the user name and password of such a user in the Username to connect to XMS and Password for the user text boxes.
- Confirm the password of the user by retyping it in the Confirm password for the user text box.
- To clear all the configuration details, click on the Clear button. To start discovery instead, click on the Update button.
Clicking on the Update button requests you to confirm whether you want to start discovery based on the specifications provided (see Figure 2). Click the Yes button to begin discovery.
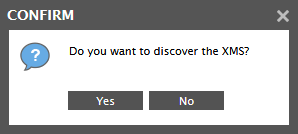
Figure 2 : Confirm the discovery of the XMS Management Servers
Regardless of the discovery approach used (discovery using an IP range or using XMS Management Server), triggering EMC XtremIO storage systems discovery will lead you straight to the COMPONENTS - MANAGE / UNMANAGE page.
To view the XMS Management Server so added, select the View configured XMS option from the What would you like to perform list? (see Figure 3). Then the list of XMS servers that have been configured for discovering EMC XtremIO hosts will appear.
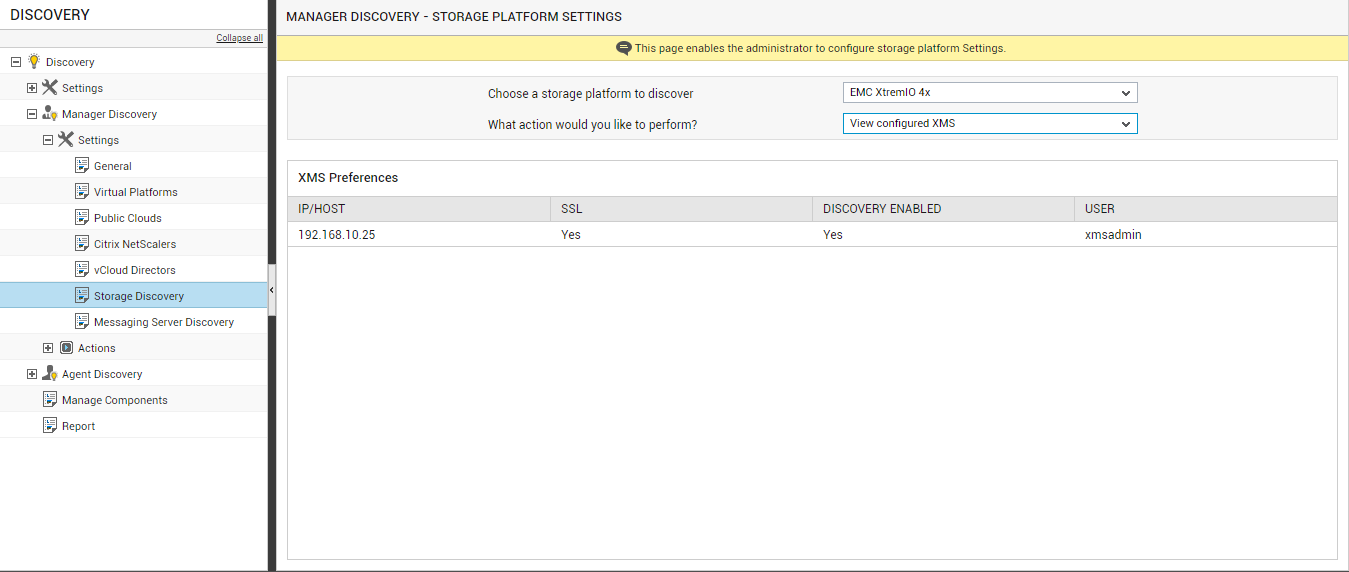
Figure 3 : Viewing the configured XMS servers
To modify a XMS Management Server configuration, select the Modify configured XMS option from the What action would you like to perform? drop down list as shown in Figure 4. Then, select the IP/host name of the XMS Management Server to be modified from the XMS identity (IP or Host name) list. The details of the chosen XMS Management Server will then be displayed against the appropriate fields. You can modify any of the displayed details and update the changes by clicking the Update button.
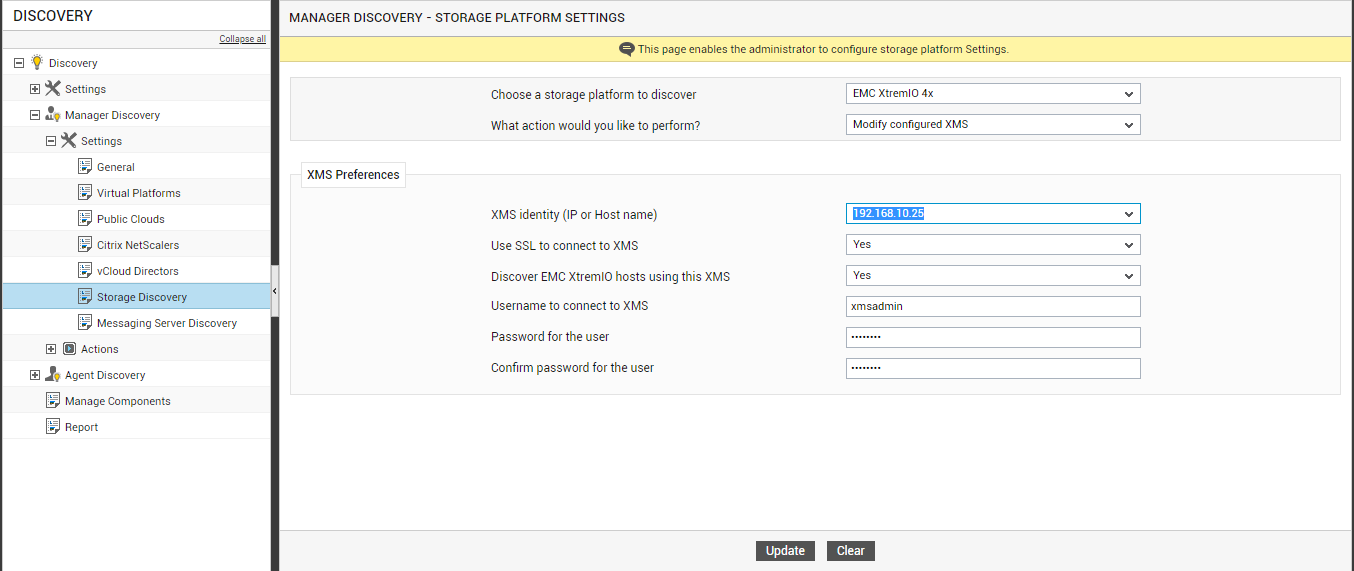
Figure 4 : Modifying the details of the XMS Management server
To delete a particular XMS Management Server, select the Delete configured XMS option from the What action would you like to perform? drop-down list. Then the list of available XMS Management Servers appears in Figure 5.
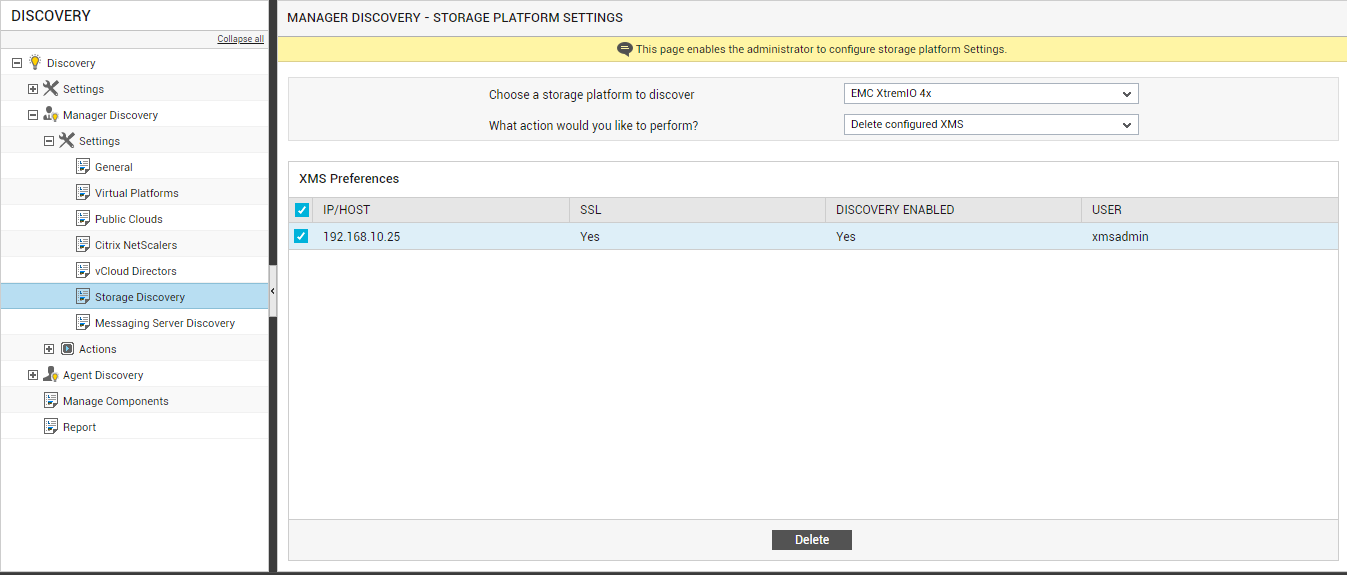
Figure 5 : Deleting the XMS Management Server
Select the XMS Management Server to be deleted by selecting the check boxes corresponding to the XMS Management Server configuration. To mark all the listed XMS Management Servers for deletion simultaneously, simply select the top-most check box in the column of check boxes. To delete the marked XMS Management Servers, click on the Delete button in Figure 5.