Importing/Exporting user-defined Tests
In many IT infrastructures, as an industry-standard best practice, administrators may have added a new test using the Integration Console capability offered by the eG Enterprise, and may want to add the same test across the servers in their environment. To achieve this, administrators may have to painstakingly document the ‘ideal’ configuration and then manually login to each server, add the test one by one. To reduce the manual effort and time involved in this exercise, eG Enterprise enables administrators to quickly apply the configuration of a test added using the Integration Console to other servers at one go, using a simple export-import routine.
To export the configuration settings of a user-defined test, do the following:
- Login to the eG administrative interface.
-
Follow the menu sequence: Admin -> Miscellaneous -> Export/Import Configuration -> Integration Console -> Test. Figure 1 will then appear.
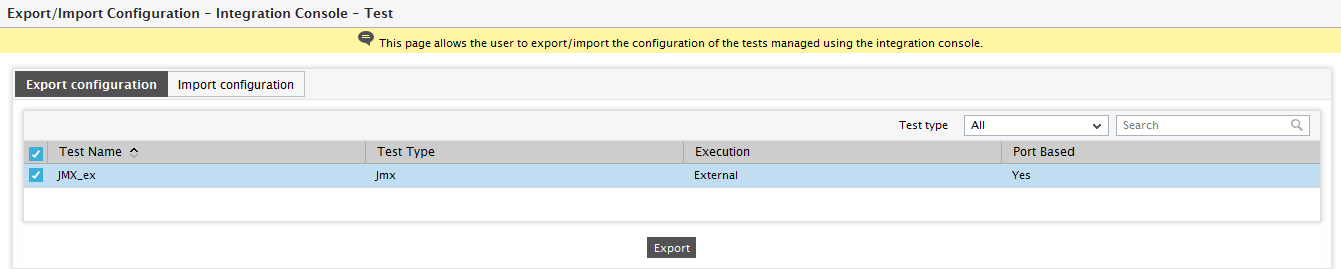
Figure 1 : Exporting the configuration of a user-defined test
-
By default, the Export configuration tab page of Figure 1 will open. Using this tab page you can export the configuration settings of the user-defined tests listed in this page.
To select a test, click on the check box corresponding to the test i.e., Test A_ex. To select all displayed tests, click on the check box against the Test Name. To search for a test of your choice, you can use the Search text box. If you wish to deselect a test, then you can uncheck the check box against the test. To deselect all the tests, uncheck the check box against the Test Name.
If you wish to filter the tests based on the category that was chosen while adding the test, then you have to select an option from the Test type list. By default, All option will be chosen from this list indicating that all the tests will be listed in this page, by default.
-
Then, click on the Export button to begin exporting the settings of the chosen component types. eG Enterprise exports the configuration settings you select to a zip file, which is by default named in the following format: <Fully qualified host name>_eGICTest_<Date of export>.zip. This zip file will by default be downloaded to the default download destination that you have configured in your browser. Once the export completes successfully, the contents of this zip file will be displayed on-screen for you to take a look.
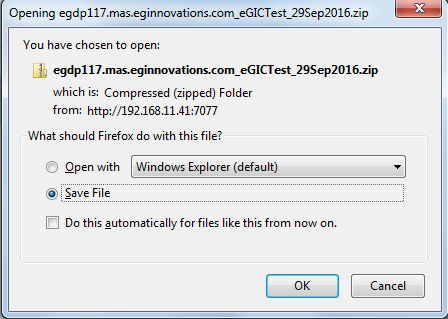
Figure 2 : Saving the exported configuration
Once the export completes successfully, the contents of this zip file will be displayed on-screen for you to take a look as shown in Figure 3.
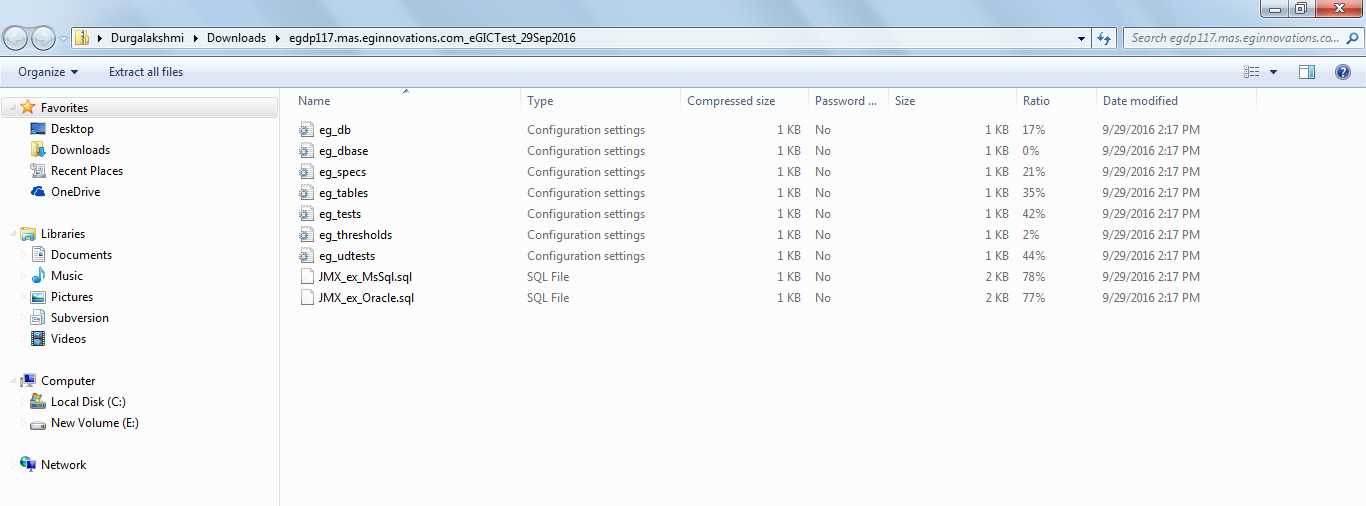
Figure 3 : Contents of the zip file containing the exported configuration files
To enable an eG manager say, Manager B to import the configuration that was exported from a manager say Manager A, follow the steps below:
- First, copy this zip file from the default download destination of the Manager A to any folder on Manager B’s host.
- Then, login to Manager B's administrative interface and select the Test option from the Export/Import Configuration option that is available under the Miscellaneous menu of the Admin tile.
-
Figure 4 will appear. This time, click on the Import configuration tab page in Figure 4 to open it.

- Using the Browse button in Figure 4, browse the Manager B's host to locate the zip file that contains the configurations to be imported.
- Then, click on the Upload button in Figure 4 to upload the file to the server.
-
Figure 5 will then appear. With the help of this page, you can choose the tests that you want to import. To select a test, click on the check box corresponding to it. To select all displayed tests, click on the check box against the Test Name. To deselect a particular test, simply uncheck the check box corresponding to the test in this page. To search for a test of your choice, you can use the Search option.
If you wish to filter the tests based on the category that was chosen while adding the test, then you have to select an option from the Test type list. By default, All option will be chosen from this list indicating that all the tests will be listed in this page, by default.
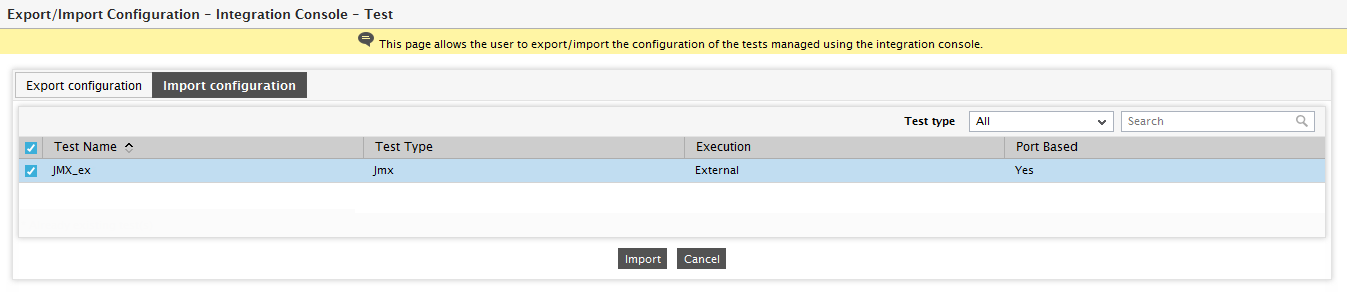
Figure 5 : Selecting the configuration settings to be imported
- To begin the import of the selected tests, click on the Import button in Figure 5.
- If import is successful, a message to that effect will appear.