Pre-requisites for Authenticating Email Alerts Using OAuth
Before selecting OAuth2.0 as the Authentication type, make sure you do the following:
-
Create an App on Azure AD, which will be used to authenticate email alerts sent by eG manager to Office 365;
-
Assign a client secret to the App, so it can prove its identity when requesting a token from Office 365;
-
Allow the App to read user profile and send emails to Office 365 as any user
The steps for achieving each of these requirements are detailed below.
Creating an App on Azure AD for OAuth
To achieve this, do the following:
-
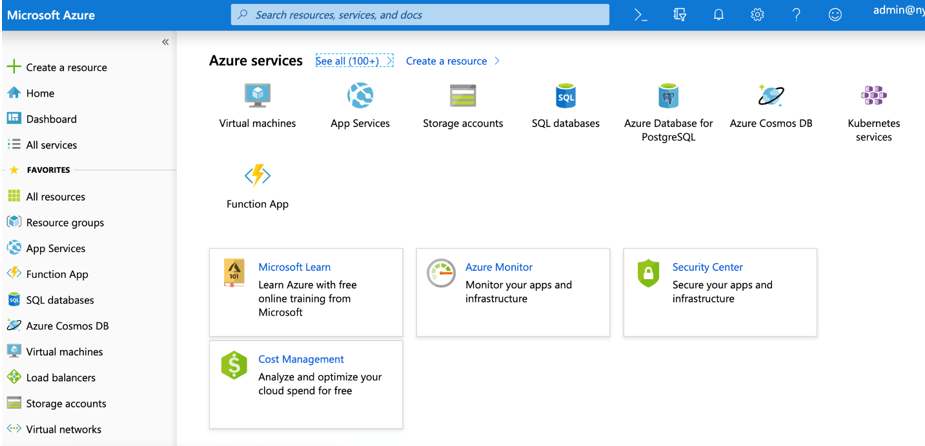
Open a browser, connect to the Azure portal using the URL: https://portal.azure.com, and then login to the portal by providing valid credentials. Figure 4 will then appear.
-
From the FAVORITES menu options in the left panel, pick the Azure Active Directory option (see Figure 5).
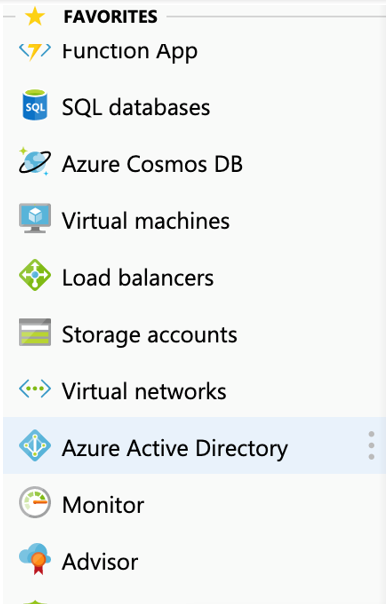
Figure 5 : Picking the Azure Active Directory option from the FAVORITES menu
-
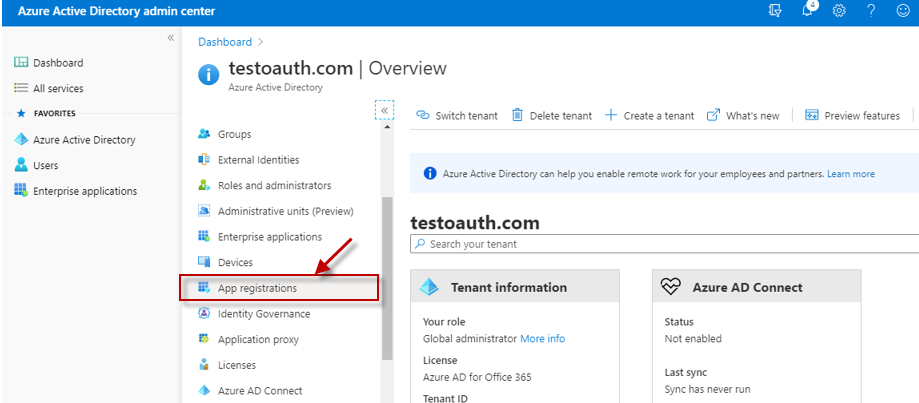
When Figure 6 appears, select the App Registrations option from the left panel of Figure 6.
-
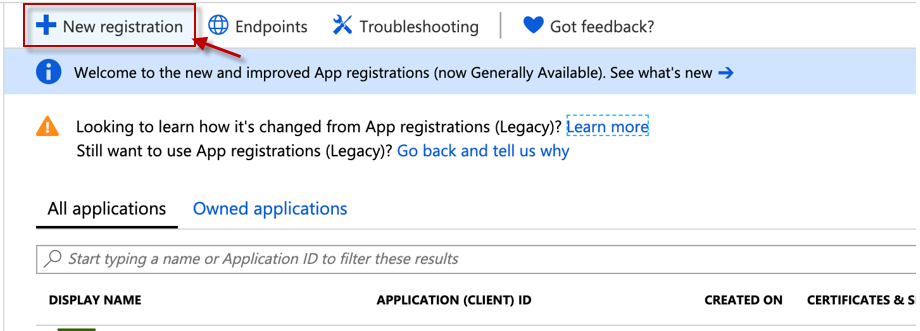
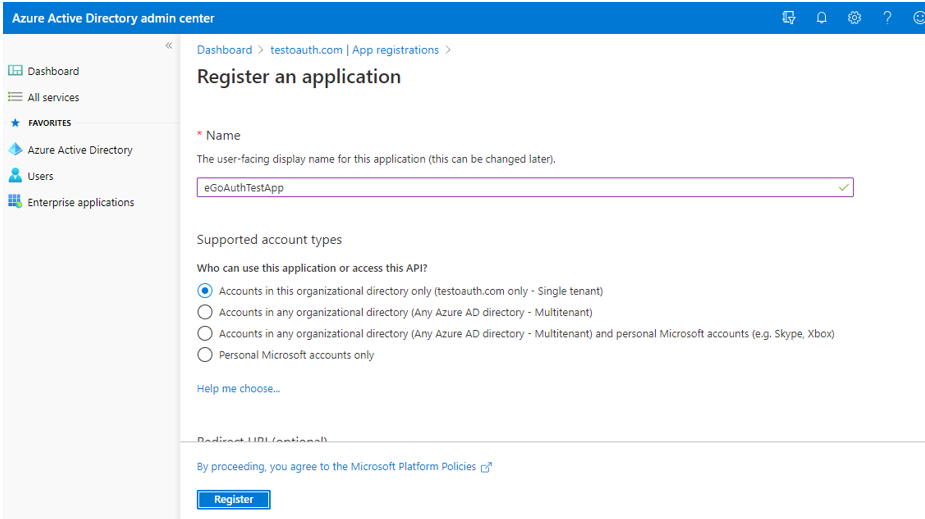
Next, pick the + New Registration option (see Figure 7).
-
When Figure 8 appears, specify the user-facing display name for the new application against Name. Then, proceed to indicate that only a single tenant should access the new app. For that, select the Accounts in this organizational directory only option in Figure 8. Then, click the Register button.
-
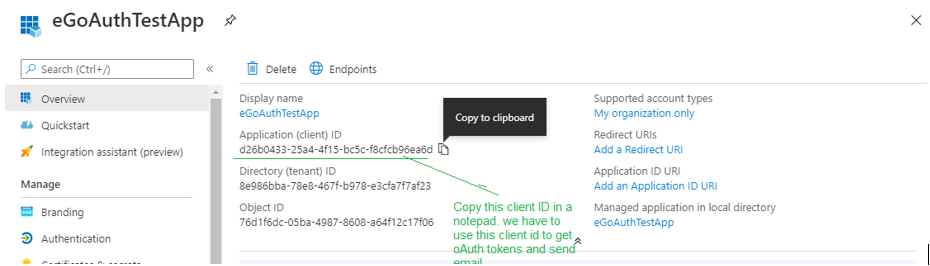
Figure 9 then appears displaying the details of the new app that you registered. Azure AD auto-generates and assigns a client ID for the app, which will also be displayed in Figure 9. Make a note of the client ID, by copying it from Figure 9 and pasting it to a text file.
Assigning a Client Secret to the App
After making note of the client ID, do the following to assign a client secret to the app:
-
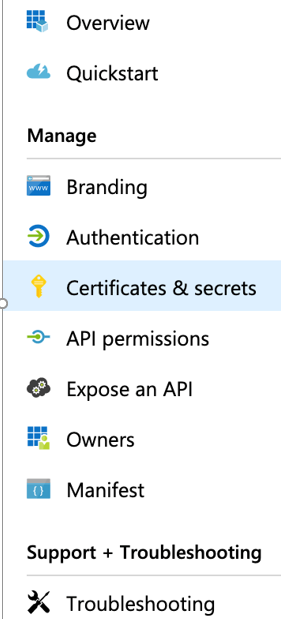
From the list of options in the left panel of Figure 9, select the Certificates & Secrets option (see Figure 10 to zoom into the list of menu options).
-
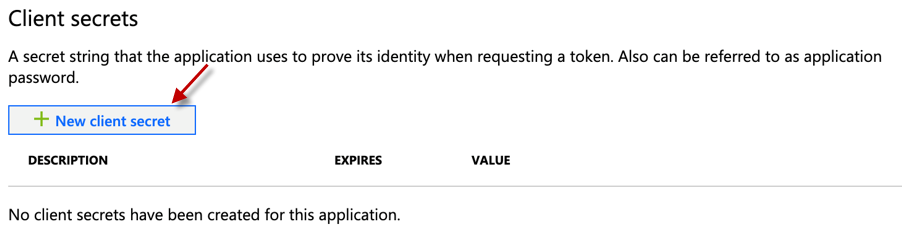
Figure 11 will then appear. Click the + New client secret button in Figure 11.
-
Figure 12 then appears. The app name will be displayed against Description. Indicate that the client secret you wish to assign to this app should never expire by picking the Never option under Expires. Finally, click the Add button in Figure 12 to add the client secret.
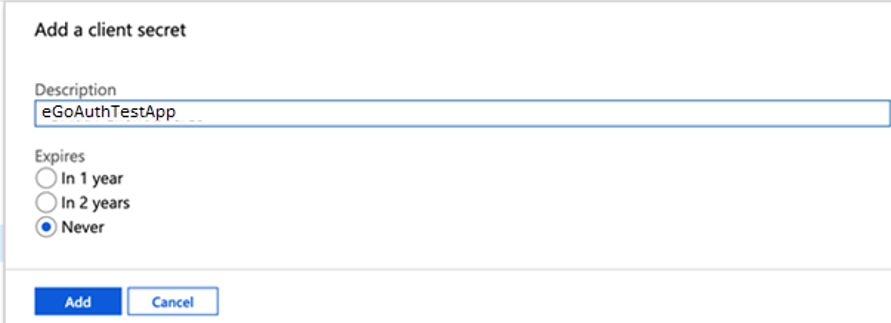
Figure 12 : Configuring the client secret to never expire
-
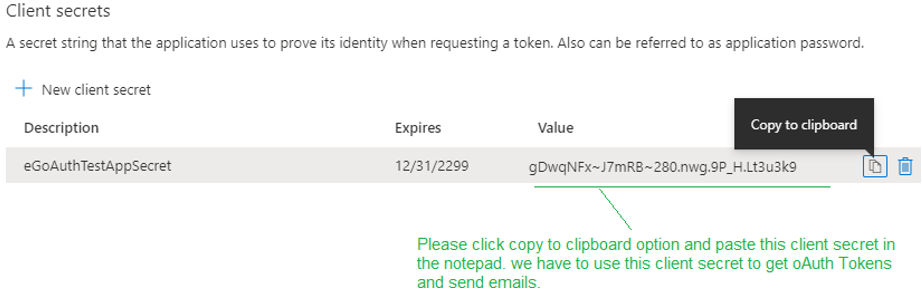
Clicking on the Add button in Figure 12 will invoke Figure 13, where the auto-generated client secret will be displayed. Make note of the client secret by copying it from here and pasting it into the same text file where the client ID was copied.
-
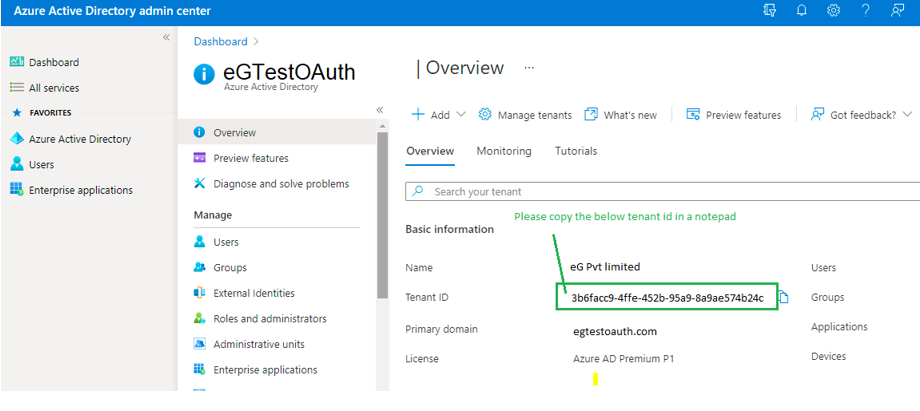
Then, click on the Overview option in Figure 10. The Basic Information pertaining to the new app will then be displayed (see Figure 14). The Tenant ID, indicating which tenant has access to the app, will also be displayed as part of the basic details. Make a note of the Tenant ID by copying it from Figure 14 and pasting it to the same text file where the client ID and secret are stored.
Granting Mail Send and User Read Permissions to the New App
Once the client ID, client secret, and tenant ID for the new app are available, do the following:
-
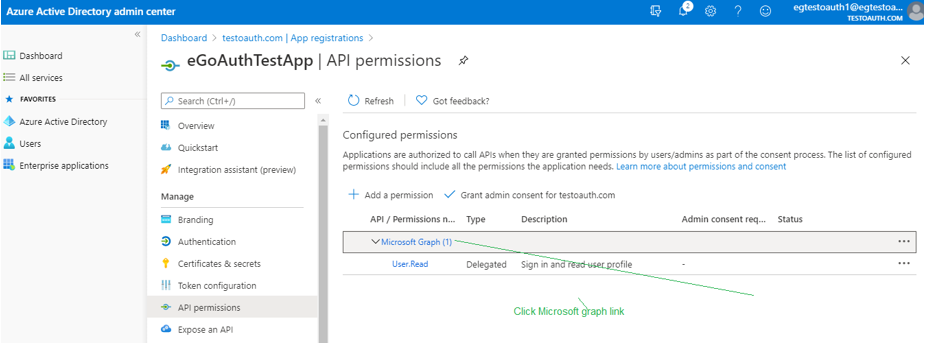
From the list of menu options in Figure 10, select the API permissions option.
-
When Figure 15 appears, click on the Microsoft Graph link its right panel.
-
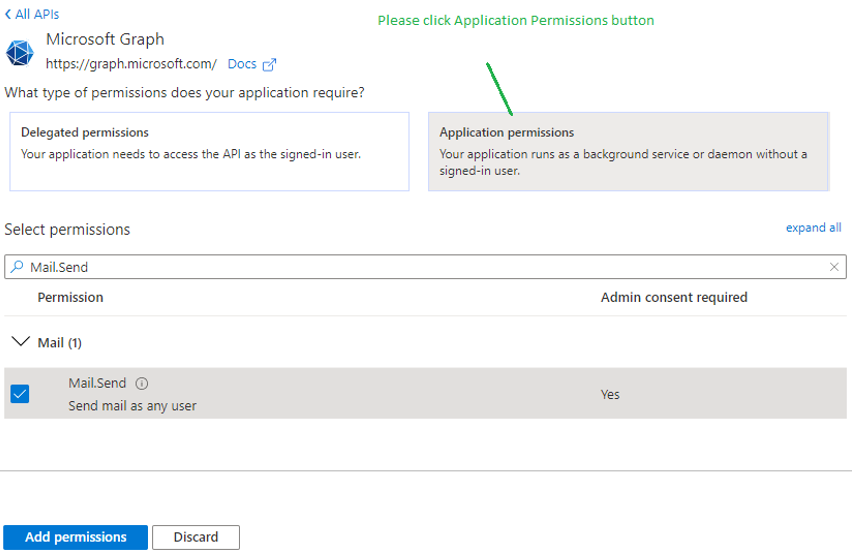
This will open Figure 16. Click on the Application permissions option in Figure 16. Then, in the search box under the Select permissions section, type the string Mail.Send, and click the magnifying glass icon alongside to search for that permission. In the search results, look for the Mail.Send permission that allows mails to be sent as any user. Once that permission is visible, select it and then click the Add permissions button to add that permission to the app.
-
Similarly, add the User.Read permission to the app, so that the app can sign in and read the user profile. For that, first click the Delegated permissions option as indicated by Figure 17. Then, search for the User.Read permission, by specifying that permission as a search string in the search text box under Select permissions. Click on the magnifying glass icon to look for the specified permission. Once it appears in the search results, select it and click the Add permissions button (see Figure 17).
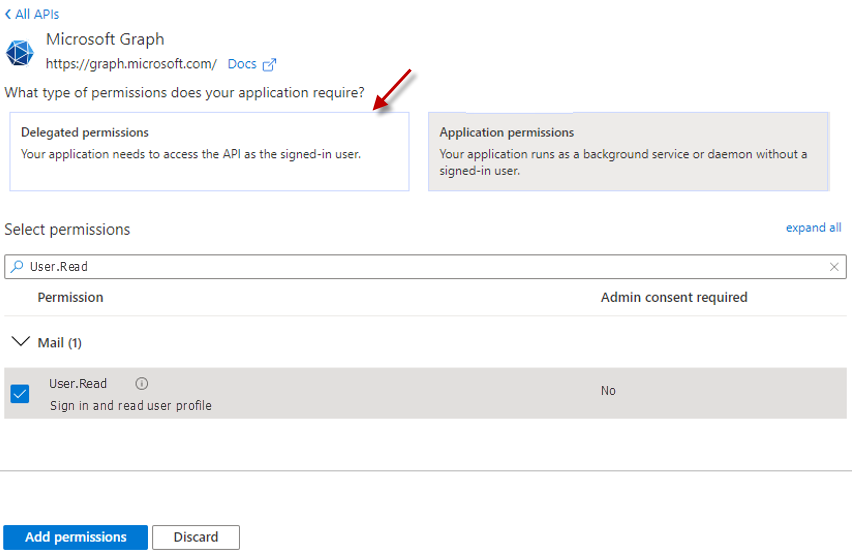
Figure 17 : Assigning the User.Read permission to the new app
-
Finally, when Figure 18 appears, you will find that the Mail.Send permission and the User.Read permission are listed under the Microsoft Graph link. Now, click on the Grant admin consent for oauth option in Figure 18 to grant admin consent to the oauth app you have created for using both the permissions.
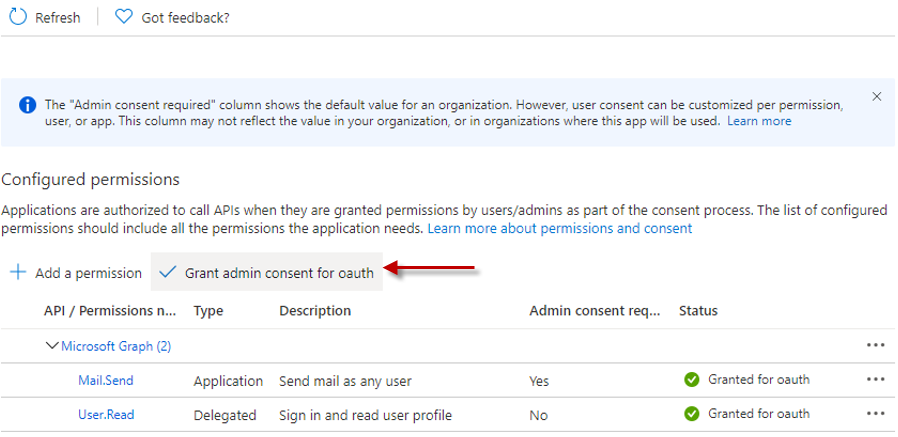
Figure 18 : The Microsoft Graph link displaying the User.Read and Mail.Send permissions