Quick Links
Based on the roles and responsibilities assigned to them, users to the eG Enterprise system may perform a few operations more frequently than the rest. For instance, in dynamic infrastructures, you would find administrators adding components for monitoring on a daily basis. Likewise, you could have help desk managers who may be interested in checking the alarm history every few days, while performing more detailed event analysis as well using the eG Reporter. Similarly, you could be a VMware administrator, who routinely studies the highs and lows of the virtualized infrastructure using the Virtualization Reports offered by eG Reporter.
Such users may need instant access to those web pages in the eG management console, which they visit often for performing their routine, yet critical operations, so that no time is wasted in following the sequence of menu options offered by the eG Enterprise system or in manually switching from one module to another. To enable this quick, module-independent access, eG Enterprise allows users to configure Quick Links to specific web pages that they frequently visit. These links are defined per user and can hence be configured only for those modules a user is permitted to access.
To configure quick links, do the following:
-
The main menu bar of each module of the eG Enterprise system - be it Admin, Monitor, Reporter, or Configuration - includes a Quick Links icon (
 ). If the user who logs into a module has already configured quick links for that module, then clicking on the Quick Links icon will invoke a window that lists all the links that are enabled for that user for the module that is currently open (by default). If no quick links pre-exist for the module logged in, then a message to that effect will appear in the same window (see Figure 1).
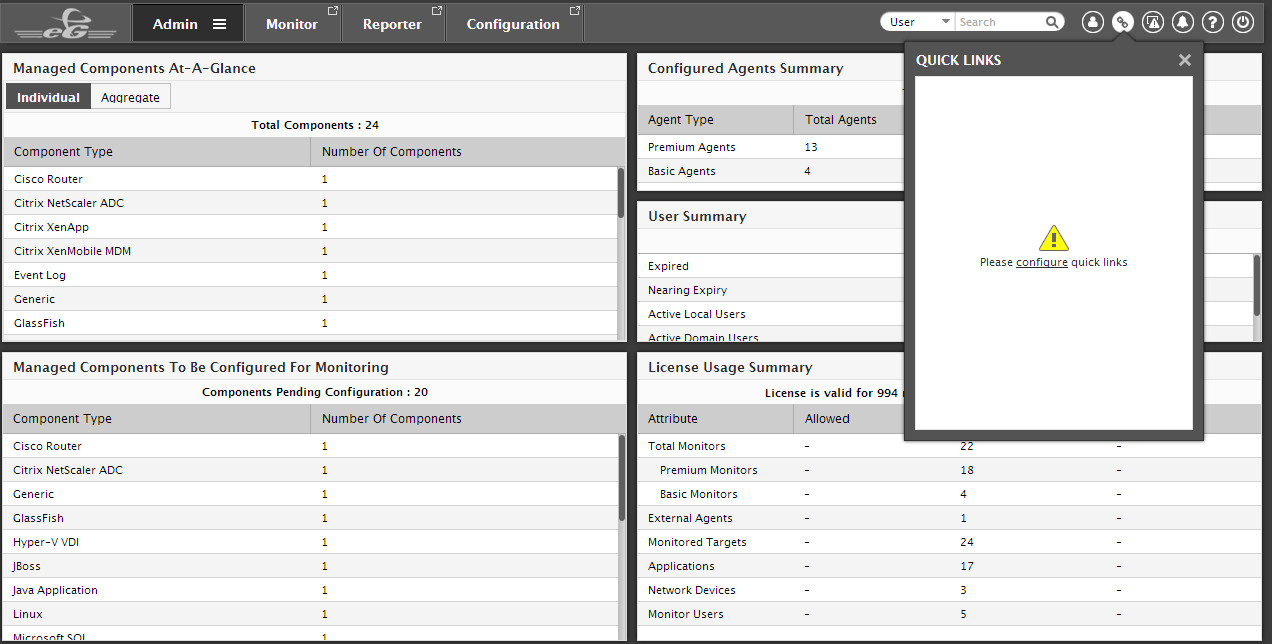
Figure 1 : A message stating that no quick links pre-exist
To begin configuring quick links, click on the Please configure quick links message in Figure 1.
This will lead you to Figure 2. By default, the module that is currently open will be chosen from the Module list in Figure 2. To configure quick links for the default module, select the links to enable from the Disabled Links list and click < button.
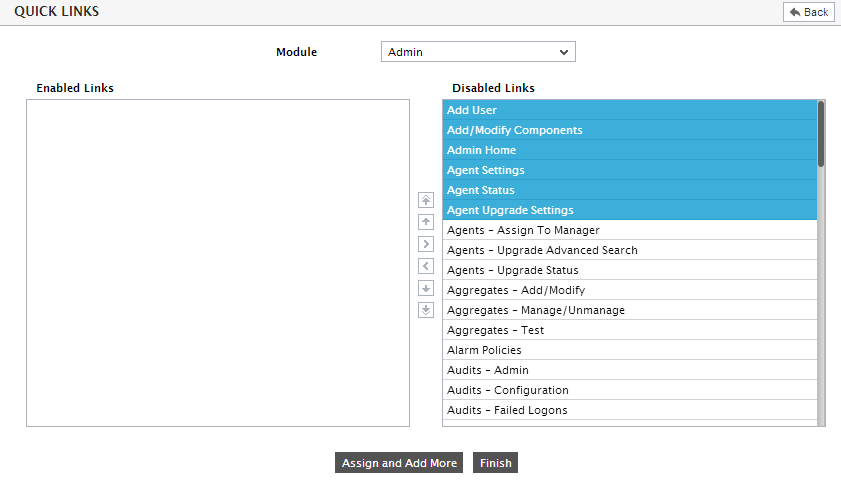
Figure 2 : Selecting the links to enable
This will transfer your selection to the Enabled Links list (see Figure 3). To disable one/more enabled links, just select the links from the Enabled Links list and click the > button.
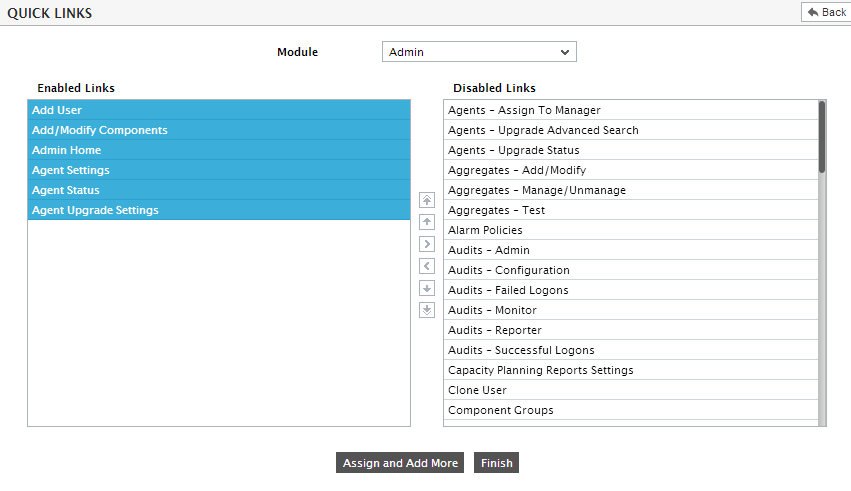
Figure 3 : Selection transferred to the Enabled Links list
To configure links for other modules, you need to click the Assign and Add More button in Figure 3 and select a different module from the Module list. The list of Disabled Links for that module will then be listed. You can then repeat the procedure discussed at step 3 and 4 above to enable links for the chosen module. This way, you can configure quick links for all modules that you have access to.
By default, the quick links in the Disabled Links and in the Enabled Links lists will be arranged in alphabetical order. If, after moving specific links to the Enabled Links list, you wish to change the order in which the links are displayed for selection, then, you can use the arrow buttons to the left of the Enabled Links list for this purpose. For instance, if you want the Add/Modify Components link in the Enabled Links list to be moved up in the order, then, select the Add/Modify Components link from the Enabled Links list, and click the up-arrow button to the left of the list. This will push the Add/Modify Components link above the Add Users link.
The other buttons available to the left of the Enabled Links list and their purpose have been discussed below:
Button Purpose 
Moves the selection to the top of the Enabled Links list

Pushes the selection one down the order

Moves the selection to the bottom of the Enabled Links list
With the help of these buttons, you can ensure that links to the most frequently accessed pages are readily available at the top of the list, and the less-used links are pushed down the order.
Once you are done enabling links, click the Finish button in Figure 3 to save the changes and exit the quick links page.
If you now click on the Quick Links icon (
 ), Figure 4 will appear displaying the quick links enabled for the module that is currently open (by default).
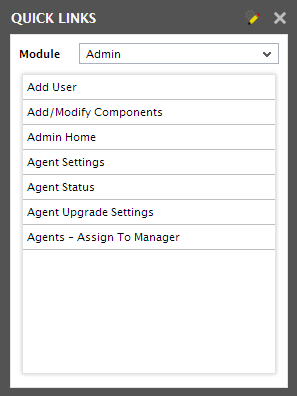
Figure 4 : The quick links configured for the module that is currently open
Click on any link in Figure 4 to immediately switch to the web page of interest to you, without having to follow menu sequences. For instance, clicking on say, Add/Modify Components in Figure 4 will provide you with instance access to Figure 5. In the absence of quick links, you will have to invoke the Admin tile menu, browse the Infrastructure tile, move your mouse pointer over the Components sub-menu, and click the Add/Modify option within to access Figure 5.

Figure 5 : A Quick Link instantly opening the Agent Discovery Setting page
You can pick any other Module from the Quick Links pop-up to view the links configured for that module (see Figure 6).
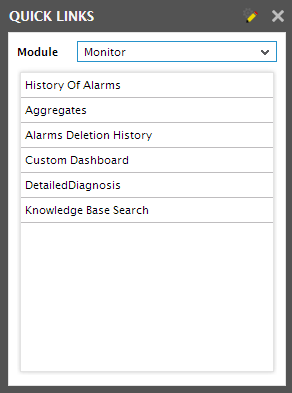
Figure 6 : Quick links configured for the Monitor module
Clicking on a link in Figure 6 will give you 'single-click' access to a web page in a different module, without mandating a manual module switch. For instance, clicking on the History Of Alarms link in Figure 6 will instantly open Figure 7, regardless of which module you are currently logged into.
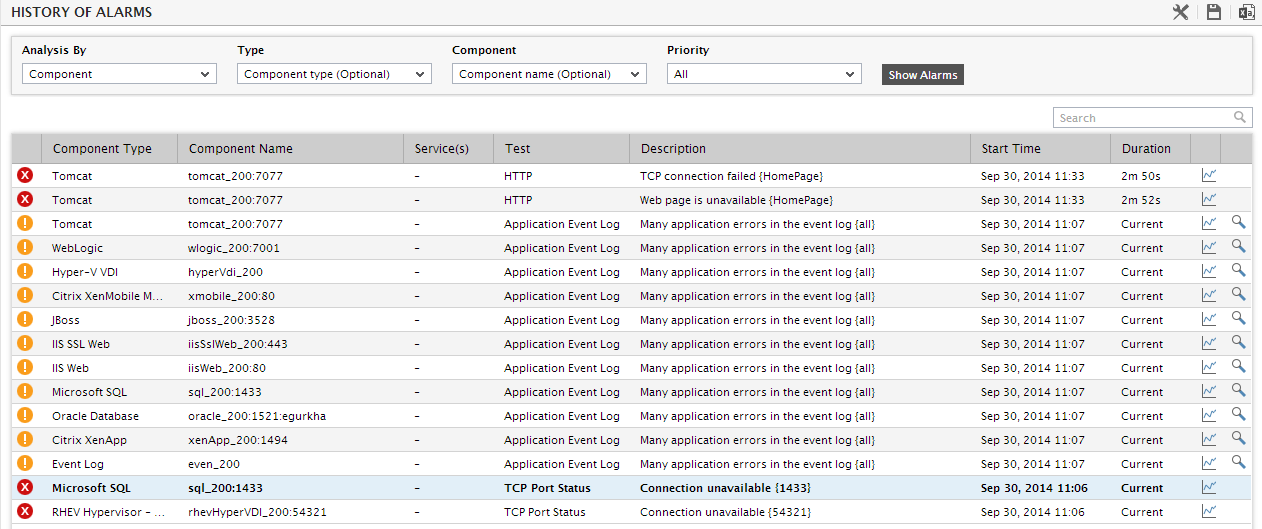
Figure 7 : A Quick Link providing you with instant access to a web page in a different module