
Configuring the eG Agent to Monitor NVIDIA Graphics Processing Units (GPUs)
To determine whether/not the vGPUs assigned to a Windows virtual desktop are adequate for the graphic processing requirements of the that desktop, administrators must understand whether/not memory-intensive I/O operations are performed on that desktop and if so, how they impact vGPU usage. To perform this check, administrators can periodically run the GPU – OS test on every Windows virtual desktop on the cloud.
For this test to run and report metrics, the NVWMI must be installed on every Windows virtual desktop.
NVIDIA WMI (NVWMI) is a graphics and display management and control technology that interfaces to Microsoft’s Windows Management Instrumentation infrastructure, specific to NVIDIA graphics processing units (GPUs). This allows scripts and programs to be created that configure specific GPU related settings, perform automated tasks, retrieve and display a range of information related to the GPU as well as many other administrative tasks and functions.
The following NVIDIA products support NVWMI:
-
NVIDIA Quadro K600
-
Quadro K6000
-
Quadro K5000
-
Quadro K4000
-
Quadro K2000D
-
Quadro K2000
-
Quadro FX 5800
-
Quadro FX 580
-
Quadro FX 570
-
Quadro FX 5600
-
Quadro FX 4800
-
Quadro FX 4700 X2
-
Quadro FX 4600
-
Quadro FX 380 Low Profile
-
Quadro FX 3800
-
Quadro FX 380
-
Quadro FX 3700
-
Quadro FX 370
-
Quadro FX 3450
-
Quadro FX 1800
-
Quadro FX 1700
-
Quadro CX
-
Quadro 7000
-
Quadro 6000
-
Quadro 600
-
Quadro 5000
-
Quadro 410
-
Quadro 4000 for Mac
-
Quadro 4000
-
Quadro 400
-
Quadro 2000D
-
Quadro 2000
-
NVIDIA NVS 510
-
NVS 450
-
NVS 420
-
NVS 315
-
NVS 310
-
NVS 300
-
NVS 295
-
NVS 290
-
Quadro Plex S Series
-
Quadro Plex Model IV
-
Quadro Plex D Series
-
Quadro Plex 7000
NVWMI can be installed in the following three ways:
-
When the NVIDIA GPU driver is installed
-
Via a standalone install
-
Via command line install
Note:
NVWMI is only supported on Windows 7 and later operating systems.
Each of these installation options are detailed in the sub-sections.
Installing NVWMI as Part of the NVIDIA GPU Driver
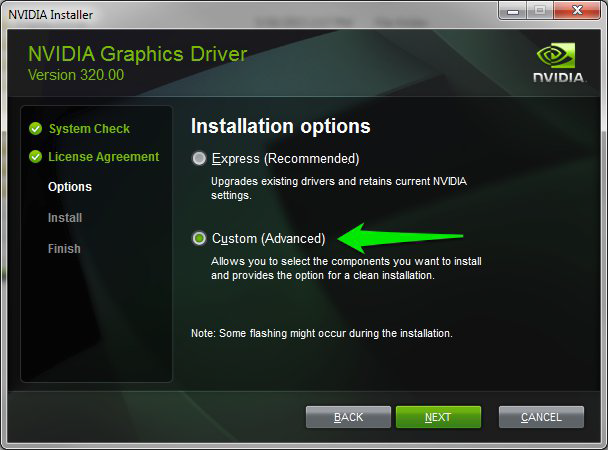
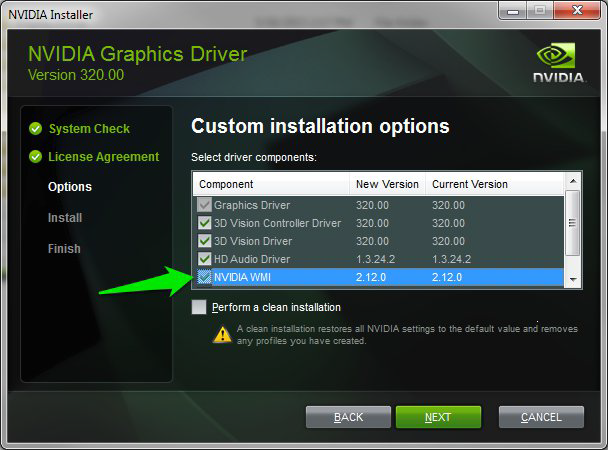
When installing the full GPU driver, please be aware that NVWMI is not installed by default. To ensure that it is installed, it is necessary to customize the installation and ensure that the NVWMI check box is checked, as shown in Figure 1 and Figure 2 in the following procedure.
-
Download the full GPU driver from www.nvidia.com/drivers.
-
Double click the setup.exe.
-
Select Custom (Advanced Options) under “Installation options".
-
Select the NVIDIA WMI check box under Custom installation options.
-
Continue to install the driver and follow the on-screen instructions to complete the installation.
-
Repeat steps 1-5 on every Windows virtual desktop on which you want to run the GPU Stats – OS test.
Installing NVWMI from the Standalone Installer
-
Go to www.nvidia.com/drivers.
-
Select the NVIDIA Enterprise Manager under Beta, Older drivers and more.
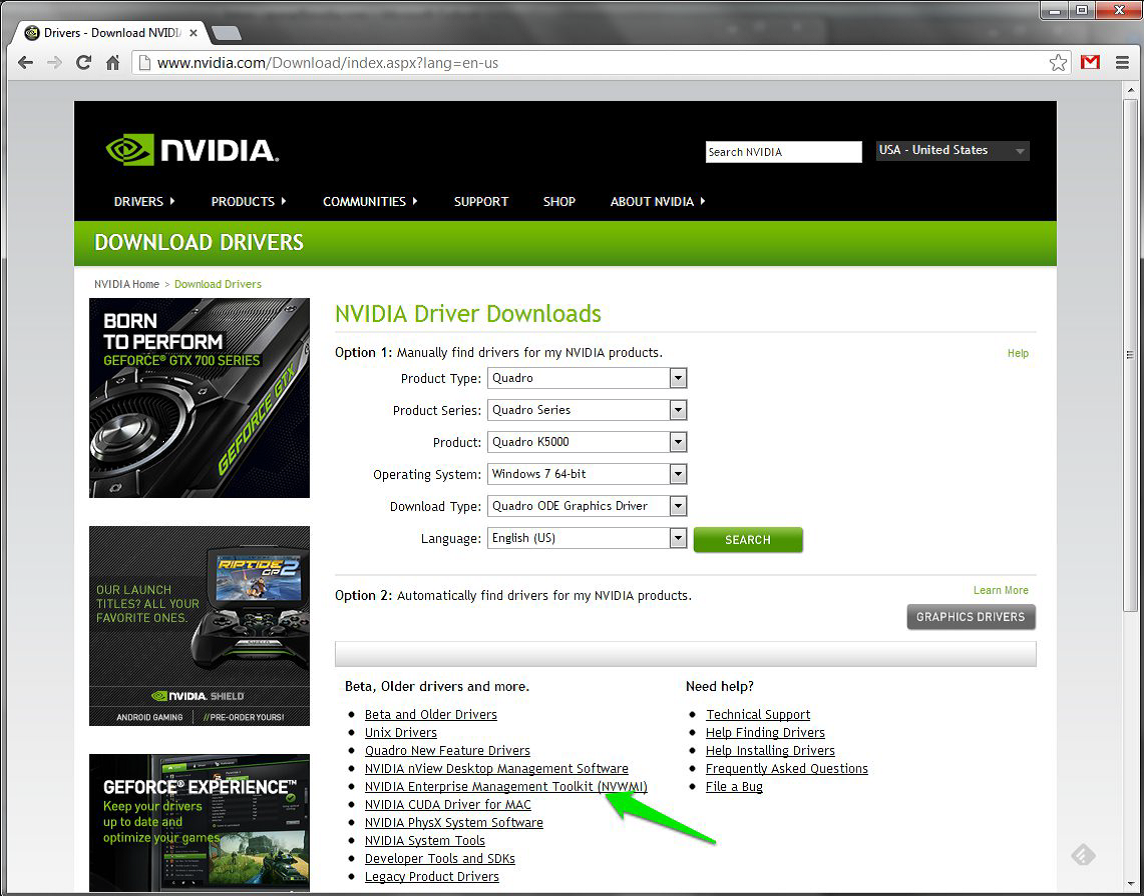
Figure 3 : NVIDIA Enterprise Management Toolkit (NVWMI)
-
Ensure to verify the minimum driver version is met and download the driver.

Figure 4 : NVIDIA WMI minimum driver requirements
-
Continue to install the driver and follow the on-screen instructions to complete the installation.
-
Repeat steps 1-4 on every Windows virtual desktop on which you want to run the GPU Stats – OS test.
Installing NVWMI via the Command Line
-
Download the driver from the URL www.nvidia.com/drivers
-
Using the command line navigate to the extracted directory of the downloaded driver.
-
Issue the following command at the command prompt:
setup.exe [switches][package]
Here:
-
[package] = Display NVWMI
-
[switches] can be one of the following:
Switches
Description
-s
Silent install or uninstall
-k
Force a reboot after install or uninstall
-uninstall
Performs an uninstall instead of an install
To confirm if NVIDIA WMI is already installed, simply look in the list of programs available to change or uninstall in the Control Panel under Programs and Features heading.

Figure 5 : Checking the Control Panel for NVIDIA WMI
-
-
Repeat steps 1-3 on every VM on which you want to run the GPU Stats – OS test.
