How to Monitor CAM Payment System Using eG Enterprise?
To monitor CAM Payment System using eG Enterprise, follow the broad steps outlined below:
-
Add a CAM Payment System component using eG Admin interface;
-
Configure tests for the managed CAM Payment System;
Each of these broad steps are discussed elaborately below.
Adding a CAM Payment System component
The eG Enterprise cannot automatically discover a CAM Payment System. This implies that you need to manually add the component for monitoring. The steps for manually adding a CAM Payment System are detailed below:
-
Login to the eG admin interface.
-
Click on the Add Component button in the right corner of the Components at a Glance page that appeared or follow the Infrastructure -> Components -> Add/Modify menu sequence.
-
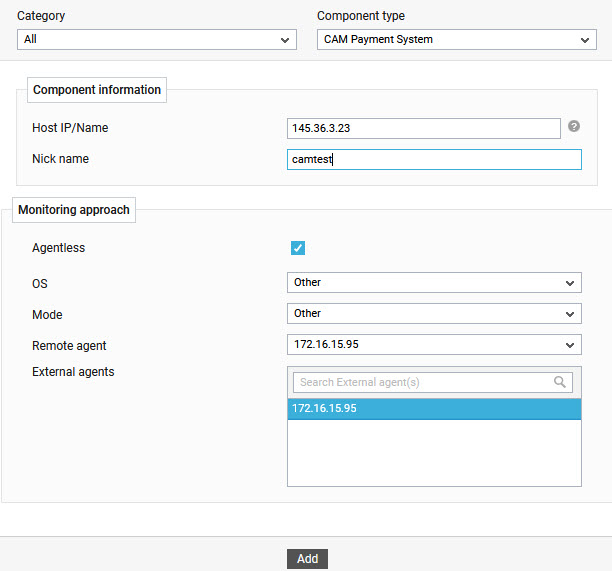
In the page that appears, select CAM Payment System as the Component type and click the Add New Component button. Figure 1 will then appear.

-
In Figure 1, assign a unique Nick name to the target CAM Payment System component.
-
The Agentless flag is enabled by default, as 'agentless' is the default monitoring approach for the CAM Payment System.
-
The OS and Mode are by default selected as Other.
-
Pick a remote agent from the Remote agent list box.
-
Pick an external agent from the External agents list box and click the Add button to add the component for monitoring.
Configuring the tests
Once the CAM Payment System component is added, proceed to configure tests for the application. For that, do the following:
-
Follow the Infrastructure -> Components -> Add/Modify menu sequence in the eG admin interface.
-
In the page that appears next, select CAM Payment System as the Component type. The CAM Payment System that you recently added will then be listed therein. To configure tests for that server, click on the
 icon corresponding to it (see Figure 2).
Figure 2 : Clicking on the Configure Tests icon corresponding to a managed CAM Payment System
-
Figure 3 will then appear. The UNCONFIGURED TESTS list box that then appear will display the tests that are still to be configured for the chosen server. From the UNCONFIGURED TESTS list in Figure 3, select the test that you want to configure. Once you select the test, click the Configure button in Figure 3 to configure it.

-
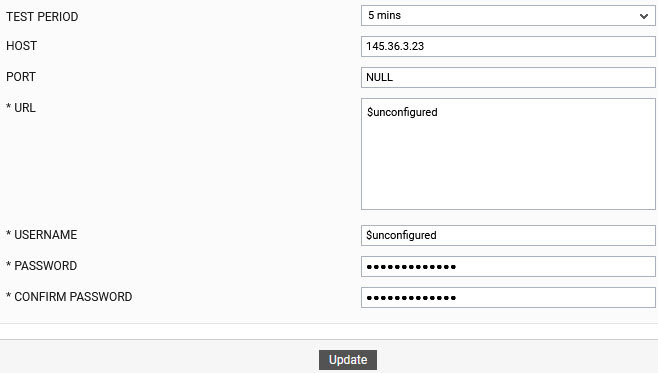
For instance, if you click on CAM Credit File Headers Test Figure 4 will appear.

-
To know how to configure this test, refer to CAM Credit File Headers Test
-
Click the Update button to update the test configuration. This will automatically configure all the other unconfigured tests for the CAM Payment System component.
