Configuring the eG Agent with Proxy Server Settings
If the remote agent host communicates with the Citrix cloud via a proxy server, then you need to make sure that the eG agent is also configured with these proxy server settings. For this, follow the steps below:
-
Login to the system hosting the eG agent that monitors the target Citrix Cloud Control Plane.
-
Open the Internet Explorer browser on that system, and click on the
 icon provided at the right corner of that browser.
 -
Clicking the
icon will invoke a menu. Choose Internet Optionsfrom the menu. Then, select the Connections tab in the Internet Options window that appears (see Figure 188).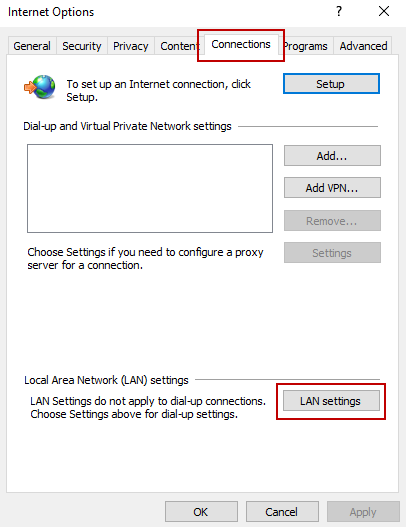
Figure 188 : The Connections tab in the Internet Options window
-
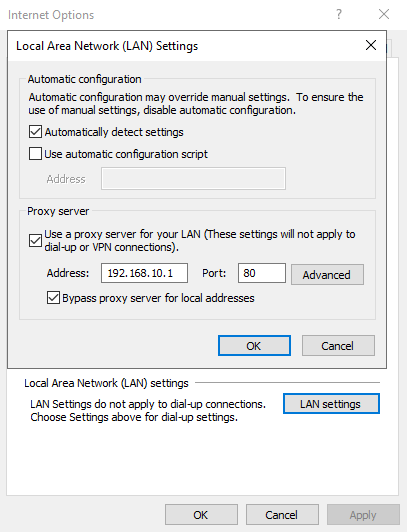
Now, click the LAN Settings button in Figure 188. This will open the Local Area Network (LAN) Settings window (see Figure 189). In the Proxy Server section of this window, enable the Use a proxy server for your LAN check box and specify the IP address and port of the proxy server that the emote agent host uses to communicate with the cloud in the Address and Port text boxes. Finally, click the OK button to register the changes.
-
Next, run the following command from the command prompt to import the assigned settings to the eG agent.
C:\Windows\System32\bitsadmin.exe /util /setieproxy LOCALSYSTEM MANUAL_PROXY <PROXY_IPADDRESS/PROXY_HOSTNAME:PROXY_PORT> "<local>"
For instance:
C:\Windows\System32\bitsadmin.exe /util /setieproxy LOCALSYSTEM MANUAL_PROXY 192.168.10.1:8080 " <local>"
C:\Windows\System32\bitsadmin.exe /util /setieproxy LOCALSYSTEM MANUAL_PROXY xyz.proxy.com:8080 " <local>"
-
Finally, make sure that you configure the PROXY HOST and PROXY PORT parameters of the eG tests with the Address and Port values (respectively) you have specified in Figure 189.
Note:
You can remove the proxy settings that you provided in the Internet Explorer settings after the proxy settings are imported to the eG agent.