Configuring the Citrix Logon Simulator to Perform the Simulation
Once the Pre-requisites for Using eG Enterprise Logon Simulator for Citrix are fulfilled, follow the steps detailed below to get the simulator up and running.
- Log into the eG administrative interface.
- Add a dedicated external agent for the purpose of the simulation. For that, follow the Agents -> External Agents menu sequence and click on the Add New Agent button. Then, specify the IP address/host name of the system that is hosting the dedicated external agent, and also provide a Nick name for the agent (see Figure 2).
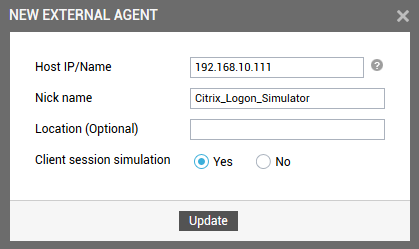
Figure 2 : Adding a dedicated external agent for the simulation
Note:
A single eG external agent can be used to run different types of simulations (for e.g., Citrix logon simulation,
- If you wish to specify the location of the external agent, then, you can do so using the Location text box.
- Also, make sure that the Client session simulation flag is set to Yes for the agent.
- Finally, click the Update button in Figure 2 to save the changes.
-
Once this external agent is started, it simulates the entire logon process by periodically running a Citrix Logon Simulator test. It is this test that serves as the eG Citrix Logon Simulator. Since this test is mapped to a Citrix Logon Simulator component, you now need to manage a component of that type. For this, follow the Infrastructure -> Components -> Add/Modify menu sequence, and then pick Citrix Logon Simulator from the list of Component types. Then, click Add New Component. When Figure 3 appears, add a Citrix Logon Simulator using any IP address and nick name you want.
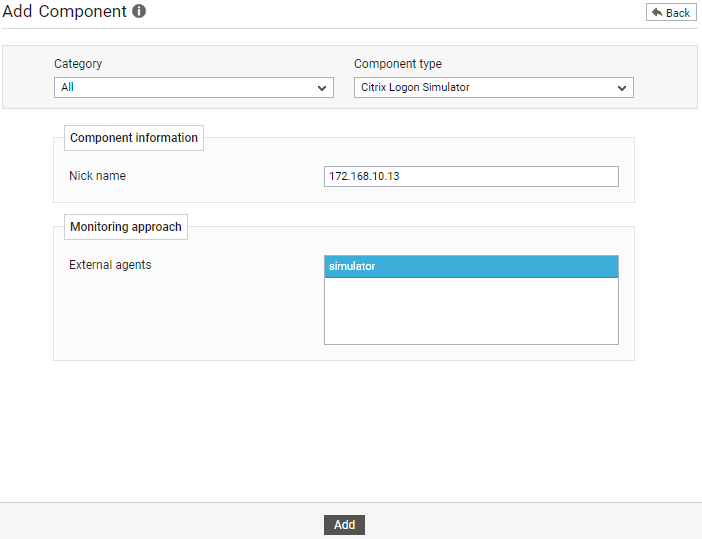
- When adding, make sure you assign the dedicated external agent, which you had previously installed and configured for the sole purpose of this simulation, to the simulator component.
- After clicking Add in Figure 3, proceed to configure the Citrix Logon Simulator test for this component.
- Figure 4 will then appear. Click on each of the parameters in the figure below to know how to configure it.
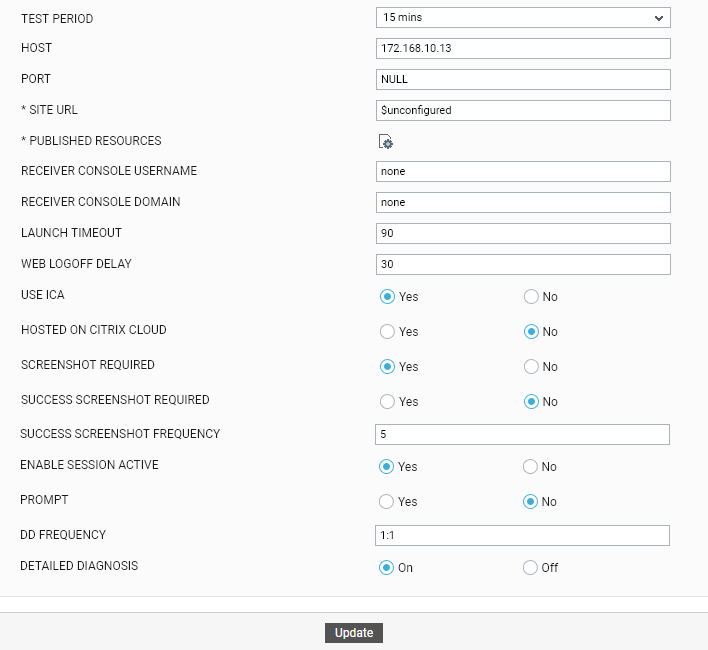
- To know how to configure the test, refer to The Citrix Logon Simulator Test
- Once all parameters are configured, click the Update button to save the configuration.