Managing the EMC Unity Storage system
The eG Enterprise cannot automatically discover the EMC Unity storage system. Therefore, you need to manually add the component for monitoring. Remember that the eG Enterprise automatically manages the components that are added manually. To manage an EMC Unity storage system, do the following:
- Log into the eG administrative interface.
- Follow the Components -> Add/Modify menu sequence in the Infrastructure tile of the Admin menu.
-
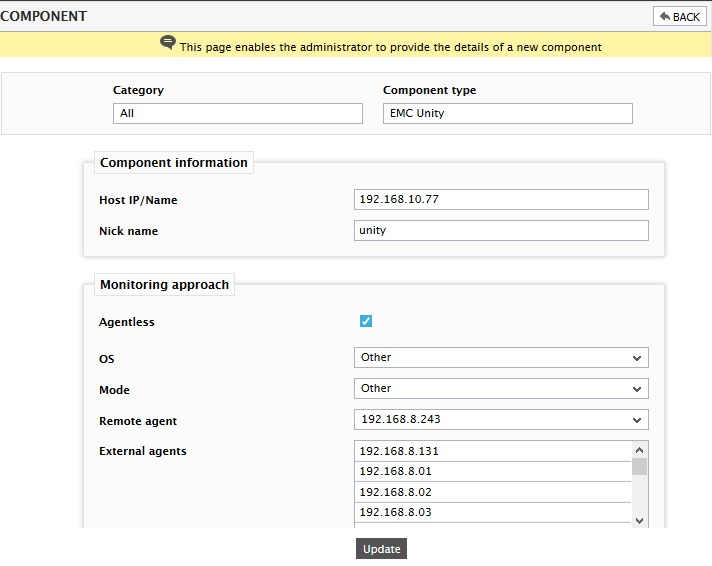
In the COMPONENT page that appears next, select EMC Unity as the Component type. Then, click the Add New Component button. This will invoke Figure 1.
-
Specify the Host IP/Name and the Nick name of the EMC Unity storage system. This EMC Unity storage system can only be monitored in an agentless manner. Therefore, the Agentless check box will be checked by default. Next, select Other as the OS and Other as the Mode. Then, click the Add button to register the changes (see Figure 1).
-
The EMC Unity storage system so added will be managed automatically by eG Enterprise. Now, try to sign out of the user interface. Doing so, will bring up the following page as shown in Figure 2, which prompts you to configure a list of unconfigured tests for the new EMC Unity storage system.
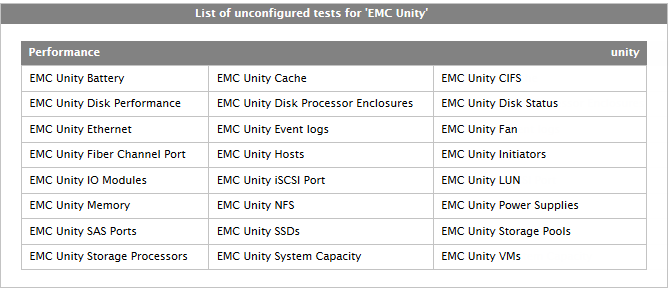
Figure 2 : A page displaying the tests that need to be configured for the EMC Unity
-
Click on any test in the list of unconfigured tests. For instance, click on the EMC Unity Battery test to configure it. Figure 3 then appears.
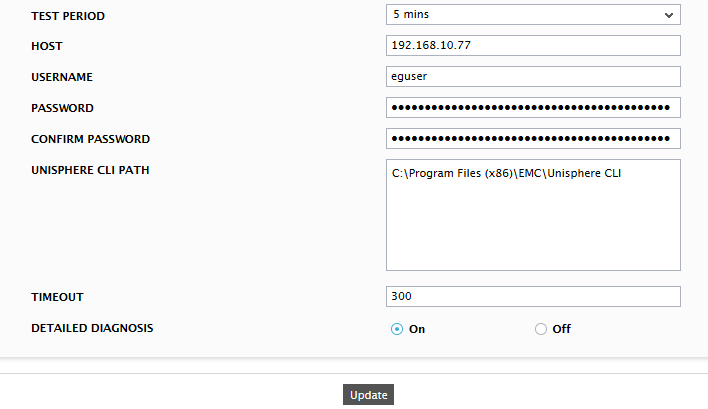
- To know how to configure the test, refer to Monitoring the EMC Unity Storage system .
- Finally, signout of the eG administrative interface.