Securing the ‘jmxremote.password’ file
To enable the eG agent to use JMX (that requires authentication only) for monitoring the GemFire cluster, you need to ensure that the jmxremote.password file in the <GEMFire_INSTALL_DIR>\defaultConfigs folder used by the target application is accessible only by the Owner of that file. To achieve this, do the following:
- Login to the Windows host as a local/domain administrator.
- Browse to the location of the jmxremote.password file using Windows Explorer.
-
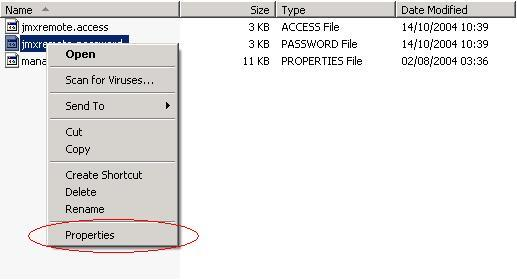
Next, right-click on the jmxremote.password file and select the Properties option (see Figure 1).
-
From Figure 2 that appears next, select the Security tab.
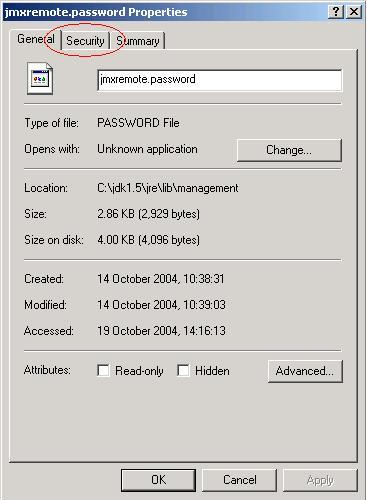
Figure 2 : The Properties dialog box
However, if you are on a Windows computer that is not part of a domain, then the Security tab may be missing. To reveal the Security tab, do the following:
- Open Windows Explorer, and choose Folder Options from the Tools menu.
-
Select the View tab, scroll to the bottom of the Advanced Settingssection, and clear the check box next to Use Simple File Sharing.
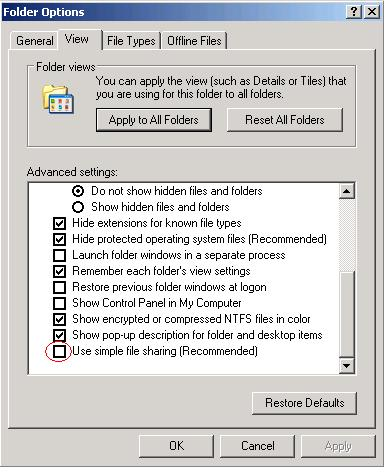
Figure 3 : Deselecting the ‘Use simple file sharing’ option
- Click OK to apply the change
- When you restart Windows Explorer, the Security tab would be visible.
-
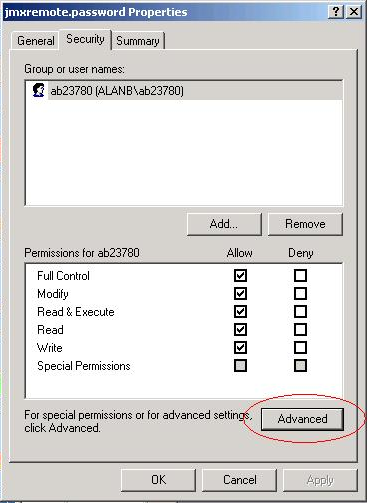
Next, select the Advanced button in the Security tab of Figure 4.
-
Select the Owner tab to see who the owner of the file is.
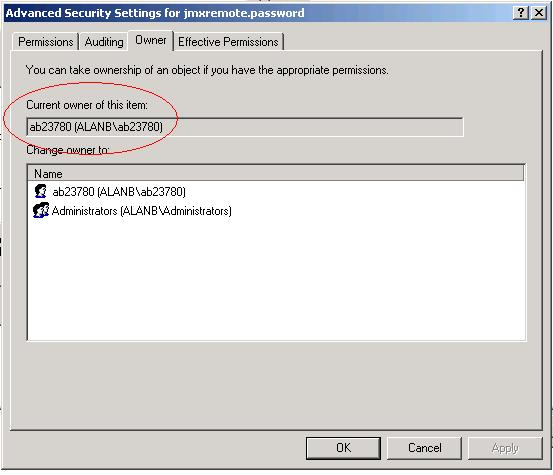
Figure 5 : Verifying whether the Owner of the file is the same as the application Owner
-
Then, proceed to select the Permissions tab in Figure 5 to set the permissions. If the jmxremote.password file has inherited its permissions from a parent directory that allows users or groups other than the Owner to access the file, then clear the Inherit from parent the permission entries that apply to child objects check box in Figure 6.
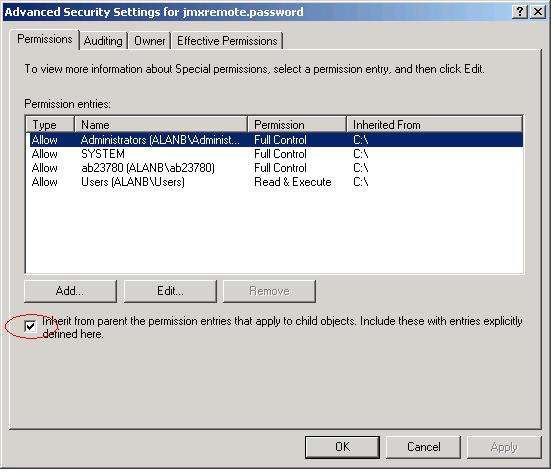
Figure 6 : Disinheriting permissions borrowed from a parent directory
-
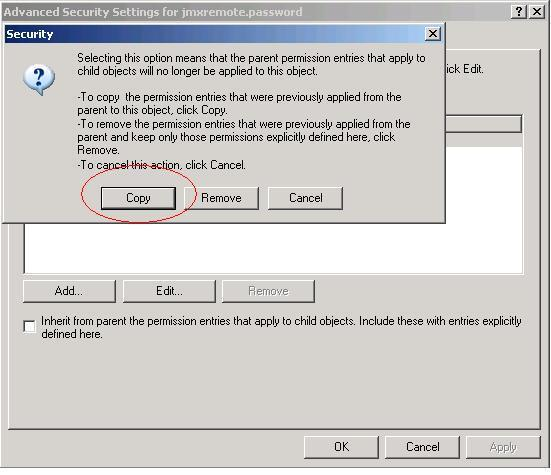
At this point, you will be prompted to confirm whether the inherited permissions should be copied from the parent or removed. Press the Copy button in Figure 7.
-
Next, remove all permission entries that allow the jmxremote.password file to be accessed by users or groups other than the file Owner. For this, click the user or group and press the Remove button in Figure 8. At the end of this exercise, only a single permission entry granting Full Control to the owner should remain in Figure 8.

- Finally, click the Apply and ok buttons to register the changes. The password file is now secure, and can only be accessed by the file owner.
Note:
If you are trying to enable JMX on a Linux host, you might encounter issues with the way hostnames are resolved.
To solve it you might have to set the -Djava.rmi.server.hostname=<hostname or localhost or ip> property in the startup script of the target server.
If you are in local, simply try with -Djava.rmi.server.hostname=localhost or -Djava.rmi.server.hostname=127.0.0.1.