How does eG Enterprise Monitor Google Chromebooks Group?
eG Enterprise collects metrics from the Google Chromebooks Group in an agentless manner only - i.e., using an eG remote agent deployed on any Windows/Linux host/VM in the environment. This agent makes REST API calls to Chrome Management Telemetry API to monitor the operation and health of devices running ChromeOS within the Google Workspace console. In order to collect the performance metrics, the following pre-requisites should be fulfilled:
-
Ensure that the ChromeOS devices to be monitored are bundled with Chrome Enterprise Upgrade or Chrome Education Upgrade license offered as part of ChromeOS device management.
-
To connect to the Google Workspace, the eG agent should be configured with name of a private key file of a service account. For this purpose, first, you need a service account with the following roles in the target project.
-
Compute Viewer
-
Monitoring Viewer
-
Cloud Asset Viewer
If the service account with the mentioned roles already exists in the project, administrators can use the existing service account. If not, administrators should create a service account using the steps explained in the Creating a Service Account
-
-
Once the service account is created, download the private key file of the service account. The steps for doing this are given in the Downloading Service Account Key
-
To collect metrics from the Chrome devices, you need to enable the following service APIs:
-
Admin SDK API
-
Chrome Management API
To know how to enable the APIs, refer to Enabling Service APIs.
-
-
The service account should be assigned with an admin role to monitor the target devices. To know how to create the admin role, refer to Creating an Admin Role. To know how to assign the role to the service account, refer to Assigning Admin Role to Service Account.
-
Determine the Customer ID of the organization to which the target Google Chromebooks Group belongs to. A customer ID is a unique identifier assigned to each organization in the Google Workspace environment when customers sign up for Google Workspace services. The customer ID is a string of characters that uniquely identifies the Google Workspace account and used by Google to distinguish an organization from others. To enable the eG agent to communicate with the devices in the target Google Chromebooks Group and make the REST API calls, the eG tests executed by the eG agent should be configured with the customer ID assigned to the organization to which the Google Chromebooks Group is mapped to. To know how to obtain the customer ID, refer to Determining the Customer ID
Creating a Service Account
The first step to configure the eG agent to monitor the Google Cloud is to create a service account with the following roles in the target project.
-
Compute Viewer
-
Monitoring Viewer
-
Cloud Asset Viewer
To achieve this, follow the steps below:
- Log on to the Google Cloud console by using an Google Cloud account.
-
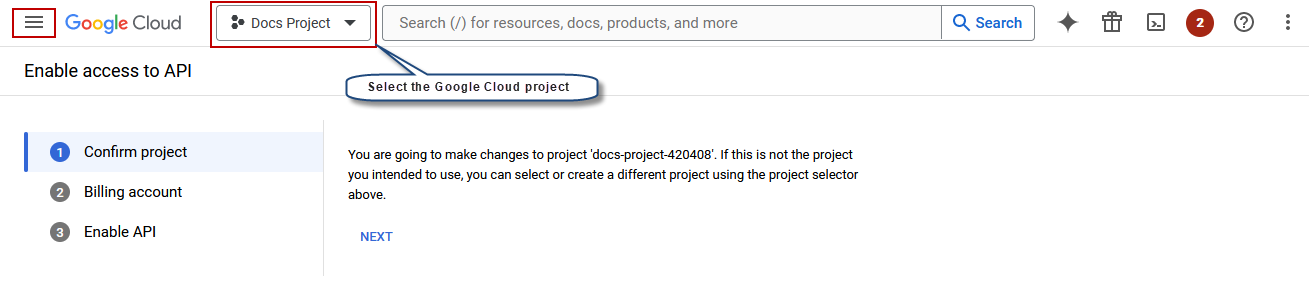
If you have multiple projects, select the project where you want to create the service account from the project selector drop down menu (see Figure 1).
-
Click the menu icon on the top left corner of the console, then select the Service Accounts option from the IAM & Admin tree in the left-side navigation menu as shown in Figure 2.
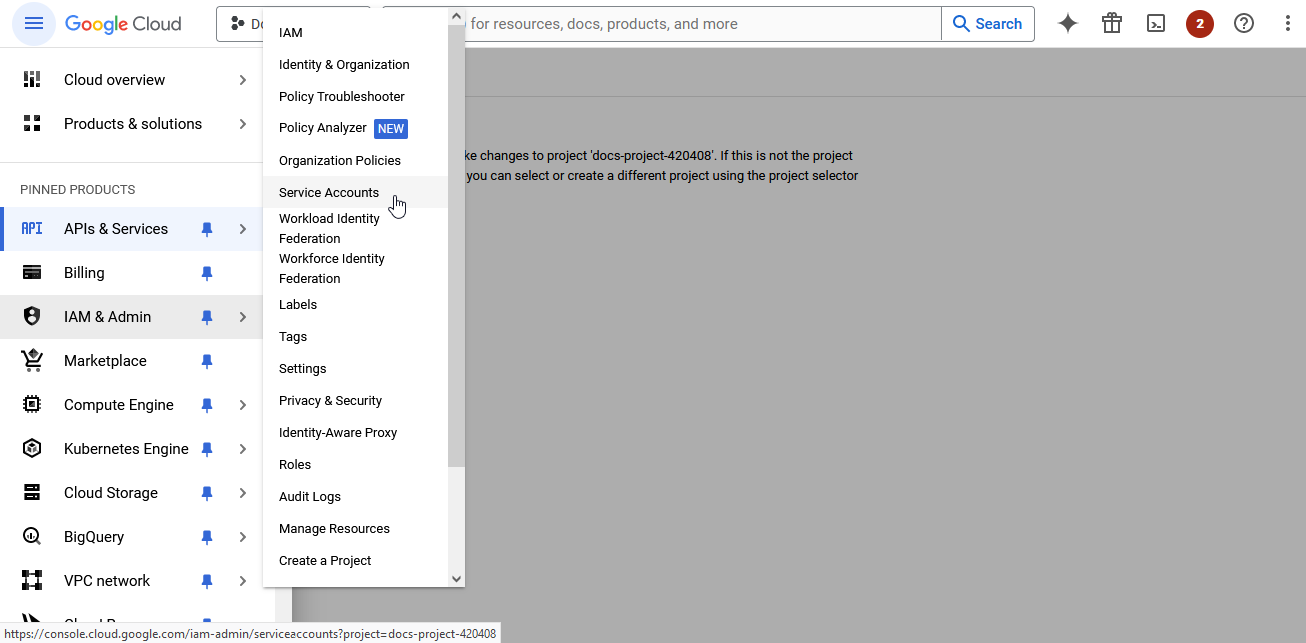
Figure 2 : Selecting the Service Accounts option from the IAM & Admin tree
-
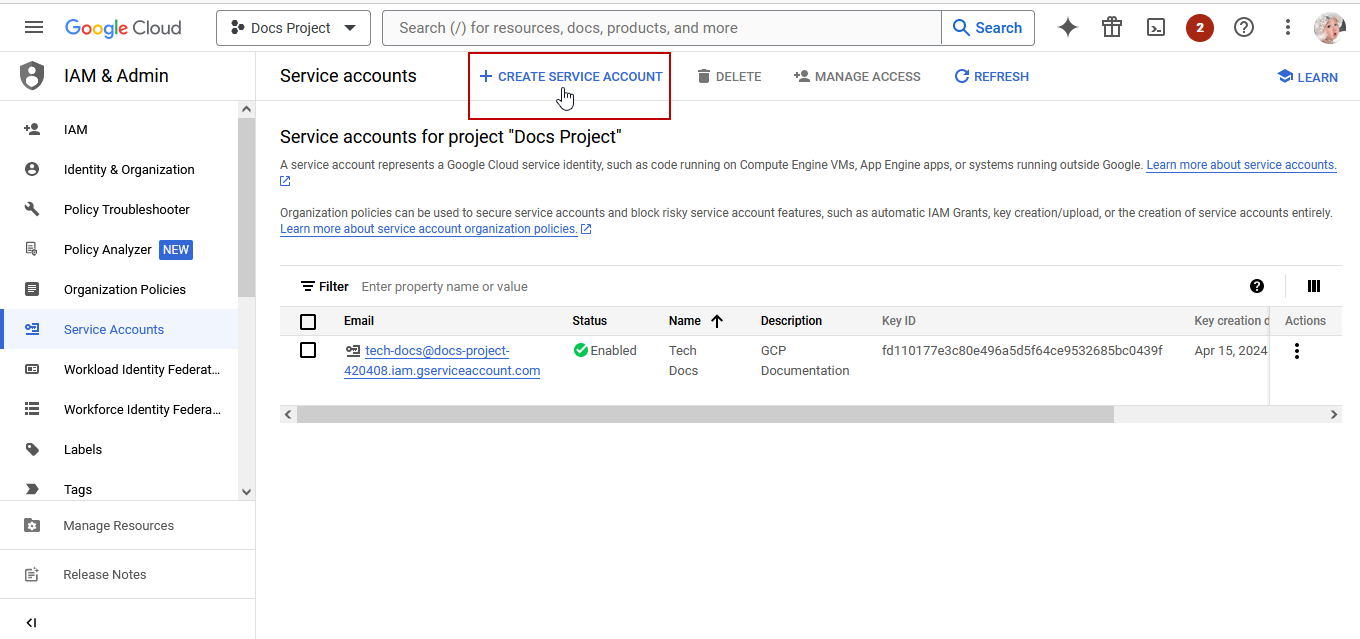
Selecting the Service Accounts option will invoke the Service Accounts page where you can view the list of service accounts (if any) created for the chosen project. In this page, click the Create Service Account button as shown in Figure 3.
-
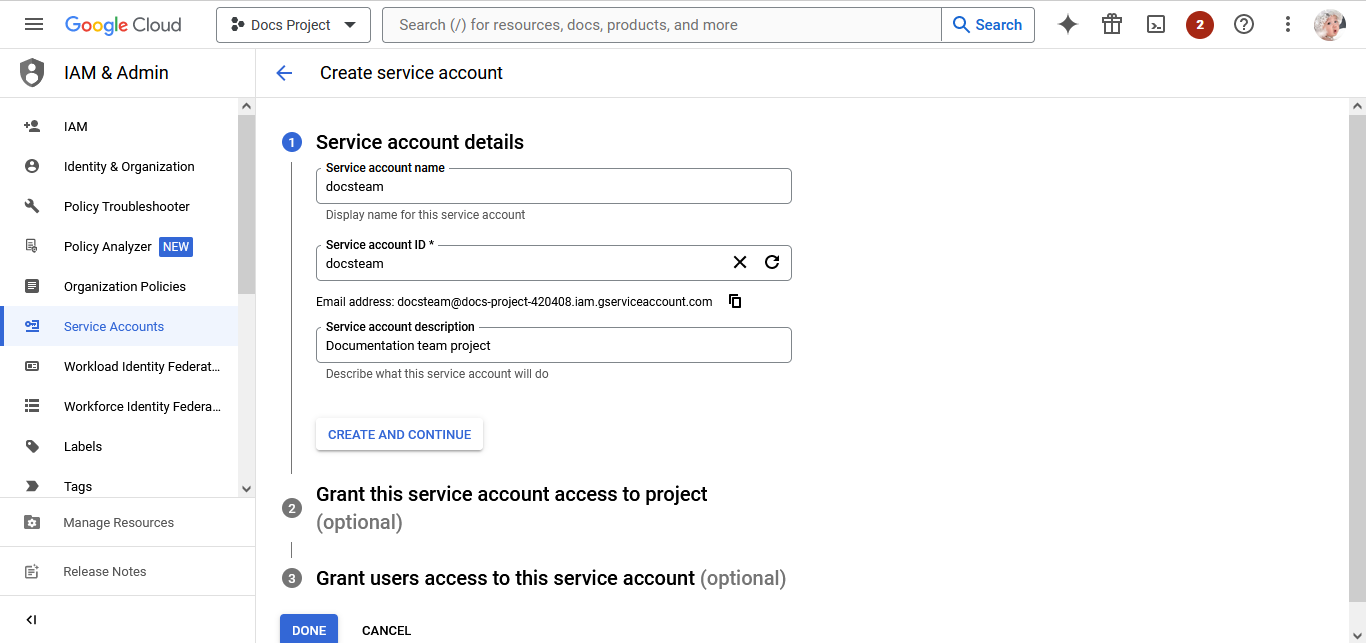
Enter a name for the service account, and optionally, provide a description in as shown in Figure 4. Next, click the create and continue button to proceed to the next step.
-
Next, you will be prompted to grant permissions to the service account (see Figure 5) in the Grant this service account access to project section. To the monitor the services in the project, the service account should be created with Compute Viewer, Monitoring Viewer, and Cloud Asset Viewer roles.
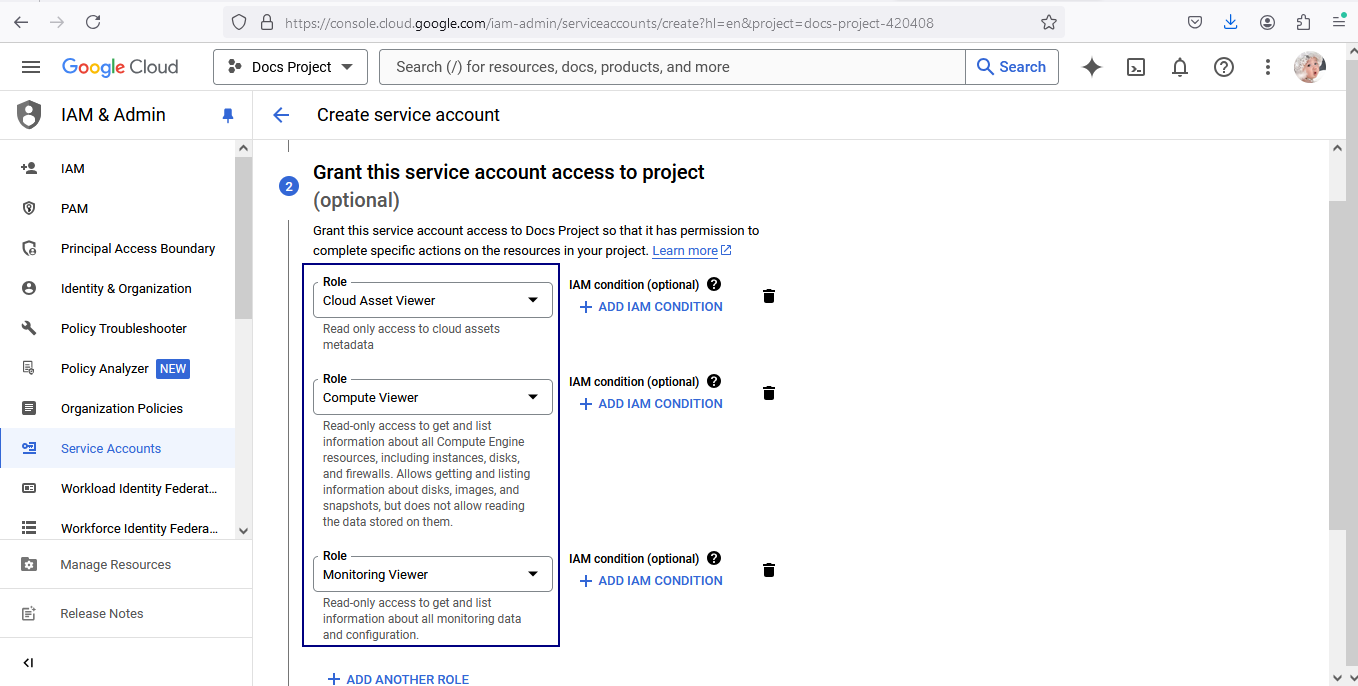
Figure 5 : Setting roles for the service account
Once you set the required roles, press continue button to proceed to next step. If you want the service account to have access to specific resources (e.g., Cloud Storage buckets, Compute Engine instances), you can specify these permissions in the Grant users access to this service account section.
-
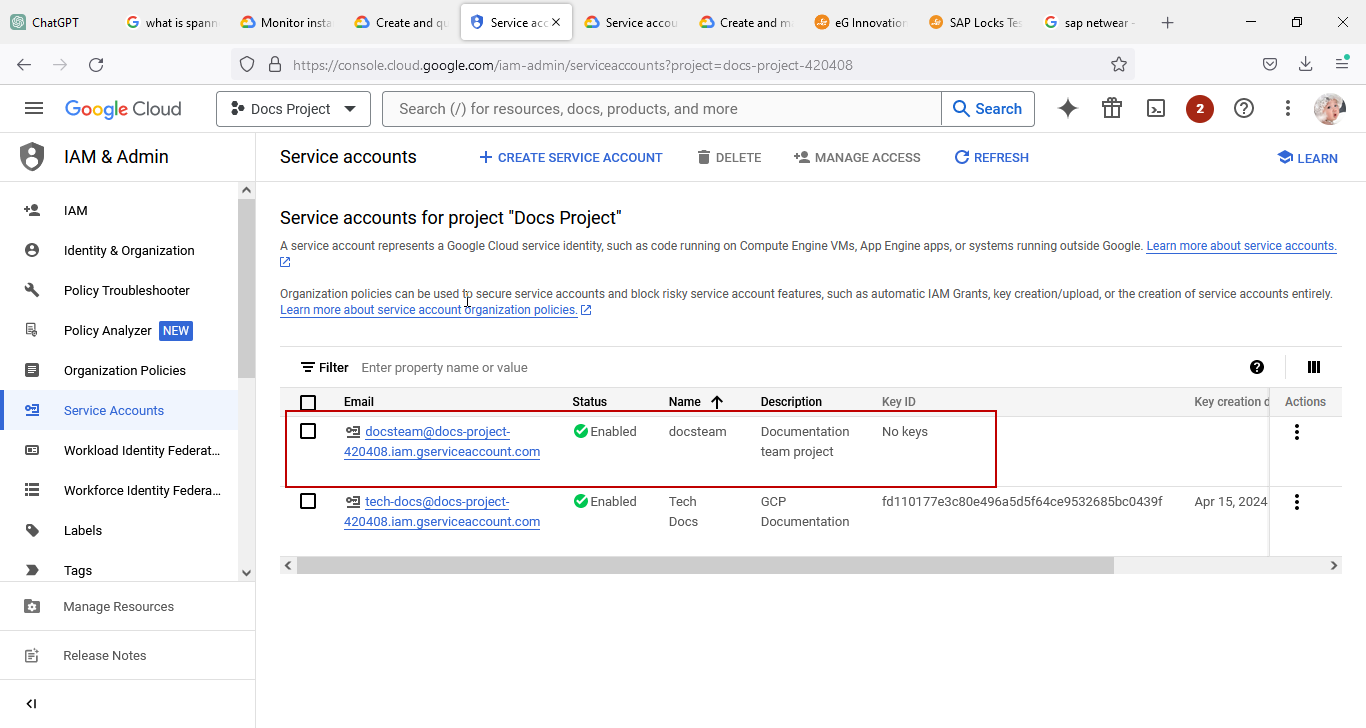
Finally, click Done button to create the service account. The newly created service account will be listed in the Service Accounts page as shown in Figure 6.
Downloading Service Account Key
To pull useful metrics related to the services, the eG agent needs to be configured with a JSON key file, also known as a service account key, that contains authentication credentials for a service account created in the project. When you create a service account in any of the projects in GCP, you have an option to create a private key for that service account in the form of a JSON file. The JSON key file includes information such as email address, unique identifier (private key ID), and the private key of the service account. The JSON key file is used to identify and verify a service account. The following sections will explain how to create a service account and generate key file for the same. To download the key associated with the created service account, do the following:
-
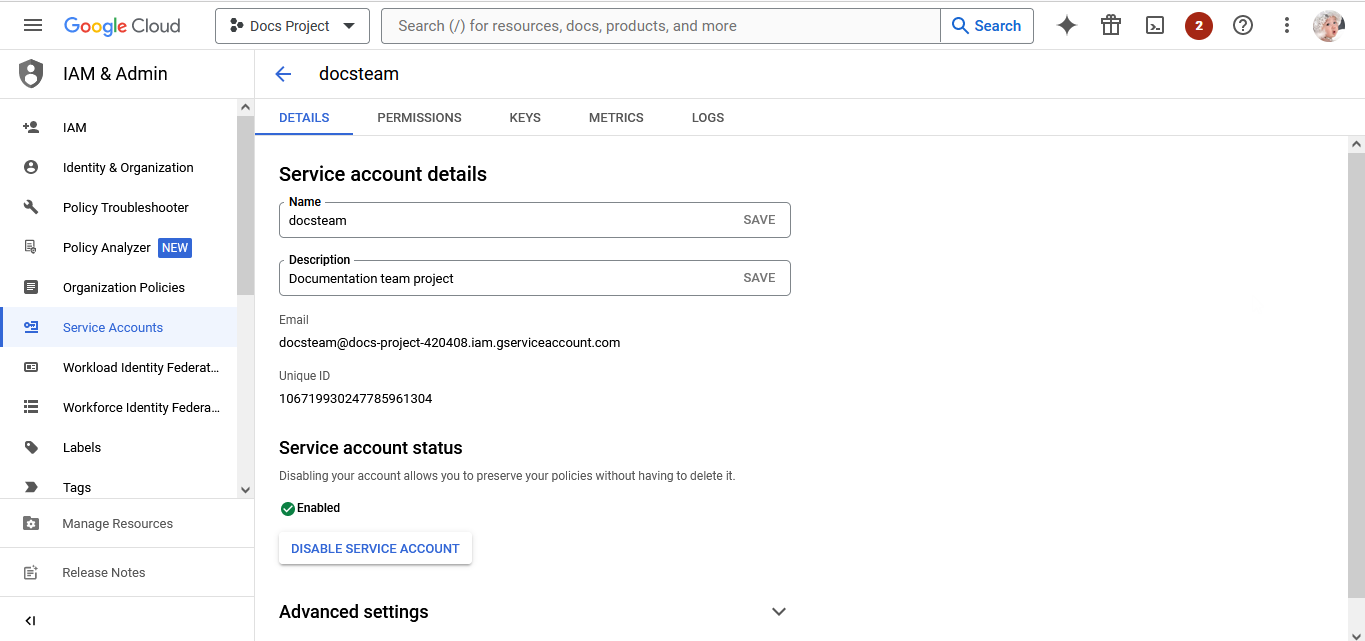
Choose the service account for which you want to download the key in the list of service accounts (see Figure 6). Click the service account name to open its details. This will invoke Figure 7:
-
In the Service account details page, navigate to the Keys tab. Under the Keys tab section, you can see a list of existing keys, if any. To create a new key, click the Add Key dropdown and select the Create new key option.
-
Next, select the JSON key type in the prompt that appears and click the Create button (see Figure 8).
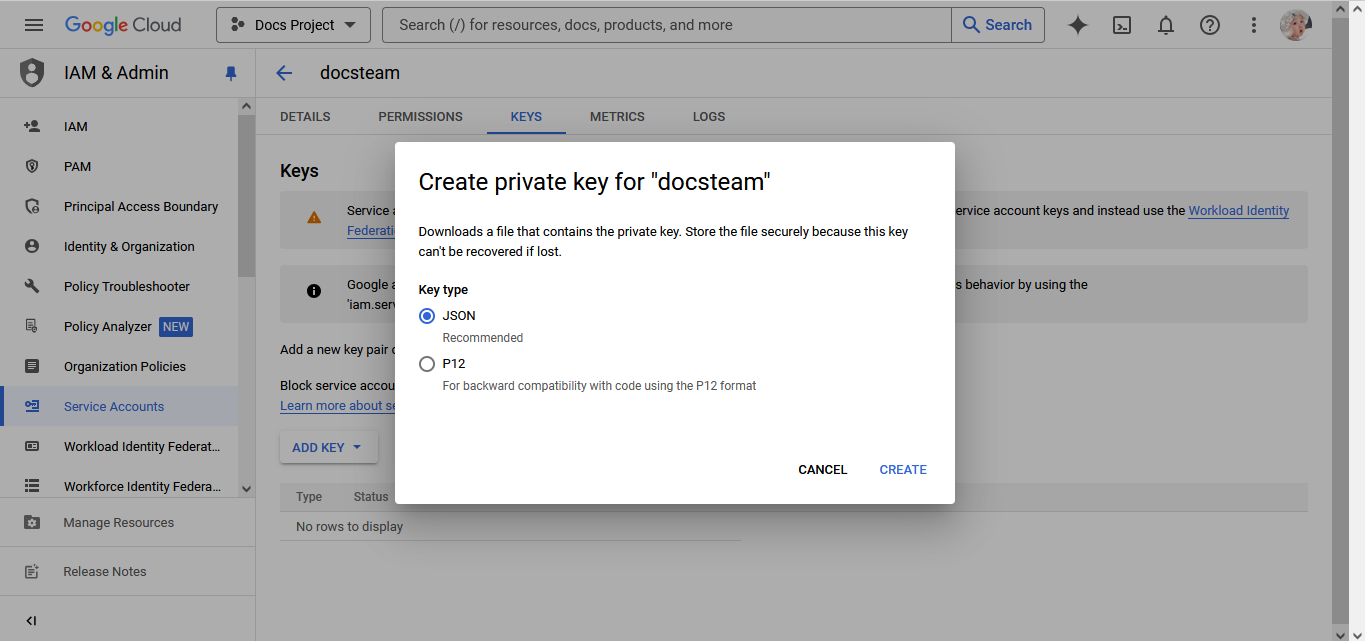
Figure 8 : Creating the private key
This will generate the JSON key file for the service account. The key file will be downloaded to your local system automatically as depicted by the following image.
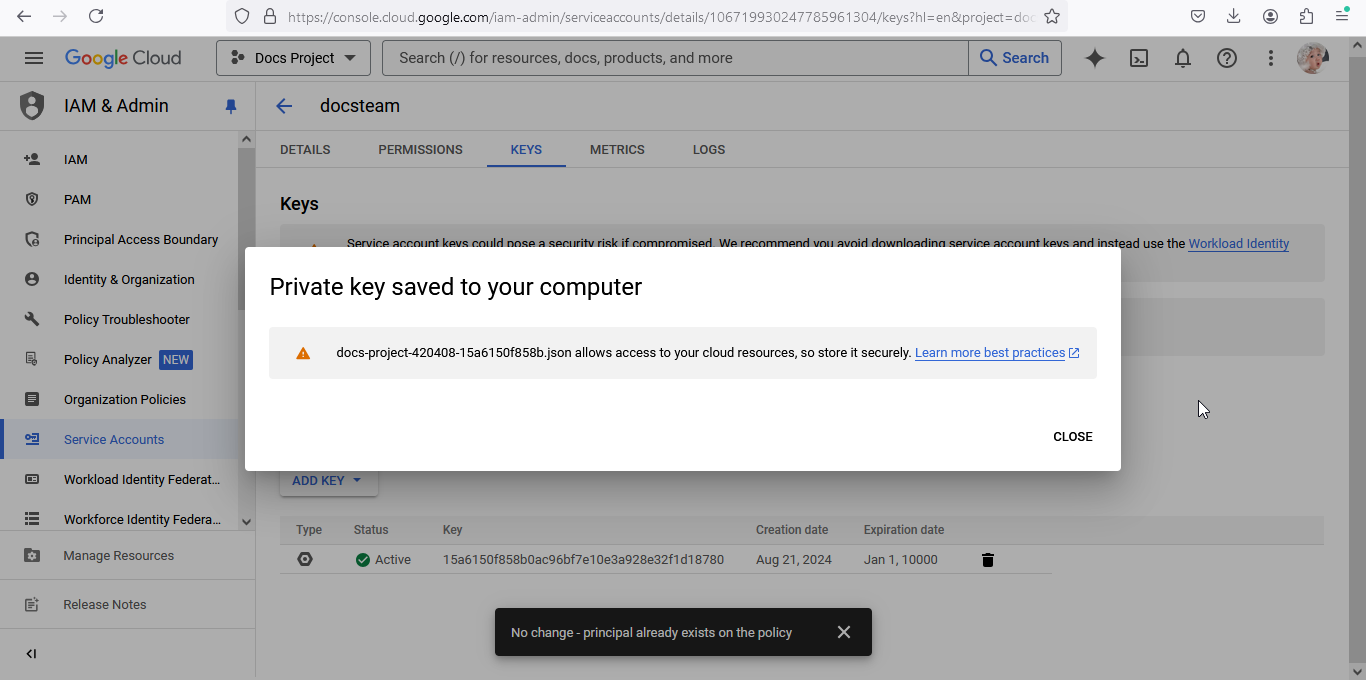
Figure 9 : Downloading the keyfile to the local system
-
Once the key file is downloaded, make sure to store it securely since the private key file contains sensitive information that grants access to your Google Cloud resources.
-
Then, copy the downloaded key file to the <eG_Install_Dir>/agent/lib folder and provide its name against the private keyfile name parameter while configuring the tests for the target component using the Specific Test Configuration page.
Enabling Service APIs
The eG agent collects the performance metrics of the services by communicating the APIs of the services using API calls. Therefore, it is necessary that the APIs for the services should be enabled to collect the metrics. To enable APIs of the services in the chosen Google Cloud project, do the following:
-
First, select the project to be monitored from the project selector drop down.
-
Next, expand the API & Services menu option from the left-side navigation pane. Select Library from the expanded menu as shown below.

Figure 10 : Selecting the Library
-
This will lead you the API Library page where you can view a list of APIs of available Google Cloud services. To monitor the Google Chromebooks using eG Enterprise, you need to enable Admin SDK API and Chrome Management API. To find out the API in the API Library, you can specify whole or part of the API's name and as shown in Figure 11.

Figure 11 : Searching the API of service that is to be monitored
-
Then, click the API in Figure 11 to open its Product details page.

Figure 12 : Enabling the Google Cloud service
On the Product details page, click the Enable button to enable the service. Note that the eG agent will be unable to report metrics if the mentioned APIs are not enabled.
-
Likewise, enable the Chrome Management API for monitoring the Chromebooks.
Creating an Admin Role
To collect metrics from the target Chromebooks, a service account should be provided with privileges of admin role. Follow the steps given below to create an admin role:
-
Log in to admin console (admin.google.com) of Google Cloud Platform.
-
Once logged in, click the Account section in the left sidebar menu. Then, click the Admin roles option under Account section (see Figure 13).

-
Clicking on the Admin roles in Figure 13 will open the Admin roles section in the right panel as shown in Figure 14.

-
The Create Role page will appear upon clicking the Create new role button in Figure 14. Now specify the name and description for the role in the Role info section of Figure 15.

-
Once you specified the required information, click the continue button in Figure 15. This will invoke the Select privileges section where you can select the privileges required for monitoring the Chromebooks. Expand the list on the left until you find the Organizational units node or search the privilege by specifying the whole or part of privilege name. Click or expand Organizational units to reveal specific privileges. Under this node, check the box next to Read as shown in Figure 16. Doing so will enable all permissions required to collect the metrics from the target Chromebooks.

Figure 16 : Selecting Organizational units Privileges
Next, navigate through the following menu sequence: Services -> Chrome Management -> Settings -> Manage ChromeOS devices. Under the Manage ChromeOS devices node, check the box next to Read option (see Figure 17). Doing so will enable all permissions required to collect the metrics from the target Chromebooks.

-
Once the privileges are selected, click the continue button to preview the settings (see Figure 18).

-
Finally, click the create role button to create the required user role. Figure 19 will then appear.

Assigning Admin Role to Service Account
Once the user role is created, you need to assign it to the service account which manages the target Chromebooks. To achieve this click the Assign service accounts button in Figure 19. This will display the Assign role page as shown in Figure 20.

Figure 20 : Assigning the role to service account
Now, copy the email address of service account created for monitoring from Figure 7 in the Creating a Service Account

Figure 21 : Specifying the email address of the service account
Next, clicking the add button will add the account and display the new role assignment as shown in Figure 22.

Figure 22 : The newly created role assigned to service account
Now click the Assign role button to complete the role assignment. This will lead you to Figure 23.

Figure 23 : Successful role assignment
Obtaining Organization/Organizational Unit (OU) ID
To obtain the organization unit (OU) ID from the Google Workspace Admin console, follow the steps given below:
-
First, go to the Google Workspace Admin console and sign in using an administrator account.
-
In the side navigation menu, click the Devices option provided below the Chrome sub-node under the Devices node.
-
This will list the organizational units and the Chrome devices managed by those organizational units upon clicking the organizational unit in the right panel.
-
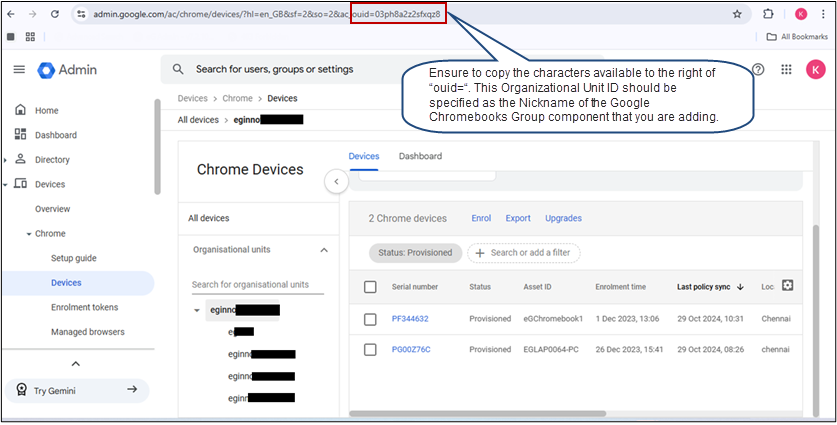
To know the ID of the organizational unit of your interest, click the organization unit's name (see Figure 24).
-
Now, the URL that appears upon clicking on the organizational unit will contain the OU ID at the end.
-
Once you obtain the OU ID from the URL, copy the ID and use it while adding the Google Chromebooks Group component for monitoring.
Determining the Customer ID
To determine the customer ID that is mapped to the organization to which the target Google Chromebooks Group belongs to, do the following:
-
Go to the Google Workspace console.
-
Sign in to the console using administrator privileges.
-
In the Admin console that appears, click the hamburger menu icon in the upper-left corner.
-
Then, navigate to the Account Settings option under the Account node in the menu. This will open the Account Settings page in the right-panel as shown in Figure 25.
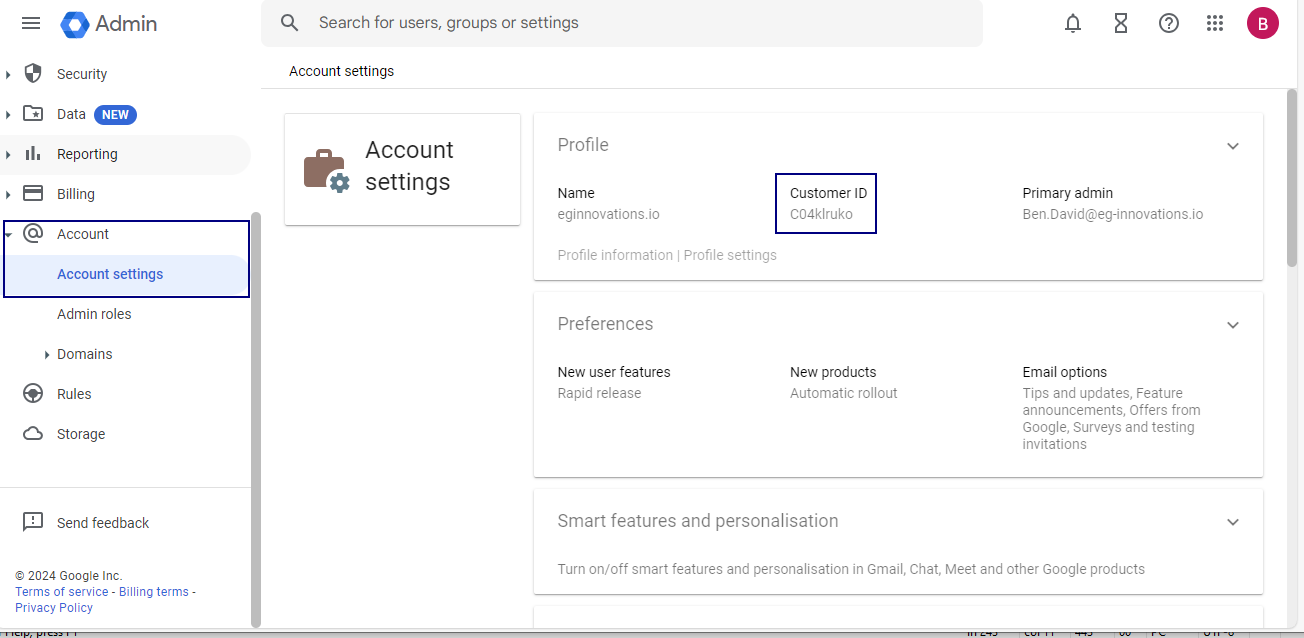
Figure 25 : Determining the Customer ID
The Account settings page displays organization's details such as name, primary admin and the customer ID of the organization. Now, obtain the customer ID mapped to the organization displayed in the page (as highlighted in Figure 25). Specify this customer ID against the customer ID when you configure the eG tests.