How to Monitor Google Cloud Using eG Enterprise?
Follow the broad steps below to monitor a Google Cloud project using eG Enterprise:
-
Install an eG agent on a remote Windows/Linux host/VM in the environment, and make sure that the remote agent is able to access the target project;
-
To enable the eG agent to access the project, Ensure that the pre-requisites provided in the How does eG Enterprise Monitor Google Cloud? are fulfilled;
-
Use the eG admin interface to add a Google Cloud component for monitoring the target Google Cloud project;
-
Configure tests for the managed Google Cloud component
The following sections explain how to add a Google Cloud component and configure the tests for the managed component.
Adding a Google Cloud Component
To achieve this, do the following:
-
Login to the eG admin interface.
- Click on the Add Component button in the right corner of the Components at a Glance page that appears or follow the Infrastructure -> Components -> Add/Modify menu sequence.
- The Components page will then appear. In the Components page, select Google Cloud as the Component type and click the Add New Component button.
-
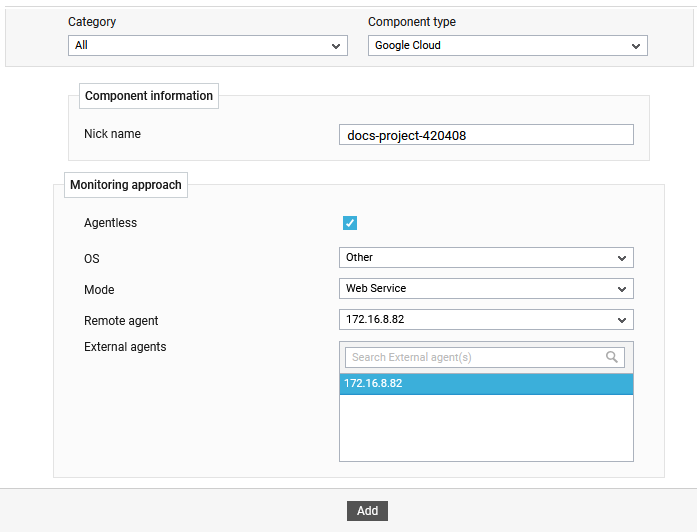
Figure 1 will then appear.
-
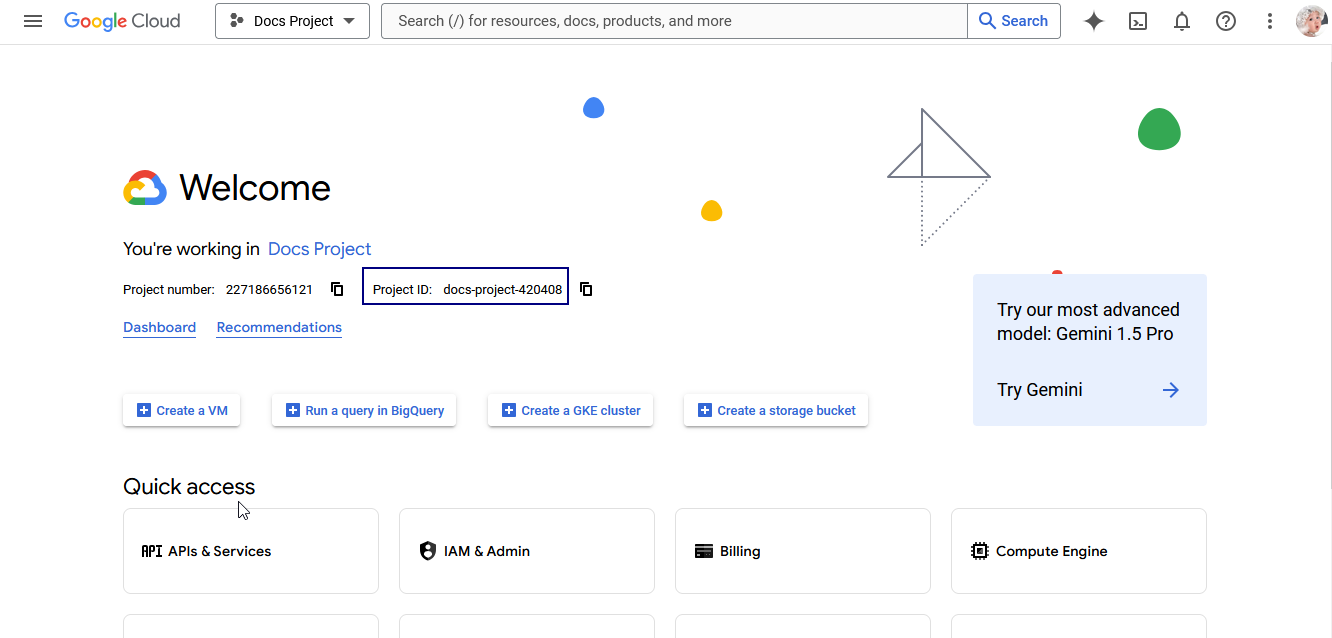
In Figure 1, first specify the ID of the Google Cloud project to be monitored in the Nick name for the component. You can find out the project ID from the Google Cloud console (see Figure 2). Now, copy the project ID from the console and paste it against the Nick name field in Figure 1.
-
By default, the Google Cloud can only be monitored in an agent-less manner so that the Agentless check box is selected by default. Now, fill the following details:
- Pick OS as the Other.
- Set the Mode to Web Service.
- Select the Remote agent that will be monitoring the target component.
- Choose an external agent by picking an option from the External agents list box.
-
Finally, click the Add button to add the component.
Configuring eG Tests for Google Cloud Component
Once you click on the Add button in Figure 1, Figure 3 will appear displaying the Google Cloud component that you just added. To configure the tests for that component, click on the Configure Tests icon corresponding to that component in Figure 3.

Figure 3 : The newly added Google cloud component
Figure 4 will then appear. From the UNCONFIGURED TESTS list in Figure 4, select the test that you want to configure. For instance, say you select the Google Cloud Big Query test. To configure this test, click on the Configure button in Figure 4.
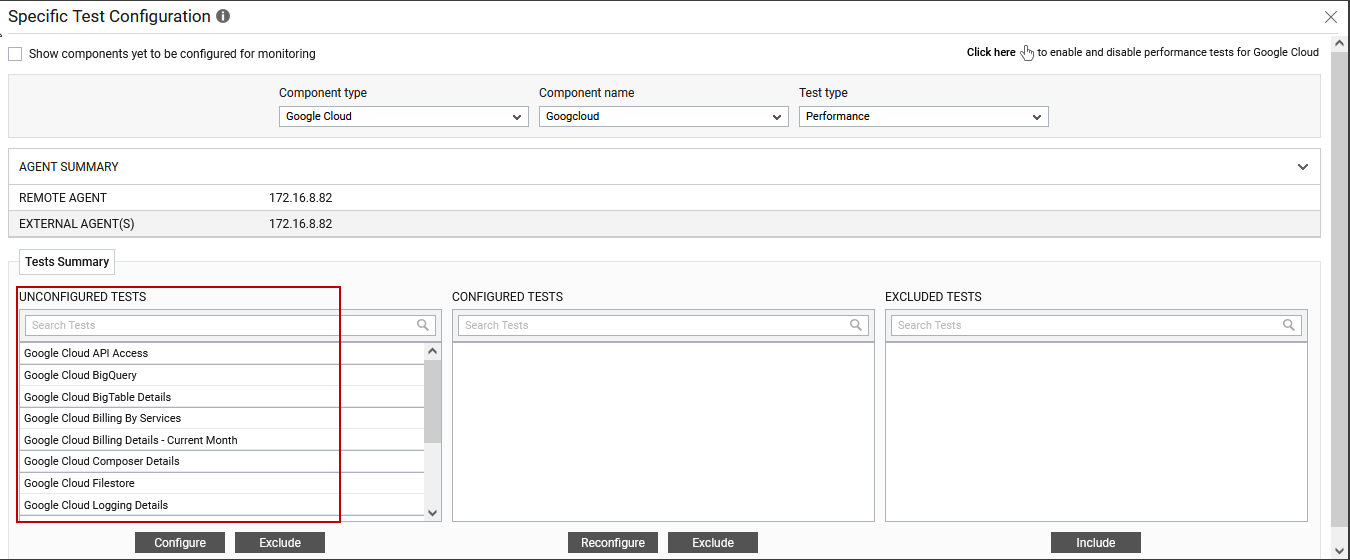
Figure 4 : Selecting the test to be configured
To know how to configure this test, refer to the Google Cloud BigQuery Test topic. Once the test is configured, click on the Update button. All other tests will be automatically configured upon configuring any of the tests. Next, switch to the eG monitor interface to view the measures reported by the configured tests.