Adding the Hadoop Cluster
To achieve this, do the following:
- Login to the eG admin interface.
- Follow the Infrastructure -> Components -> Add/Modify menu sequence.
- In the page that appears next, select Hadoop as the Component type. Then, click the Add New Component button.
-
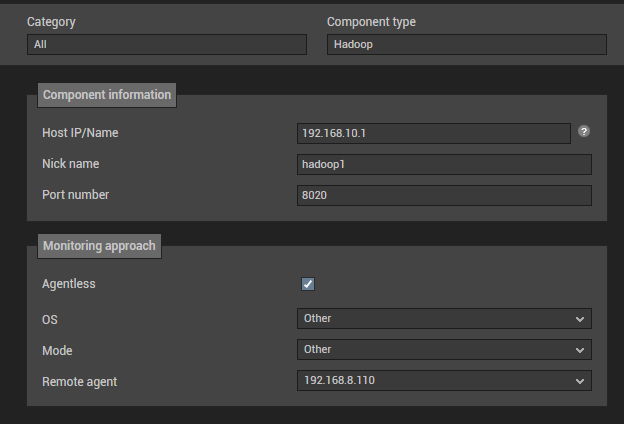
Figure 1 will then appear.
-
In Figure 1, first specify the IP/host name of the NameNode in the cluster against Host IP/Name. To determine the NameNode's IP address, do the following:
- Open the hdfs-default.xml file in the hadoop/conf/app directory.
- Look for the dfs.namenode.http-address parameter in the file.
- This parameter is configured with the IP address and base port where the DFS NameNode web user interface listens on. The format of this configuration is: <IP_Address>:<Port_Number>. Given below is a sample configuration:192.168.10.100:50070
- Configure the <IP_address> in the specification as the Host IP/Name. In the case of the above sample configuration, this will be 192.168.10.100.
-
In the Port number text box, specify the NameNode port that accepts client connections. By default, this is 8020. To determine the correct port, do the following:
- Open the core-default.xml file in the hadoop-2.7.3\share\doc\hadoop\hadoop-project-dist\hadoop-common directory.
- Look for the fs.defaultFS property in the file. The name of the default file system is configured against this property as a URI. This URI's scheme and authority determine the FileSystem implementation. The URI's scheme determines the config property (fs.SCHEME.impl) naming the FileSystem implementation class. The URI's authority is used to determine the host, port, etc. for a filesystem. The port number that is configured as part of this URI, should be specified as the Port number of the NameNode.
- The Agentless flag is enabled by default, as 'agentless' is the default monitoring approach for the Hadoop cluster.
- Do not disturb the default settings of the OS and Mode drop-down lists.
- Then, pick a Remote agent and click the Add button to add the component.
- Once the component is added, click on the Sign out icon in the left, top corner of the interface to exit the eG admin console.