Uploading SNMP MIB Files
By default, tests that monitor the SNMP traps received by the eG manager, display only the OIDs contained within the traps in their detailed diagnosis. Sometimes, for want of clarity, administrators might prefer to include the object names in the detailed diagnosis instead of the OIDs. The first step towards ensuring this is to upload to the eG manager the SNMP MIB files that correspond to the sources of these SNMP traps; these MIB files typically, bear the OID-object name mappings.
In order to enable administrators to upload MIB files, the eG administrative interface provides a delete and upload mib files page. To access this page, use the Alerts -> SNMP Traps -> Upload MIB menu sequence. To upload MIB files using this page, do the following:
-
If no MIB files have been uploaded to the eG manager yet, then the message depicted by Figure 1 will be displayed in the delete and upload mib files page.
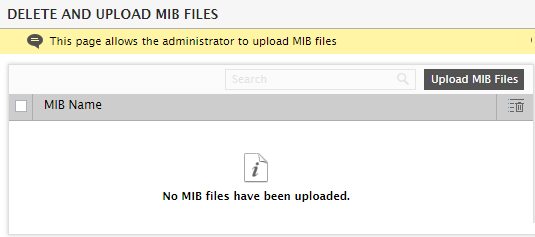
Figure 1 : The DELETE AND UPLOAD MIB FILES page indicating that no MIB files are currently available
- To upload a MIB file, first click on the Upload MIB Files button at the right top corner of Figure 1.
-
Figure 2 will then appear, where you can specify the full path to the MIB file to be uploaded. The Browse button in Figure 2 can be used for quickly locating the MIB file.
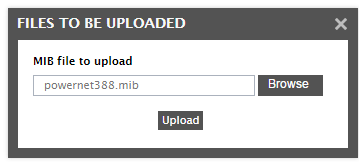
Figure 2 : Specifying the full path to the MIB file to be uploaded
- Then, click the Upload button in Figure 2.
-
If upload is successful, you will return to the delete and upload mib files page, where the newly uploaded file will be listed.
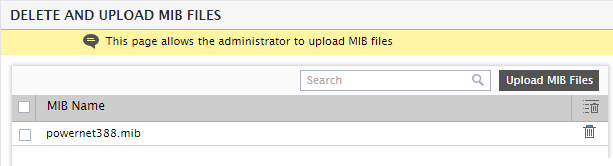
Figure 3 : The MIB file newly uploaded displayed in the DELETE AND UPLOAD MIB FILES page
-
Similarly, multiple MIB files can be uploaded to the eG manager, one after the other (see Figure 4).
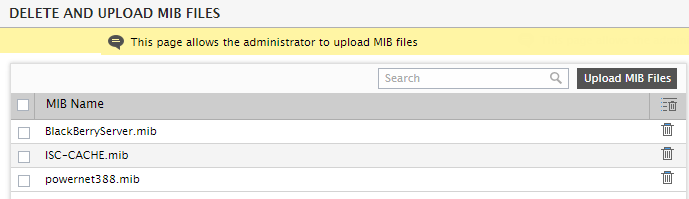
- To delete a MIB file, click on the
 button corresponding to a MIB file in Figure 4. To delete multiple MIB files at one shot, select the check box that precedes each MIB file to mark it for deletion. To mark all MIB files for deletion, click on the check box that precedes the column head MIB Name in Figure 4. Then, click on the
  button corresponding to the column head MIB Name to delete the selection.