Installing the Endpoint Agent
The Endpoint agent a.k.a eG VM Agent can be deployed on the IGEL Endpoints using the following:
-
IGEL App Portal
-
Custom Partitions
Note that IGEL recommends deploying the Endpoint Agents automatically on the IGEL Endpoints using IGEL App Portal if the IGEL Endpoints are installed with IGEL OS 12.
The following sections will discuss in detail on how to install the Endpoint agents using IGEL App Portal and Custom Partitions.
Installing the Endpoint Agent using IGEL App Portal
IGEL OS 12 is a secure, lightweight, and efficient endpoint OS that allows users to access any cloud-delivered digital workspace from any x86-64 device. It makes endpoint devices more secure by separating apps and services from the base OS. You can install and update applications like Citrix, Chromium browser, etc. individually and independently from the IGEL OS base system.
IGEL COSMOS is a powerful EUC platform for secure, managed access to any digital workspace. It includes IGEL 12 endpoint OS, a powerful and easy-to-use management console, and multiple value-added cloud services.
The IGEL App Portal is a cloud service that delivers apps as part of the IGEL COSMOS platform. The IGEL COSMOS Cloud Services and apps are stored in Azure Region West-Europe, Amsterdam.
IGEL enables deployment of Endpoint Agents a.k.a eG VM Agents on IGEL Endpoints installed with IGEL OS 12 through IGEL App Portal.
The broad steps to deploy Endpoint Agents on IGEL Endpoints installed with IGEL OS 12 are as follows:
-
Access IGEL UMS web console
-
Navigate and Open the IGEL App Portal
-
Import eG VM Agent application from App Portal
-
Assign eG VM Agent application to IGEL device profiles in UMS
-
Configure the eG VM Agent application
Let us now discuss in detail on deploying the Endpoint Agents through IGEL App Portal.
-
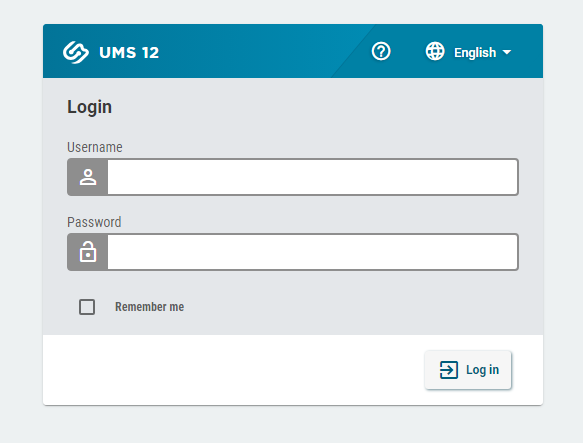
Login to the IGEL UMS web console.
-
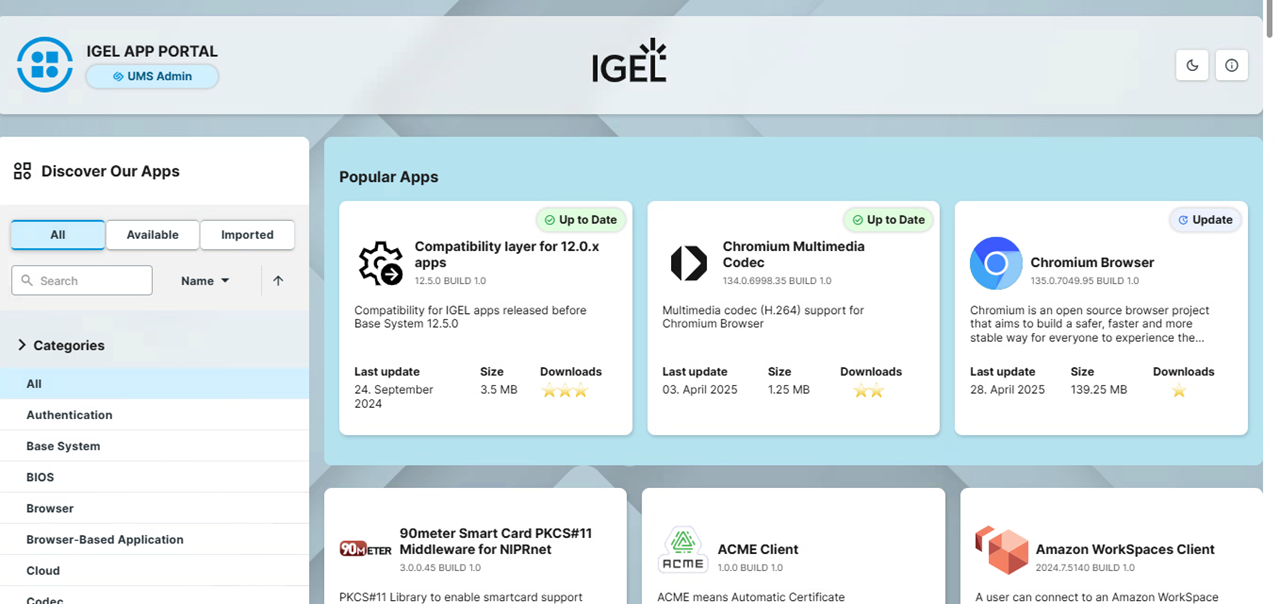
Figure 2 then appears. Here, click the App Portal. The IGEL App Portal is also available directly from: https://app.igel.com/

-
Figure 3 then appears.
-
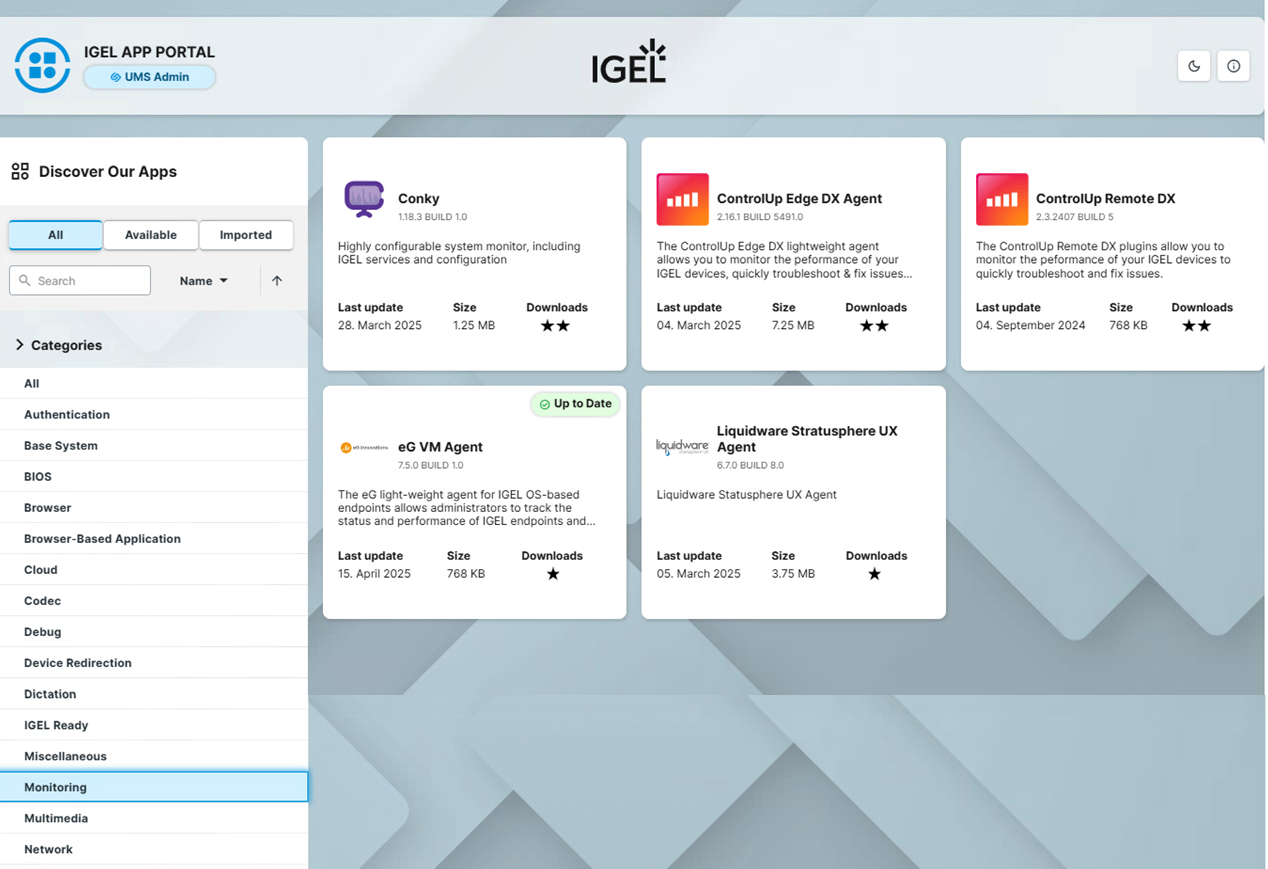
Click the Monitoring option under the Categories section in the left panel of the portal. Figure 4 then appears listing the eG VM Agent application.
-
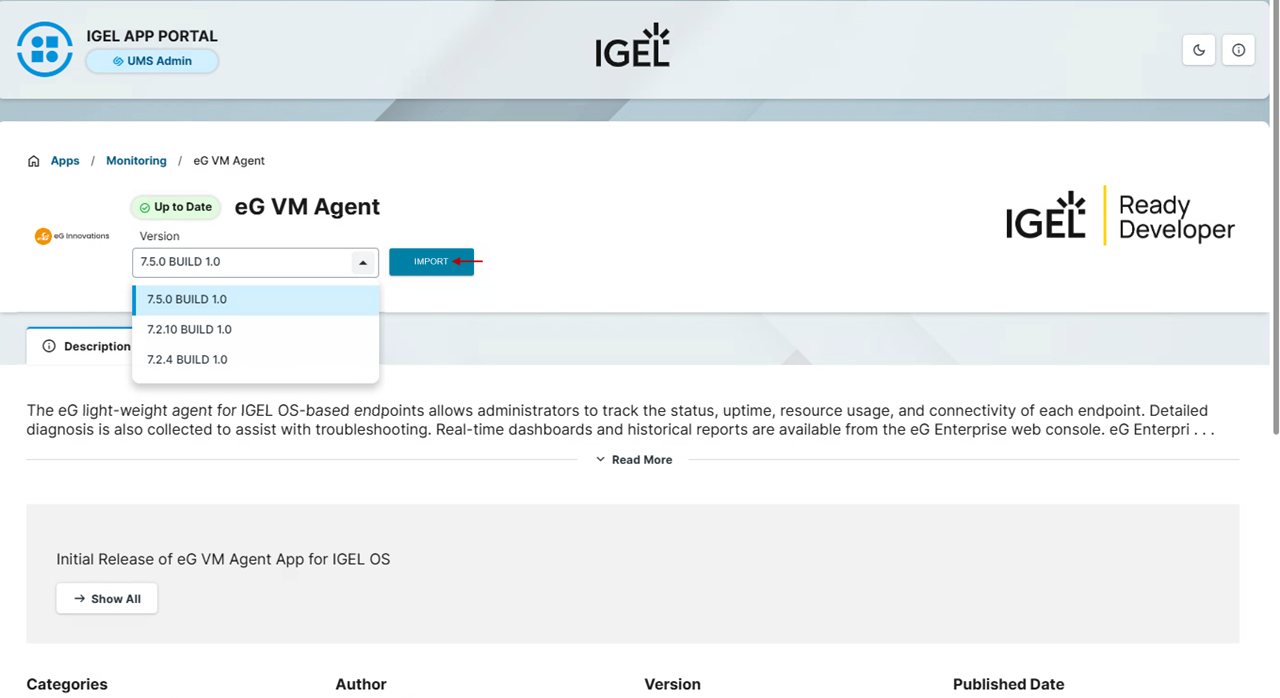
Clicking the eG VM Agent application will reveal Figure 5.
-
The IGEL App Portal supports multiple versions and builds of the eG VM Agent application. Administrators can choose the version of the eG VM Agent that they wish to deploy from the Versions drop down list (see Figure 5). Clicking the IMPORT button in Figure 5 will prompt you to confirm proceeding with the import as shown in Figure 6.
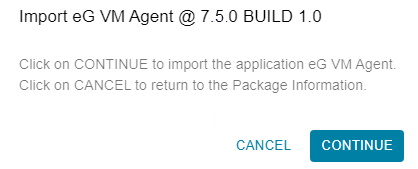
Figure 6 : Continue with importing the chosen version of application
-
As soon as you click the Continue button in Figure 6, the eG VM Agent application is imported.
-
To verify if the eG VM Agent application is imported successfully, you can navigate to the Apps tab of the IGEL UMS web console and check for the eG VM Agent application as shown in Figure 7.
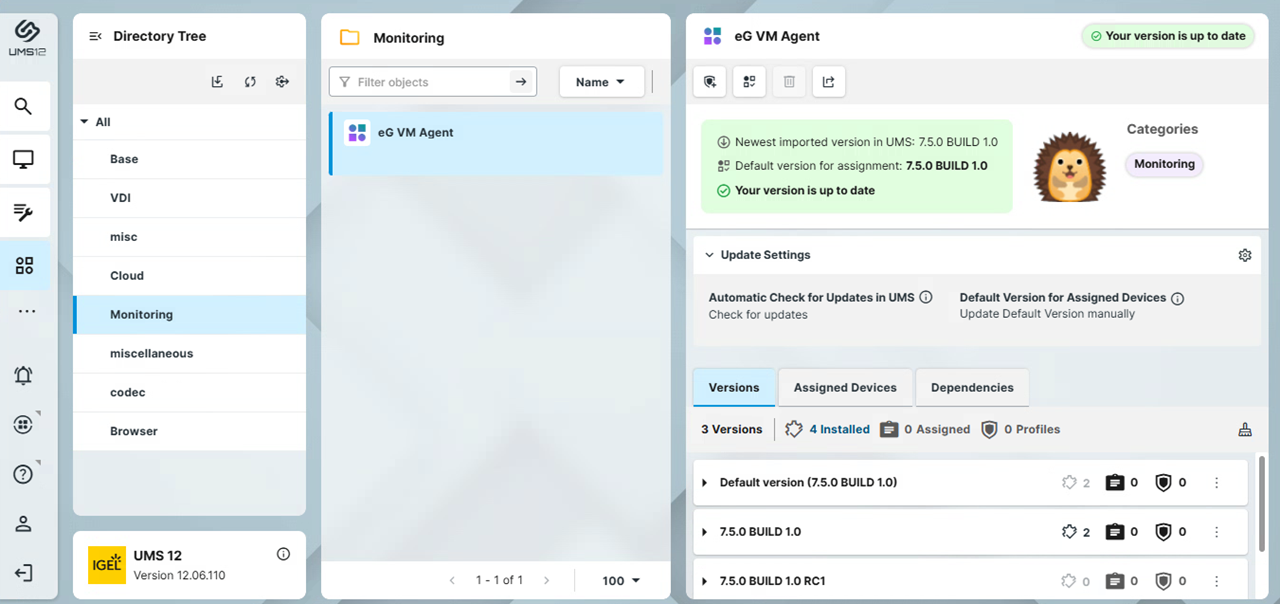
Figure 7 : Verifying the import of the eG VM Agent application
-
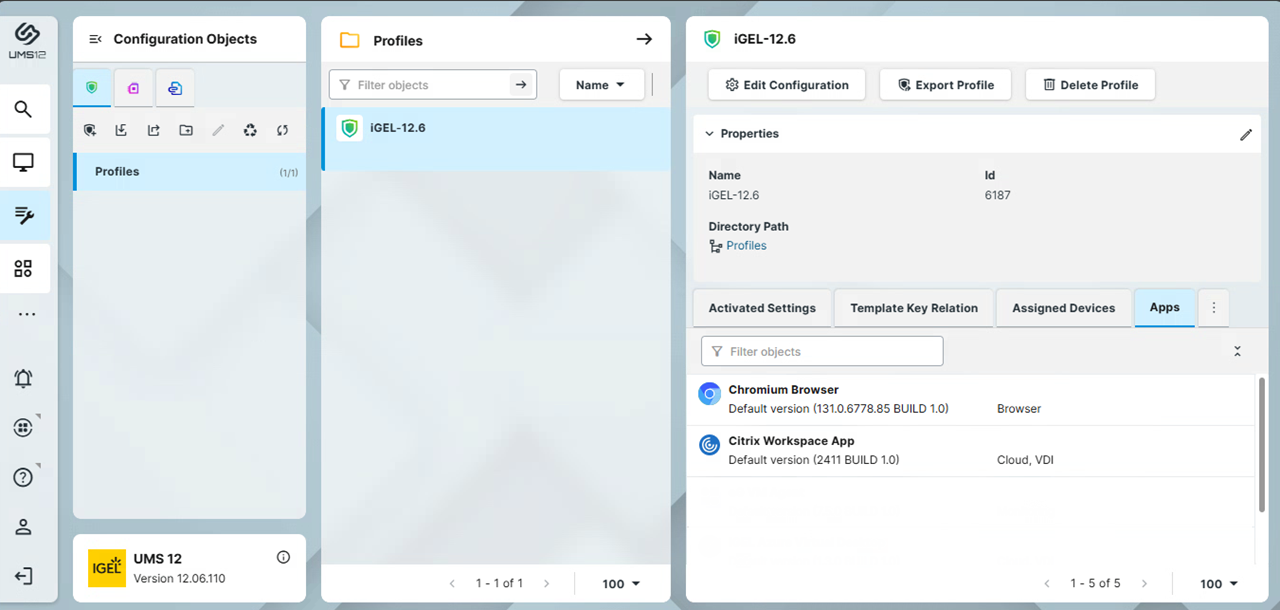
Next, navigate to the Profiles section in the Configuration tab of the IGEL UMS web console. For easy management, many IGEL Endpoints are grouped in to a Profile. You can choose to deploy the eG VM Agent to all the IGEL Endpoints in a Profile at a single shot.
-
Select the Profile of your interest in Figure 8 and click the Edit Configuration button.
-
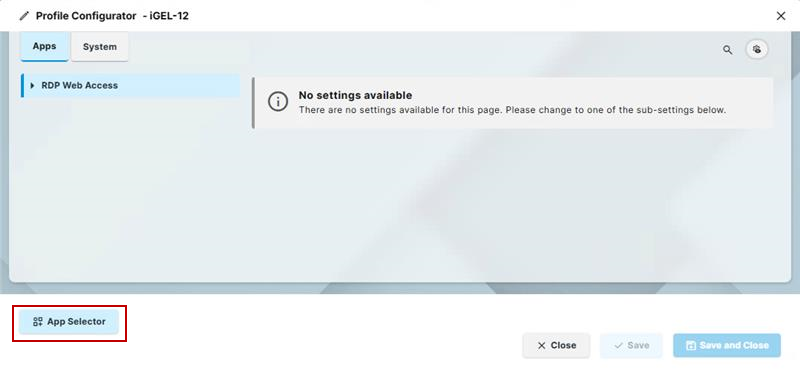
Figure 9 then appears. Click the App Selector button.
-
Figure 10 then appears. Select the eG VM Agent and click the Save button.
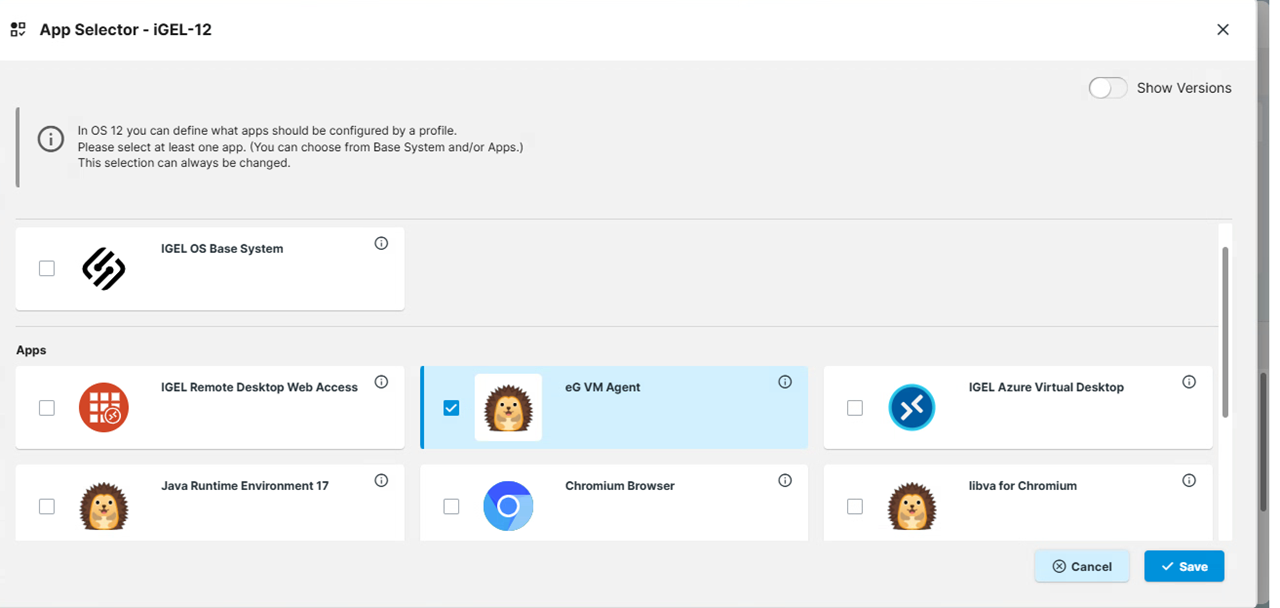
Figure 10 : Selecting the imported eG VM Agent
This will ensure that all IGEL Endpoints mapped to this profile will get the eG VM Agent application automatically.
-
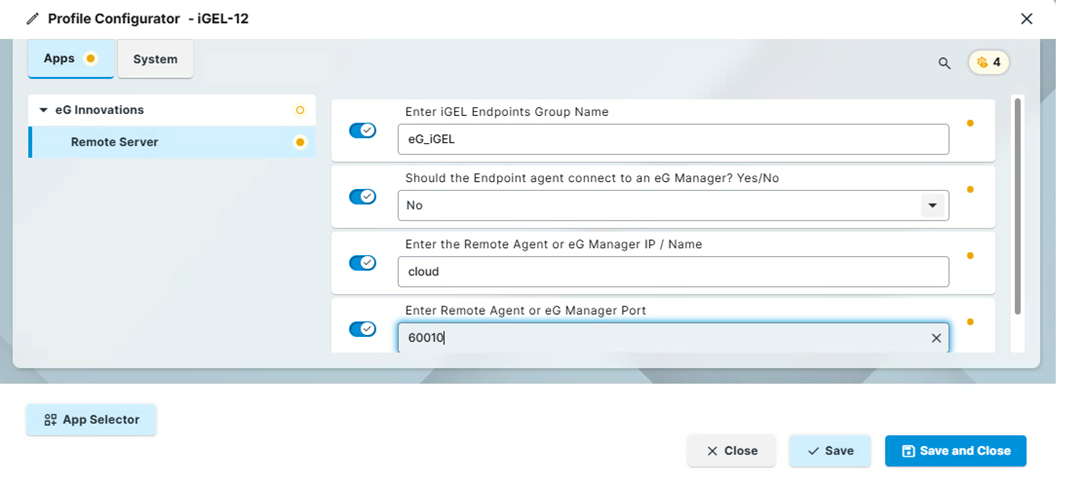
Next, navigate to the Profile Configurator page as shown in Figure 11.
-
In Figure 11, configure the eG VM Agent application as follows:
-
Enter IGEL Endpoints Group Name: Specify the name of the component in eG Enterprise to which the eG VM Agent should report to.
-
Should the Endpoint agent connect to an eG Manager? Yes/No: Specify Yes if the Endpoint agent or the eG VM Agent should connect to the eG Manager directly to report metrics. By default, No is chosen indicating that the Endpoint agent communicates with the eG remote agent to send the collected metrics.
-
Enter the Remote Agent or eG Manager IP/Name: If you have chosen to direct the eG VM Agent to communicate the metrics to the eG Manager, then specify the IP address or the host name of the eG Manager. If you have chosen to direct the eG VM Agent to communicate the metrics to the eG remote agent, then, specify the name of the eG remote agent.
-
Enter Remote Agent or eG Manager Port: Here, specify the port used by the remote agent or the eG manager for communication with the eG VM Agent, as the case may be.
Clicking the Save button will ensure that this configuration is automatically applied to all the IGEL Endpoints in this Profile.
-
-
Soon after this, the IGEL Endpoints component managed by eG Enterprise will start reporting metrics relevant to the IGEL Endpoints that are included in the scope of monitoring.
Installing the Endpoint Agent using Custom Partitions
IGEL Custom Partition is a feature that allows users to implement custom scripts, apps, and other files to one or more devices running the IGEL OS. IGEL enables deployment of a third-party tool such as eG enterprise through these Custom partitions in the IGEL UMS web console provided the devices are running on IGEL OS 10/11. Using this feature, a separate partition is created in each IGEL endpoint that is connected to the UMS server. To deploy the Endpoint Agent on each IGEL Endpoint managed by the IGEL UMS and where the eG manager is directly accessible to the IGEL Endpoints, follow the steps mentioned below:
-
Open a browser and access the following URL:
https://www.eginnovations.com/releases/v7210
In the page that appears, click the Additional Products folder. In the page that then appears, click the iGEL Agent v11 folder. From this folder, download the files relevant to the Endpoint agents and their setup information (eGvmagent_igel.bz2 and eGagent_IGEL.inf) to any host in the target environment.
-
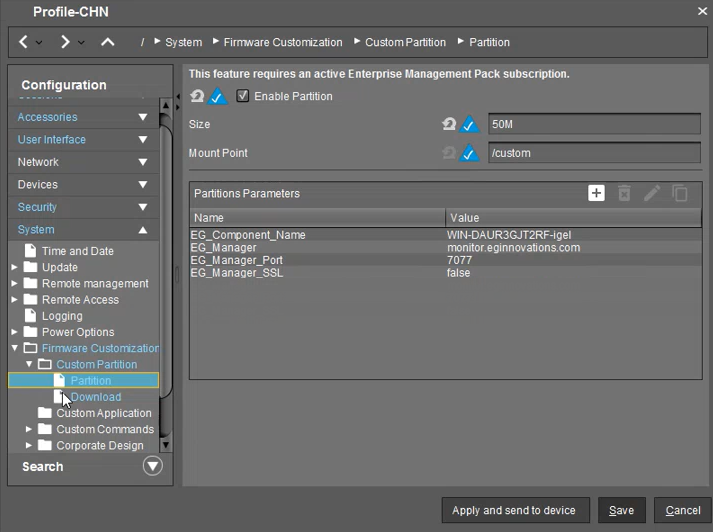
In the IGEL UMS web console, first, specify the name of the partition and the size of the partition as shown in Figure 12.
-
Then, in the Partition Parameters section (see Figure 12), add the name of the IGEL Endpoints component, the host name/IP address of the eG manager on which the IGEL Endpoints component is managed, the port number and whether the eG Manager is SSL-enabled or not. Your parameter specification should be in the following format:
Name Value EG_Component_Name
<name of the component>
EG_Manager
<IP address or host name of the eG manager>
EG_Manager_Port
<port number of the eG manager>
EG_Manager_SSL
true/false
Note:
-
The entities specified in the Name column are case-sensitive. Please ensure that you use the same specification mentioned in the above table while adding them in the Partitions Parameter section.
-
The value specified against EG_Manager_SSL in the above table is case-senstive. Therefore, please ensure that your value (true/false) is in lower case.
-
- Click the Apply and send to device button to save the partition parameters and send them to the IGEL Endpoint. The custom partition will now be automatically created on each IGEL Endpoint.
-
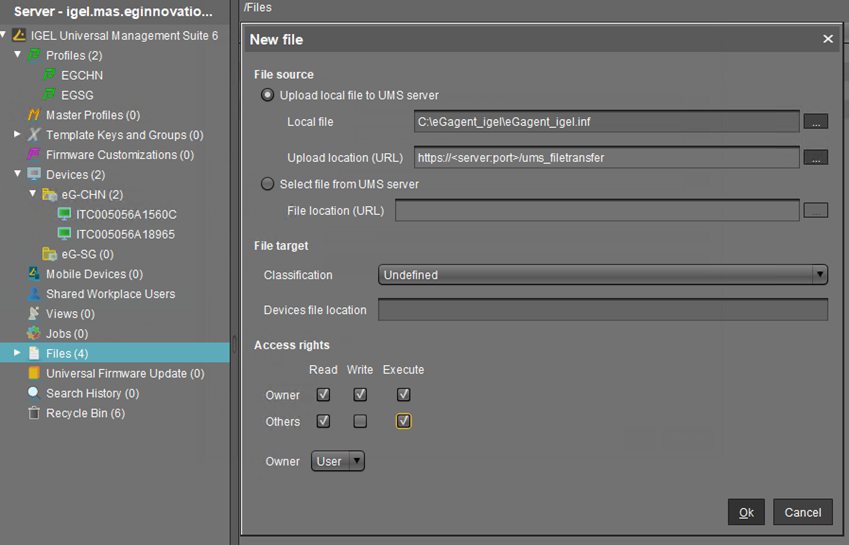
Once the custom partition is created, you need to upload the downloaded files relevant to the Endpoint Agent to a location in the IGEL UMS. Note that this is applicable only for the IGEL Endpoints that are directly managed by the IGEL UMS.
-
eGvmagent_igel.bz2 - This file is the actual Endpoint agent file

-
eGagent_IGEL.inf - This file contains information relevant to the Endpoint Agent such as name of the Endpoint Agent, size of the Endpoint Agent etc.
-
-
After you successfully upload the files as shown in Figure 13 and Figure 14, you need to specify the exact URL using which the IGEL Endpoints should download the Endpoint Agent from the IGEL UMS web console (see Figure 15). For this, you need to navigate through the System -> Firmware Customization -> Custom Partition -> Download menu sequence in the IGEL UMS web console. Also, you need to specify the credentials of the user who is authorized to download these files from IGEL UMS. Ensure that this user possesses WebDAV access (ums-filetransfer) permission.
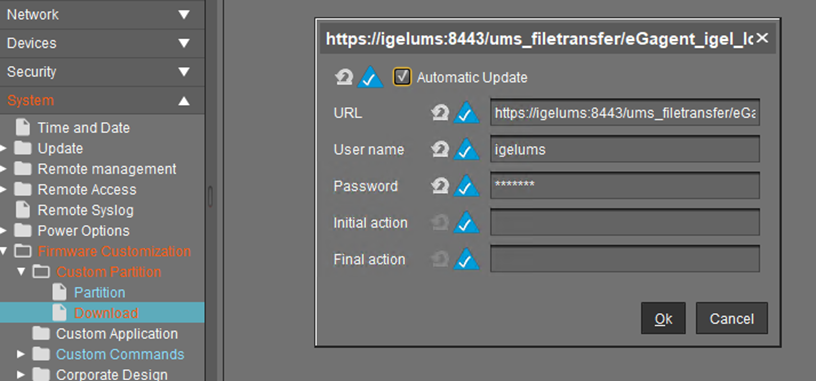
Figure 15 : Specifying the agent files for download by the IGEL Endpoints
-
If the IGEL Endpoints connect to the IGEL UMS through IGEL Cloud Gateway, then, you are allowed to upload the eGvmagent_igel.bz2 and eGagent_IGEL.inf files to a web server that can be accessed by the IGEL Endpoints. For this, specify the exact location of the uploaded eGagent_IGEL.inf file in the web server in the URL text box. Specify the credentials of the user who is authorized to access the web server.
-
Now, in order to collect metrics from the Endpoint Agent without interruption, you need to execute the igel_vmagent.sh script by issuing the following command to automatically start the Endpoint Agent. The Endpoint Agent will be started soon automatically after that agent is downloaded by the IGEL Endpoint and whenever the IGEL Endpoint is rebooted.
/bin/sh /custom/egvmagent/bin/igel_vmagent.sh
This command should be specified in the Final network command list box (see Figure 16) that appears when you navigate through the menu sequence: System -> Firmware Customization -> Custom Partition -> Custom Commands -> Network in the IGEL UMS web console.
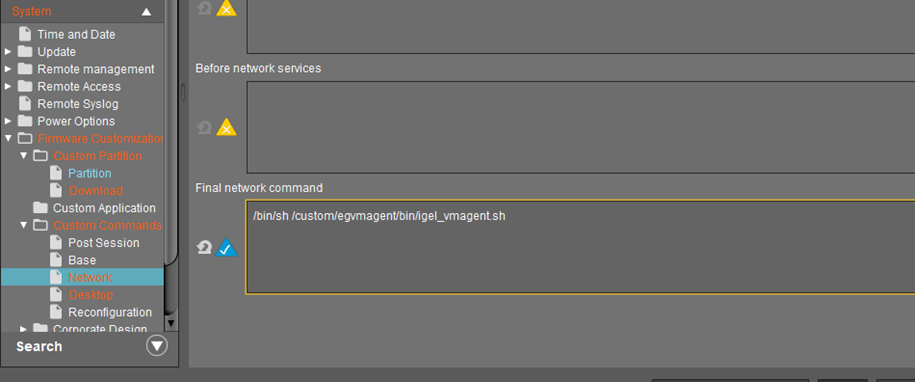
Figure 16 : Specifying the command to execute the script file
- Once the Endpoint Agents are started, the IGEL Endpoints component managed by eG Enterprise will start reporting metrics relevant to the IGEL Endpoints that are included for monitoring by the target component.
Alternately, if the users from a remote location access IGEL Endpoints registered on IGEL UMS via IGEL Cloud Gateway i.e., if the Endpoint Agent could not connect to the eG manager directly, then, follow the steps mentioned below to deploy the Endpoint Agent:
-
In the IGEL UMS web console, first, specify the name of the partition and the size of the partition as shown in Figure 12.
-
Then, in the Partition Parameters section (see Figure 17), specify the name of the IGEL Endpoints component, the IP address of the remote agent to which the Endpoint Agent should communicate to and the port number of the remote agent.
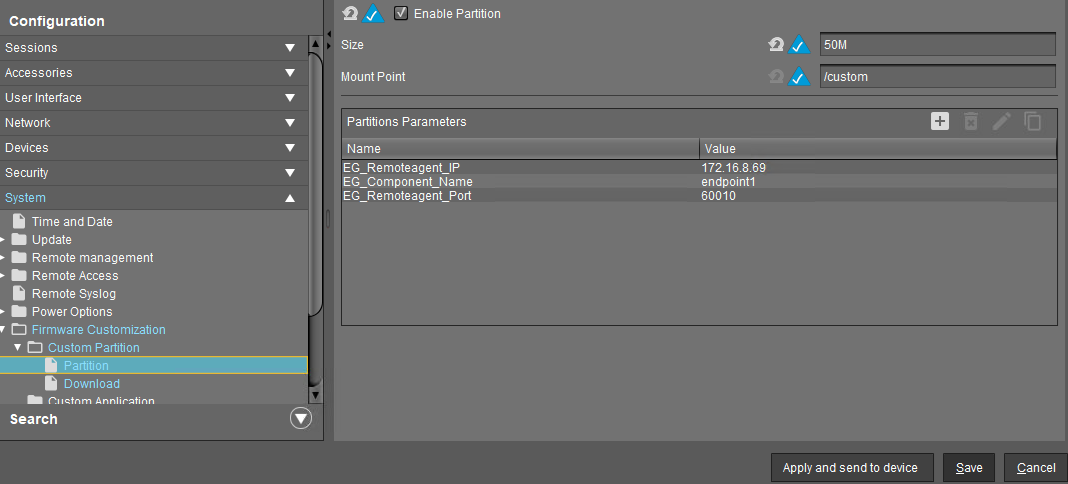
Figure 17 : Specifying the Partition Parameters when eG manager is inaccessible
-
Click the Apply and send to device button to save the partition parameters and send them to the IGEL Endpoint. The custom partition will now be automatically created on each IGEL Endpoint.
-
As soon as the Custom partition is created, the Endpoint Agents will be deployed and the IGEL Endpoints component managed by eG Enterprise will start reporting metrics relevant to the IGEL Endpoints that are included for monitoring by the target component.