Pre-requisites for monitoring an Intersystems Cache Database Server
While the eG agent extracts some of these critical statistics from the SNMP MIB of Cache (e.g., metrics related to free space in the database, buffer usage, ECP application and data servers, etc.), for a few other key metrics (e.g., metrics related to the console log, resource seizes, lock counts, etc.) the agent executes the cstat utility that is provided with Cache. This utility, which is available in the install directory of a Cache instance, provides a wealth of information about the running Cache system.
Where the eG agents needs to contact the SNMP MIB for performance data, make sure that the Windows SNMP service is installed and started either automatically or manually on the Cache host. In addition, ensure the following:
- The Cache Monitoring Service should be enabled. The steps for enabling this service are explained in the Configuring the Intersystems Cache Database to work with the eG Agent.
- Activate critical SNMP base classes, so that eG agent can monitor some of the most significant aspects of Cache performance
- Configure the Cache SNMP agent to start automatically at Cache startup
Configuring the Intersystems Cache Database to work with the eG Agent
-
Follow the steps given below to enable the Cache Monitoring Service:
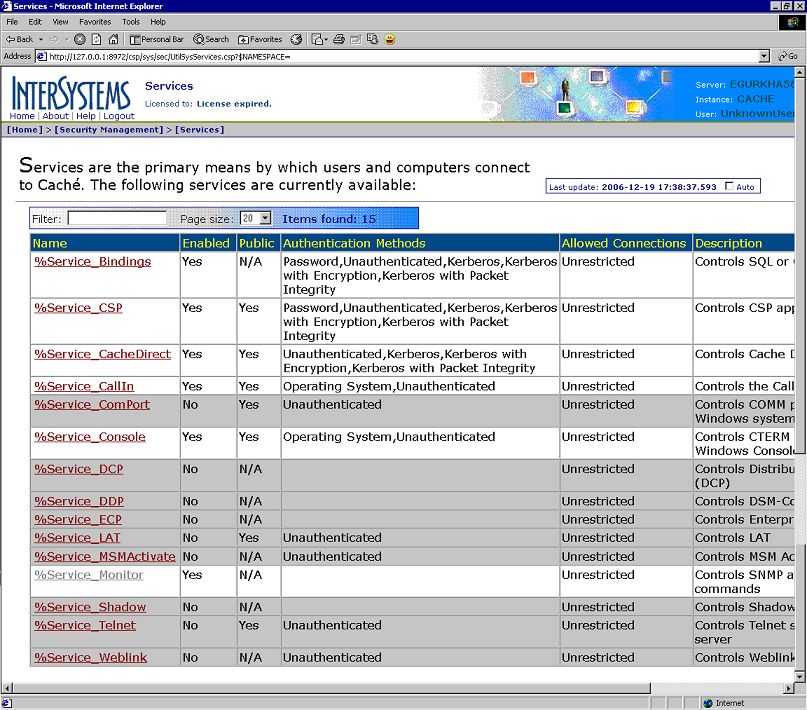
- Navigate to the Home -> Security Management -> Services page of the System Management Portal.
-
Click the %System_Monitor service in the Services page (see Figure 2).
-
Figure 3 then appears. The Service enabled check box will be deselected, by default. Click on the check box to select it and click the Save button to register the changes.
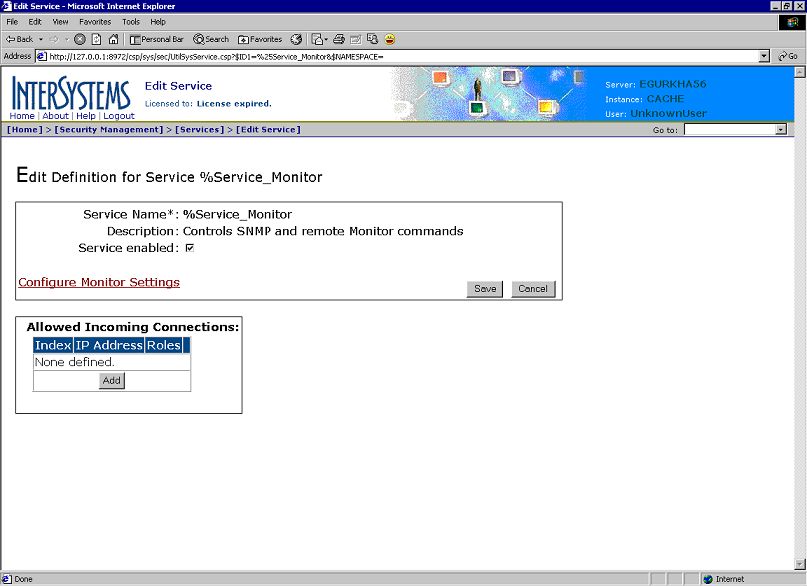
- You will then return to the Services page, where you can verify whether the %System_Monitor service is enabled or not.
-
To enable the SNMP base classes that monitor critical aspects of Cache performance, do the following:
- Start the Cache Terminal
-
From the command prompt of the Terminal, issue the command, do ^%cd, to switch to a different namespace.
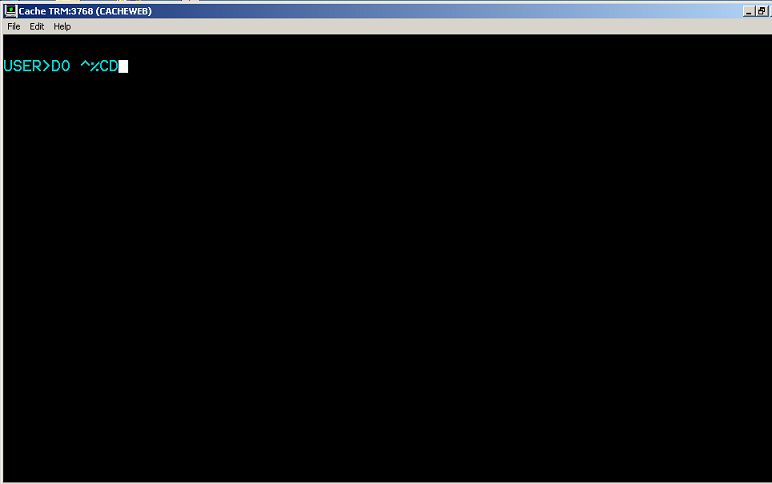
Figure 4 : Switching to a different namespace
-
You will now be prompted for a namespace. Type %sys therein.

Figure 5 : Specifying the Namespace to switch to
-
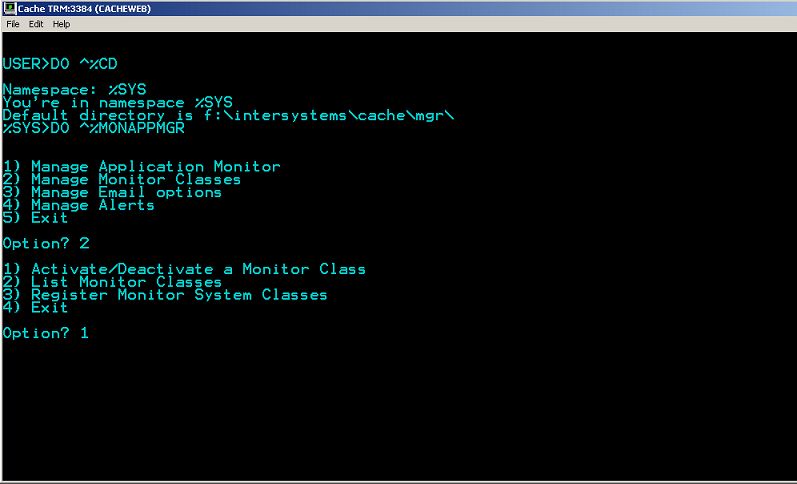
Execute the routine %MONAPPMGR as indicated by Figure 6.

-
Upon execution, the routine requests you to select from 4 options. Select the Manage Monitor Classes option, by pressing 2.
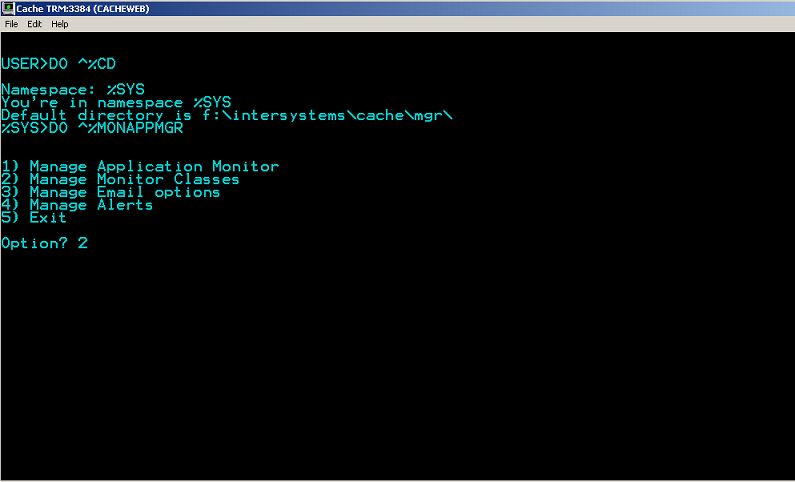
Figure 7 : Selecting the Manage Monitor Classes option
-
You will now be prompted to choose the action that you want to perform on the Monitor Classes. Since we need to activate a monitoring capability (i.e., Freespace monitoring), select the Activate/Deactivate a Monitor Class option, by pressing 1 (see Figure 8).
-
When prompted for the monitor class to activate/deactivate, specify %Monitor.System.Freespace as indicated by Figure 9. This class monitors the free space on every Cache database.
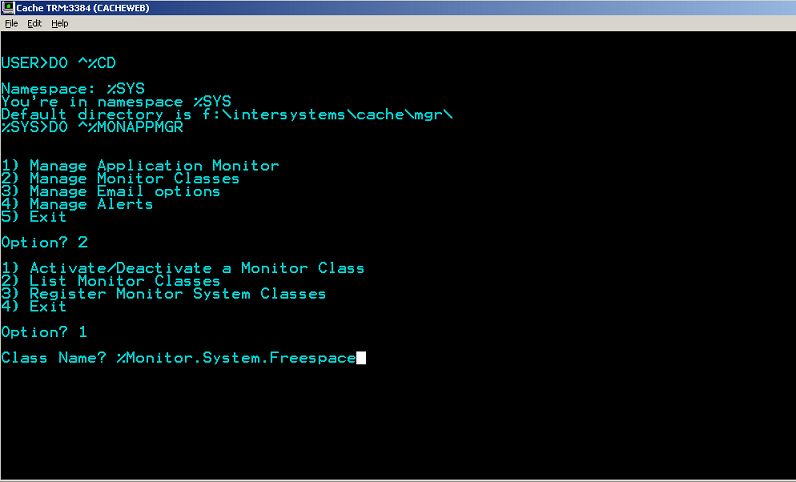
Figure 9 : Specifying the name of the class to activate/deactivate
-
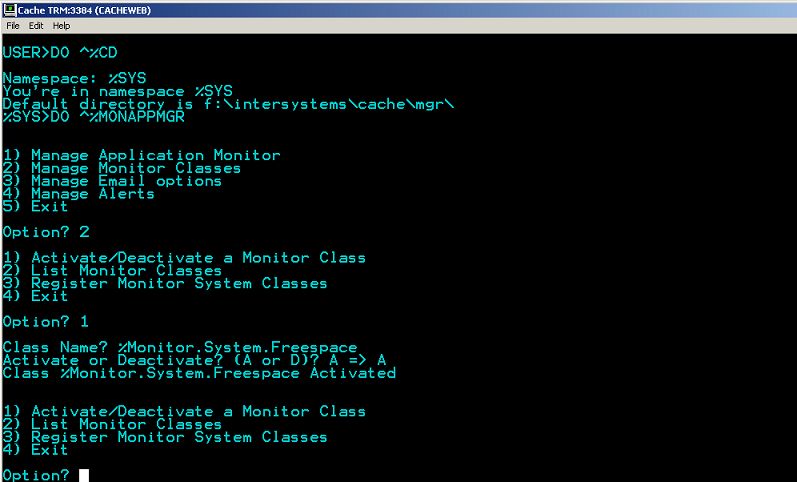
Then, choose to Activate the %Monitor.System.Freespace class by pressing a (see Figure 10).
-
Upon successful activation, a message to that effect will be displayed, followed by a list of options. Press 1 this time to activate another class.
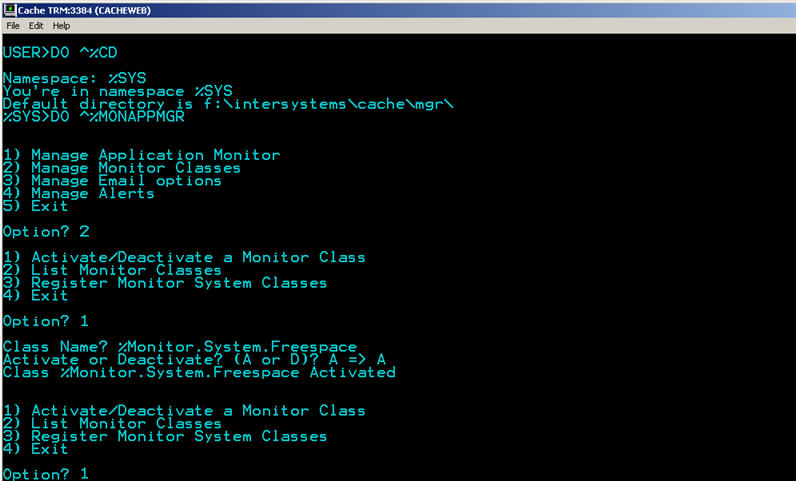
Figure 11 : Selecting another class for activation
-
This time, activate the %Monitor.System.Database class so as to enable Cache database monitoring (see Figure 12).
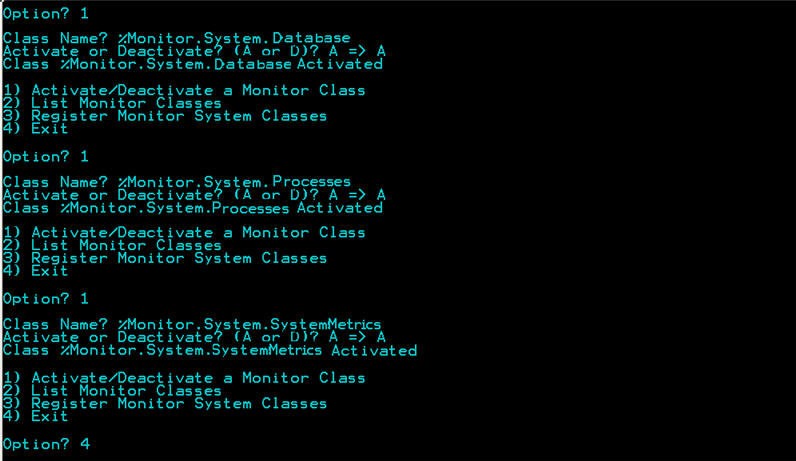
Figure 12 : Activating the Database, Processes, and SystemMetrics class
- Subsequently, activate the %Monitor.System.Processes and %Monitor.System.SystemMetrics classes (see Figure 12), so that the eG agent is able to extract Cache process-related metrics and system-related metrics.
- Finally, exit the Cache Terminal by selecting option number 4 as indicated by Figure 12.
-
To configure the SNMP sub-agent to start automatically on startup, do the following:
-
Navigate to the Home -> Configuration -> Monitor Settings page of the System Management Portal (see Figure 13).

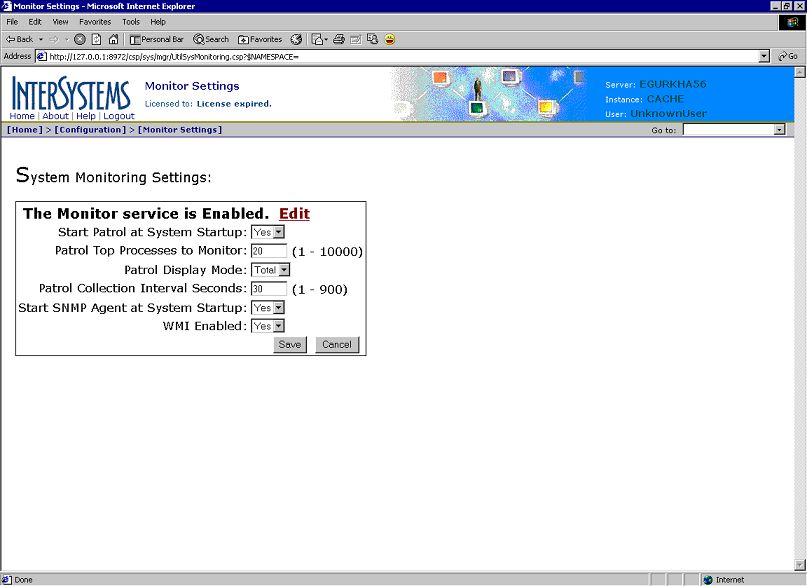
Figure 13 : The Monitor Settings page of the System Management Portal
-
Set the Start SNMP Agent at System Startup flag to Yes (see Figure 14), and click the Save button to register the changes.
- Next, start the Cache Terminal.
- From the command prompt of the Terminal, issue the command, do ^%cd, to switch to a different namespace.
-
You will now be prompted for a namespace. Type %sys therein, as only this namespace is vested with the right to start the SNMP agent service.
NAMESPACE: %SYS
-
The namespace then changes to %sys.
Default directory is d:\cache\cachesys\mgr\
%SYS>
-
Next, execute the routine that would start the SNMP agent.
DO start^SNMP(705,20)
-
Once the SNMP agent starts successfully, the eG agent gathers the required statistics from the SNMP MIB, and reports the performance data so collected to the eG manager.
On the other hand, where the eG agent needs to execute cstat for collecting the required metrics, you need to ensure that the corresponding tests are configured with the exact Cache instance name and the correct path to that instance's home directory.