Creating a User with Administrator Privileges
To achieve this, follow the steps explained below:
- Login to the JEUS7 WebAdmin console.
-
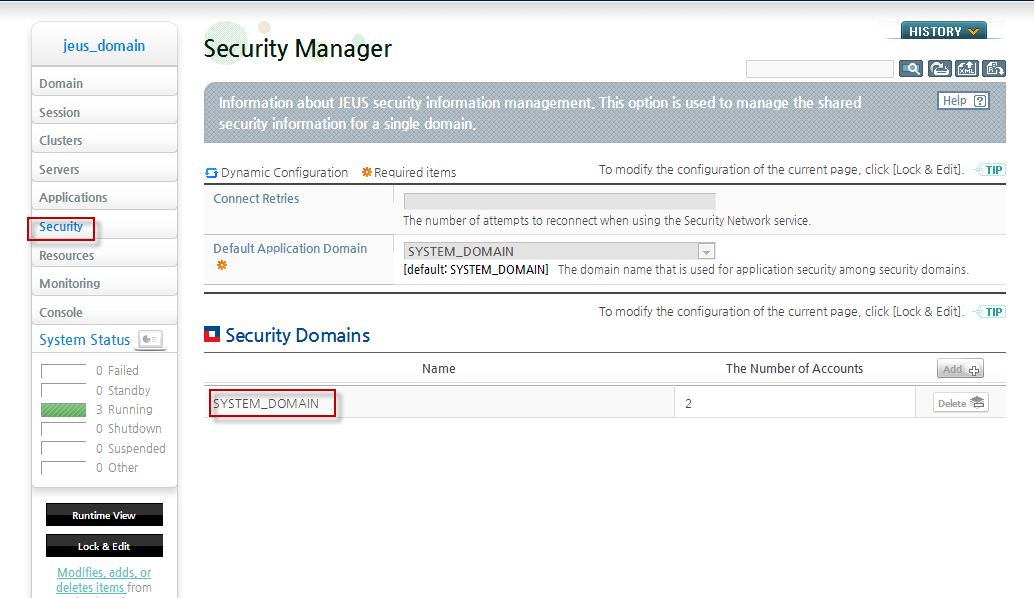
In Figure 14 that appears, click on the Security option in the left panel. This will open the Security Manager screen in the right panel. Then, click on the default application domain under the Security Domains section.
-
In Figure 15 that appears, click on the Accounts and Policies Management tab.
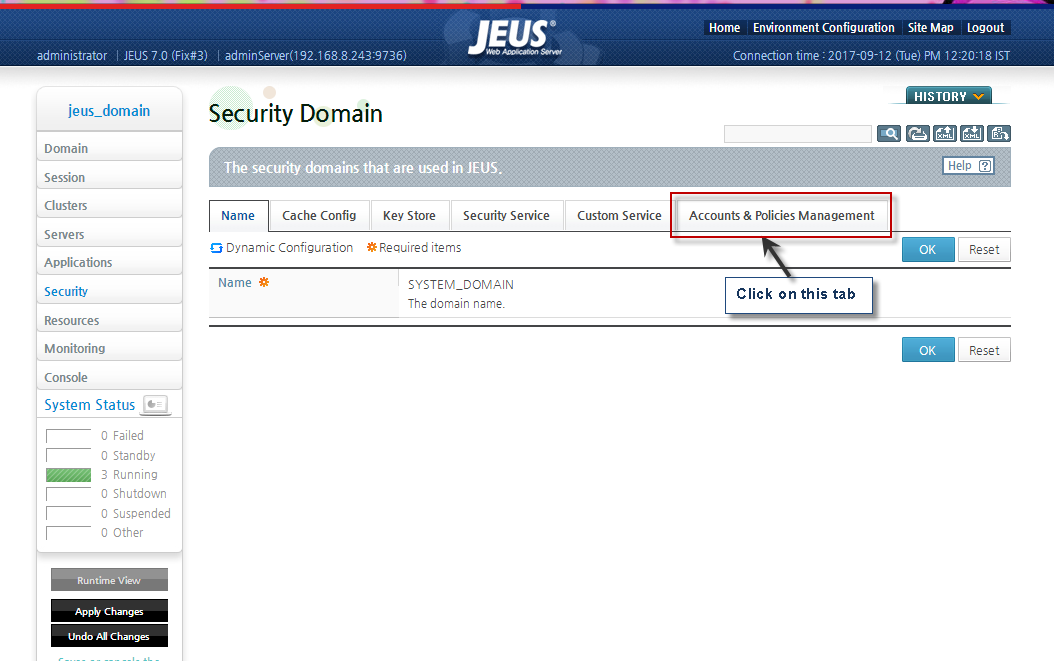
Figure 15 : Clicking on the Accounts & Policies Management tab
-
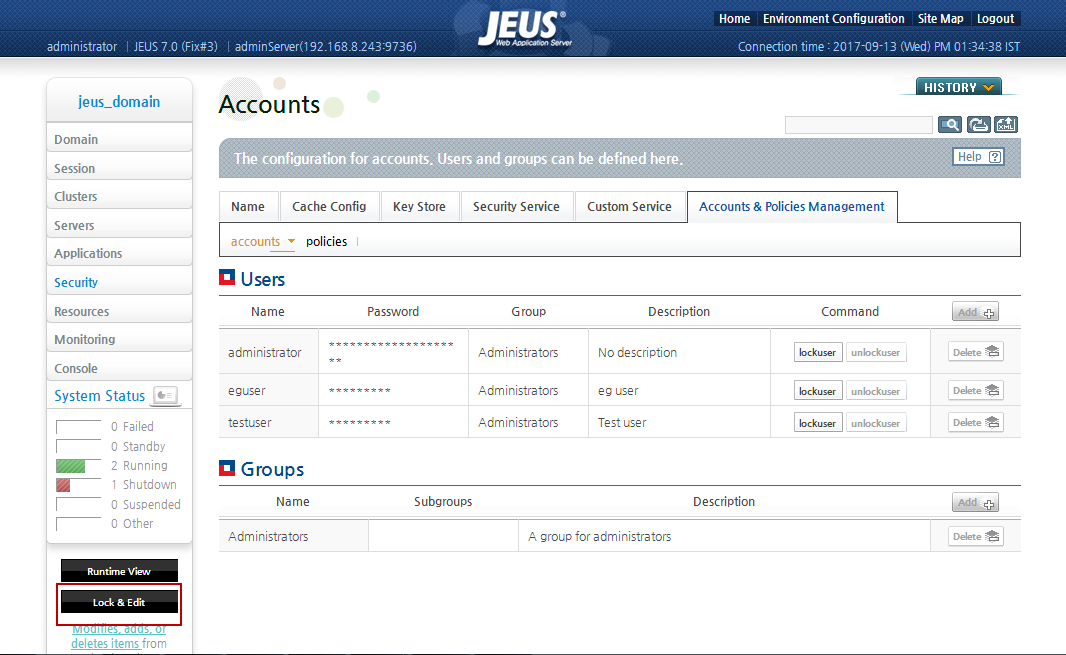
Figure 16 Will then appear. By default, this page is non-editable. To edit this page, you should click on the Lock & Edit button that appears in the left panel.
-
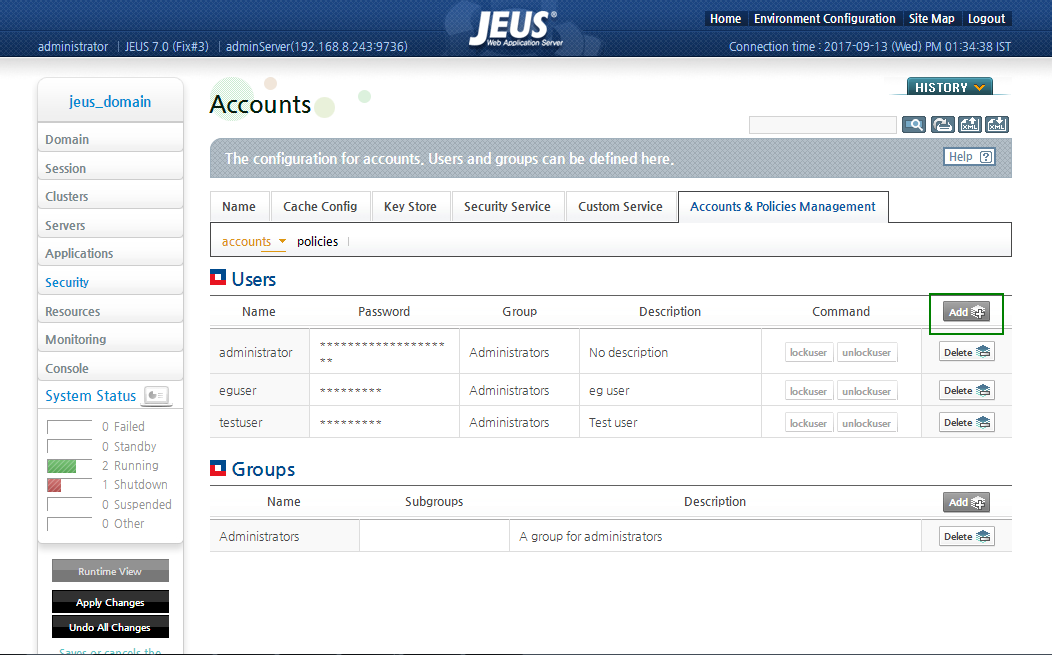
Now, click on the Add button to create a new user as shown in Figure 17.
-
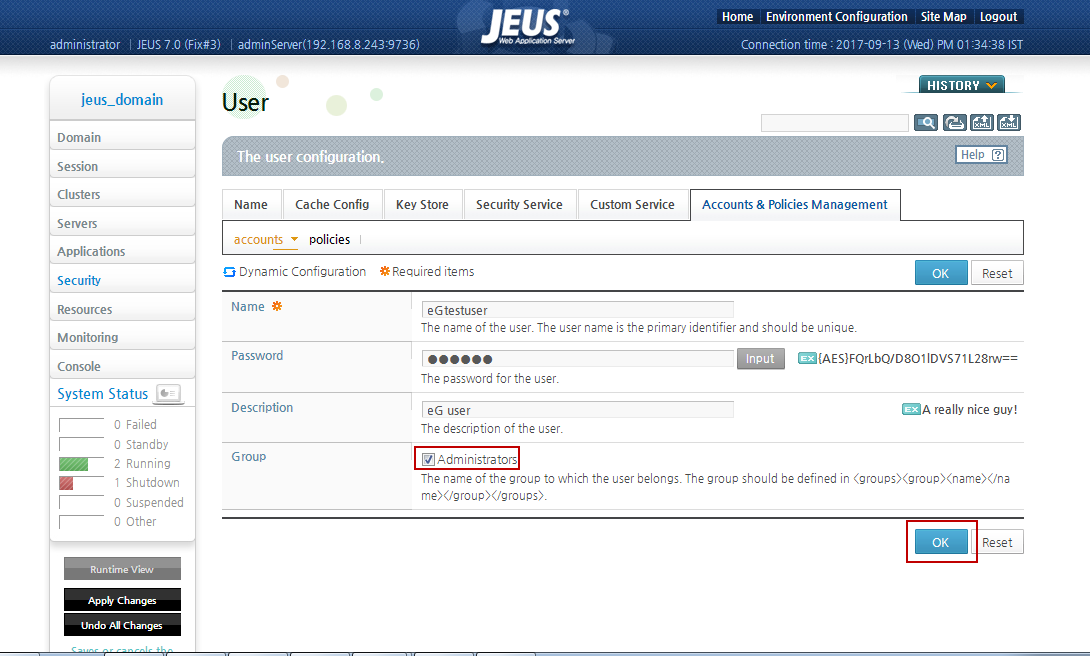
In Figure 18 that appears, specify credentials for a user in the Name and Password text boxes. and enter a brief description about the user in the Description text box.
-
In this case, clicking the Input button to the right of Password text box will invoke Figure 19. Here, the user password can be set as follows:
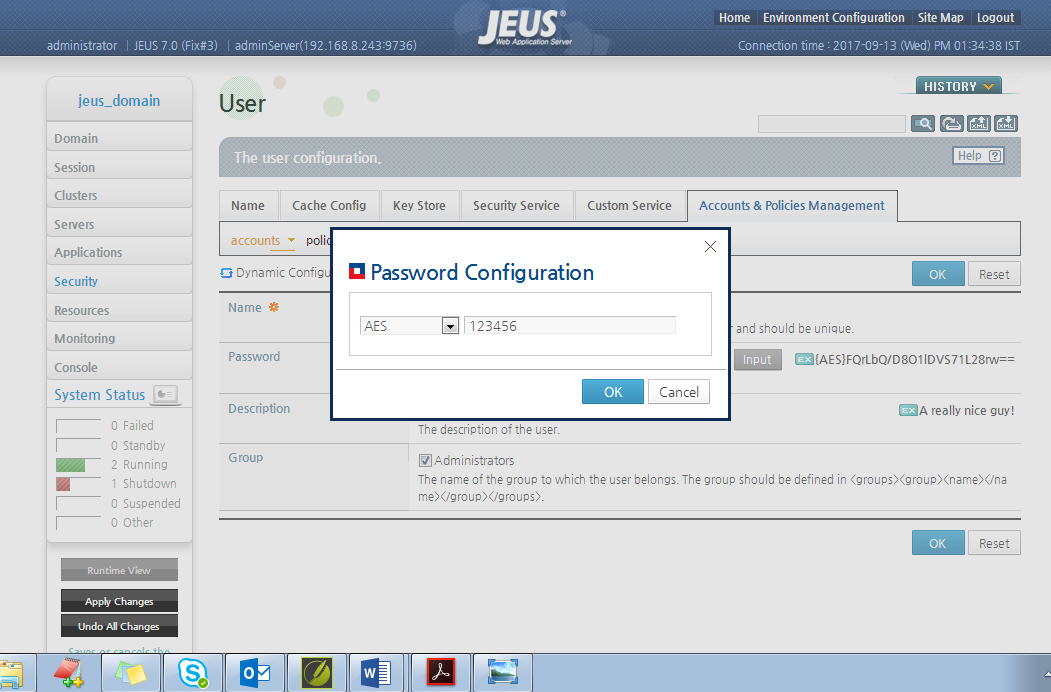
Figure 19 : Configuring the user password
- Select an encryption algorithm to encrypt the password using the drop down list.
- Then, specify the Password for the user and click ok.
When the password configuration is complete, the user password will be encrypted by the specified algorithm.
- To have access to all the resources on the target server, the user should be a part of the Administrators group. For this, select the Administrators check box as shown in Figure 18 such that the user will have the administrator privileges on the target server. Therefore, the eG agent will be able to access the JNDI objects on the target server and periodically track the critical performance metrics of the server.
-
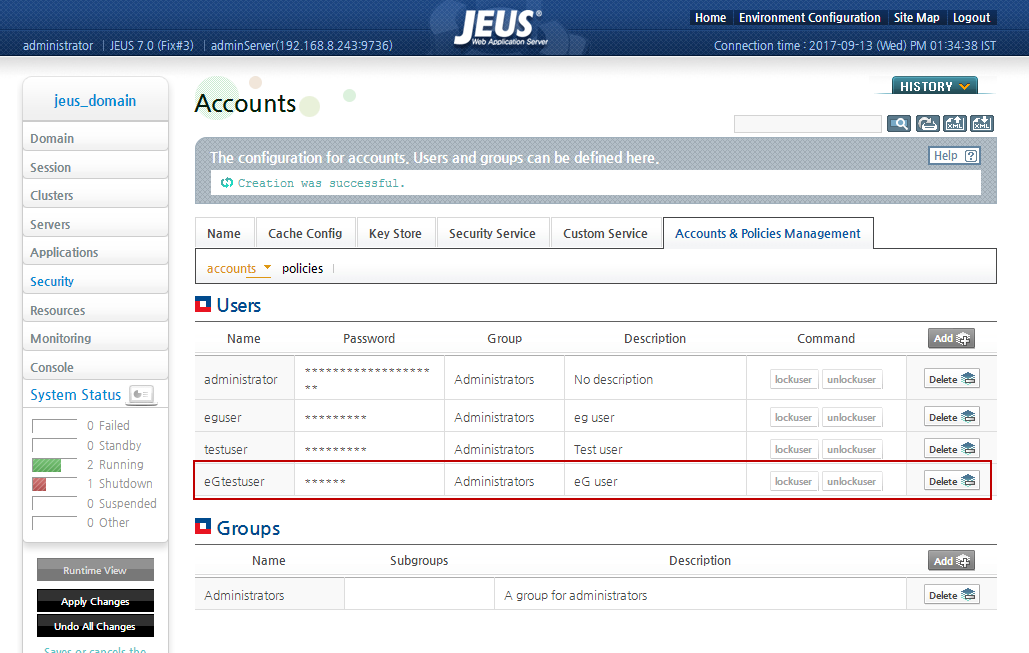
Finally, click ok to complete the configuration of the new user. Figure 20 will then appear listing the newly created user in the Users section.
Note:
The credentials of this user should be specified against the username and password text boxes while configuring the tests pertaining to the target server.