Enabling JMX Support for the JEUS Web Application Server
To enable JMX support for the JEUS web application server, follow the steps discussed below;
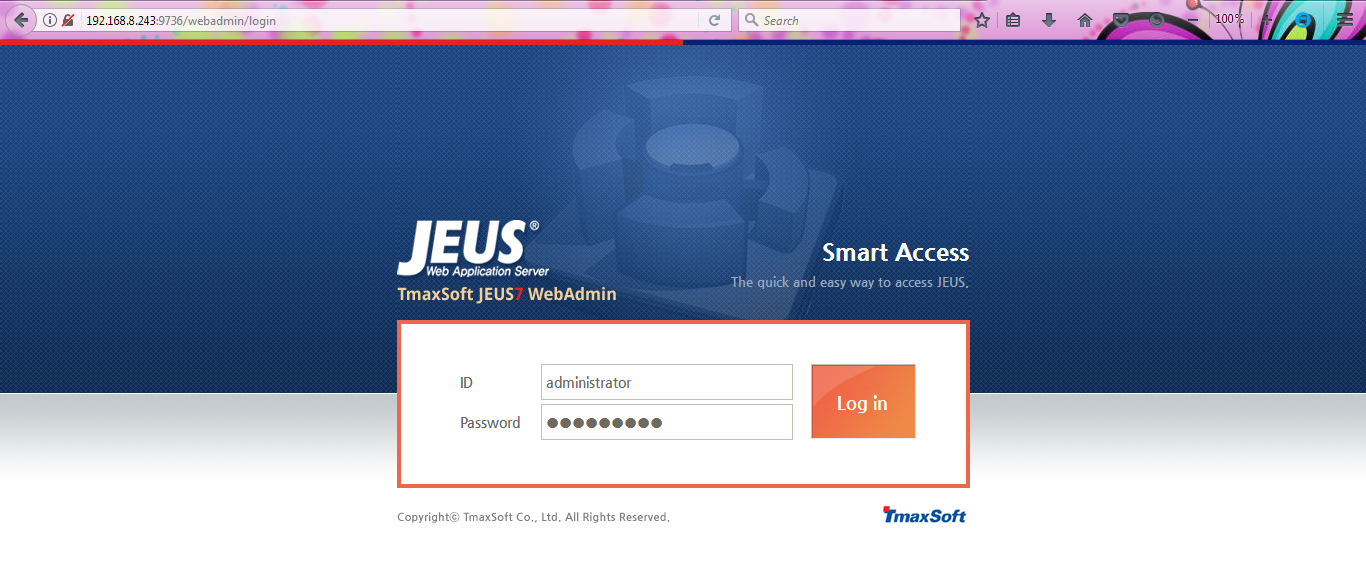
- Connect to the admin server of the JEUS web application server using the following URL: http:\\<Admin_server_IP>:<AdminServerPort/webadmin/login
-
In Figure 1 that appears, enter the credentials to login to the JEUS7 WebAdmin console.
-
Upon successful login, the JEUS7 WebAdmin console will appear as shown in Figure 2.
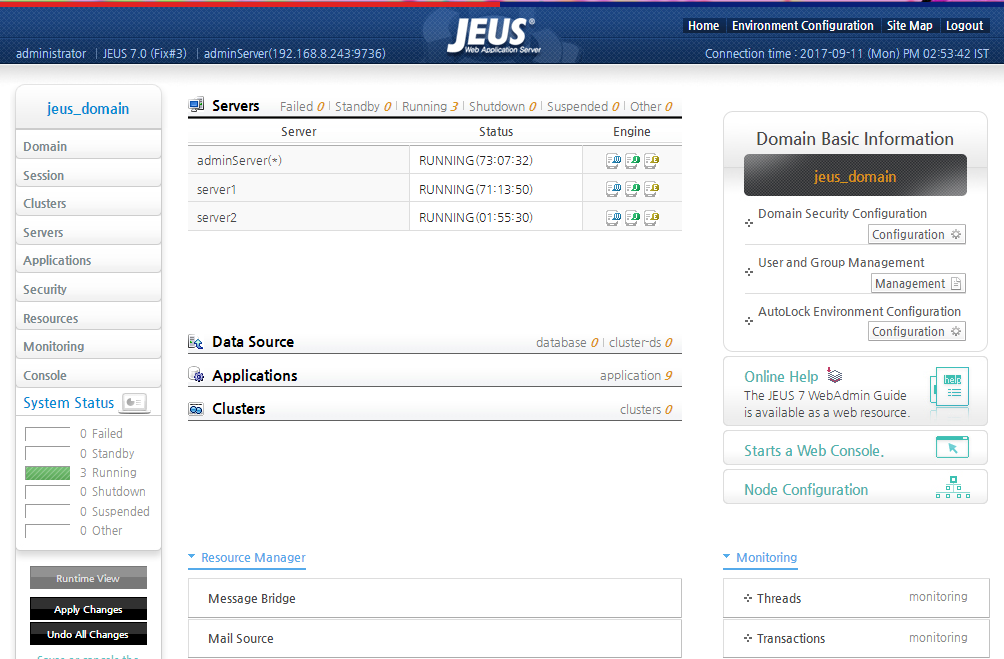
Figure 2 : The administration console of the JEUS Web Application Server
-
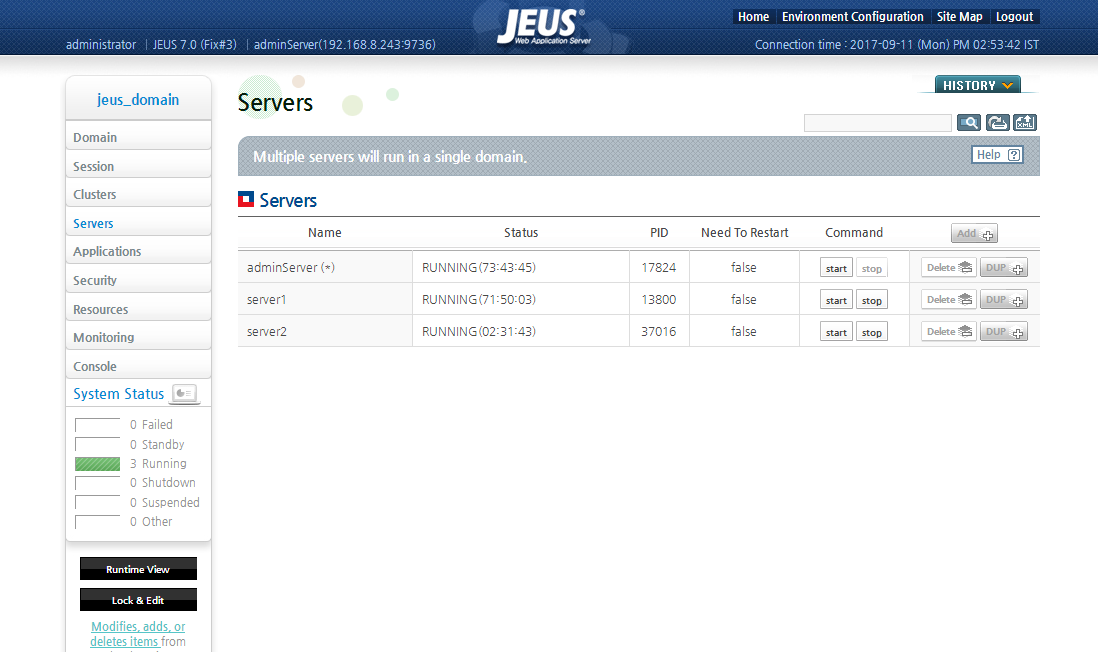
From the left panel of Figure 2, choose the Servers option. This will invoke Figure 3.
-
In the Servers page that appears, the list of servers that were created by the administrator will be displayed. From the list, click on the name of the server for which the JVM monitoring should be enabled and click on the Lock & Edit button in the left panel to modify configuration details. Doing so, will open the Server screen containing the configuration parameters as shown in Figure 4.
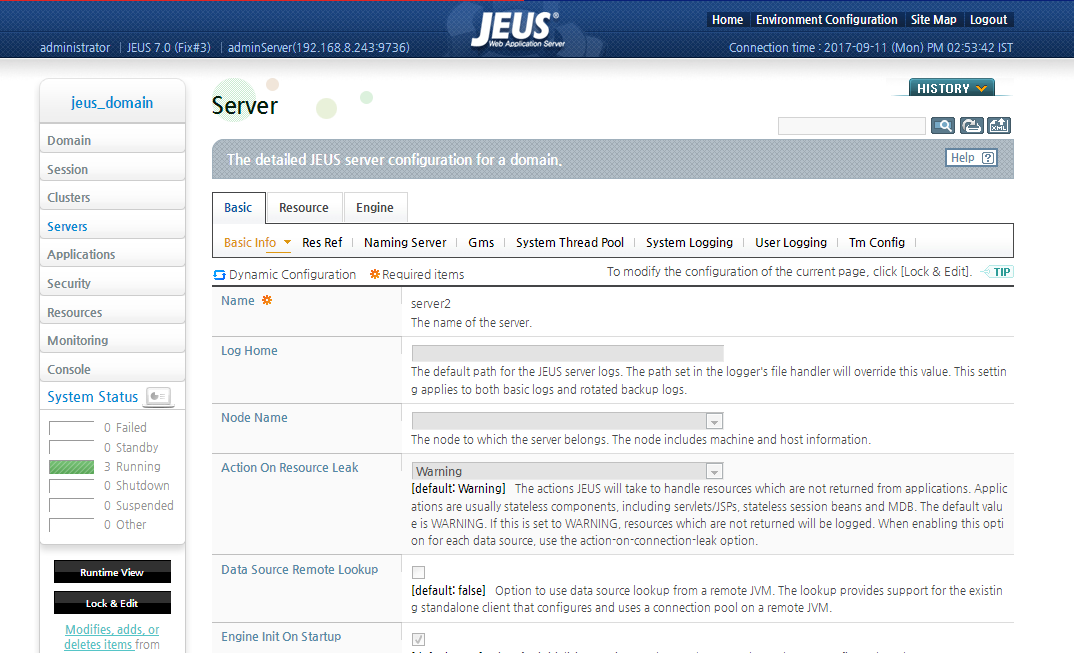
Figure 4 : The detailed JEUS Configuration for a domain
Note that the name of the server for which the JVM monitoring is enabled should be specified against the SERVERNAME parameter in the Specific test configuration page of the eG administrative interface.
-
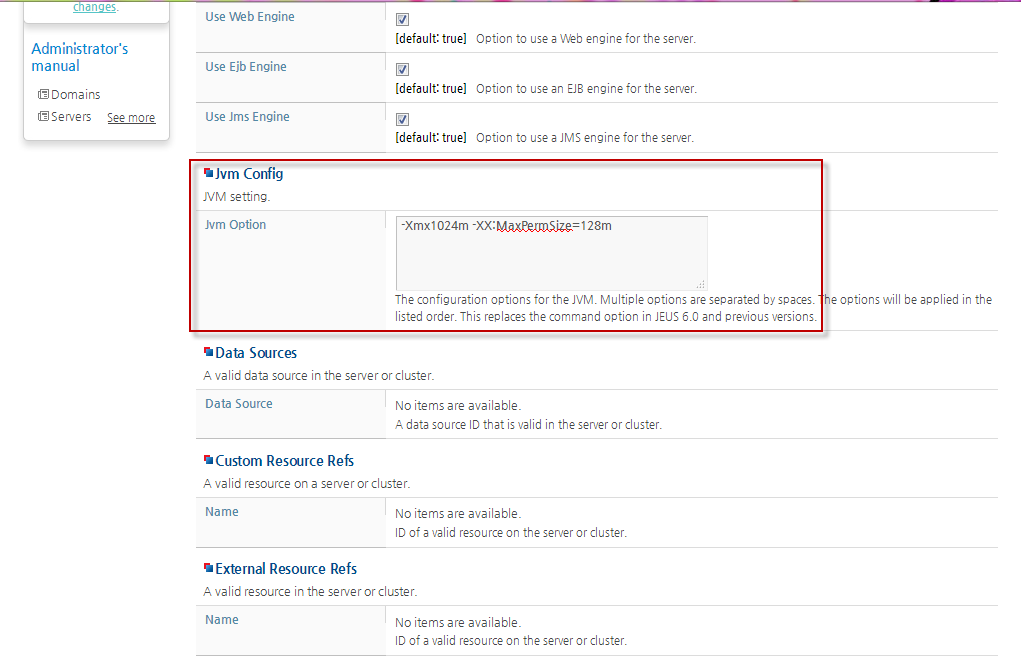
Next, check for the JVM Config details in the Server screen (see Figure 5).
-
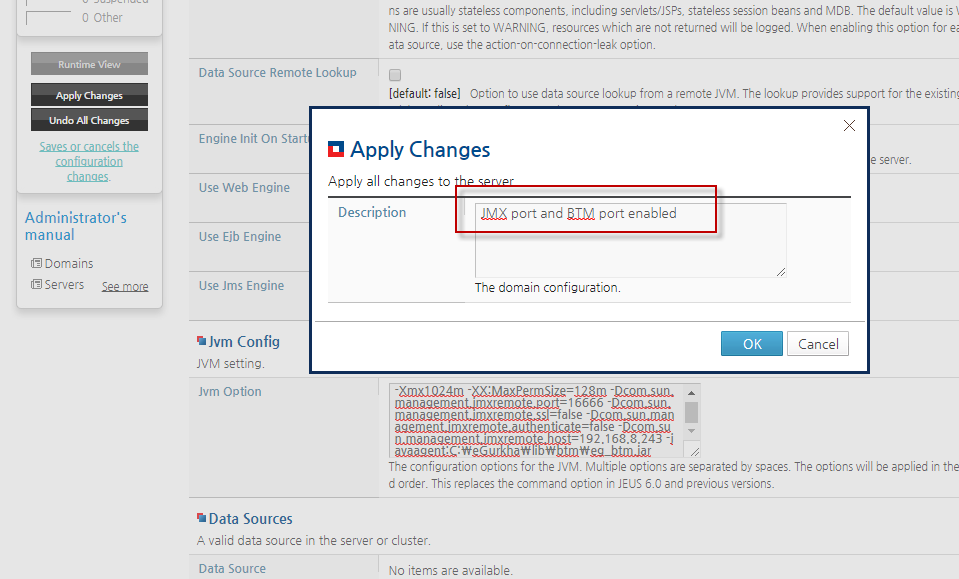
In the JMX Option text box of the JVM Config section, append the lines given below:
-Dcom.sun.management.jmxremote.port=16666
-Dcom.sun.management.jmxremote.ssl=false
-Dcom.sun.management.jmxremote.authenticate=false
-Dcom.sun.management.jmxremote.host=192.168.8.243Here,
JMX Port is 16666,
JMX Remote host is 192.168.8.243
- Finally, click OK button to save the JMX configuration changes.
-
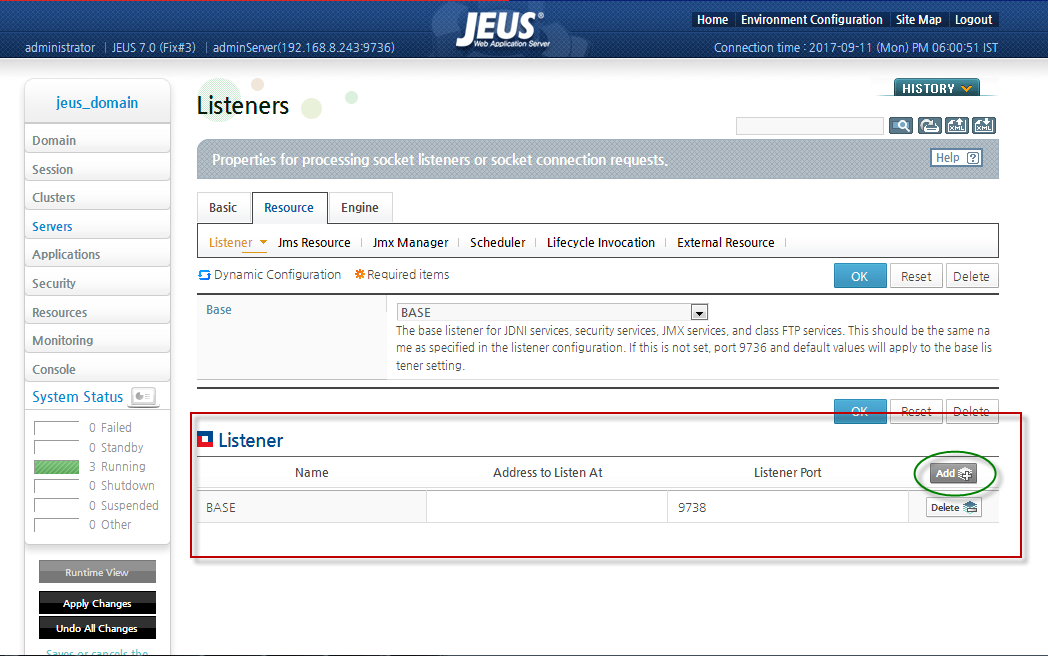
Next, click on the Resource tab in the Servers page. This will invoke the Listeners page.
-
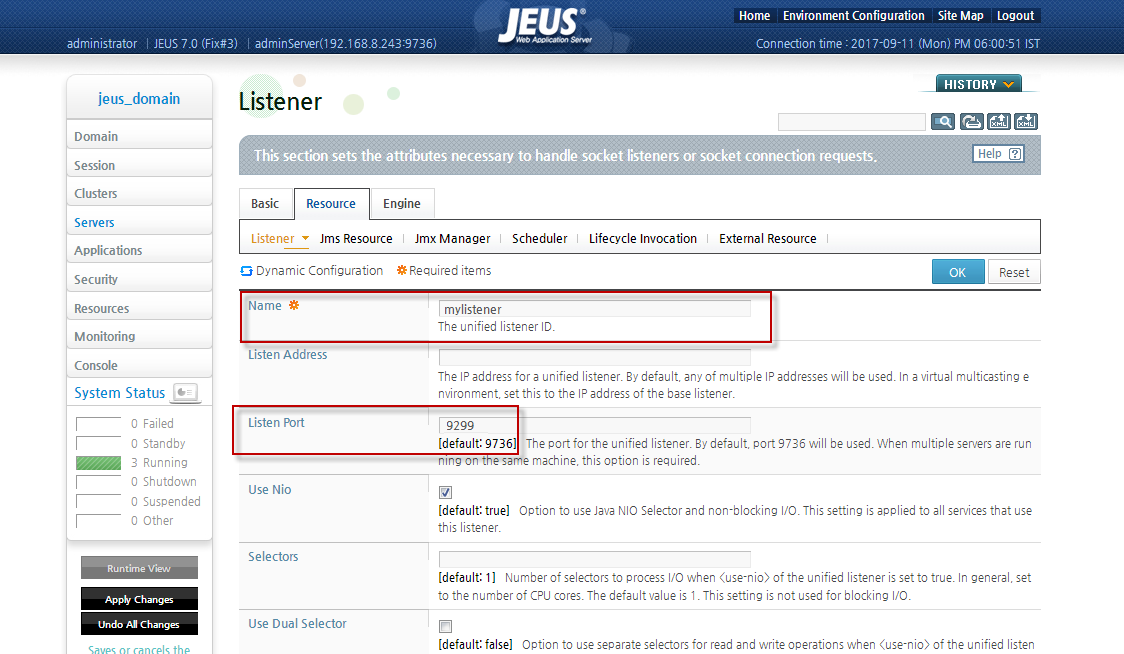
To add a listener, click the Add button under the Listener section (see Figure 6). Doing so will invoke Figure 7. Then, specify a unique name for the listener to be created in the Name text box.
-
Then, enter the port number in the Listener Port text box and click the OK button to save the changes. Upon successful creation of the listener, Figure 8 will appear stating that the listener was created successfully and the newly added listener will be displayed under the Listener section.
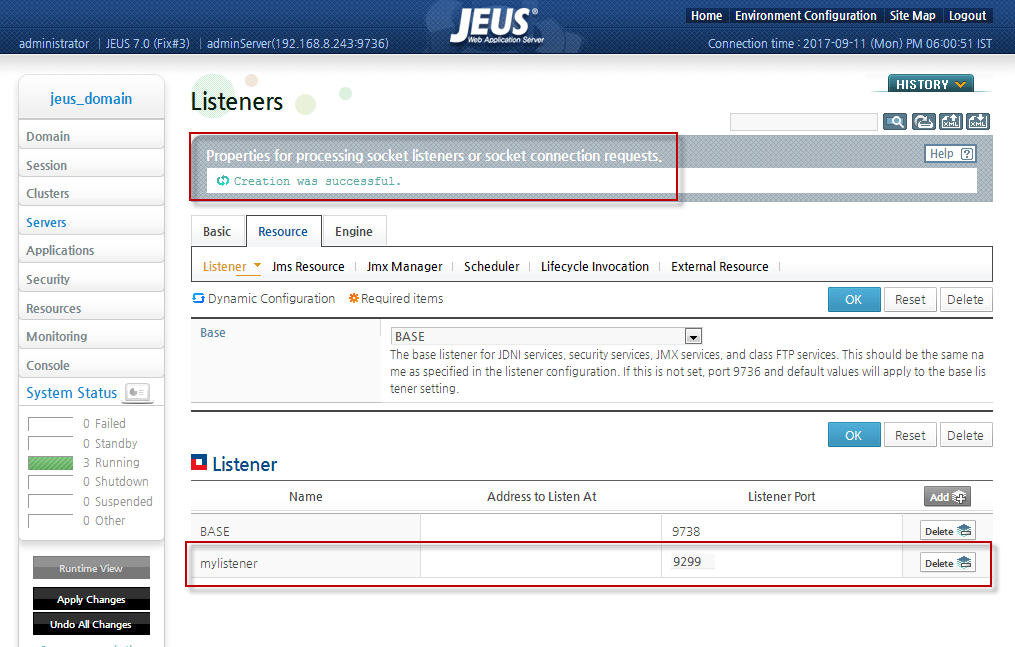
Figure 8 : A message stating successful creation of the Listener
-
Next, click on the JMX Manager tab in the Resource menu of the Listeners page. In the JMX Manager page that appears, check the JMX Connector check box as shown in Figure 9.
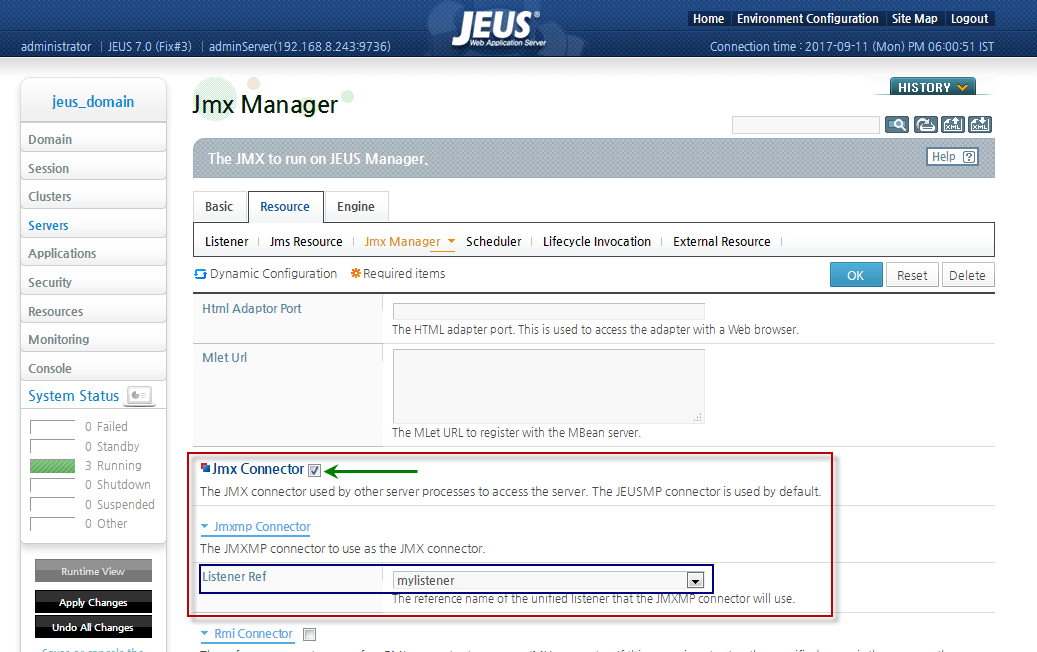
- Select the listener, which you have created, from the Listener Ref drop down list under the JMX Connector section (see Figure 9).
-
While monitoring the JEUS Web Application server 7 and below, check the Rmi Connector check box to specify the details about the reference export name (which is mandatory) of an RMI connector to use as a JMX connector. The details should be specified as shown in Figure 10.

Figure 10 : The Rmi Connector details
On the other hand, if you are monitoring the JEUS Web Application Server version 8, the eG agent now directly connects to the target server using Rmi protocol unlike using the export name (see Figure 11) to communicate the server as in the earlier versions.
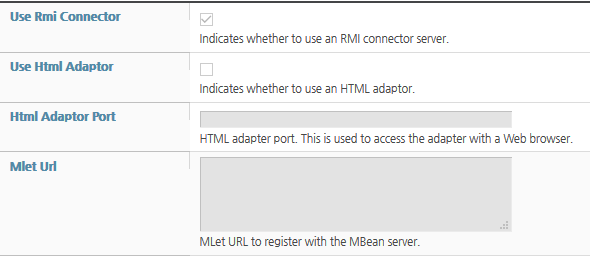
Figure 11 : The Rmi Connector details for JEUS Web Application Server 8
-
After specifying the configuration details discussed above, click on the Apply Changes button. In Figure 12 that appears, specify a Description of the changes that you have done so far. This description will be useful at times when you need to revert back to the settings that were included previously.
-
Once you click the OK button in the Apply Changes prompt to save the description, Figure 13 will then appear. The message box in Figure 13 will provide you the details on successful completion of the JMX configuration to run on the JEUS server.
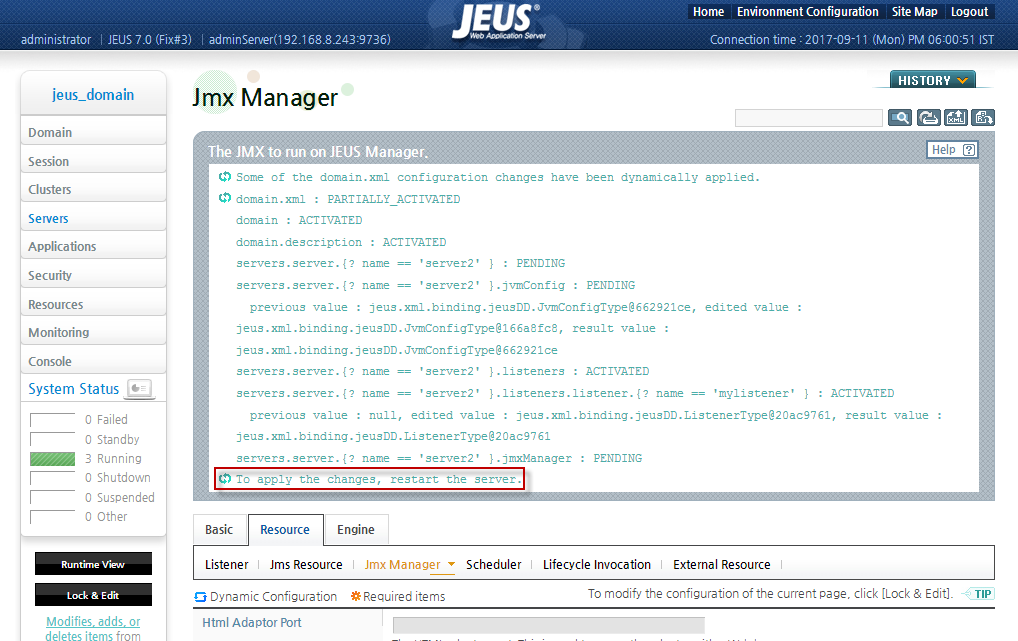
- Finally, restart the server to ensure that the changes are effected.
For the eG agent to communicate with the target web application server, the eG agent should be configured with the Listener Port, Export Name and ServerName parameters that were obtained using the procedure explained above. In case, if you are monitoring the JEUS Web Application server version 8, specify None against the Export name parameter since the eG agent can directly connect to the target server using Rmi protocol. This can be achieved when configuring the tests for the JEUS web application server. Also, ensure that the JMX port is dedicated to communicate with the eG agent before specifying these parameters in the test configuration page.