Granting the Administrator Role access to JNDI Binding Objects
Follow the steps below to allow the Administrator role to access the JNDI binding objects on the target JEUS server.
- Login to the JEUS7 WebAdmin console.
-
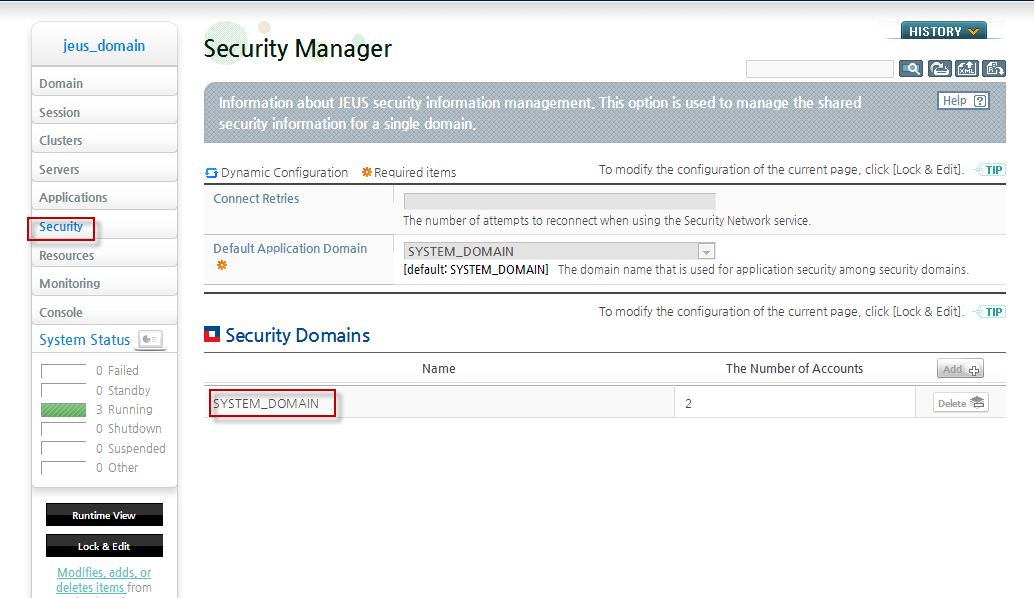
In Figure 21 that appears, click on the Security option in the left panel. This will open the Security Manager screen in the right panel. Then, click on the default application domain under the Security Domains section.
-
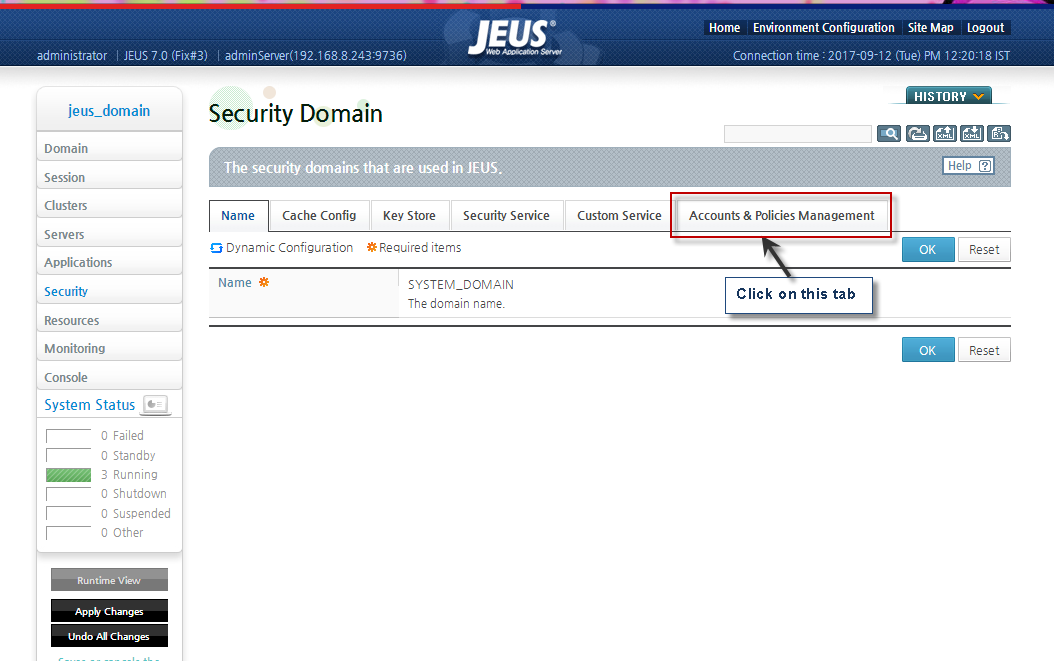
In Figure 22 that appears, click on the Accounts and Policies Management tab.
-
Figure 24 will then appear with an accounts tab and a policies tab. Click on the policies tab.
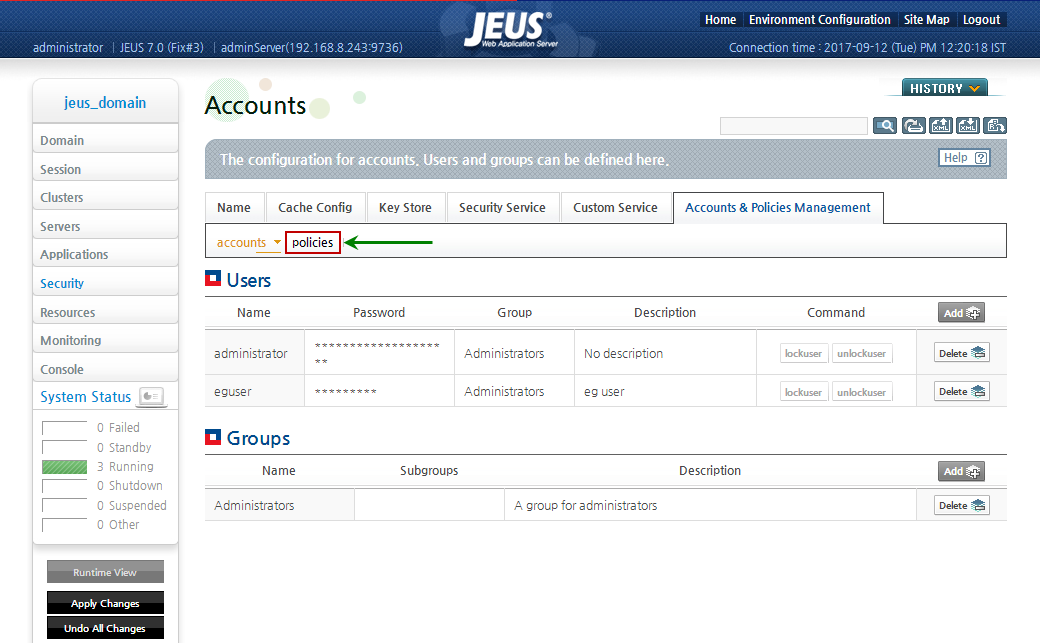
Figure 23 : The Accounts & Policies Management screen
-
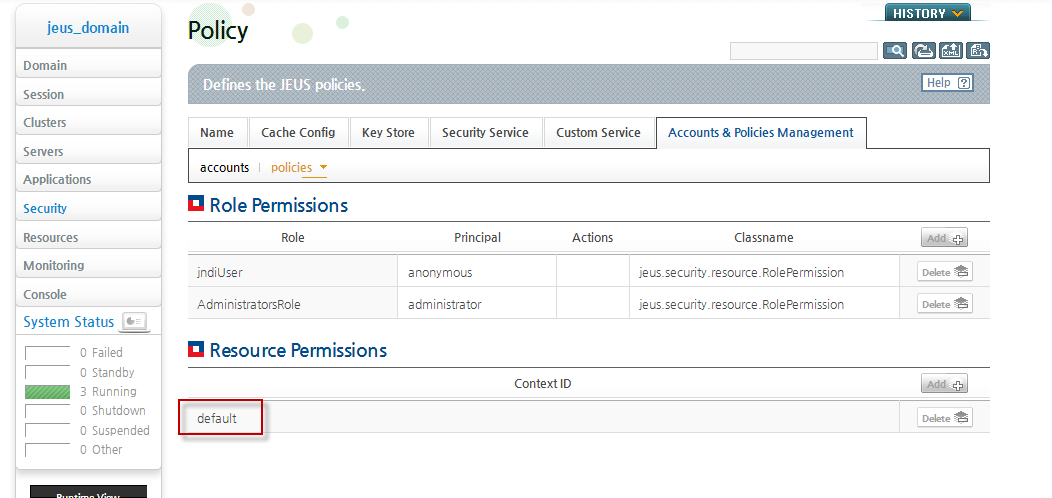
In Figure 24 that appears, click on the Context ID that you wish to access from the Resource Permissions section. The Context ID is used to identify security policies.
-
Figure 25 will then appear listing all the resources associated with the chosen Context ID.
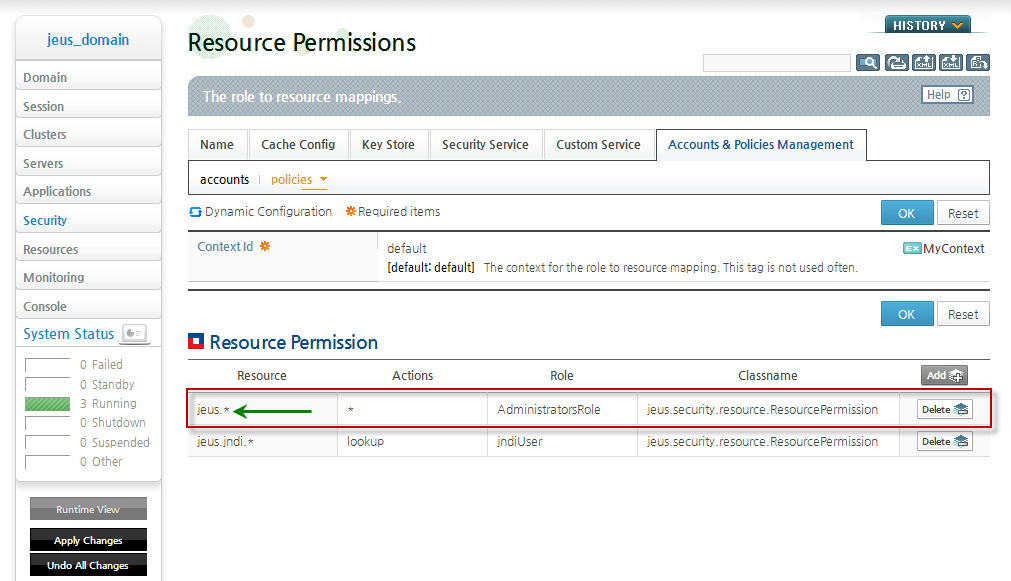
- For the eG agent to communicate with the JEUS web application server and collect the required metrics, it is necessary to grant the resource permission to the user vested with AdministratorsRole.
-
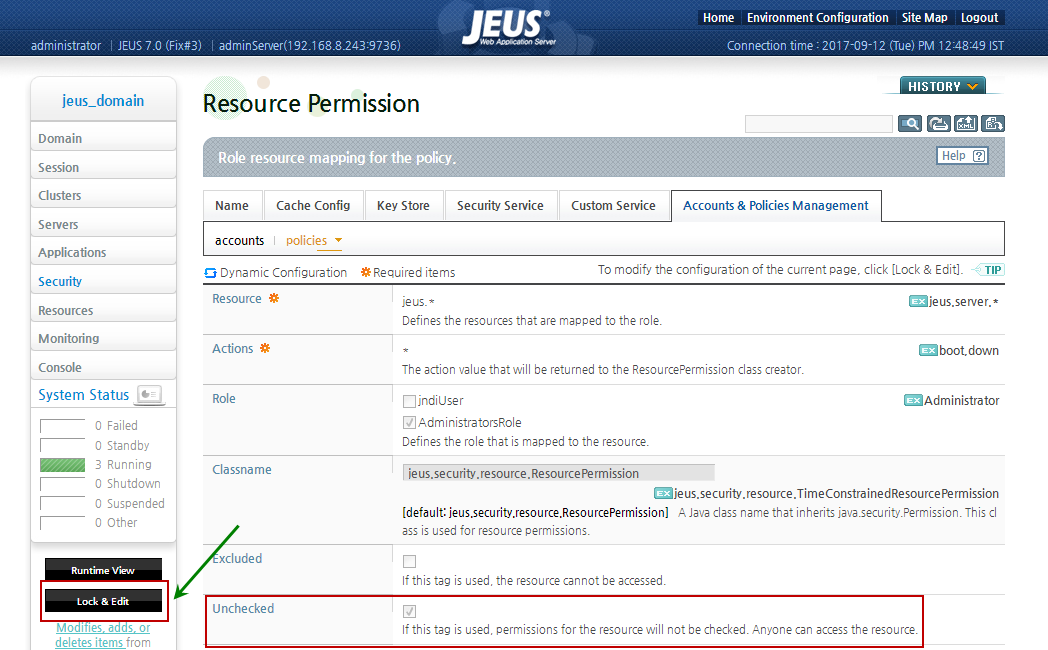
Click on the resource for which you need to grant the resource permission in Figure 25. Figure 26 will then appear. By default, this page is non-editable. To edit this page, you should click on the Lock & Edit button that appears in the left panel (see Figure 26).
-
Now, uncheck the Unchecked check box in Figure 26. This will ensure that the eG agent communicates with the JEUS web application server and collects the required metrics through this user role.
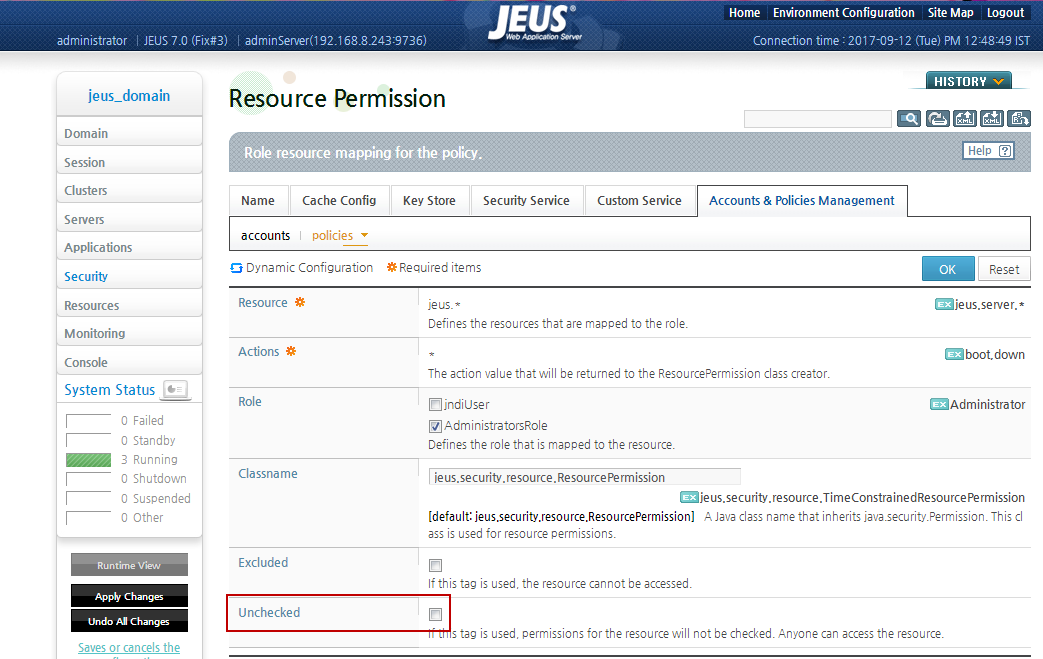
Figure 27 : The Unchecked check box
- Finally click OK to save the changes.
-
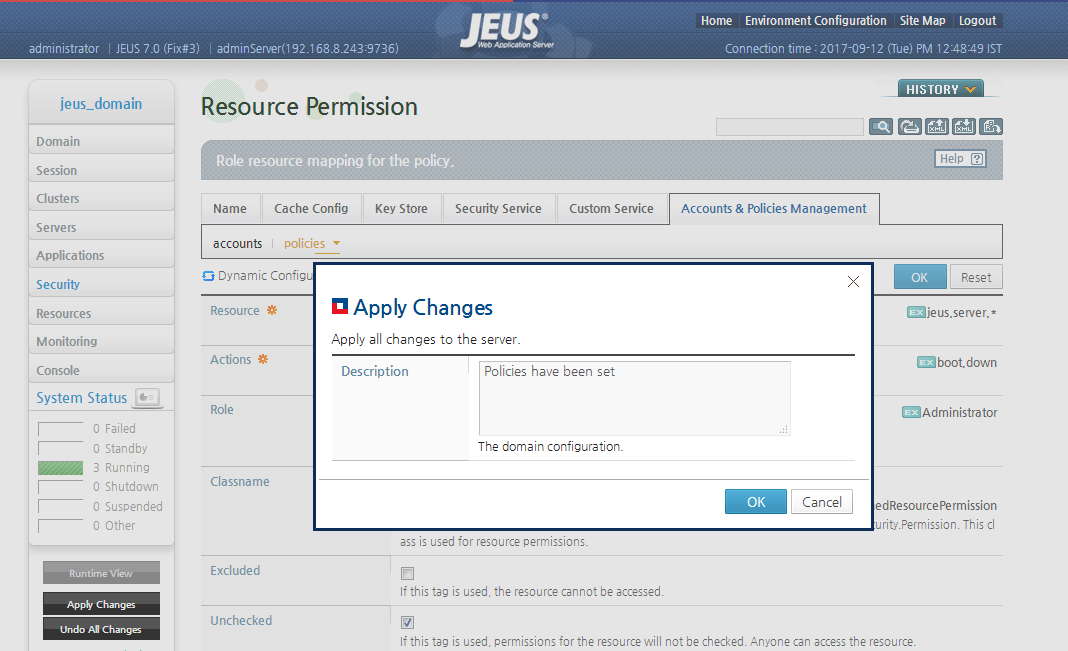
After granting the required permission to the user with AdministratorsRole, click on the Apply Changes button. In Figure 28 that appears, specify a brief Description of the changes that you have done so far. This description will be useful when you need to revert back to the settings that were included previously.
-
Click the OK button in Figure 28 to save the description. Figure 29 will then appear. The message box in Figure 29 will provide you the details of the successful completion of the role to resource mapping.
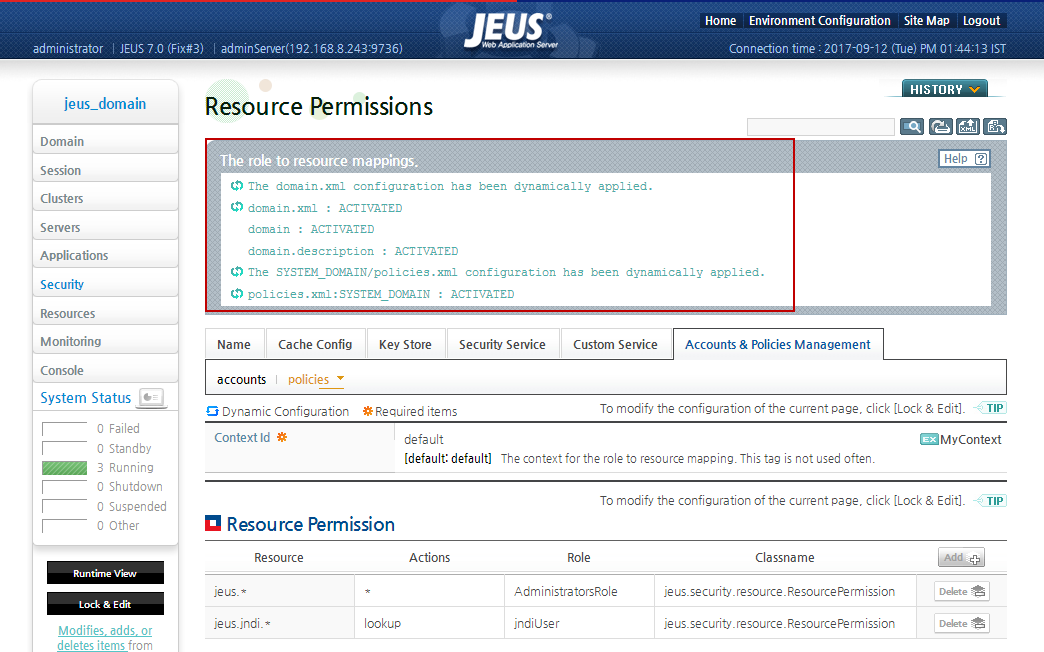
Figure 29 : A successful message stating the role to resource mapping