Enabling SNMP for Domino on Windows
To enable SNMP on an IBM Domino server (v9.0 and above) installed on Microsoft Windows operating system, follow the broad steps given below:
- Install the Windows SNMP service on the target host
- Install the IBM Domino SNMP agent (i.e., the IBM Domino SNMP agent) on the target host
- Configure the IBM Domino SNMP agent as a service on the target host
Each of these steps is discussed in great detail in the sections to come.
Installing the SNMP Service
To install the SNMP service on IBM Domino Mail server installed on Microsoft Windows operating system, do the following:
-
Login to the target IBM Domino Mail server.
-
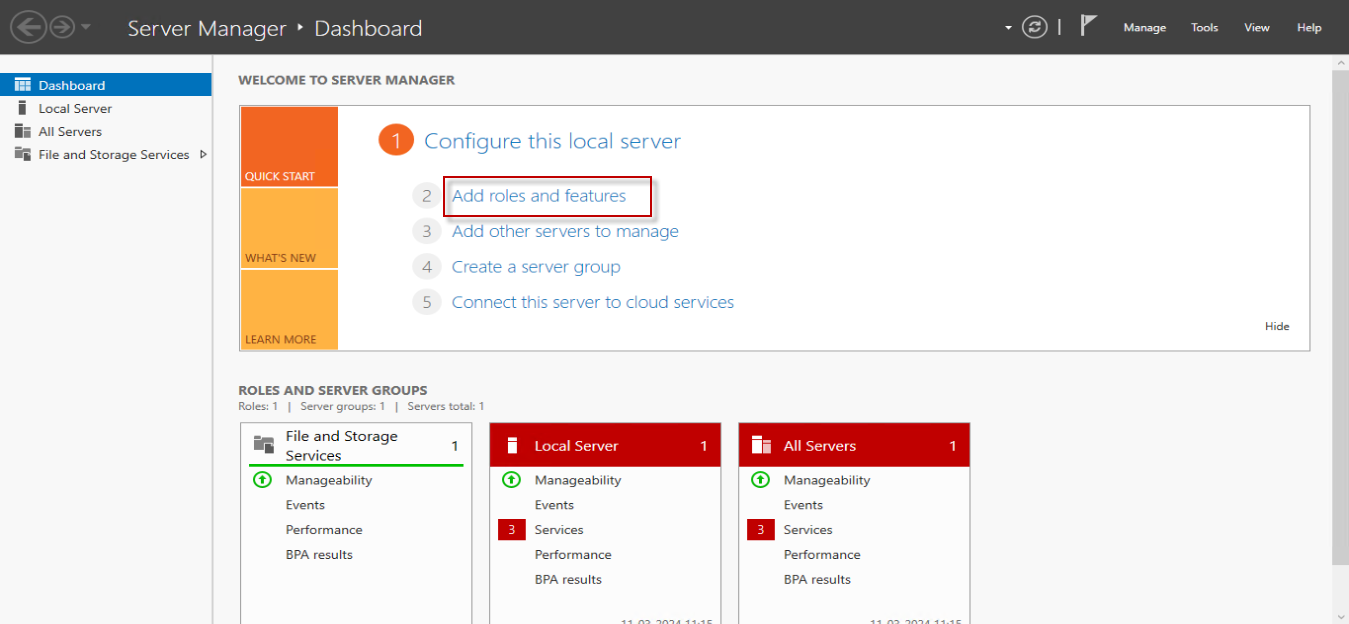
Open the Server Manager to manually enable SNMP features. Figure 1 will then appear.
-
Click the Add roles and features option in Figure 1.
-
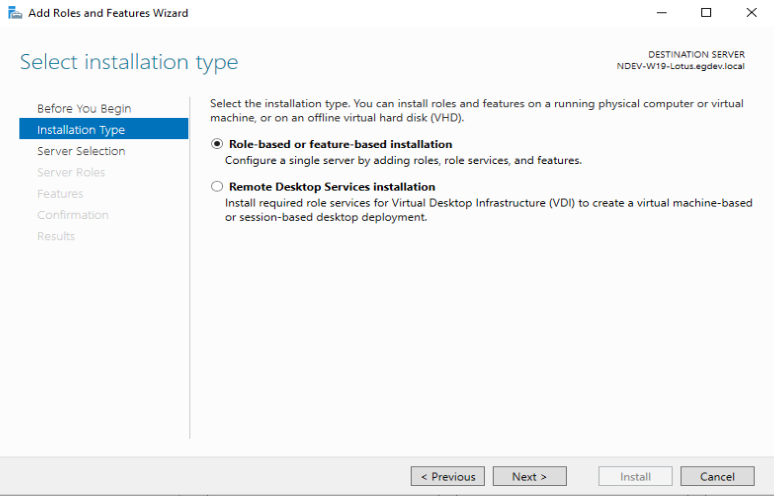
In Figure 2 that appears, by default, the Role-based or feature-based installation option will be selected. You can retain this selection and click the Next button.
-
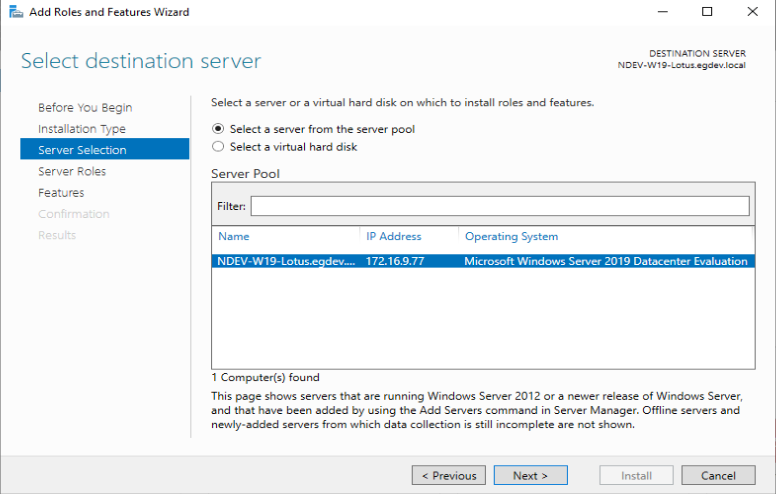
Figure 3 will then appear. Here, the Select a server from the server pool option is chosen by default. The Server Pool section will populate all the available servers. Select the server of your interest and click the Next button in Figure 3.
-
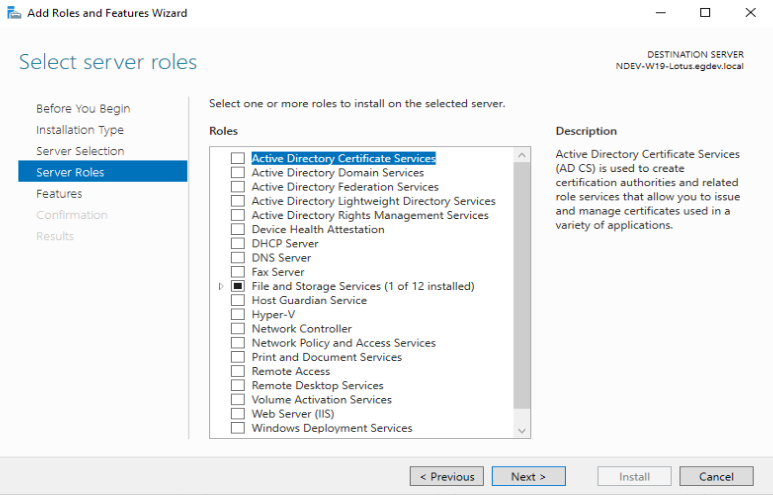
In Figure 4 that appears, by default, the File and Storage Services (1 of 12 installed) check box is checked. This is the role that you will use to install the SNMP Service. So, click Next to proceed.
-
In Figure 5 that appears next, scroll down to spot the SNMP Service feature in the Features list.
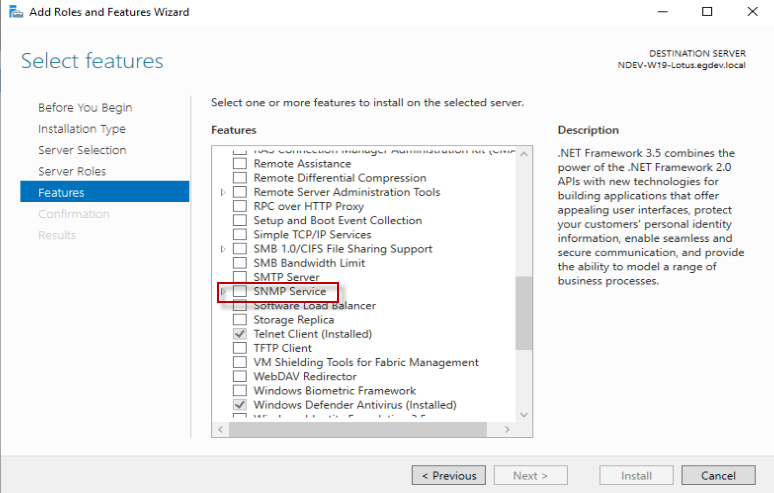
-
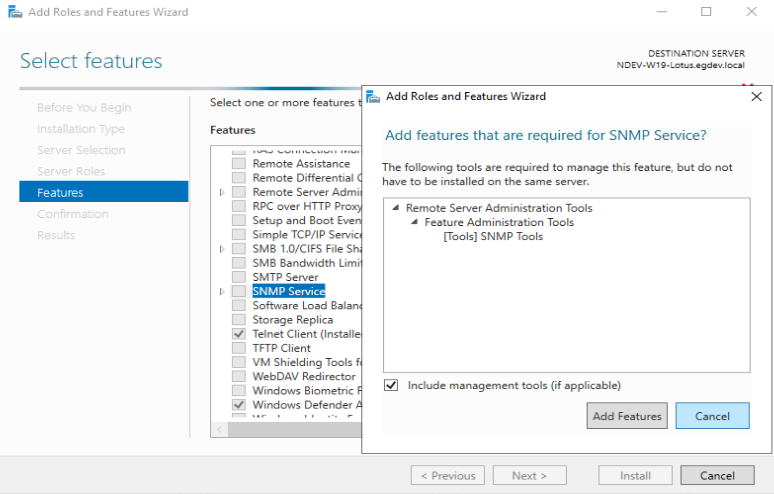
Clicking the SNMP Service feature will reveal a pop up window as shown in Figure 6. Click the Add Features button in the pop up window.
-
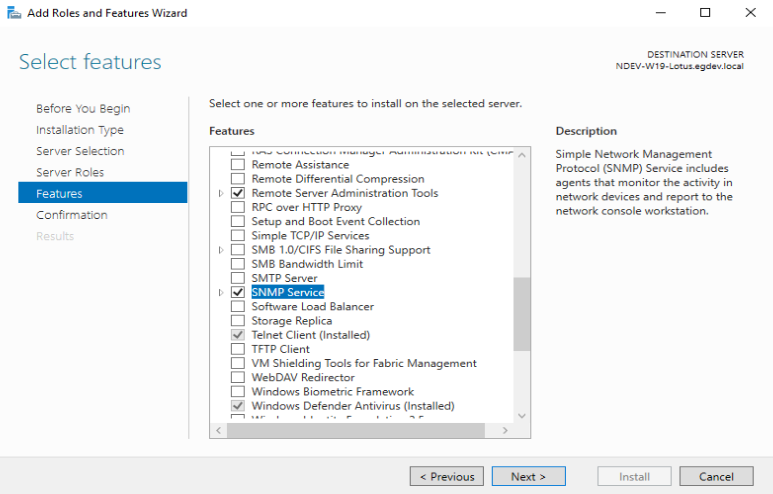
Now, the SNMP Service check box is selected (see Figure 7).
-
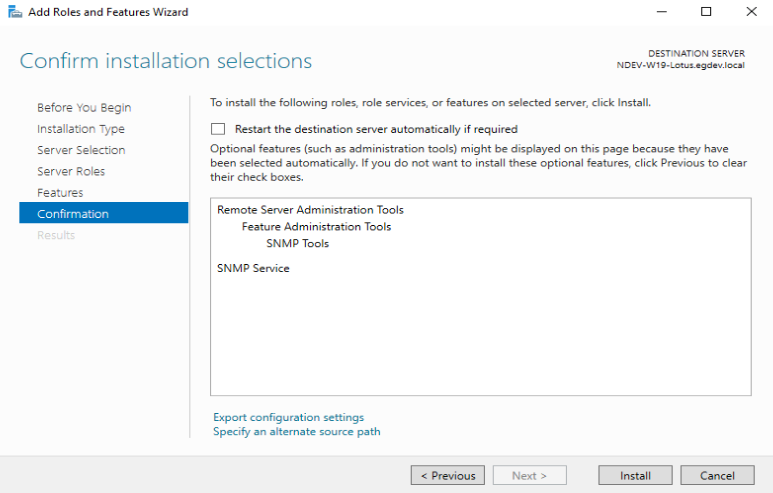
Clicking the Next button in Figure 7 will reveal Figure 8 where you are allowed to install the SNMP Service by clicking on the Install button.
-
Figure 9 then appears where you can view the installation progress. Once the installation is complete, click the Close button.
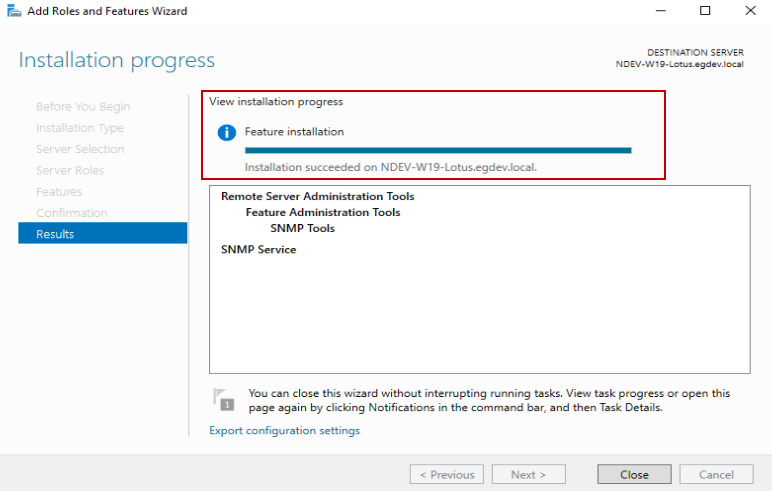
Figure 9 : Screen showing that the installation is successful
-
Now, open the Services console in the target IBM Domino Mail server to check if the installed SNMP Service is running (see Figure 10).
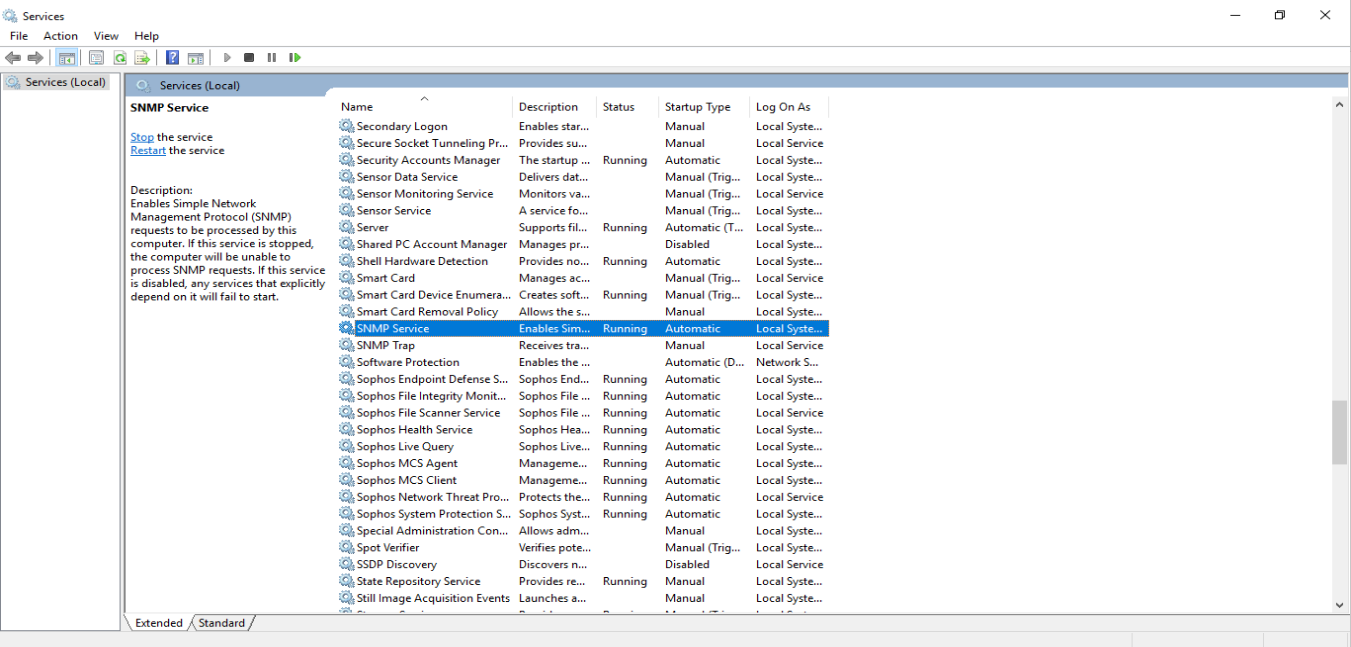
Figure 10 : Checking the status of the installed SNMP Service
-
Right-click the SNMP Service in the Services console, and select Properties (see Figure 11).
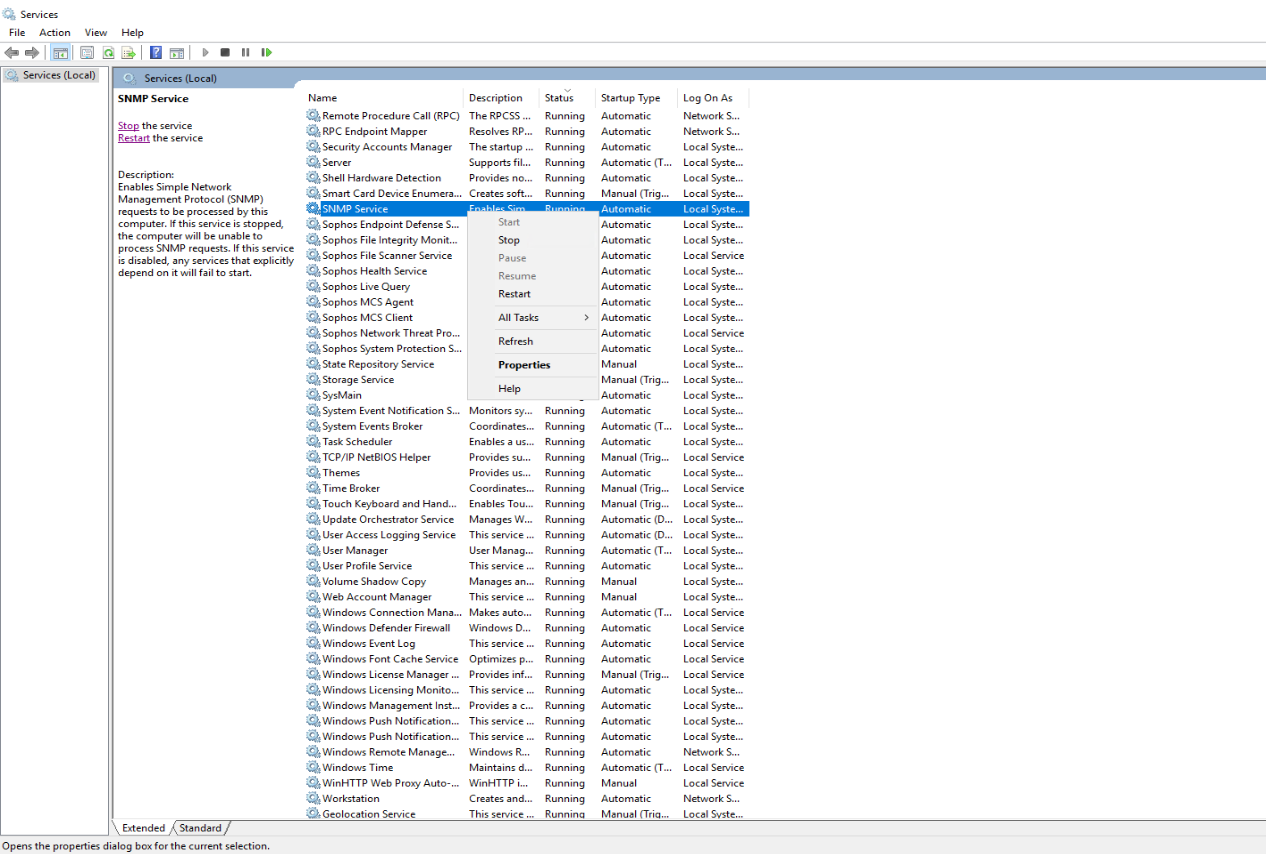
Figure 11 : Selecting the Properties option of the SNMP Service
-
Figure 12 then appears. Here, under the Security tab, deselect the Send authentication trap check box. Now, add a Community, for e.g. public and assign READ ONLY rights for monitoring purpose.
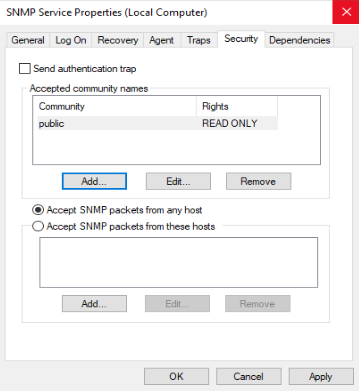
Figure 12 : Tweaking the default properties of the SNMP Service for monitoring purpose
Then, to access the SNMP data, select the Accept SNMP packets from any host option as shown in Figure 12.
Installing and Configuring the IBM Domino SNMP Agent
-
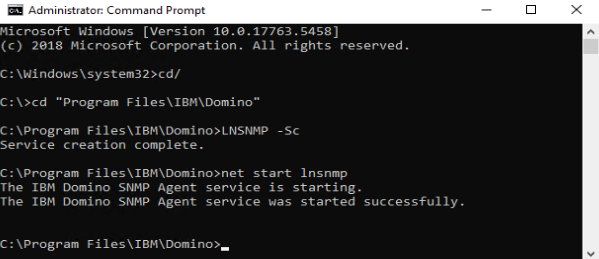
Open the command prompt with Administrator privileges and navigate to the folder where the IBM Domino Mail server is installed. For e.g., this folder can be C:\Program Files\IBM\Domino. From this path, execute the LNSNMP -Sc command (seeFigure 13). This will configure the Lotus Domino SNMP agent as a service
-
Then, start the IBM Domino SNMP Agent service by executing the net start lnsnmp command as shown in Figure 13.
-
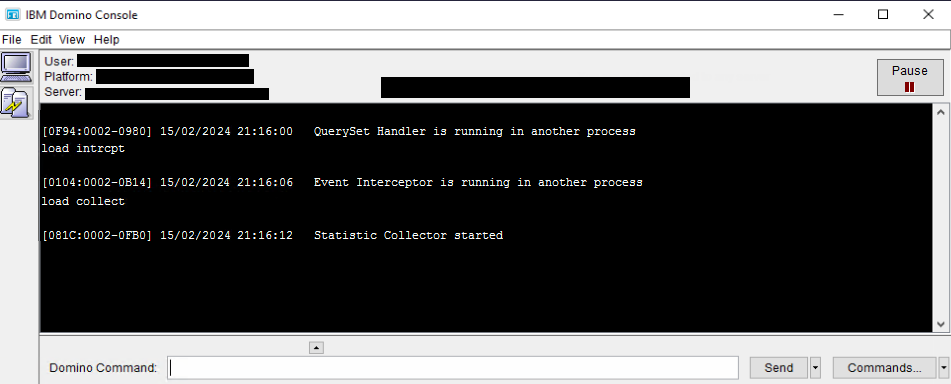
After configuring the IBM Domino SNMP Agent, start the Domino server add-in tasks such as the QuerySet, Event Interceptor, and Statistic Collector tasks. This will ensure that the Domino Mail server sends statistics to the SNMP Agent. To do this, launch the IBM Domino console and execute the following commands one after the other from the Domino Command text box in Figure 14:
load quryset
load intrcpt
load collect
-
The SNMP Agent service is now successfully configured.
Note:
-
You need to execute the add in tasks every time the IBM Domain Mail server is restarted.
-
The Domino SNMP Agent is configured as a Windows Service and is set up to run automatically. This means that once the Domino SNMP Agent is configured, it is virtually always running, even when Domino is not. If you later upgrade Domino, you should stop the LNSNMP and Windows SNMP Services before beginning the upgrade process.
-
If you ever need to undo the configuration of the Lotus Domino SNMP Agent as a service, enter this command: lnsnmp -Sd