Azure Virtual Machine Scale Set Test
Azure virtual machine scale sets let you create and manage a group of load balanced VMs. It can automatically increase or decrease the number of VM instances that run your application. This automated and elastic behavior reduces the management overhead to monitor and optimize the performance of your application.
You create rules that define the acceptable performance for a positive customer experience. When those defined thresholds are met, autoscale rules take action to adjust the capacity of your scale set. You can also schedule events to automatically increase or decrease the capacity of your scale set at fixed times. The number of VM instances can automatically increase or decrease in response to demand or a defined schedule.
You can create autoscale rules using built-in host metrics available from your VM instances. Host metrics give you visibility into the performance of the VM instances in a scale set without the need to install or configure additional agents and data collections. Autoscale rules that use these metrics can scale out or in the number of VM instances in response to CPU usage, memory demand, disk access, and network throughput.
To make sure that such rules are always effective, administrators should closely monitor the host metrics used as the basis for the auto-scaling rules to understand if usage patterns have changed. If so, then they should reconfigure the rules, so that they reflect these dynamics. If this is not done, then virtual machine scale sets will not automatically scale up/down when the resource demands of applications increase/decrease. Besides falsifying the scalability claims of virtual machine scale sets, this outcome can also significantly degrade application performance. To avoid this, administrators should periodically run the Azure Virtual Machine Scale Set test.
For each virtual machine scale set, this test reports the CPU, memory, network, and disk I/O resources used by that scale set. In the process, the test points to scale sets that are probably running resource-intensive applications. You can compare these usage metrics with the usage thresholds set as scaling rules for each scale set, to verify if the rules align with usage. You can also check if threshold violations trigger automatic scaling operations. This way, you can assess the effectiveness of the rules, identify scale sets with ineffective rules, and initiate efforts to reset them.
Target of the Test: A Microsoft Azure Subscription
Agent deploying the test: A remote agent
Output of the test: One set of results for each Azure virtual machine scale set configured for every resource group in the target Azure Subscription
| Parameters | Description |
|---|---|
|
Test Period |
How often should the test be executed. |
|
Host |
The host for which the test is to be configured. |
|
Subscription ID |
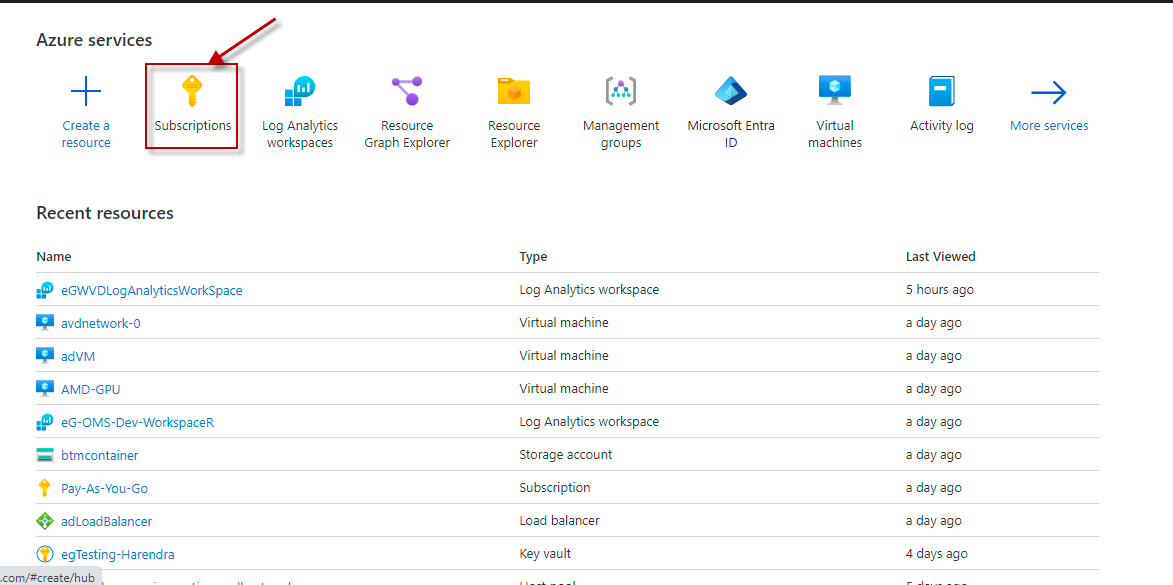
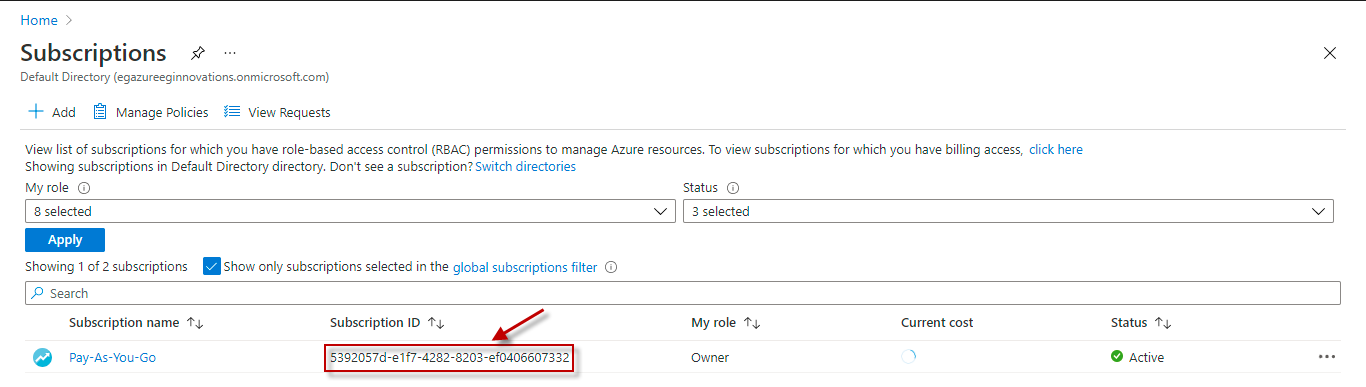
This field will be automatically populated if you have chosen to automatically fulfill the pre-requisites for monitoring the Microsoft Azure Subscription. Specify the GUID which uniquely identifies the Microsoft Azure Subscription to be monitored in this text box
|
|
Tenant ID |
This field will be automatically populated if you have chosen to automatically fulfill the pre-requisites for monitoring the Microsoft Azure Subscription. Specify the Directory ID of the Azure Entra ID tenant to which the target subscription belongs in this text box |
|
Client ID, Client Password, and Confirm Password |
To connect to the target subscription, the eG agent requires an Access token in the form of an Application ID and the client secret value. For this purpose, you should register a new application with the Microsoft Entra tenant. To know how to create such an application and determine its Application ID and client secret, refer to Configuring the eG Agent to Monitor a Microsoft Azure Subscription Using Azure ARM REST API. Specify the Application ID of the created Application in the Client ID text box and the client secret value in the Client Password text box |
|
Proxy Host and Proxy Port |
In some environments, all communication with the Azure cloud be routed through a proxy server. In such environments, you should make sure that the eG agent connects to the cloud via the proxy server and collects metrics. To enable metrics collection via a proxy, specify the IP address of the proxy server and the port at which the server listens against the Proxy Host and Proxy Port parameters. By default, these parameters are set to none, indicating that the eG agent is not configured to communicate via a proxy, by default. |
|
Proxy Username, Proxy Password and Confirm Password |
If the proxy server requires authentication, then, specify a valid proxy user name and password in the Proxy Username and Proxy Password parameters, respectively. Then, confirm the password by retyping it in the Confirm Password text box. |
|
Detailed Diagnosis |
To make diagnosis more efficient and accurate, the eG Enterprise embeds an optional detailed diagnostic capability. With this capability, the eG agents can be configured to run detailed, more elaborate tests as and when specific problems are detected. To enable the detailed diagnosis capability of this test for a particular server, choose the On option. To disable the capability, click on the Off option. The option to selectively enable/disable the detailed diagnosis capability will be available only if the following conditions are fulfilled:
|
| Measurement | Description | Measurement Unit | Interpretation | ||||||||||||
|---|---|---|---|---|---|---|---|---|---|---|---|---|---|---|---|
|
Provisioning state |
Indicates the current provisioning status of this scale set. |
|
The values reported by this measure and its numeric equivalents are mentioned in the table below:
Note: By default, this measure reports the Measure Values listed in the table above to indicate the current provisioning status of a scale set. In the graph of this measure however, the same is represented using the numeric equivalents only. Use the detailed diagnosis of this measure to know the location of the scale set, the disk size type, and capacity of the scale set. |
||||||||||||
|
Is auto scaling enabled? |
Indicates whether/not auto-scaling is enabled for this scale set. |
|
The values reported by this measure and its numeric equivalents are mentioned in the table below:
Note: By default, this measure reports the Measure Values listed in the table above to indicate whether/not auto-scaling is enabled for a virtual machine scale set. In the graph of this measure however, the same is represented using the numeric equivalents only. Use the detailed diagnosis of this measure to know the profile settings of the virtual machine scale set. A profile is where the minimum, maximum, and default number of VM instances are defined. When your autoscale rules are applied, these instance limits make sure that you do not scale out beyond the maximum number of instances, or scale in beyond the minimum of instances. |
||||||||||||
|
Total instances |
Indicates the number of VM instances in this scale set. |
Number |
Use the detailed diagnosis of this measure to know which VMs are in a scale set. |
||||||||||||
|
Total profiles |
Indicates the total number of profiles defined for this scale set. |
Number |
A profile is where the minimum, maximum, and default number of VM instances are defined. When your autoscale rules are applied, these instance limits make sure that you do not scale out beyond the maximum number of instances, or scale in beyond the minimum of instances. To know which profiles are defined for any monitored scale set, and which scaling rules are mapped to each profile, use the detailed diagnosis of this measure. |
||||||||||||
|
Average CPU utilization |
Indicates the average percentage of allocated compute units that are currently in use by the VM instances in this virtual machine scale set. |
Percent |
If the value of this measure is consistently close to or equal to 100%, it implies that the VM instances in the scale set are over-utilizing the allocated compute units. In such a situation, the scale set should automatically scale out the number of VM instances, so that more computing resources are at the disposal of the application. To make sure that this action is triggered at the right time, you need to continuously track the variations in the value of this measure, understand the demand for CPU resources, and accordingly set the threshold for the Percentage CPU host-level metric in the scaling rule. |
||||||||||||
|
Total incoming network traffic |
Indicates the total number of bytes received on all network interfaces for this scale set. |
MB |
To make sure that automatic scaling occurs when network traffic is indeed high, you need to closely study the changes to these measures over time, understand how traffic normally is, and accordingly configure scaling rules using the Network In and Network Out host-level metrics. |
||||||||||||
|
Total outgoing network traffic |
Indicates the total number of bytes out on all network interfaces for this scale set. |
MB |
|||||||||||||
|
Total data reads from disk |
Indicates the total bytes read from the disks of all VMs in this scale set during the last measurement period. |
MB |
To make sure that automatic scaling alerts and reacts only to an unusual rise in read/write activity on disks, you need to closely study the changes to these measures over time, understand the normal disk activity levels, and accordingly configure scaling rules using the Disk Read Bytes and Disk Write Bytes host-level metrics. |
||||||||||||
|
Total data writes to disk |
Indicates the total written to the disks of all VMs in this scale set during the last measurement period. |
MB |
|||||||||||||
|
Average disk read operations |
Indicates the average number of disk read operations performed per second by all VM instances in this scale set. |
Operations/Sec |
To make sure that automatic scaling occurs only when the IOPS on VM instances are unusually high, you need to closely study the changes to these measures over time, understand what the normal disk operational level is, and accordingly configure scaling rules using the Disk Read Operations/Sec and Disk Write Operations/Sec host-level metrics. |
||||||||||||
|
Average disk write operations |
Indicates the average number of disk write operations performed per second by all VM instances in this scale set. |
Operations/Sec |
|||||||||||||
|
Average CPU credits remaining |
Indicates the number of CPU credits that are yet to be used by the VMs in this scale set. |
Number |
VMs accumulate CPU credits when their CPU consumption is less than their base performance level. Credits are spent whenever VMs utilize CPU more than their base performance level. If the value of this measure is very low, it implies that VMs in the scale set have been consistently using up more processing power than their baseline. This in turn is indicative of a high demand for CPU resources. To make sure that automatic scaling smartly detects and responds to such abnormal load conditions, you need to closely study the changes to these measures over time, understand what is normal CPU consumption, and accordingly configure scaling rules using the CPU Credits Remaining and CPU Credits Consumed host-level metrics. |
||||||||||||
|
Average CPU credits consumed |
Indicates the count of CPU credits consumed by the VMs in this scale set. |
Number |
|||||||||||||
|
Average data disk read data |
Indicates the amount of data read from data disks of the VMs in this scale set during the last measurement period. |
MB |
To expand your available storage, Azure virtual machine scale sets support VM instances with attached data disks. Typically, data disks are added if you need to install applications and store data. Data disks should be used in any situation where durable and responsive data storage is desired. Where data disks are used, you may want to configure automatic scaling to occur when read/write activity levels on data disks are really abnormal. In this case, you may want to closely study the changes to the value of these measures, understand the norms, and accordingly define scaling rules using the Data Disk Read Bytes/sec and Data Disk Write Bytes/sec host-level metrics.
|
||||||||||||
|
Average data disk write data |
Indicates the amount of data written to data disks of the VMs in this scale set during the last measurement period. |
MB |
|||||||||||||
|
Average data disk read operations |
Indicates the average number of disk read operations performed per second on all data disks in this scale set. |
Operations/Sec |
To make sure that automatic scaling occurs only when the IOPS on data disks are unusually high, you need to closely study the changes to these measures over time, understand the norms of usage, and accordingly configure scaling rules using the Data Disk Read Operations/Sec and Data Disk Write Operations/Sec host-level metrics.
|
||||||||||||
|
Average data disk write operations |
Indicates the average number of disk write operations performed on all data disks in this scale set. |
Operations/Sec |
|||||||||||||
|
Average data disk queue depth |
Indicates the number of enqueued I/O requests for data disks. |
Number |
A high value for this measure could be a sign of an I/O processing overload. Make sure that your autoscaling rules capture such scenarios and automatically scale out VM instances to handle the additional load. |
||||||||||||
|
Average OS disk read data |
Indicates the amount of data read from OS disks of the VMs in this scale set during the last measurement period. |
MB |
When a scale set is created or scaled, an OS disk is automatically attached to each VM. Operating system disks can be sized up to 2 TB, and hosts the VM instance's operating system. The OS disk is labeled /dev/sda by default. To enable autoscaling rules to detect and appropriately respond to abnormal read/write activity on OS disks, you may want to:
|
||||||||||||
|
Average OS disk write data |
Indicates the amount of data written to OS disks of the VMs in this scale set during the last measurement period. |
MB |
|||||||||||||
|
Average OS disk read operations |
Indicates the average number of disk read operations performed per second on all OS disks in this scale set. |
Operations/Sec |
To make sure that automatic scaling occurs when the IOPS on OS disks are unusually high, you need to closely study the changes to these measures over time, understand the norms of usage, and accordingly configure scaling rules using the OS Disk Read Operations/Sec and OS Disk Write Operations/Sec host-level metrics. |
||||||||||||
|
Average OS disk write operations |
Indicates the average number of disk write operations performed on all OS disks in this scale set. |
Operations/Sec |
|||||||||||||
|
Average OS disk queue depth |
Indicates the number of enqueued I/O requests for OS disks. |
Number |
A high value for this measure could be a sign of an I/O processing overload. Make sure that your autoscaling rules capture such scenarios and automatically scale out VM instances to handle the additional load. |
||||||||||||
|
Data disk bandwidth consumed |
Indicates the percentage of bandwidth consumed by data disks attached to this scale set. |
Percent |
Compare the value of this measure across scale sets to know which scale set's data disks are consuming bandwidth excessively. If the value of this measure is close to 100% for any scale set, it means that your application running is IO capped from your data disk's bandwidth limit. |
||||||||||||
|
Data disk IOPS consumed |
Indicates what percentage of total data disk IOPS is provisioned to this scale set. |
Percent |
Compare the value of this measure across scale sets to know which scale set's data disks are consuming bandwidth excessively. If the value of this measure is close to 100% for any scale set, it means that the application associated with the scale set is engaged in I/O-intensive operations, If the over-utilization is consistent, you may want to reset the auto-scaling rules of the scale set. |
||||||||||||
|
Data disk max burst bandwidth |
Indicates the throughput limit that the data disks attached to this scale set can burst up to. |
Number |
|
||||||||||||
|
Data disk max burst IOPS |
Indicates the IOPS limit that the data disks attached to this scale set can burst up to. |
Number |
|
||||||||||||
|
Data disk target bandwidth |
Indicates the throughput limit that the data disks attached to this scale set can achieve without bursting. |
Number |
|
||||||||||||
|
Data disk target IOPS |
Indicates the IOPS limit that the data disks attached to this scale set can achieve without bursting. |
Number |
|
||||||||||||
|
Data disk used burst BPS credits |
Indicates the accumulated percentage of the throughput burst used for the data disks attached to this scale set. |
Percent |
If the value of this measure touches 100% consistently, it could mean that the application associated with the scale set requires more throughput than the VMs in the scale set allow. You may hence want to redefine the auto-scaling rules to handle the additional load. |
||||||||||||
|
Data disk used burst IO credits |
Indicates the percentage data disk burst I/O credits used so far by this scale set. |
Percent |
If the value of this measure touches 100% consistently, it could mean that the application associated with the scale set requires more I/O resources than the VMs in the scale set allow. You may hence want to redefine the auto-scaling rules to handle the additional load before all I/O credits run out. |
||||||||||||
|
OS disk bandwidth consumed |
Indicates the percentage of bandwidth consumed by the OS disks attached to this scale set. |
Percent |
If the value of this measure consistently touches 100% for any scale set. it could mean that the OS disks attached to the application are utilizing bandwidth excessively. You may want to consider reconfiguring the auto-scaling rules so that the scale set automatically expands its capacity sooner, so that the application has more bandwidth resources at its disposal. |
||||||||||||
|
OS disk IOPS consumed |
Indicates the percentage of IOPS consumed by the OS disks attached to this scale set. |
Percent |
If the value of this measure consistently touches 100% for any scale set. it could mean that the OS disks attached to the application are utilizing I/O resources excessively. You may want to consider reconfiguring the auto-scaling rules so that the scale set automatically expands its I/O capacity sooner, so that the application has more I/O resources at its disposal at all times. |
||||||||||||
|
OS disk max burst bandwidth |
Indicates the throughput limit that the OS disks attached to this scale set can burst up to. |
Number |
|
||||||||||||
|
OS disk max burst IOPS |
Indicates the IOPS limit that the OS disks attached to this scale set can burst up to. |
Number |
|
||||||||||||
|
OS disk target bandwidth |
Indicates the throughput limit that the OS disks attached to this scale set can achieve without bursting. |
|
|
||||||||||||
|
OS disk target IOPS |
Indicates the IOPS limit that the OS disks attached to this scale set can achieve without bursting. |
|
|
||||||||||||
|
OS disk used burst BPS credits |
Indicates the accumulated percentage of the throughput burst used for the OS disks attached to this scale set. |
Percent |
If the value of this measure touches 100% consistently, it could mean that the application associated with the scale set requires more throughput than the VMs in the scale set allow. You may hence want to redefine the auto-scaling rules to handle the additional load. |
||||||||||||
|
OS disk used burst IO credits |
Indicates the percentage data disk burst I/O credits used so far by this scale set. |
Percent |
If the value of this measure touches 100% consistently, it could mean that the application associated with the scale set requires more I/O resources than the VMs in the scale set allow. You may hence want to redefine the auto-scaling rules to handle the additional load before all I/O credits run out. |
||||||||||||
|
Inbound flows |
Indicates the current number of inbound flows to the VMs in this scale set. |
Number |
The Azure networking stack maintains state for each direction of a TCP/UDP connection in data structures called ‘flows’. A typical TCP/UDP connection has two flows created, one for the inbound and another for the outbound direction. Each flow is distinguished by a 5-tuple (protocol, local IP address, remote IP address, local port, and remote port) information. Data transfer between endpoints requires creation of several flows in addition to flows that perform the data transfer. Some examples are flows created for DNS resolution and flows created for load balancer health probes. Network virtual appliances (NVAs) such as gateways, proxies, firewalls, see flows created for connections terminated at the appliance and originated by the appliance. Note that the VMs can handle a maximum of 500 active flows in each direction. Once this limit is hit, other connections are dropped. This in turn can impact network performance. To avoid this, first compare the value of this measure across scale sets. This will point you to those scale sets with VMs that are about to reach the flow limit. Based on these observations, you can then benchmark workloads against expected traffic patterns and scale out workloads appropriately to match your performance needs. |
||||||||||||
|
Inbound flows max creation rate |
Indicates the maximum creation rate of inbound flows to the VMs in this scale set. |
Number |
|
||||||||||||
|
Outbound flows |
Indicates the current number of outbound flows from the VMs in this scale set. |
Number |
The Azure networking stack maintains state for each direction of a TCP/UDP connection in data structures called ‘flows’. A typical TCP/UDP connection has two flows created, one for the inbound and another for the outbound direction. Each flow is distinguished by a 5-tuple (protocol, local IP address, remote IP address, local port, and remote port) information. Data transfer between endpoints requires creation of several flows in addition to flows that perform the data transfer. Some examples are flows created for DNS resolution and flows created for load balancer health probes. Network virtual appliances (NVAs) such as gateways, proxies, firewalls, see flows created for connections terminated at the appliance and originated by the appliance. Note that the VMs can handle a maximum of 500 active flows in each direction. Once this limit is hit, other connections are dropped. This in turn can impact network performance. To avoid this, first compare the value of this measure across scale sets. This will point you to those scale sets with VMs that are about to reach the flow limit. Based on these observations, you can then benchmark workloads against expected traffic patterns and scale out workloads appropriately to match your performance needs. |
||||||||||||
|
Outbound flows maximum creation rate |
Indicates the maximum creation rate of outbound flows from the VMs in this scale set. |
Number |
|
||||||||||||
|
Premium data disk cache read hit |
Indicates the number of cache read hits for the premium data disks in this scale set. |
Number |
Host caching works by bringing storage closer to the VM that can be written or read to quickly. You can enable host caching when you create your virtual machine and attach disks - standard or premium OS/data disks. Premium disks are backed by SSD-based high-performance, low-latency disk. These disks are recommended for VMs that run production workloads. Premium Storage supports DS-series, DSv2-series, GS-series, and FS-series VMs. You can turn on and off host caching on your disks on an existing VM. By default, cache-capable data disks will have read-only caching enabled. Cache-capable OS disks will have read/write caching enabled. For peak storage performance, direct disk reads/writes should be low and cache reads/writes should be high. Ideally therefore, the value of the Premium data disk cache read hits and Premium OS disk cache read hits measures should be high and that of the Premium data disk cache read miss and Premium OS disk cache read missmeasures should be low. If the values of these measures are reversed, its a cause for concern. In such a situation, n, you may want to opt for a storage type that is sized with cache space that is sufficient for your workload. |
||||||||||||
|
Premium data disk cache read miss |
Indicates the number of cache read misses for the premium data disks in this scale set. |
Number |
|||||||||||||
|
Premium OS disk cache read hit |
Indicates the number of cache read hits for the premium OS disks in this scale set. |
Number |
|||||||||||||
|
Premium OS disk cache read miss |
Indicates the number of cache read misses for the premium OS disks in this scale set. |
Number |
|||||||||||||
|
VM cached bandwidth consumed |
Indicates the percentage calculated by the total disk throughput completed over the max cached throughput of the VMs in this scale set. |
Percent |
Virtual machines that are enabled for both premium storage and premium storage caching have two different storage bandwidth limits.
If the value of the VM uncached bandwidth consumed is at 100%, it means that the VMs in the scale set have fully utilized their default storage limit. No data can be stored in their disks from this point forward. This can cause the VMs to suffer serious and prolonged performance degradations. If the value of the VM cached bandwidth consumed is at 100%, it means that the VMs in the scale set have fully utilized the storage set aside for host caching. You may want to consider allocating more space for caching to improve throughput. |
||||||||||||
|
VM uncached bandwidth consumed |
Indicates the percentage calculated by the total disk throughput completed over the max uncached throughput of this VM. |
Percent |
|||||||||||||
|
VM cached IOPS consumed |
Indicates the percentage calculated by the total IOPS completed over the max cached IOPS limit of the VMs in this scale set. |
Percent |
Azure virtual machines have input/output operations per second (IOPS) and throughput performance limits based on the virtual machine type and size. If the value of the VM uncached IOPS consumed measure is 100%, it means the performance of the VMs has been capped. This can happen when the VMs are requesting for more IOPS or throughput than what is allotted for them or their attached disks. When capped, the VMs experience suboptimal performance. This can lead to negative consequences like increased latency. To avoid this, you may want to increase the IOPS limit of the VMs. Reads served by the cache are not included in the disk IOPS and Throughput, hence not subject to disk limits. Cache has its separate IOPS and Throughput limit per VM. If the VM cached IOPS consumed measure reports the value 100%, then it means that the VMs in the scale set have exhausted the IOPS limit configured for the cache. This can adversely impact throughput and I/O processing by the cache. To avoid this, you may want to increase the IOPS limit of the cache. |
||||||||||||
|
VM uncached IOPS consumed |
Indicates the percentage calculated by the total IOPS completed over the max uncached IOPS limit of the VMs in this scale set. |
Percent |
|||||||||||||
|
VM cached used burst BPS credits |
Indicates the percentage of cached burst BPS credits used by the VMs in this scale set. |
Percent |
If the value of this measure touches 100% consistently, it could mean that the application associated with the scale set requires more cached throughput than the VMs in the scale set allow. You may hence want to consider increasing the max cached throughput for the VMs in the scale set. |
||||||||||||
|
VM cached used burst IO credits |
Indicates the percentage of cached burst I/O credits used so far by this scale set. |
Percent |
If the value of this measure touches 100% consistently, it could mean that the application associated with the scale set requires more cached I/O resources than the VMs in the scale set allow. You may hence want to consider increasing the max cached IOPS for the VMs in the scale set. . |
||||||||||||
|
VM uncached used burst BPS credits |
Indicates the percentage of uncached burst BPS credits used by the VMs in this scale set. |
Percent |
If the value of this measure touches 100% consistently, it could mean that the application associated with the scale set requires more uncached throughput than the VMs in the scale set allow. You may hence want to consider increasing the max uncached throughput for the VMs in the scale set. . |
||||||||||||
|
VM uncached used burst IO credits |
Indicates the percentage of uncached burst I/O credits used so far by this scale set. |
Percent |
If the value of this measure touches 100% consistently, it could mean that the application associated with the scale set requires more uncached I/O resources than the VMs in the scale set allow. You may hence want to consider increasing the max uncached IOPS for the VMs in the scale set. . |
||||||||||||
|
Scale up instances |
Indicates the number of new instances that were added to this scale set to scale up its capacity during the last measurement period. |
Number |
Use the detailed diagnosis of this measure to know which instances were added. |
||||||||||||
|
Scale down instances |
Indicates the number of new instances that were automatically removed from this scale set to scale down its capacity during the last measurement period. |
Number |
Use the detailed diagnosis of this measure to know which instances were removed. |
The detailed diagnosis of the Provisioning state measure reveals the location of the scale set, the disk size type, and capacity of the scale set.

Figure 3 : The detailed diagnosis of the Provisioning state measure reported by the Azure Virtual Machine Scale Set test
Use the detailed diagnosis of the Total instances measure to know which VMs are in a scale set, and the current status of each VM - i.e., whether they are running or not.

Figure 4 : The detailed diagnosis of the Total instances measure