Enabling Guest level Monitoring for Azure Virtual Machines
To enable guest-level monitoring for an Azure virtual machine, do the following:
-
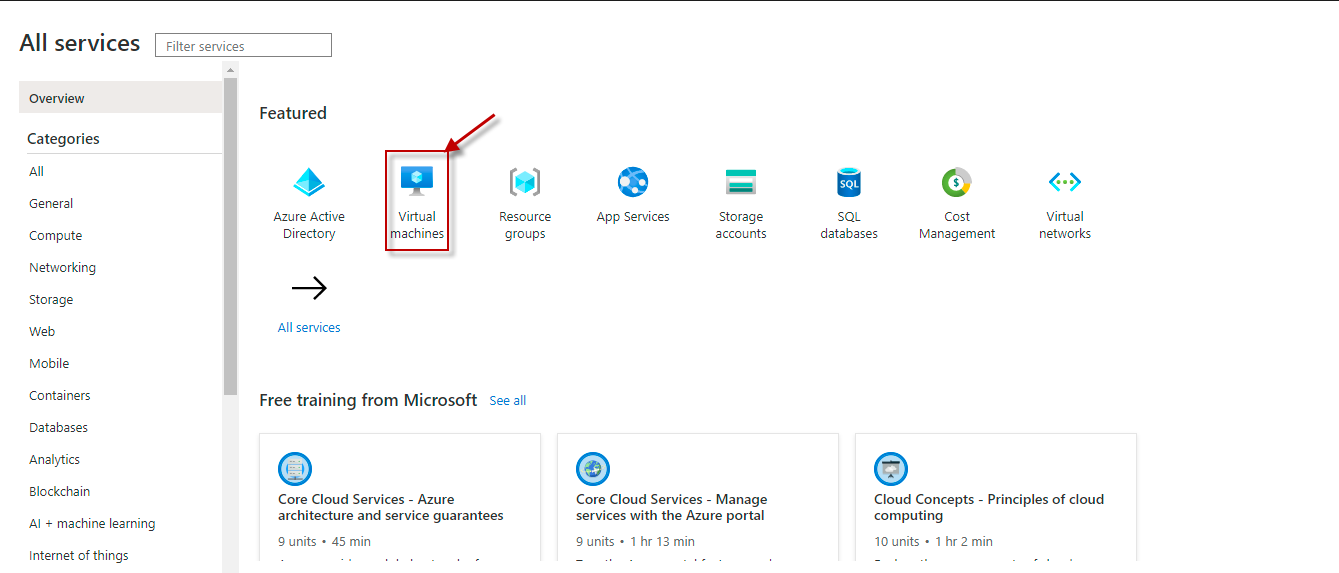
Login to the Azure portal and click on the Virtual Machines service (see Figure 1).
-
Figure 2 will then appear, list all Azure VMs. Click on the VM for which you want to enable guest-level monitoring.

-
Figure 3 will then appear displaying the properties of the chosen virtual machine. Scroll down the list of options in the left panel of Figure 3, until the Diagnostic Settings option (indicated by Figure 3) comes into view. Once it becomes visible, click on it.

Figure 3 : Clicking on the Diagnostic Settings option for the chosen virtual machine
-
Figure 4 will then appear. Click on the Enable guest-level monitoring button, indicated by Figure 4. This will install the Azure Diagnostic Agent on the chosen agent, which will start collecting guest-level metrics from that VM.
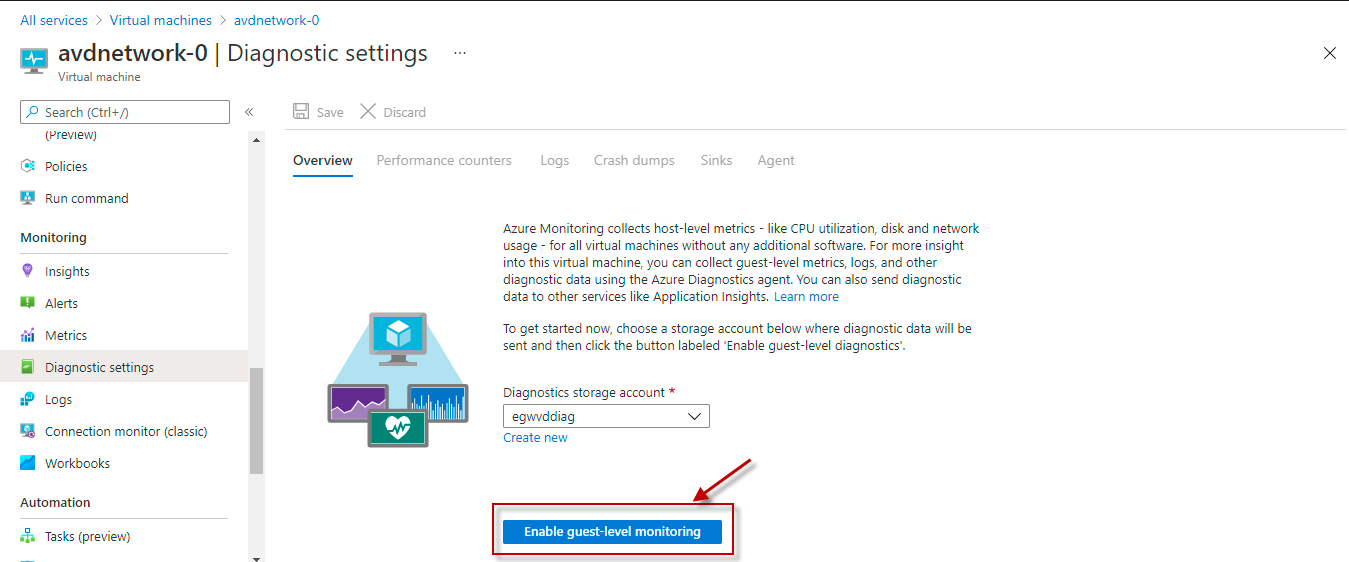
Figure 4 : Clicking on the Enable guest-level monitoring button
-
Finally, repeat steps 1-4 for each VM you want monitored.