Pre-Requisites for Monitoring Microsoft Azure (ARM)
The eG agent collects metrics from the target Microsoft Azure cloud in an agentless manner only.
In order to collect metrics from the target Microsoft Azure cloud, the eG agent communicates with the target Microsoft Azure cloud using Java API calls. To collect the required metrics, the eG agent requires the following:
- Directory ID of the target Microsoft Azure cloud;
- Access token in the form of an Application ID and Client secret.
Broad Steps to Determine the Tenant ID and the Access Token
- Create a Web Application in Microsoft Entra.
- Figure out the Tenant ID, the Application ID and Key value associated with the Application ID.
- Grant the required privileges to the Web Application from the Subscription of the target Microsoft Azure.
Creating a Web Application
To create the Web Application, do the following:
-
Login to Microsoft Entra admin center with valid credentials.
-
Figure 315 will then appear. Click on the App Registrations option in the left pane of Figure 315.

-
When Figure 316 appears, click on New registration to begin registering a new app.

-
Figure 317 will then appear.

-
In Figure 317, specify the following:
- The name of the application in the Name text box,
-
Select the type of the account from the Supported account types section.
Supported account types Description Accounts in this organizational directory only
Select this option if you want all user and guest accounts in your directory to use the application or API.
Use this option if your target audience is internal to your organization.
Accounts in any organizational directory
Select this option if you want all users with a work or school account from Microsoft to use this application or API. This includes schools and businesses that use Office 365.
Use this option if your target audience is business or educational customers and to enable multitenancy.
Accounts in any organizational directory and personal Microsoft accounts
Select this option if you want all users with a work or school, or personal Microsoft account to use your application or API. It includes schools and businesses that use Office 365 as well as personal accounts that are used to sign in to services like Xbox and Skype.
Use this option to target the widest set of Microsoft identities and to enable multitenancy.
Personal Microsoft Accounts only
Select this option if you want the application or API to be used by only those users with personal accounts that are used to sign in to services like Xbox and Skype.
-
Then, enter the redirect URl (or reply URL) for your application in the Redirect URl text box (see Figure 318). Typically, you need to provide the base URL of your app. For example, http://localhost:31544 might be the URL for a web app running on your local machine. Users would use this URL to sign in to a web client application. For public client applications, provide the URL used by Microsoft Entra to return token responses. Enter a value specific to your application, such as https://DocApp.com//auth.

-
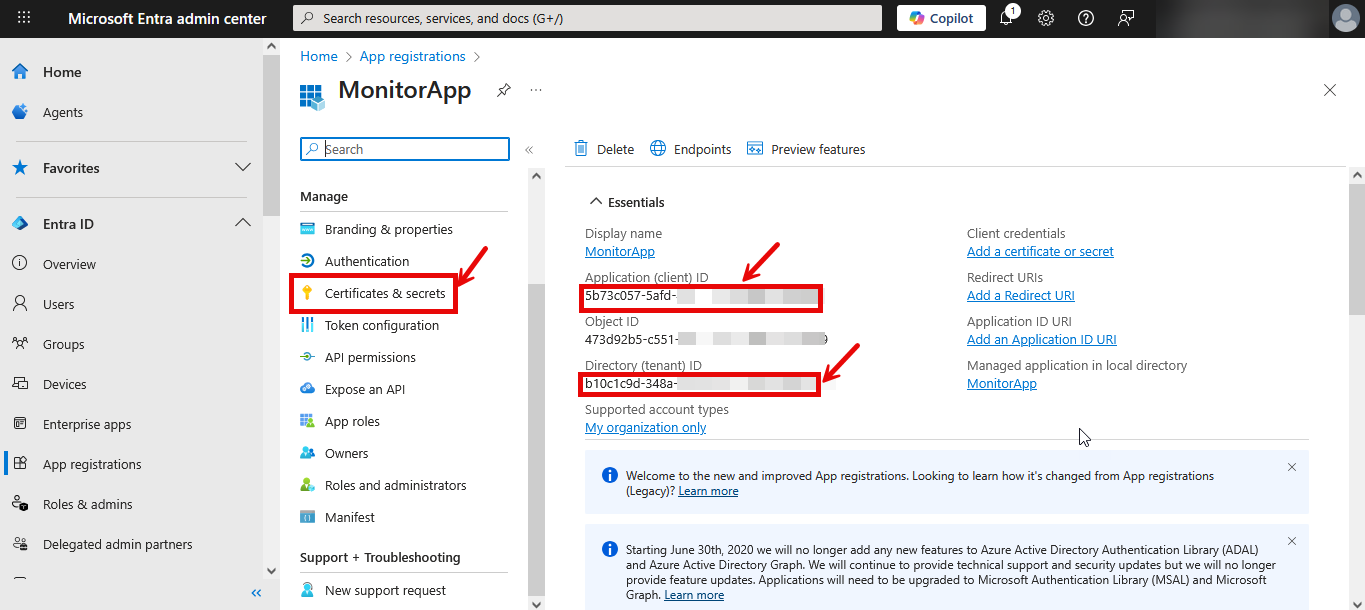
Clicking the Register button in Figure 318 will create the Application. Then, Figure 319 will appear displaying the Essentials related to the new Application.
-
From the Essentials, you can obtain the Application ID and Directory ID (see Figure 319). Copy the Application ID and the Directory ID and paste them against the Client ID and TENANT ID text boxes while configuring eG tests for the target Azure component.
Obtaining the Client Secret
For the eG agent to obtain metrics from the target Microsoft Azure component, it is necessary to provide the client secret associated with the registered Application. For this, click on the Certificates & secrets option in the left pane of Figure 319. This will invoke Figure 320.

Figure 320 : Creating New Client Secret
Clicking on the New client secret button in the right panel of Figure 320 will invoke Figure 321. Specify the description of the client secret in the Description text box and choose an expiry period from the Expires section as shown in Figure 321.

Figure 321 : Adding the client secret
Clicking the Add button in Figure 321 will display a client secret value in the Value column of Figure 322.

Figure 322 : Generating the client secret value for the application
Note that the Value will disappear once you leave this page, so make sure that you copy the new client secret value in the clipboard by clicking the  icon. Otherwise, you may need to generate a new client secret value. The client secret value has to be specified against the Client password field in the test configuration page.
Granting the Reader privilege to the Web Application
Once the web application is created, the web application should be granted Reader privilege on the Subscription associated with the Azure Active Directory. To grant the Reader privilege, do the following:
-
Click on All services option in the leftmost pane as shown in Figure 9.
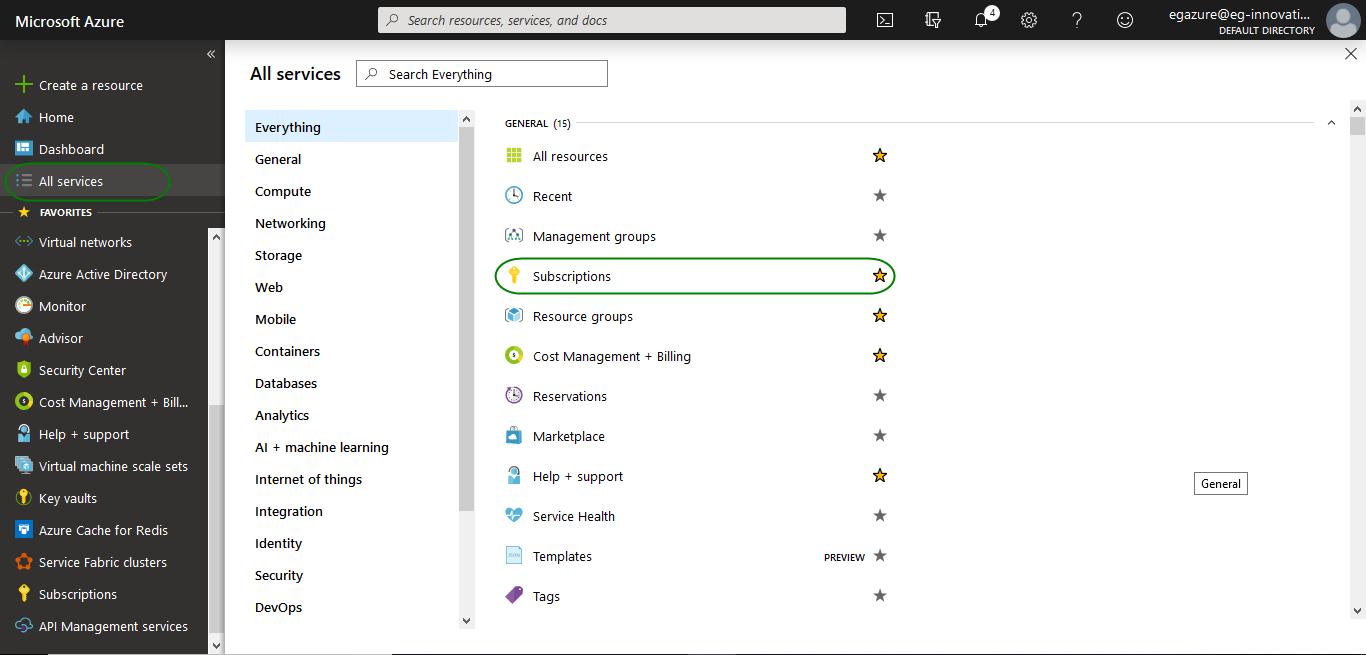
- A context-sensitive menu sequence then appears in the right panel. Clicking the Subscriptions label from this panel in Figure 323 opens another context sensitive panel to the right. This will list all the subscriptions associated with your Azure account.
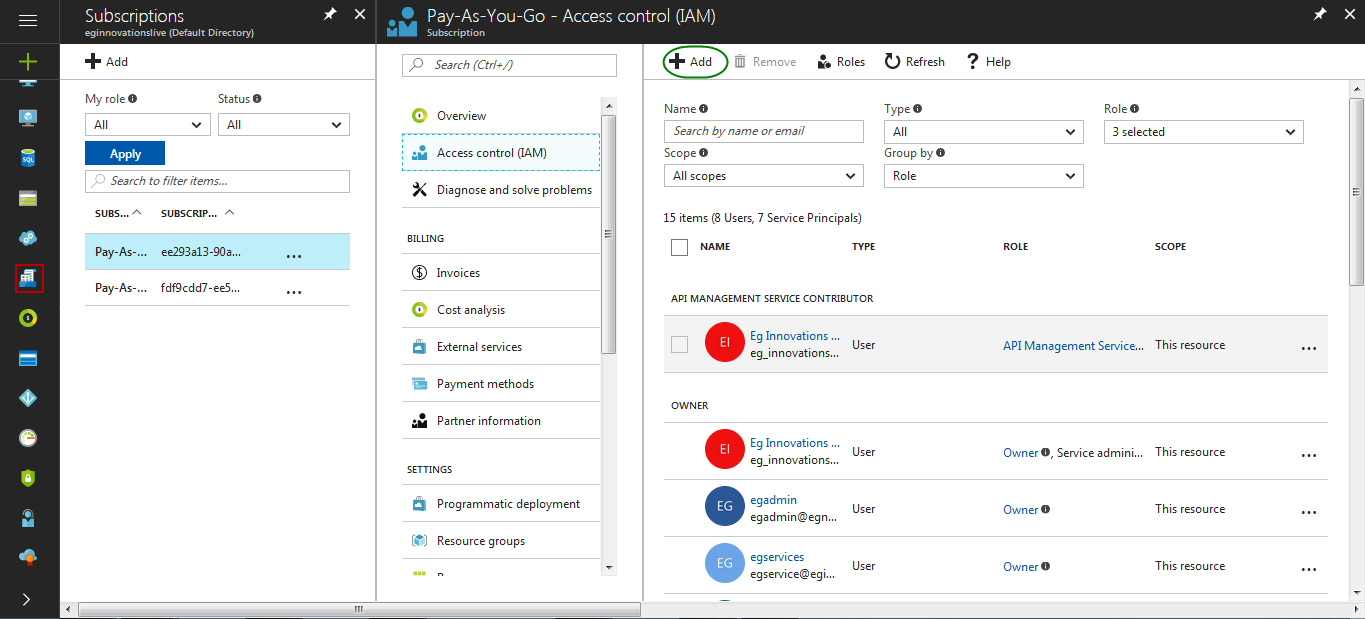
Figure 324 : Adding the Subscription
Select the subscription that is associated with the target Microsoft Azure and click the Access Control (IAM). In the next panel, click the Add button (seeFigure 324). In Figure 325 that appears, choose the Reader role from the Role list. In the Select text box, type the first few alphabets of the web application that you have created. Your selection will then appear as shown in Figure 325.
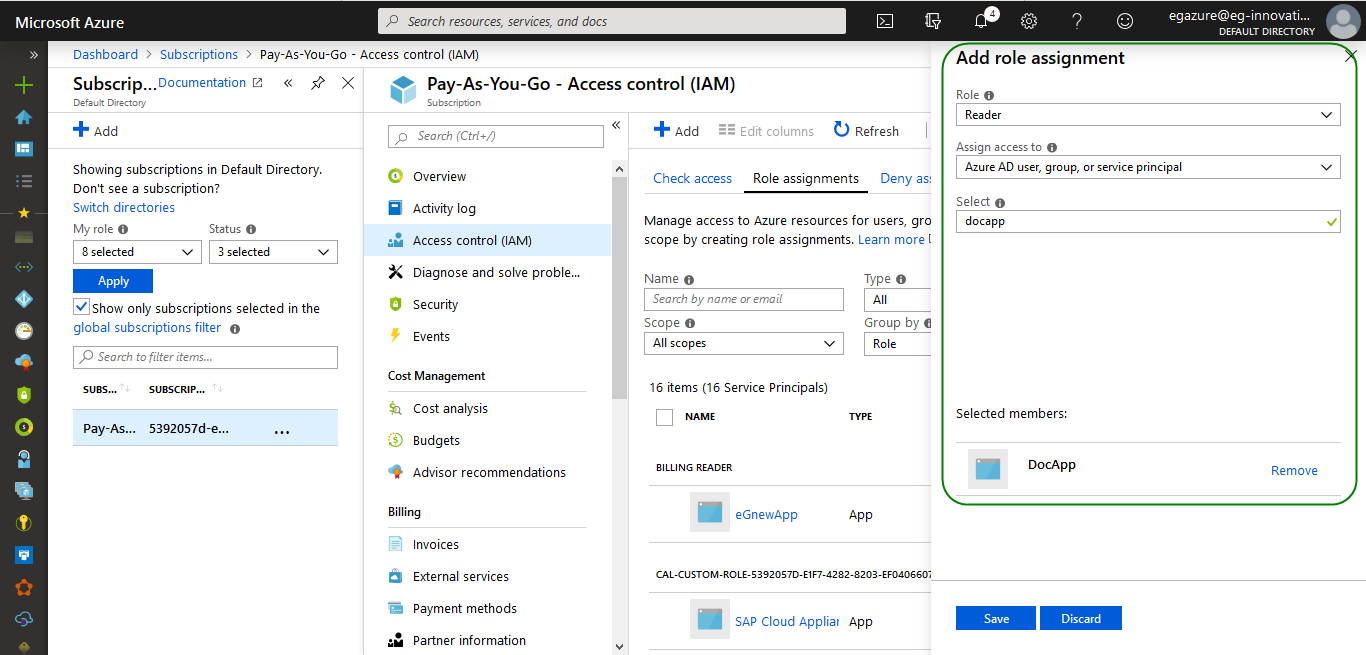
Figure 325 : Granting the Reader role to the created web application
Clicking the Save button in Figure 325 will save your changes.