Configuring Tests for Microsoft Entra Connect
The first step towards achieving this is to identify the tests that require manual configuration.
If the Microsoft Entra Connect component is auto-managed, then follow the steps below in the eG admin interface to view the tests to be configured for that component:
-
Click on the Admin hamburger menu in the home page of the eG admin interface, and follow the menu sequence, Agents -> Tests -> Specific Configuration.
-
Figure 1 will then appear. Select Microsoft Entra Connect as the Component type in Figure 1, and choose the auto-managed AD Connect server from the Component name drop-down. The UNCONFIGURED TESTS and CONFIGURED TESTS list boxes that then appear will display the tests that are still to be configured and the tests that have been configured by default (respectively) for the chosen server.
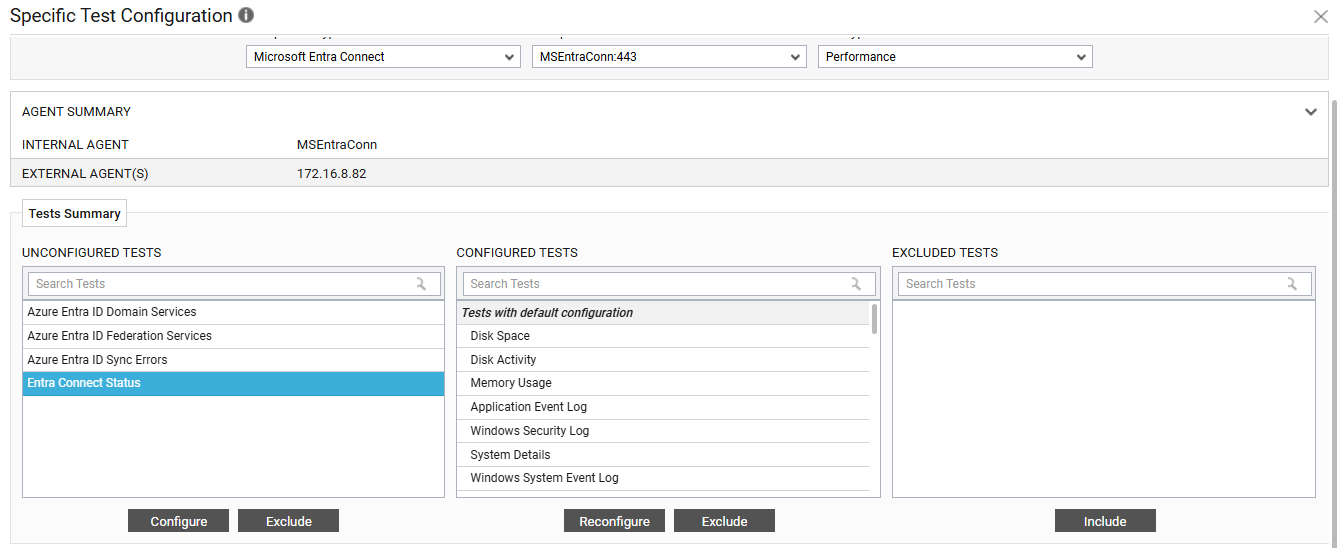
Figure 1 : Viewing the tests to be configured for the Microsoft Entra Connect server
On the other hand, if you have manually added Microsoft Entra Connect to be monitored, then follow the steps below to view the unconfigured tests:
-
As soon as you add the server, Figure 2 will appear displaying the server you just added.

Figure 2 : The Microsoft Entra Connect server that was just added
-
Click on the
 icon corresponding to that server (see Figure 2). Doing so will open the Specific Test Configuration page of Figure 1, where you can view the unconfigured tests and the tests that have been pre-configured.
Next, proceed to configure the unconfigured tests. For that, do the following:
-
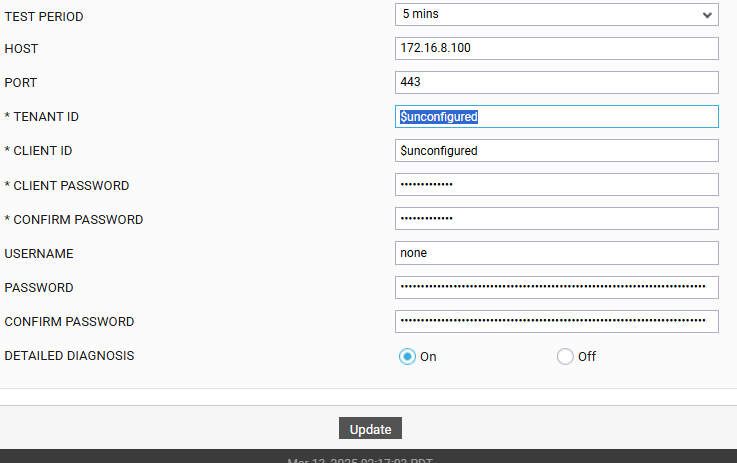
Select any test from the UNCONFIGURED TESTS list of Figure 1 and click on the Configure button. For instance, if you select the Entra Connect Status test from the UNCONFIGURED TESTS list and click on the Configure button, Figure 3 will appear displaying the parameters of that test.
-
To know what parameters this test takes and how to configure them, refer to
-
After the required parameter values are provided, click on the Update button in Figure 3 to save the changes.
-
After the required parameter values are provided, click on the Update button in to save the changes.
-
With that, all tests will be configured.