Creating a Tier
Now that the layout has been set, proceed to add a new tier. To achieve this, do the following:
-
When Figure 1 appears, provide a Tier name and click on the update button to register the changes.

-
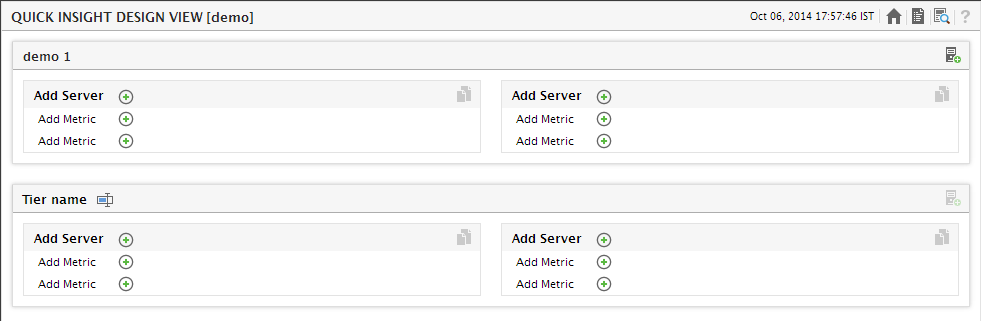
The design view will now reflect the name of the tier(see Figure 2).
-
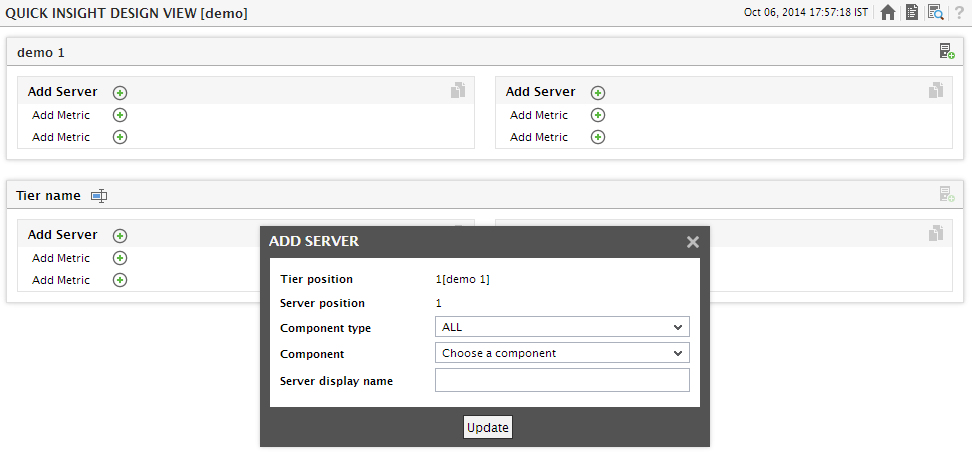
To add a new tier, click on the Tier Name. Once the addition is updated, the name of the new tier will be visible in this page. You can also modify or delete the tier name. Similarly, clicking on the [Add server] link here, will allow you to add a new server to a tier.
-
To modify a tier, click on the name of the tier in Figure 3. Figure 4 will then appear displaying the tier name. Change the name if required and update the changes by clicking on the Update button. The displayed tier can also be deleted using the Delete button in Figure 3
