Managing NetApp E-Series Storage
eG Enterprise automatically discovers the NetApp E-Series Storage component in the target environment and also auto-manages the component after it is discovered. However, if for some reason the component is not discovered automatically, you will have to manually add the component to the eG Enterprise system using the eG admin interface.
-
Login to the eG admin interface as a user with administrative privileges.
-
Click on the Add Component button in the right corner of the Components at a Glance page that appeared or follow the Infrastructure -> Components -> Add/Modify menu sequence.
-
The Components page will then appear. In the Components page, select NetApp E-Series Storage as the Component type and click the Add New Component button.
-
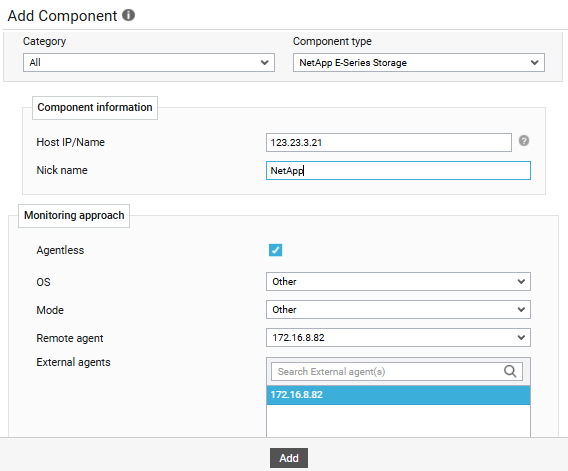
Specify the Host IP/Name and the Nick name of the NetApp E-Series Storage as shown in Figure 1, and click the Add button to register the changes.
-
Once the NetApp E-Series Storage is added successfully, you will be again redirected to the Components page (see Figure 2). Using the options provided in the Components page, you can modify, unmanage or delete the newly added component. In addition, you can also configure the tests.

-
Click on any test in the list of unconfigured tests (see Figure 3). For instance, click on the NetApp E-Series Storage Disk test to configure it.
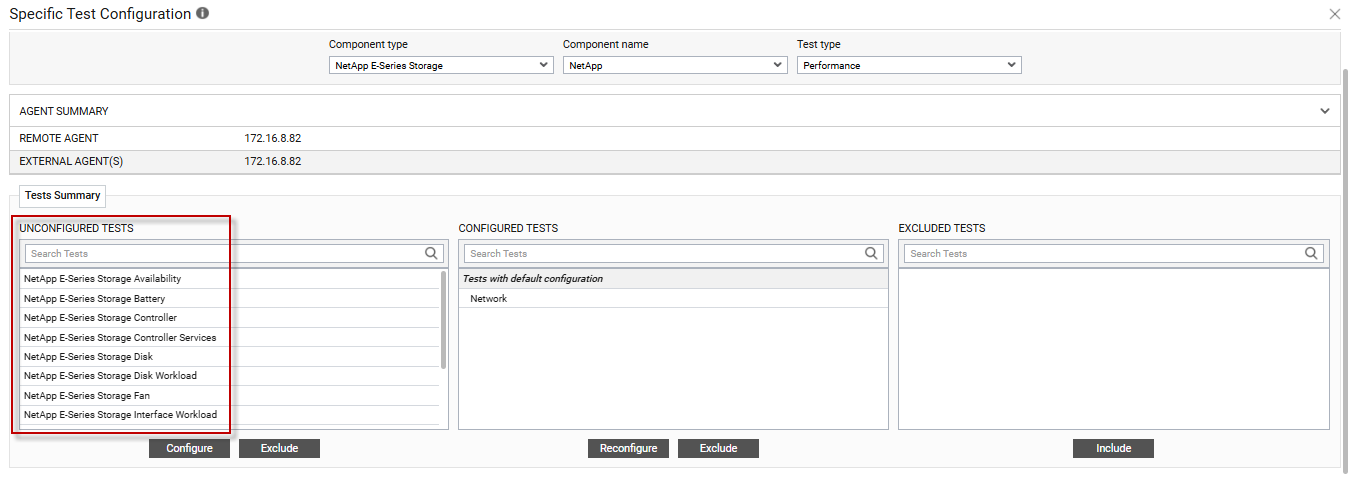
Figure 3 : List of unconfigured tests for NetApp E-Series Storage
-
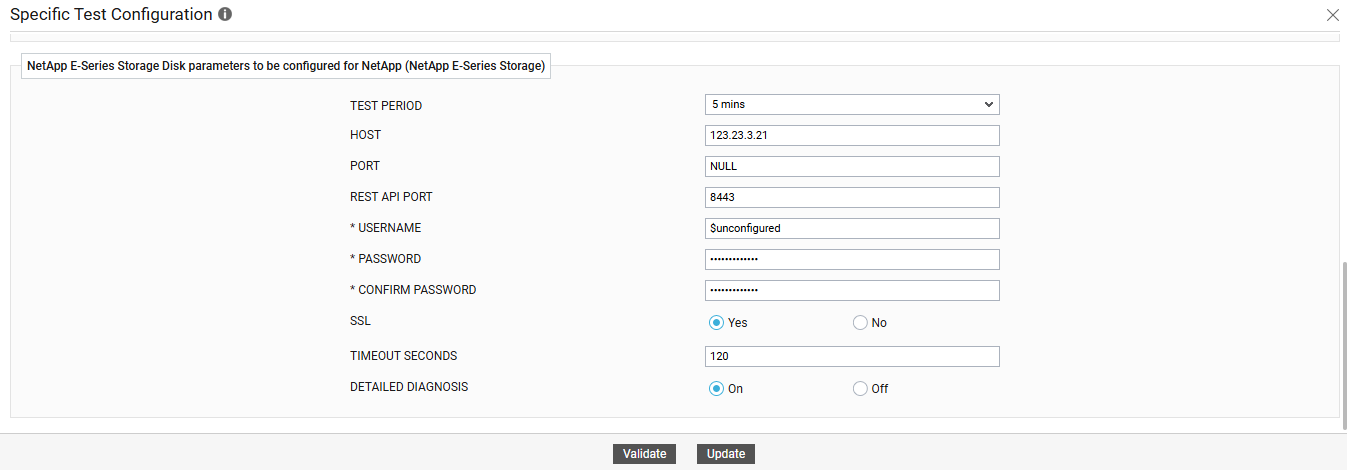
In the page that appears, specify the parameters as shown in Figure 4 and click the Update button to configure the test.
-
Once all the tests are configured, switch to the Monitor tab to view the performance metrics reported by the tests.