Manually Enabling Certificate-based Authentication For an Office 365 Tenant
The broad steps for achieving this are as follows:
-
Create a new application on Microsoft Entra for the purpose of enabling certificate-based authentication.
-
Create a self-signed X.509 certificate.
-
Upload the certificate to the Office 365 cloud for secure communication.
-
Grant the Exchange.ManageAsApp permission in the Office 365 Exchange Online API add Sites.FullControl.All permission in Office 365 SharePoint Online API to the new application.
-
Assign the Exchange Administrator role to the new application
-
Install the certificate on the system hosting the eG agent
-
Capture the ID of the new application and the certificate thumbprint into a *.dat file.
-
Configure the eG tests for Office 365 components with the name of the tenant for which certificate-based authentication has been enabled. The tests will then read the Application ID and Certificate Thumbprint of that tenant from the .dat file. Using this access information, the eG tests will then communicate with O365 and pull metrics related to the target tenant and its resources.
The sections that follow will discuss steps 1-7, elaborately.
Creating a New Application on Microsoft Entra for Certificate-based Authentication
To achieve this, follow the steps detailed below:
-
Login to the Office 365 portal as a user with Global Administrator rights to the Office 365 tenant being monitored. When Figure 1 appears, click on the
 icon at its left top corner. This will invoke the menu options depicted by Figure 1. Select the Admin option from the menu.
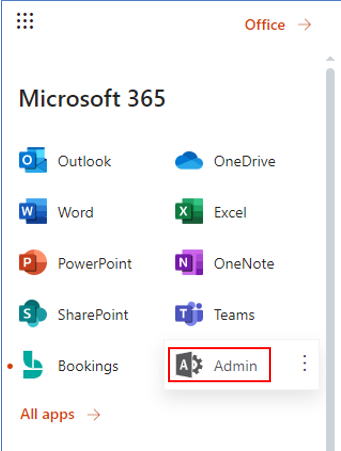
-
Figure 2 will then appear. Select the Identity option from Figure 2.

-
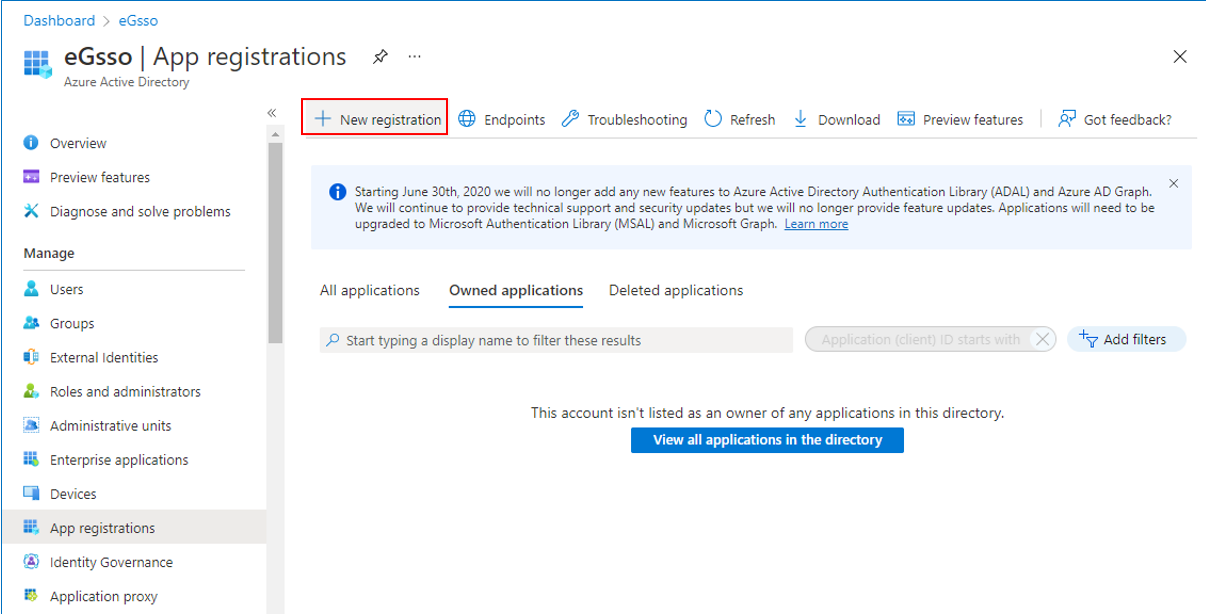
This will open Figure 3. From the left panel of the Overview page of Figure 3, select the App registrations option. To create a new application, click on the New registrations link in the right panel of Figure 3.
-
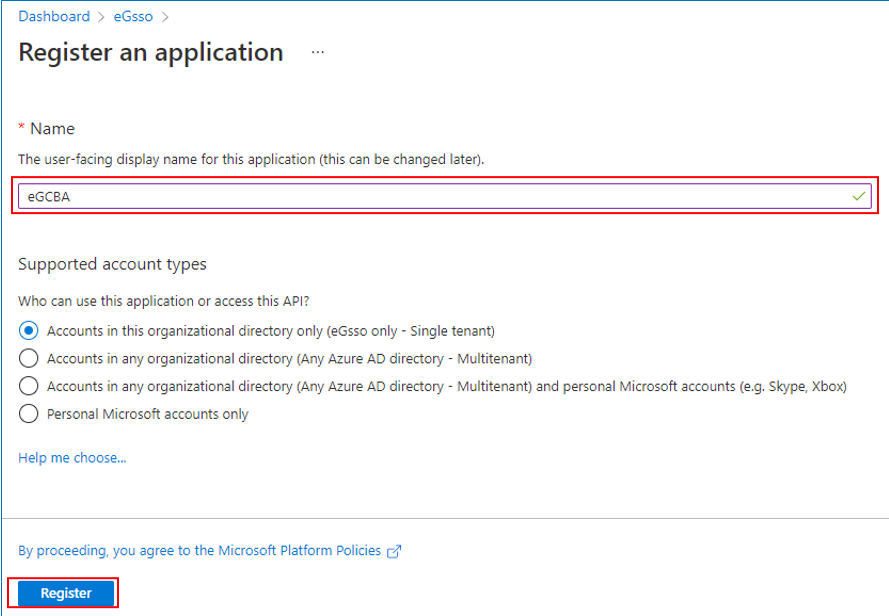
This will open Figure 4. Under Name, specify the name for the new application you are creating. Then, click the Register button in Figure 4 to register a new application on Microsoft Entra with the specified name.
-
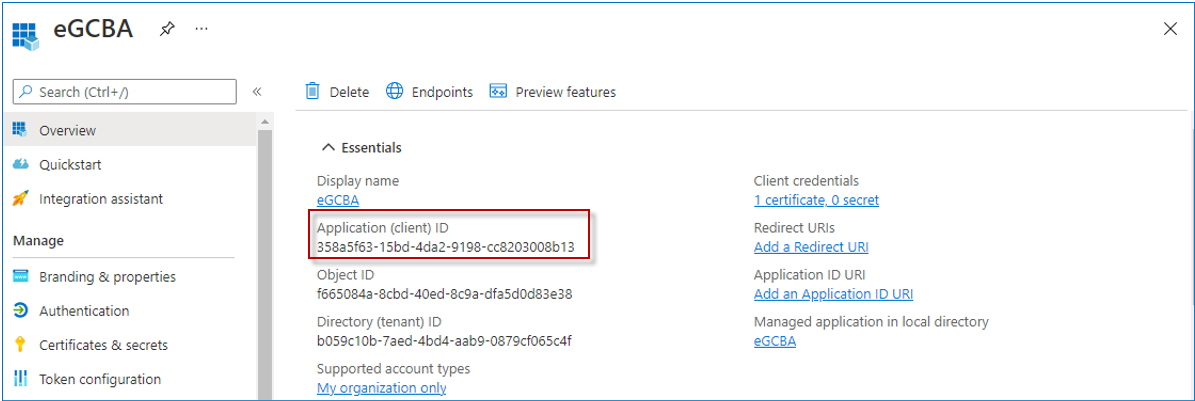
Once the application is successfully created, Figure 5 will appear. Make a note of the Application (client) ID displayed in Figure 5.
Creating an X.509 Certificate
The next step is to create and configure a self-signed X.509 certificate, which will be used to authenticate the application you have created against Microsoft Entra, while requesting the app-only access token.
Follow the steps below to create the self-signed certificate:
-
First, log into the system hosting the eG agent.
- To enable you to automatically generate a self-signed certificate, eG provides a proprietary powershell script. To run this script, open the Windows PowerShell ISE as 'administrator', and run the O365GenerateCertificate.ps1 script in the <EG_AGENT_INSTALL_DIR>\lib directory.
-
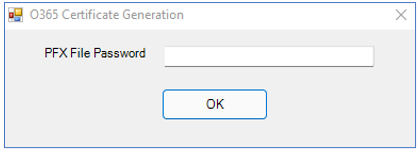
The self-signed certificate that this script creates will be available as a .cer file and as a .pfx file in the <EG_AGENT_INSTALL_DIR>\agent\O365\AppInfo directory. To make sure that the certificate allows secure access to a tenant's resources, you need to protect the .pfx certificate file using a password. Set this PFX File Password using Figure 6 that appears, and click the OK button therein.
-
Upon clicking OK in Figure 6, a Microsoft login prompt will appear (see Figure 7). Login using the credentials of the special O365 user you created (manually or automatically) for monitoring purposes (refer to Creating a New User in the Office 365 Portal or Automatically Fulfilling Pre-requisites For Monitoring Microsoft Office 365 Environments). Alternatively, you can login using Global Administrator credentials.
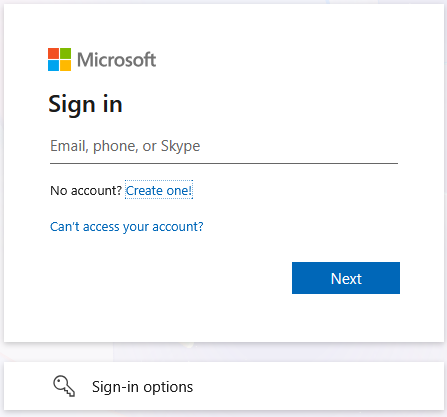
Figure 7 : Login using Monitor User credentials or Global Administrator credentials
-
Your login, once authenticated successfully, will help identify the certificate named after the tenant.
Uploading the Certificate to the Office 365 Cloud
Next, proceed to upload the .cer certificate file on the eG agent host to Entra application. For this, do the following:
-
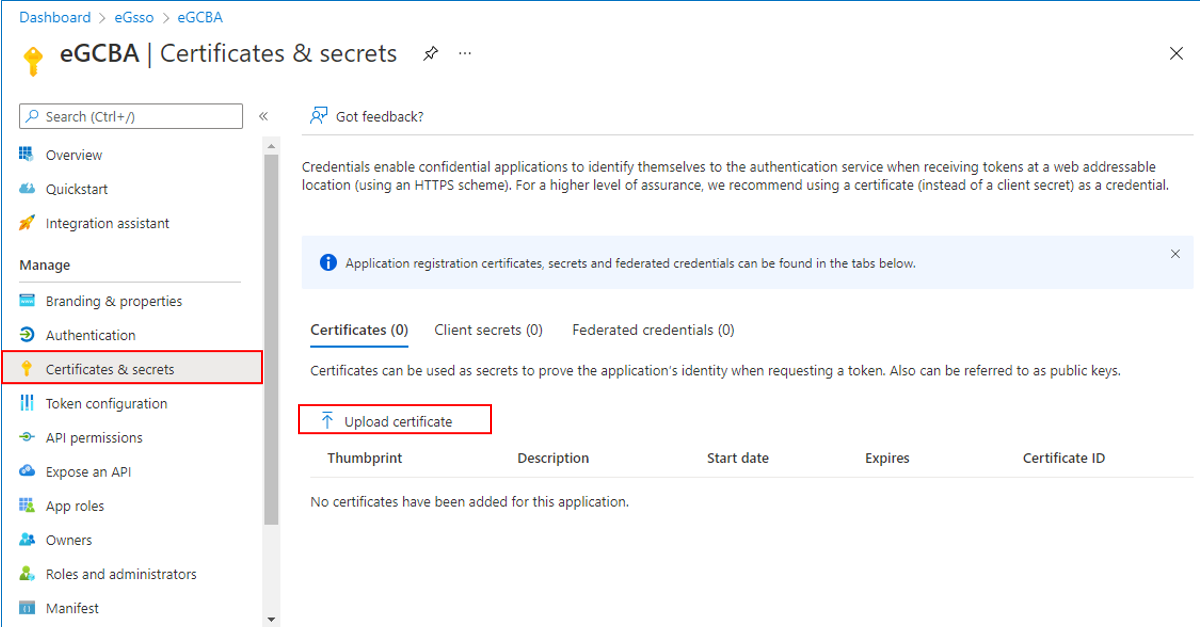
Click on the Certificates and Secrets option in the left panel of Figure 8. The right panel will change to display a Certificates section. Click on the Upload certificate link in Figure 8.
-
Figure 9 will then appear. In the Select a file text box, specify the full path to the .cer file that was automatically created previously using the O365GenerateCertificate.ps1 script. You can use the
 button in Figure 9 to quickly browse and locate the certificate file. Note that you will find the .cer file and the .pfx file in the <EG_AGENT_INSTALL_DIR>\agent\O365\AppInfo directory.
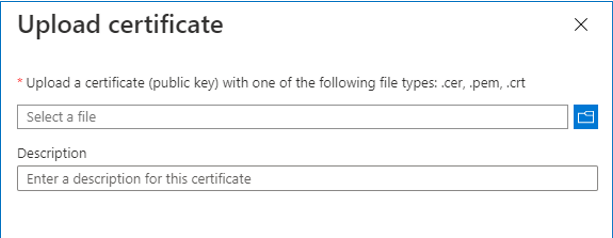
-
Figure 10 will then appear. Make a note of the certificate Thumbprint displayed in Figure 10.
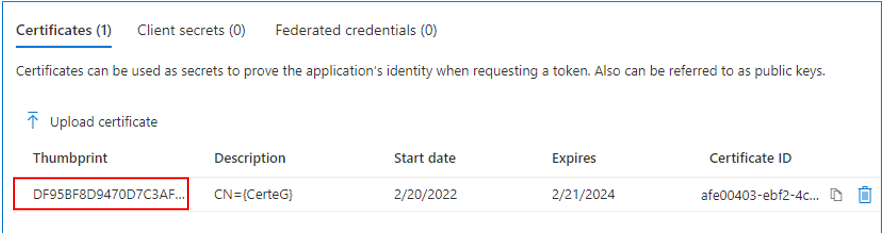
Figure 10 : Details of the uploaded certificate, including its thumbprint
Granting Permissions to the New App in the Office 365 Exchange Online API
For this, do the following:
-
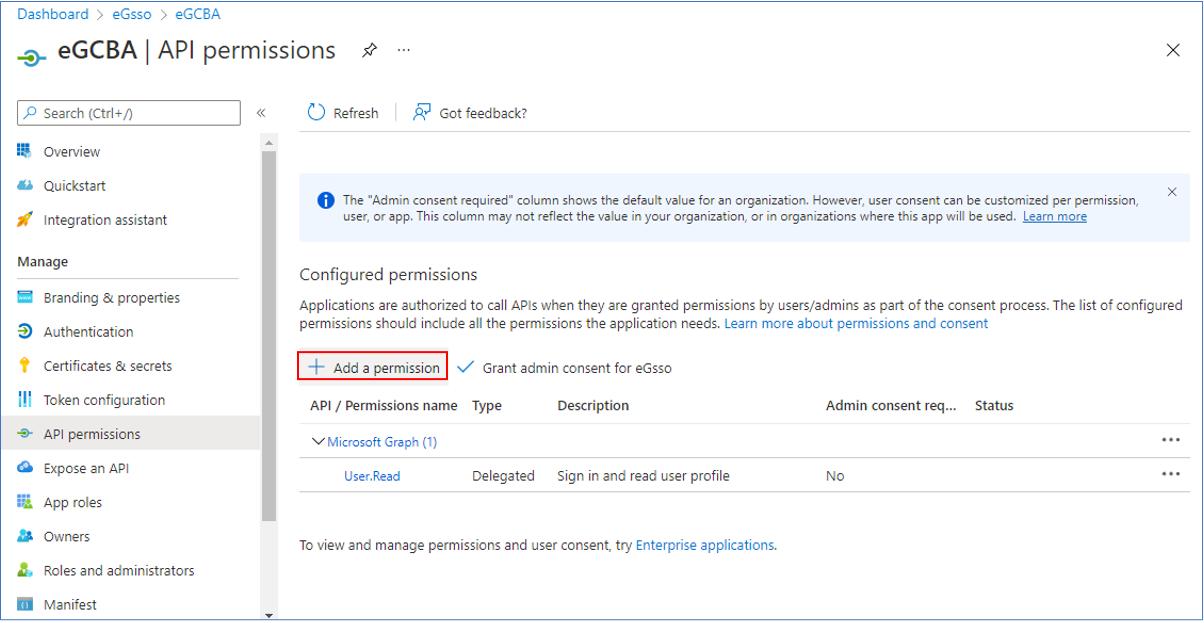
Click on the API permissions option in the left panel of Figure 11. The right panel will then change to display pre-set API permissions. To grant new permissions, click on the Add a permission link in the right panel of Figure 11.
-
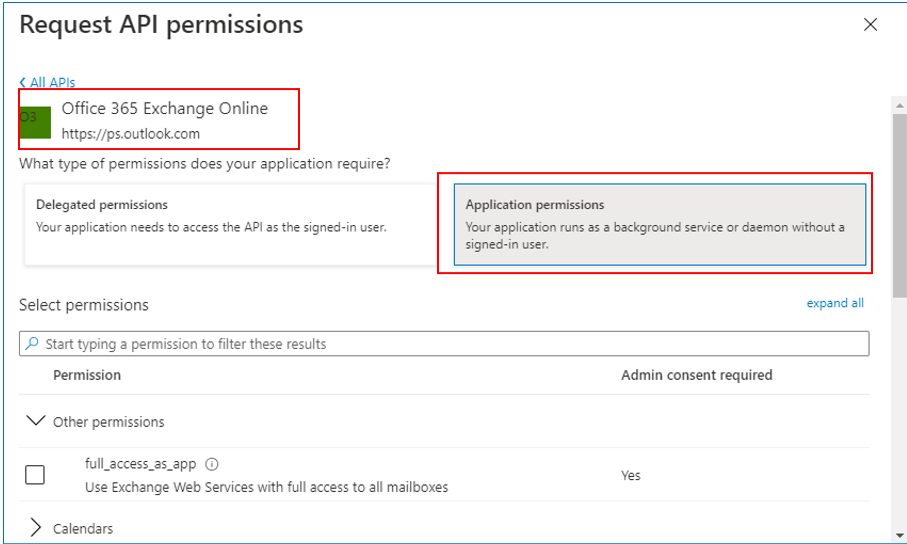
Figure 12 will then appear, with the Microsoft APIs tab page selected by default. Switch to the APIs my organization uses tab page by clicking on it (see Figure 13). In the search text box (the box with the 'magnifying glass' icon within) in Figure 13, type office. All APIs with names that start with the string, office, will then be listed under the text box. Keep scrolling down the list until you find the Office 365 Exchange Online API (see Figure 14). Click on that API, and then select the Application permissions option (see Figure 14).

Figure 12 : The Microsoft APIs tab page
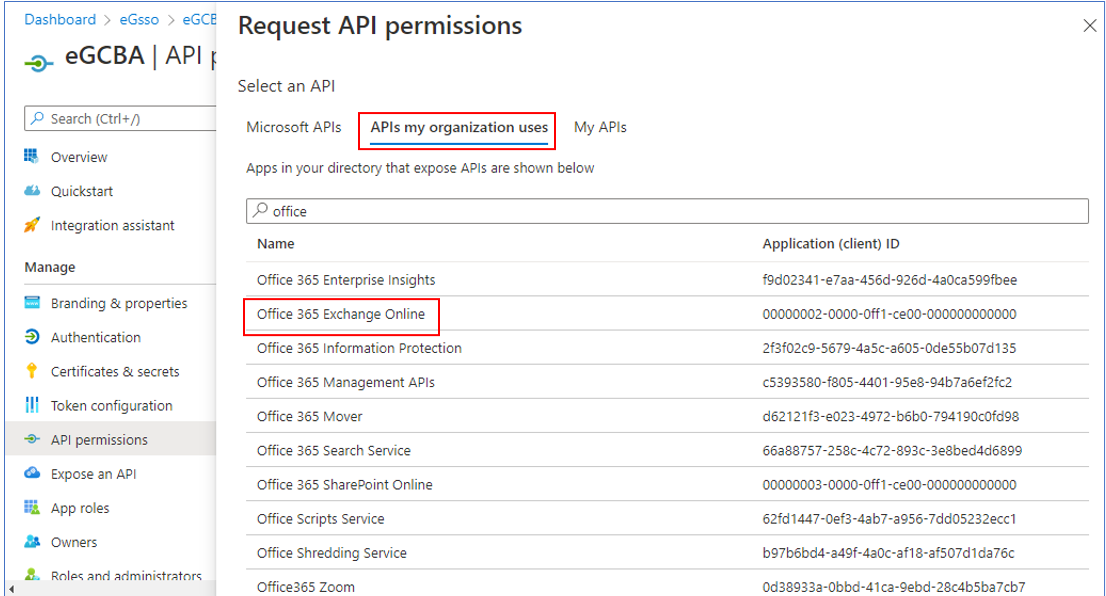
Figure 13 : Switching to the APIs my organization uses tab page and selecting the Exchange Online API
-
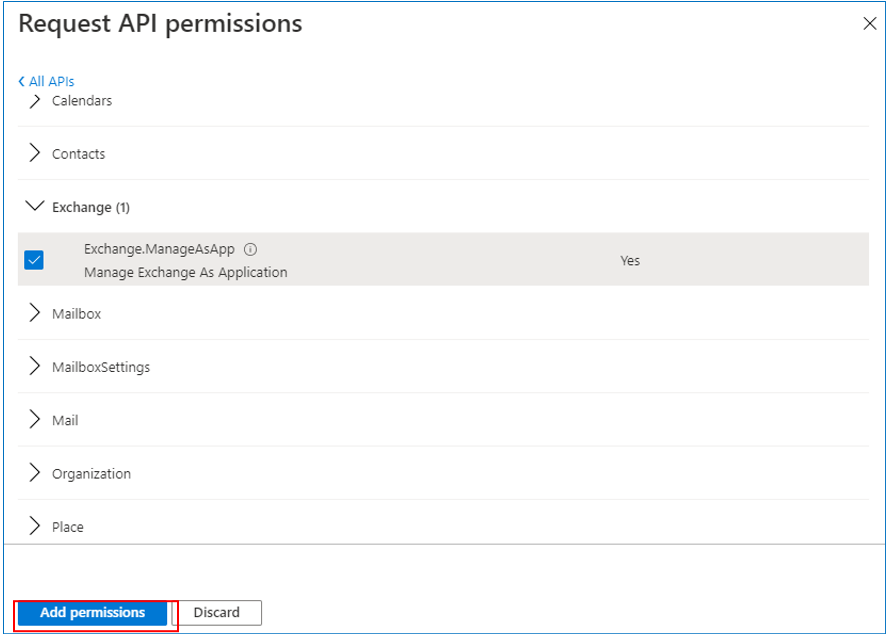
Next, scroll down the Select permissions section of Figure 14, until you find the Exchange.ManageAsApp permission. Select that permission and click on the Add permissions button (see Figure 15).
-
Figure 16 then appears displaying the selected permission. Here, click on the Grant admin consent link.
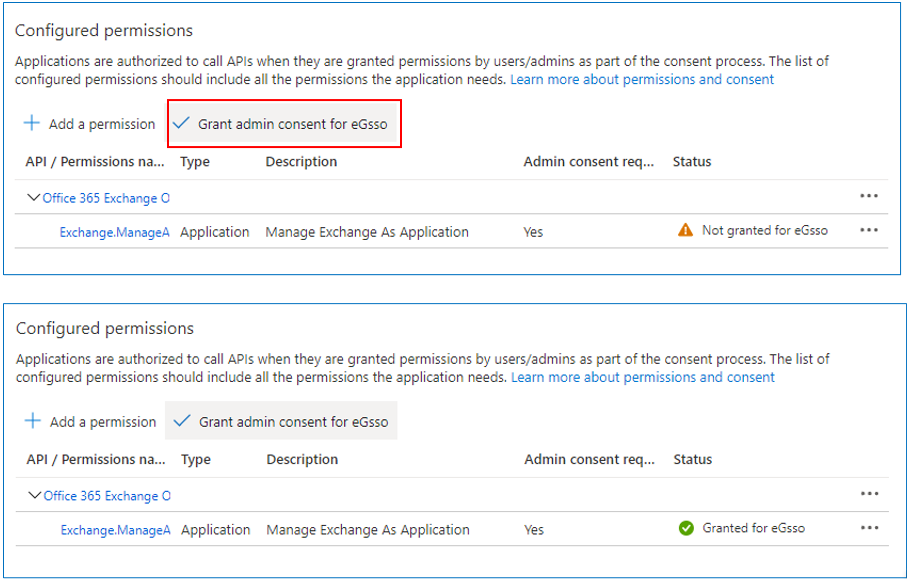
Figure 16 : Granting admin consent to the selected permission
-
Similarly, switch to the Office 365 SharePoint Online API, select Application permissions option, and assign the Sites.FullControl.All permission to the app. Then, Grant admin consent to the selected permission as well.
Assigning the Exchange Administrator role to the New Application
Follow the steps below to achieve this:
-
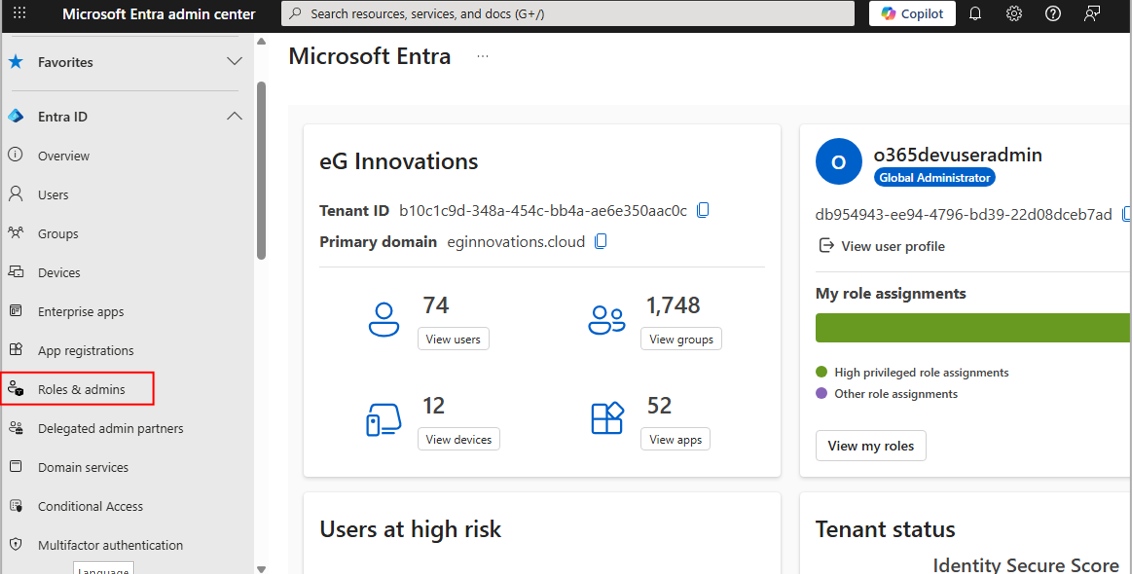
Go to the Microsoft Entra Admin Center, and click on the Roles and admins option in the left panel (see Figure 17).
-
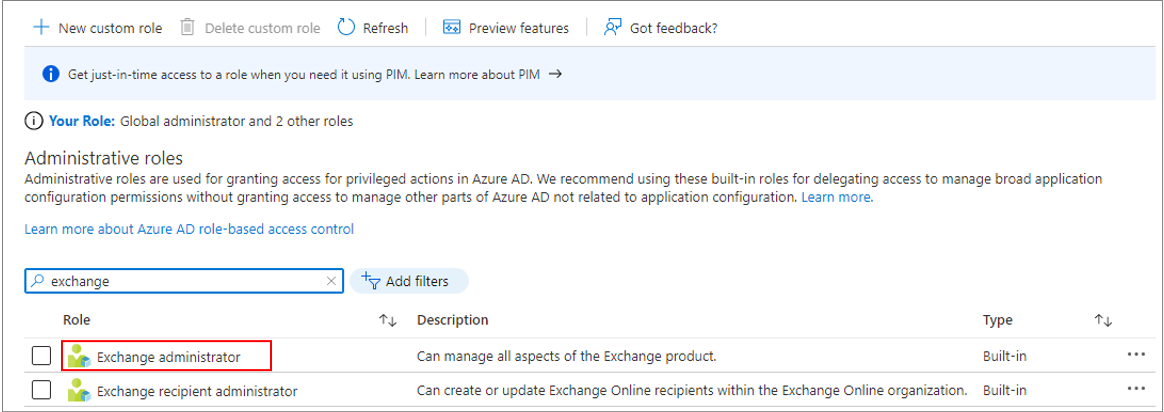
Figure 18 will then appear. Use the Search text box here to look for 'exchange' roles. From the search results, pick the Exchange administrator role by clicking on the check box alongside.
-
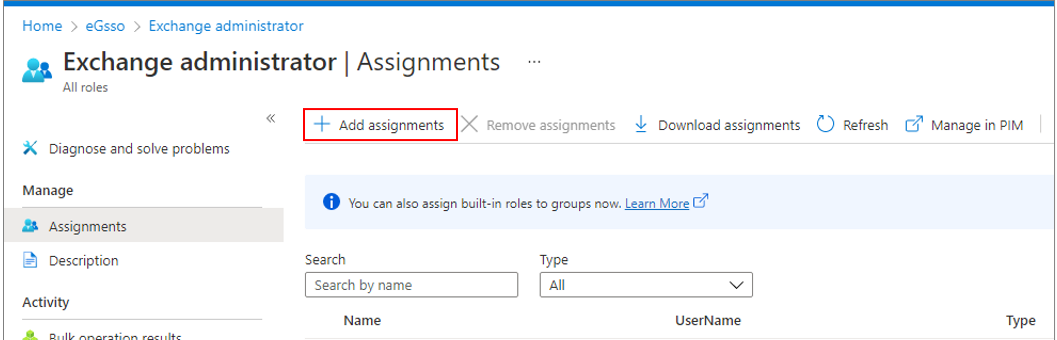
When Figure 19 appears, click on the Add assignments link.
-
Figure 20 will then appear. Using the Search text box in Figure 20, search for the application you created in Creating a New Application on Microsoft Entra for Certificate-based Authentication. Scroll down the search results to locate that application. Once you find the application, select it by clicking on it.

Figure 20 : Selecting the new application to which the Exchange administrators role is to be assigned
-
Figure 21 will then appear.
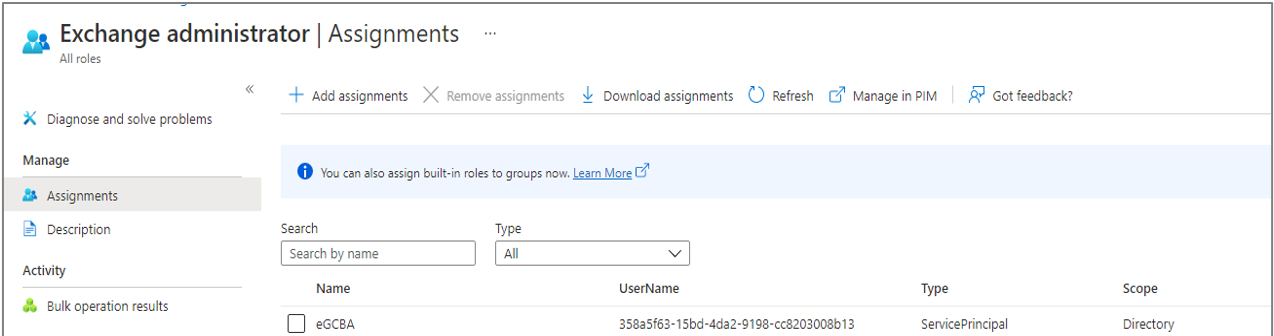
Figure 21 : Assigning the Exchange administrators role to the new application created for the purpose of certificate-based authentication
Installing the Certificate on the eG Agent Host
For this do the following:
-
As mentioned already, the certificate that is auto-generated using the O365GenerateCertificate.ps1 script will be available as a .pfx file in the <EG_AGENT_INSTALL_DIR>\agent\O365\AppInfo directory.
-
To install the PFX certificate on the agent host, navigate to the <EG_AGENT_INSTALL_DIR>\agent\O365\AppInfo directory on the agent host (using Windows Explorer), right-click on the PFX file therein, and select Install PFX. Figure 22 will then appear.
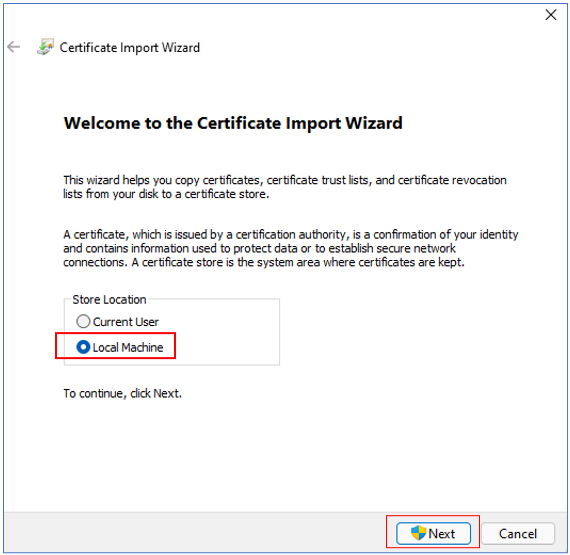
Figure 22 : Selecting Local Machine as Store Location in the Certificate Import Wizard
-
Set Local Machine as the Store Location in Figure 22 and click the Next button.
-
This will invoke Figure 23. Click on Yes here to proceed..
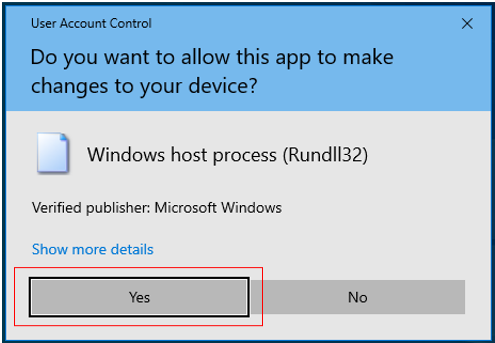
Figure 23 : A message seeking your confirmation to proceed with the installation
-
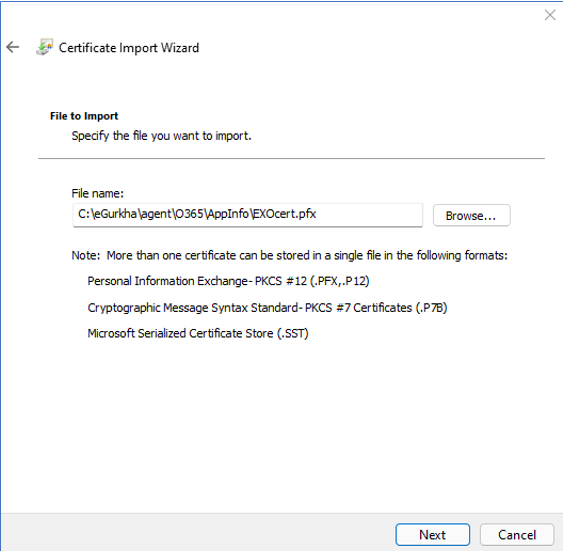
In Figure 24 that then appears, the path to the PFX file to be installed will by default be displayed in the File name text box. Verify the location of the file, and if it is correct, click on the Next button to proceed.
-
Figure 25 will then appear. In the Password text box of Figure 25, enter the same PFX File Password you specified in Figure 6 above. Then, click the Next button.

-
Figure 26 will then appear. Here, you need to indicate where the certificate needs to be stored. Select the Automatically select the certificate store based on the type of certificate option in Figure 26. If this option is chosen, then Windows will automatically select a certificate store where the certificate will be stored. Then, click the Next button to move on.
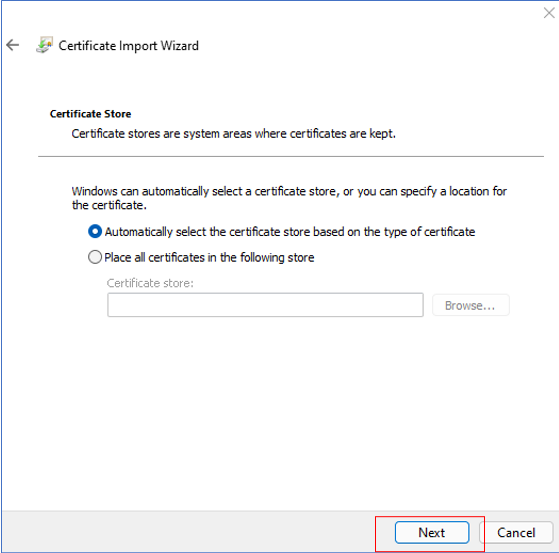
Figure 26 : Allowing Windows to select the certificate store
-
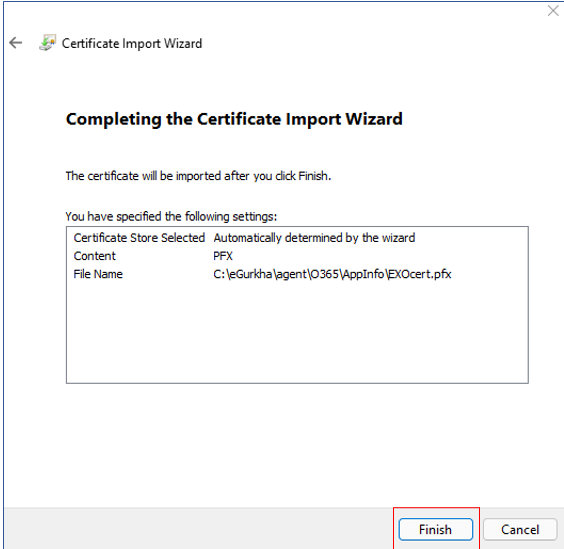
When Figure 27 appears, click the Finish button here to end the installation.
-
If the certificate is successfully imported to the agent host, a message to that effect will appear. Click the OK button here to exit the wizard.

Figure 28 : A message indicating the certificate import is successful
Capturing Certificate Details into a File
To achieve this, do the following:
-
Login to the system hosting the eG agent.
-
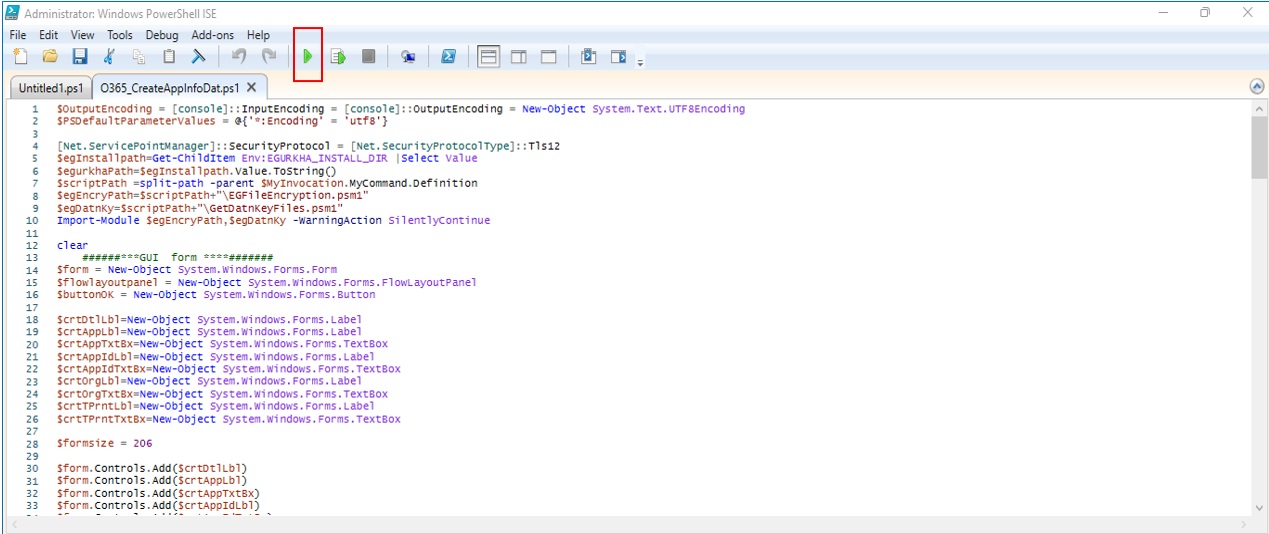
Open the Windows PowerShell ISE as 'administrator', and run the O365_CreateAppInfoDat.ps1 script in the <EG_AGENT_INSTALL_DIR>\lib directory (by clicking on the button indicated by Figure 29).
-
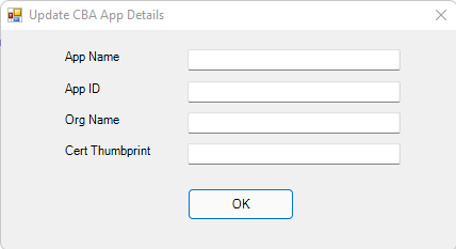
Upon successful script execution, Figure 30 will appear.
-
In Figure 30, specify the following:
-
App Name: Specify the name of the new application you created using the procedure detailed in Creating a New Application on Microsoft Entra for Certificate-based Authentication.
-
App ID: Enter the ID of the new application. Here, mention the Application (client) ID that you see in Figure 5.
-
Org Name: Specify the name of the tenant for which certificate-based authentication has been enabled. To know the tenant name, do the following:
-
Log in to the Microsoft 365 Admin Center as an administrator.
-
Under Setup, click on Domains.
-
Find a domain that ends with .onmicrosoft.com - this is your Microsoft O365 tenant name
-
-
Certificate Thumbprint: Specify the thumbprint of the certificate you uploaded to Office 365. Here, specify the Thumbprint you see in Figure 10.
-
Finally, click the OK button in Figure 30.
-
-
The details you provide in Figure 30 will be automatically captured into an AppDetails.dat file. The powershell script will create this file in the <EG_AGENT_INSTALL_DIR>\egurkha\agent\O365 directory. Once you configure eG tests with a Tenant Name, then the test will read the certificate details that correspond to that tenant from this file. Using these access details, the test will communicate with O365 and pull metrics related to that tenant and its resources.
Note:
To make sure that every eG agent that monitors an O365 tenant uses certificate-based authentication, copy the AppDetails.dat file that gets automatically created at step 5 to the <EG_AGENT_INSTALL_DIR>\agent\O365 diirectory of every such agent.