Registering the Microsoft Graph App On Microsoft Entra ID
To achieve this, follow the steps detailed below:
-
Login to the Office 365 portal as a Global Administrator.
-
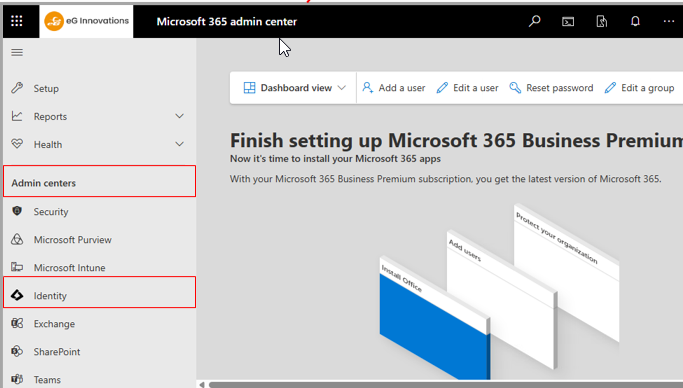
When Figure 1 appears, browse the left panel of Figure 1 for the Admin Centers node. Expand the node and select the Identity sub-node within.
-
Figure 2 then appears. Select App registrations to register the Microsoft Graph app.

Figure 2 : Selecting the App registrations option to register a new app on Azure Entra ID
-
Figure 3 then appears, using which you can register the Microsoft Graph app. In the Name text box, specify the display name of the app you intend to register. Make sure you copy this name to notepad. Then, from the drop-down in the Redirect URI section, select Web. In the text box adjacent to the drop-down, specify the URL to which the authentication response needs to be returned after successfully authenticating users to the new app. Make sure that this URI is in the format: https://<initial/default domain>-my.sharepoint.com. For example, the URI can be https://egitest-my.sharepoint.com. Finally, click the Register button in Figure 3 to register Microsoft Graph on Azure Entra ID.
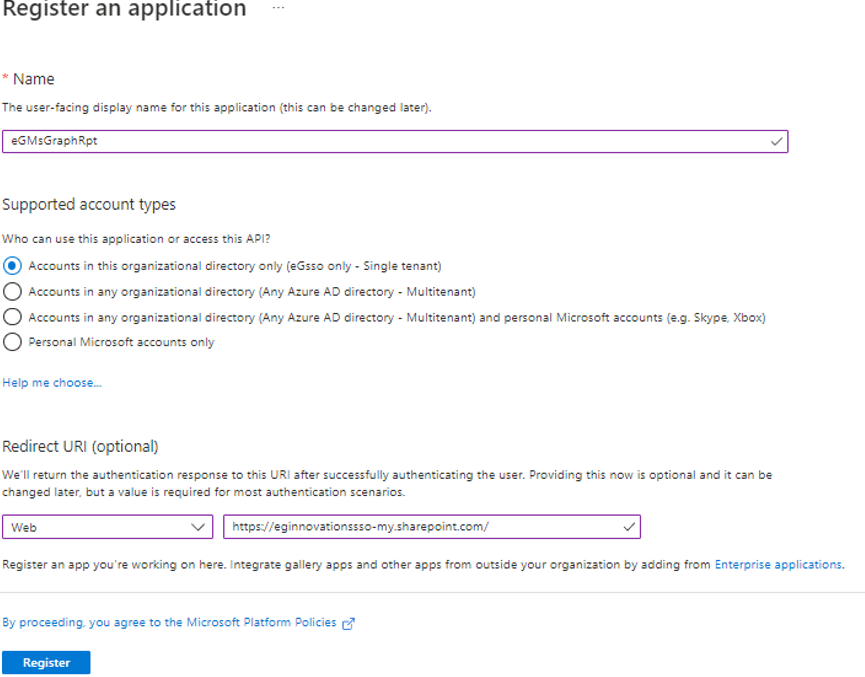
Figure 3 : Registering the Microsoft Graph app on Azure Entra ID
-
Upon successful app registration, Figure 4 will appear displaying a message to that effect. Additionally, Figure 4 will display the Application (client) ID that is auto-generated and auto-assigned to the Microsoft Graph app. Make sure you copy this ID also to notepad.
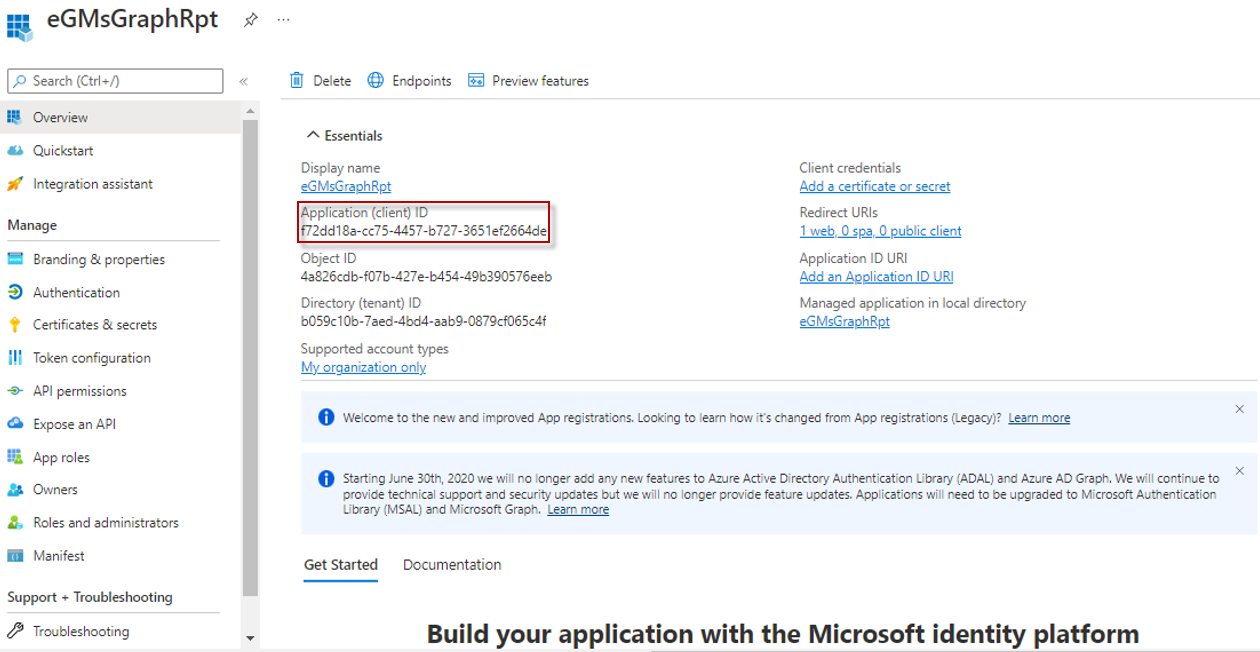
Figure 4 : Viewing and making a note of the Application ID of the Microsoft Graph app
-
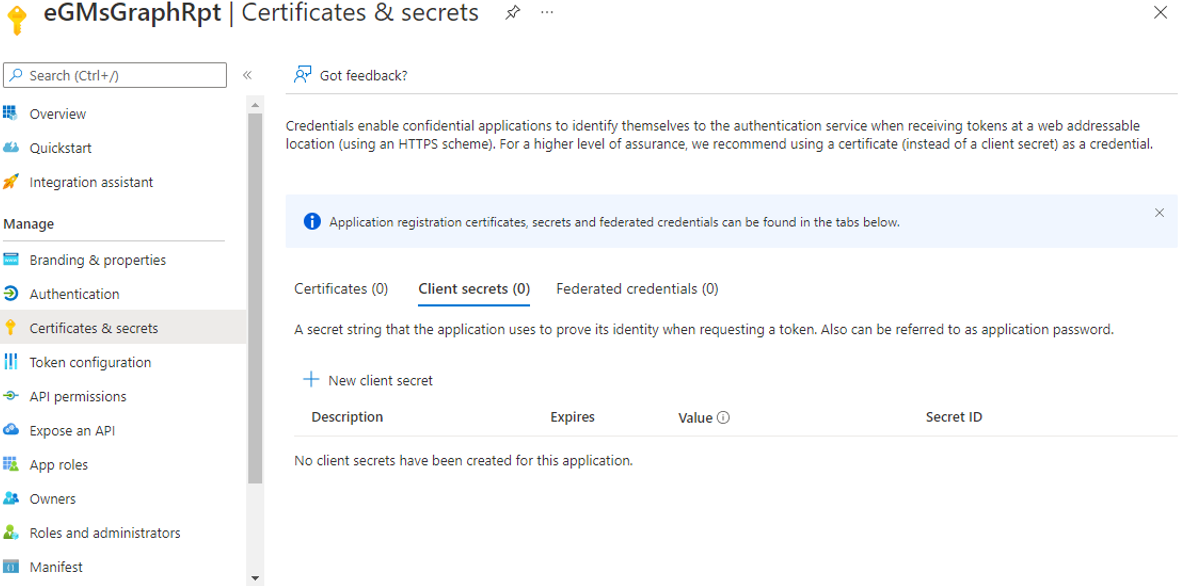
Next, proceed to create a secret for the new app. To achieve this, click on the Certificates & Secrets option under Manage in the left panel of Figure 4. Figure 5 will then appear. Now, click on the New client secret link in the Client Secrets section in the right panel of Figure 5.
-
When Figure 6 appears, provide a Description for the new secret, set an expiry period by picking an option from the Expires drop-down, and click the Add button to add the new secret.
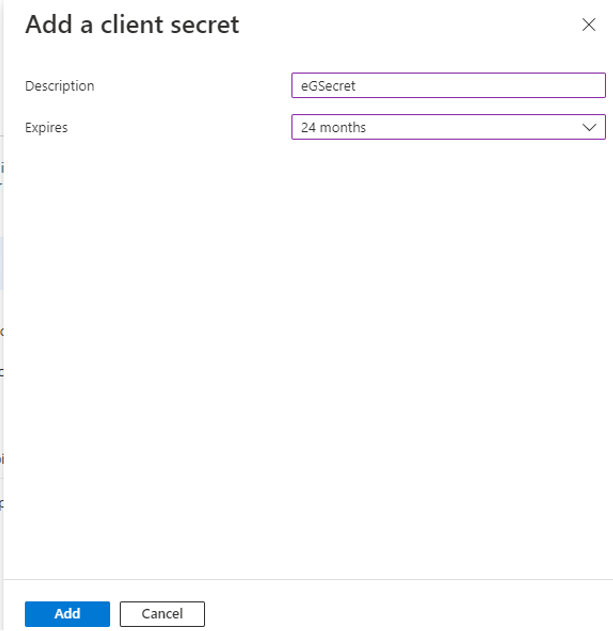
Figure 6 : Creating a new secret for the Microsoft Graph App
-
Once the new secret is successfully created, a key Value will be generated for it as depicted by Figure 7. Make a note of this key in notepad.
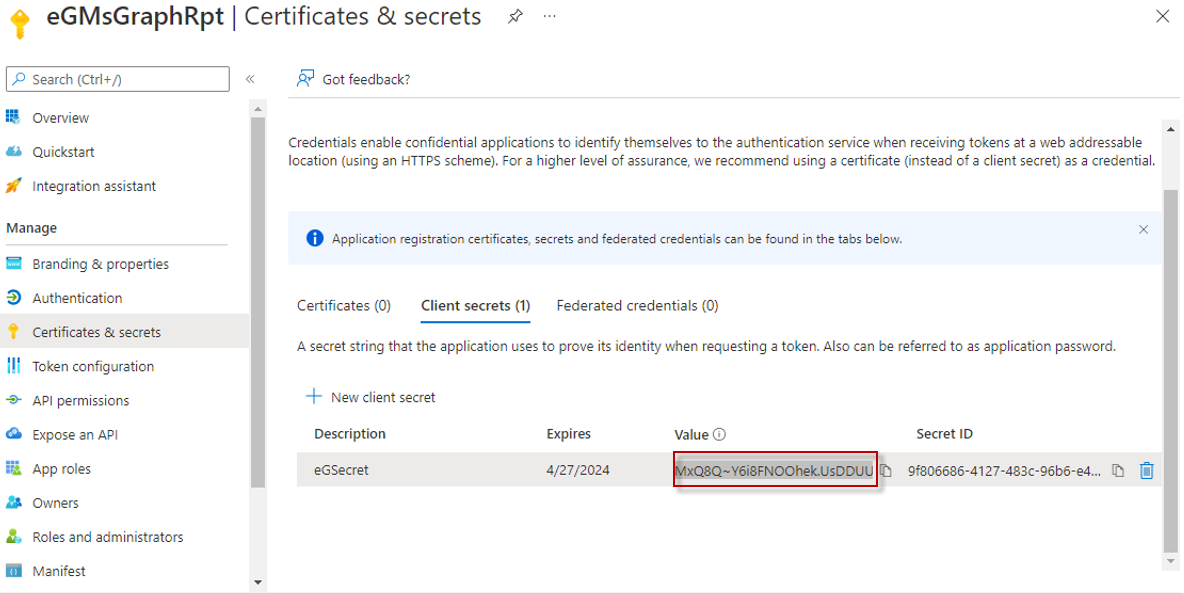
Figure 7 : The key Value that is generated and assigned to the client secret of the Microsoft Graph app
-
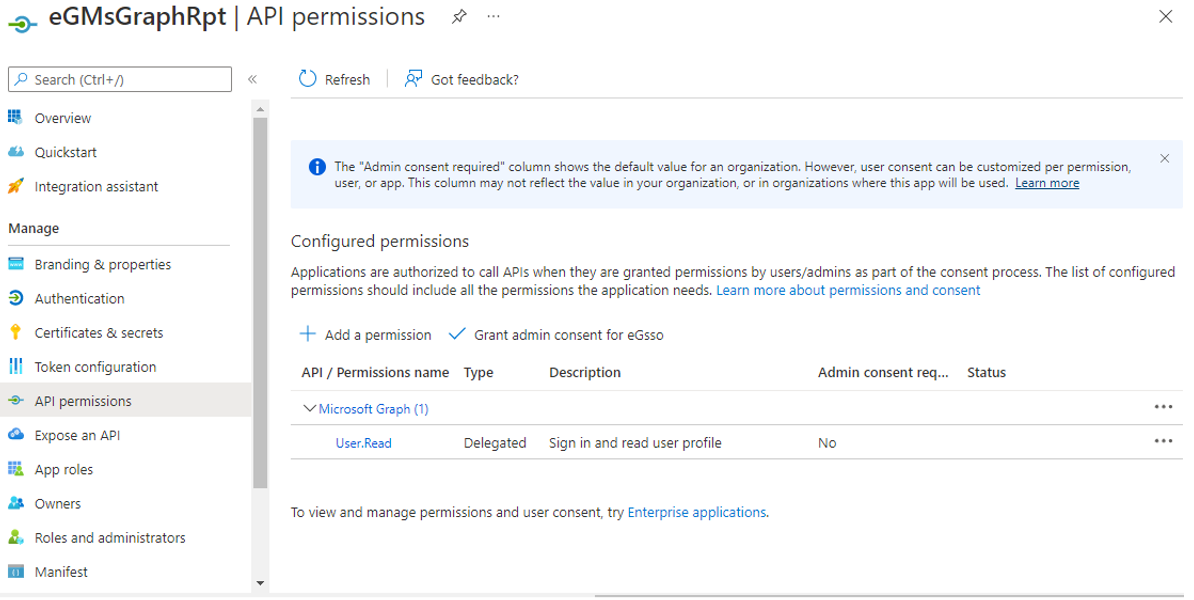
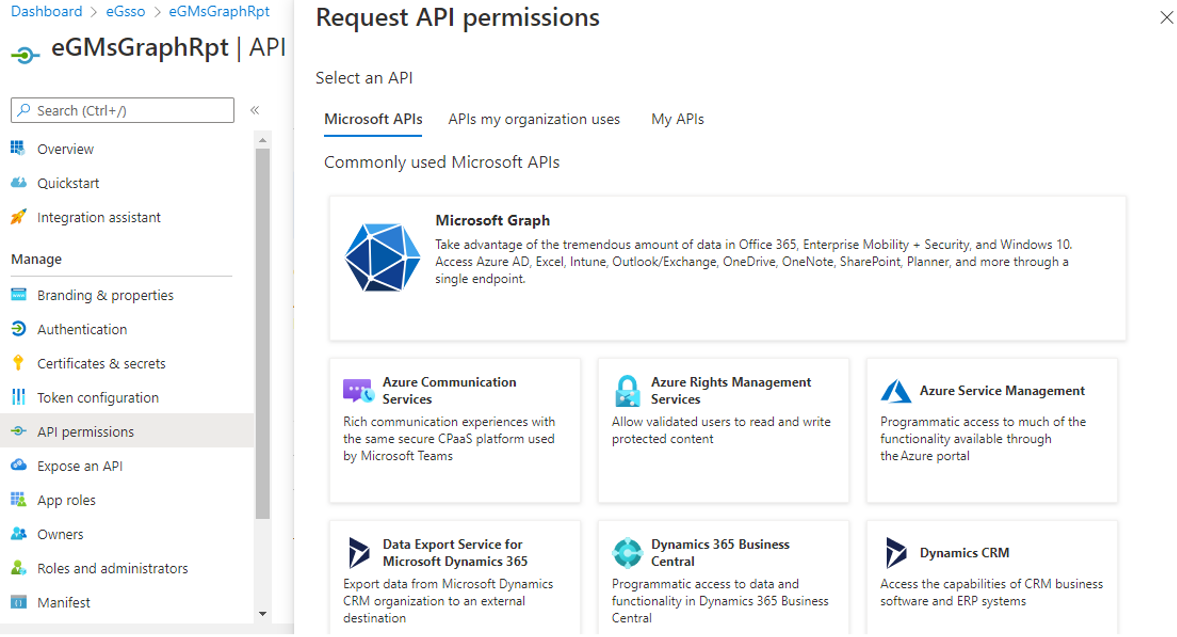
Next, proceed to grant permissions to the Microsoft Graph app, so it can pull the desired metrics. For this, click on the API permissions option under Manage in the left panel of Figure 7. This will invoke Figure 8. In the right panel of Figure 8, click on the Add a permission link.
-
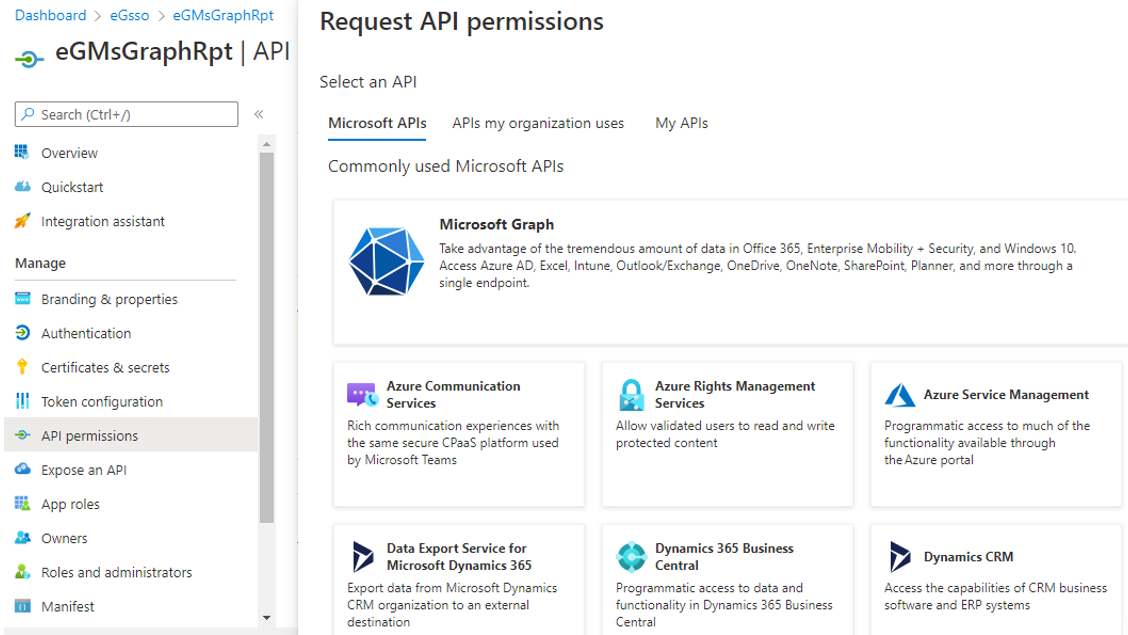
Then, click on Microsoft Graph in the Request API Permissions window that appears (see Figure 9).
-
When Figure 10 appears, click on Application permissions. Then, when the Permission tree appears (see Figure 11), do the following:
-
Expand the ServiceHealth node and select the ServiceHealth.Read.All option;
-
Expand the ServiceMessage node and pick the ServiceMessage.Read.All option;
- Expand the User node, and select the User.Read.All option;
-
Expand the Reports node, and select the Reports.Read.All option;
This will allow the Microsoft Graph app to read the service health information, user profiles, and usage reports of your organization. Finally, click on Add permissions in Figure 11 to add the chosen permission.
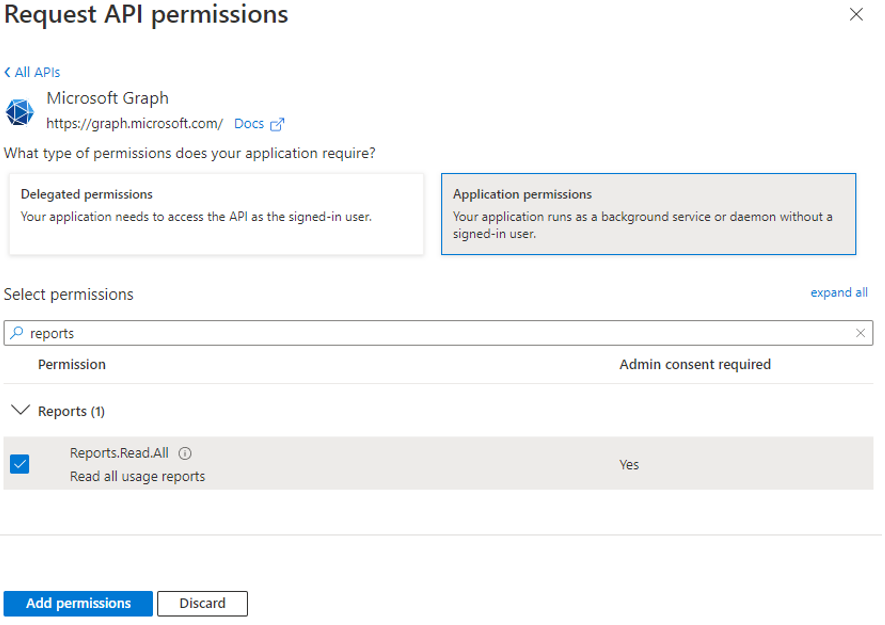
Figure 10 : Selecting the Application permission option
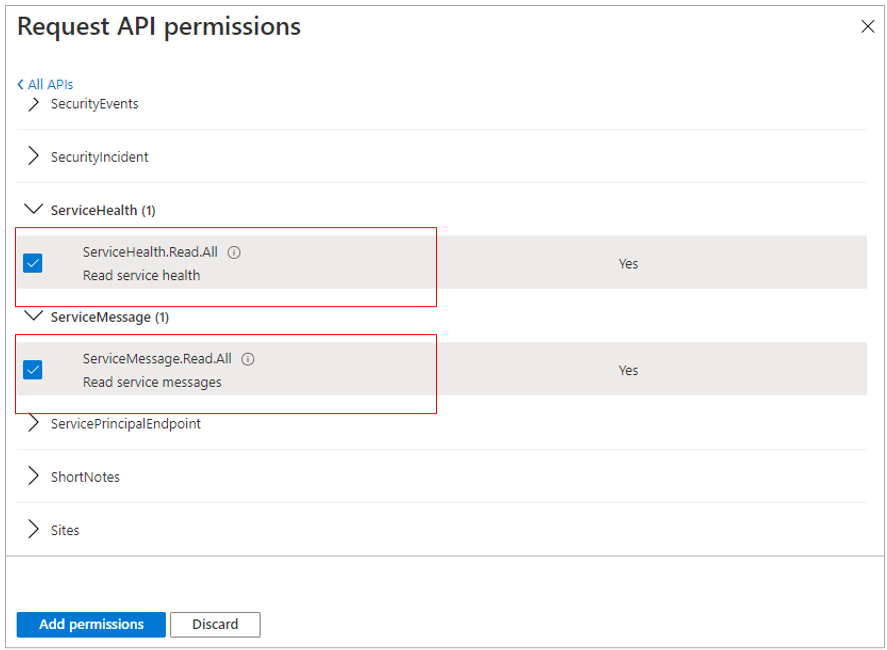
Figure 11 : Granting ServiceHealth and ServiceMessage permissions
-
-
When Figure 12 appears, click on Grant admin consent for ... to grant admin consent to the permissions requested.

-
Similarly, you can grant all other Microsoft Graph API Application Permissions required for monitoring purposes, to the app you created. These permissions are as follows:
Permission Type
API
Permissions
Application Permissions
Microsoft Graph
Calendars.ReadWrite
Reports.Read.All
ServiceHealth.Read.All
ServiceMessage.Read.All
User.Read.All
Mail.ReadWrite
Mail.Send
Directory.Read.All
AuditLog.Read.All
Sites.Read.All
CallRecords.Read.All
Presence.Read.All
-
Now, click on the Add a permission link in Figure 12 yet again.
-
From Figure 13 that then appears, select the Microsoft Graph option once again.
-
Then, select the Delegated permissions option from Figure 14. Next, in the text box under Select Permissions, type channel. All permissions under the group Channel will then be displayed. Select the Channel.Create permission by clicking on the check box alongside, and click the Add permission button (seeFigure 14).
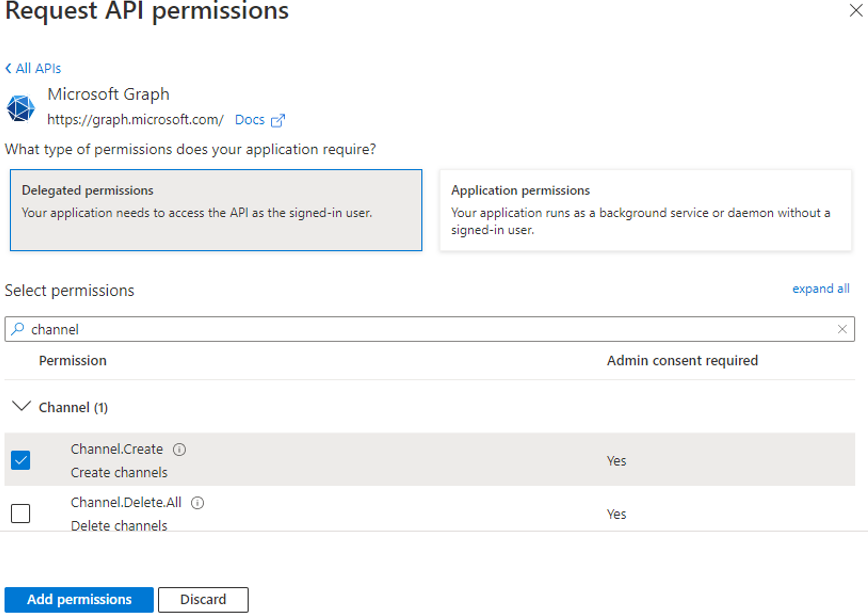
Figure 14 : Granting permission to Microsoft Graph app to read from and write to user files
- You will now return to Figure 12, where you will find the Channel permission you added (see Figure 14) displayed. Click onGrant admin consent for ... in Figure 12 to grant admin consent to that permission.
-
Similarly, you can grant all other Microsoft Graph API and Viva Engage Delegated Permissions required for monitoring purposes, to the app you created. These permissions are as follows:
Permission Type
API
Permissions
Purpose
Delegated Permissions
Microsoft Graph
Channel.Create
Allows app to create channels
ChannelMember.ReadWrite.All
Allows app to add and remove channel members
ChannelMessage.Read.All
Allows app to read user channel messages
ChannelMessage.Send
Allows app to send channel messages
ChannelSettings.ReadWrite.All
Allows app to read and write the names, descriptions, and settings of all channels, on behalf of the signed-in user.
Chat.Create
Allows app to create chats
Chat.ReadWrite
Allows app to read and write user chats
ChatMember.ReadWrite
Allows app to add and remove chat members
ChatMessage.Send
Allows app to send user chat messages
Directory.ReadWrite.All
Allows app to read and write data in your organization's directory, such as users, and groups
Team.Create
Allows app to create teams
TeamMember.ReadWrite.All
Allows app to add and remove members from teams, on behalf of the signed-in user.
TeamSettings.ReadWrite.All
Allows app to read and change all teams' settings, on behalf of the signed-in user.
User.Read.All
Allows app to read the full set of profile properties, reports, and managers of other users in your organization, on behalf of the signed-in user.
Community.ReadWrite.All
Allows an application to read, create, update, and delete communities within Microsoft Graph, specifically within the context of employee experience features like Viva Engage
Viva Engage
user_impersonation
Is typically granted to applications that need to perform actions in Viva Engage as if they were the signed-in user.
-
Next, proceed to create a .dat file to which the details of the Microsoft Graph app - i.e., the app name, its client ID, and client secret - will be written. At run time, the eG agent reads the .dat file to know which app should be used for pulling metrics from Office 365. To create the .dat file, first, login to the eG agent host. Then, using Powershell ISE, execute the O365_CreateGraphDat.ps1 command from the <EG_INSTALL_DIR>\lib\O365 directory. Upon successful command execution, the dialog box depicted by Figure 15 will appear.
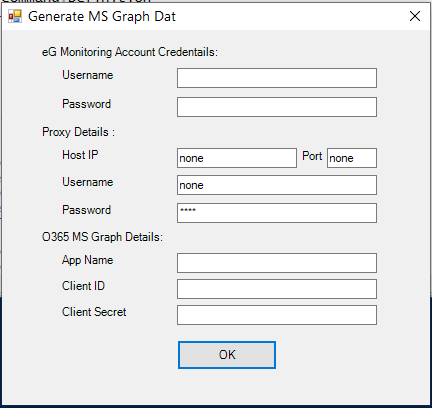
Figure 15 : Capturing the details of the Microsoft Graph App
- In Figure 15, specify the Username and Password of the O365 user account that you have created for monitoring purposes. If the eG agent will be communicating with Office 365 via a Proxy server, then configure the Host IP and Port number of the Proxy server. If the Proxy server requires authentication, then provide a valid Username and Password for the Proxy user. Then, in the O365 MS Graph Details section, mention the App name. This should be the same name you gave the app in step 4 above. Then, specify the Client ID and Client secret for the app. The Client ID should be the Application (client) ID you made a note of in step 5 above (see Figure 4). The Client secret should be the key that is generated and assigned to the client secret in step 8 above (see Figure 7). Finally, click the OK button.
-
If the .dat file is created successfully, a message to that effect will appear. You will find this .dat file in the <EG_AGENT_INSTALL_DIR>\agent\O365\MSGraph folder in the eG agent host.
Note:
In environments where hundreds of users connect to Office 365, it is common practice to configure multiple agents to monitor a single Office 365 tenant for the purpose of load-balancing. In such environments, you do not have to run the O365_CreateGraphDat.ps1 script on each agent and create a separate .dat file on every agent host. Instead, after registering the MS Graph App, run the O365_CreateGraphDat.ps1 script on any one agent, so that the .dat file (containing the app name, client ID, client secret) is automatically created on that agent. You can then copy the MSGraph folder (containing the .dat file) so created to the <EG_AGENT_INSTALL_DIR>\agent\O365\ directory of every other agent that has been configured to monitor the target Office 365 tenant.