Configuring Oracle WebLogic Application Server 9.2
The eG agent package contains a web archive file called egurkha9x.war. On Unix environments, this file will be available in the /opt/egurkha/lib location. On Windows environment, this file will be available in the <EG_HOME_DIR>\lib directory. This file has to be installed on the WebLogic server ver. 9 (and above), which has to be monitored. Prior to deploying this war file, make sure that you follow the steps below:
- Login to the system hosting the eG agent that is monitoring the WebLogic server.
- Copy the egurkha9x.war file from the /opt/egurkha/lib directory to any other directory on the eG agent host.
- Rename the war file as egurkha.war.
Next, follow the steps given below to deploy the war file:
- Ensure that the WebLogic application server to be monitored has been started.
-
Next, go to the following URL: http://<WebLogic_server_IP>:<WebLogicPort>/.
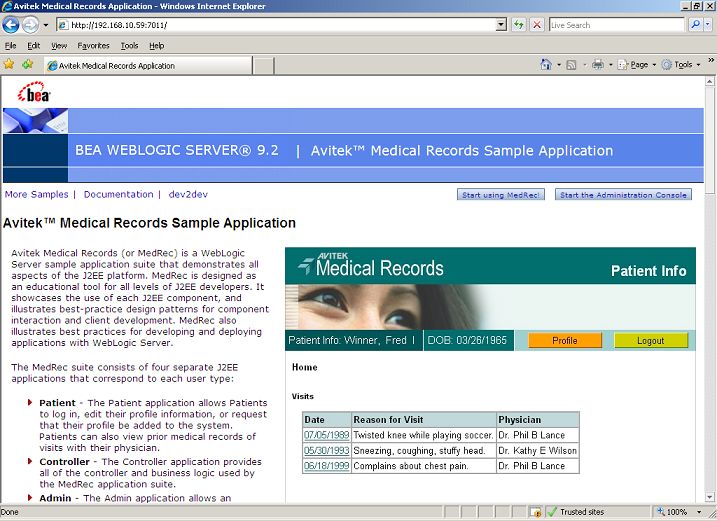
- To begin application deployment, click on the Start the Administration Console button in Figure 1 that appears next.
-
Now, an authentication dialog (see Figure 2) that requires a username and password, will appear. Specify the user name and password of the WebLogic administrator to login.
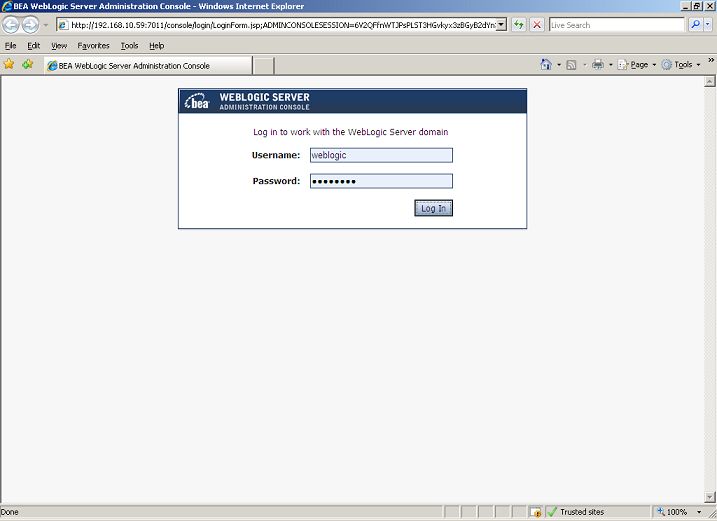
Figure 2 : Specifying user name and password in the authentication dialog box
-
Upon successful authentication, the following WebLogic 9.2 Administration console will appear (see Figure 3).
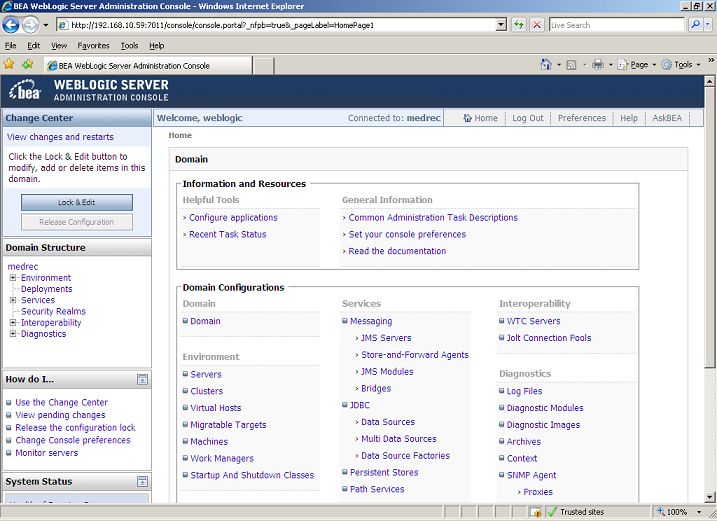
Figure 3 : The Administration Console of the Oracle WebLogic server 9.2
-
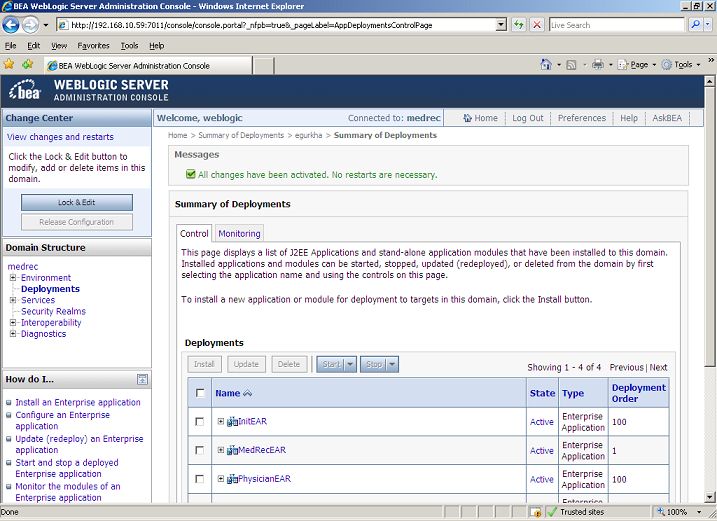
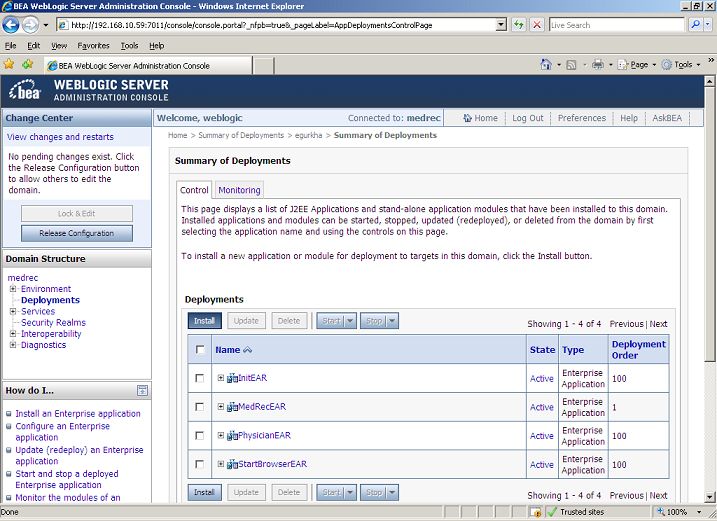
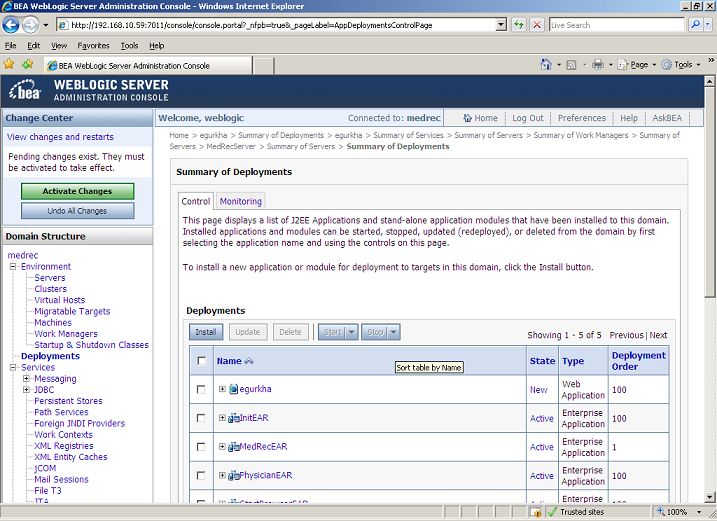
From the Domain Structure section in the left panel of Figure 3, choose the Deployments node. A Summary of Deployments follows (see Figure 4), which lists all the applications that pre-exist on the WebLogic server (see the right panel).
-
To add a new application, you first need to change to the Edit mode. To achieve this, click on the Lock & Edit button under the Change Center section in the left panel of Figure 4. Following which, the Install button in the Deployments section of the right panel, gets enabled (see Figure 5).
-
To begin application deployment, click on the enabled Install button in the right panel of Figure 5 above. Next, using the slew of screens that appear one after another, browse for and specify the full path to the egurkha.war file (path: <EG_INSTALL_DIR>\agent\lib) to be deployed (see Figure 6, Figure 7, Figure 8, and Figure 9.
Note:
By default, the egurkha.war file will be searched for in the local disk of the system from which the browser is launched. Therefore, if you are trying to access the WebLogic console from a system that does not host an eG agent, then, before attempting to deploy the egurkha.war file, do the following:
- Login to any agent host in your environment.
- Copy the egurkha9x.war file in the <EG_AGENT_INSTALL_DIR>\libdirectory (on Windows; on Unix, this will be the /optegurkha/libdirectory) of the agent host to any other directory on that host.
- Rename the egurkha9x.war file as egurkha.war file.
- Copy the egurkha.war file to the local host from which the browser is launched.
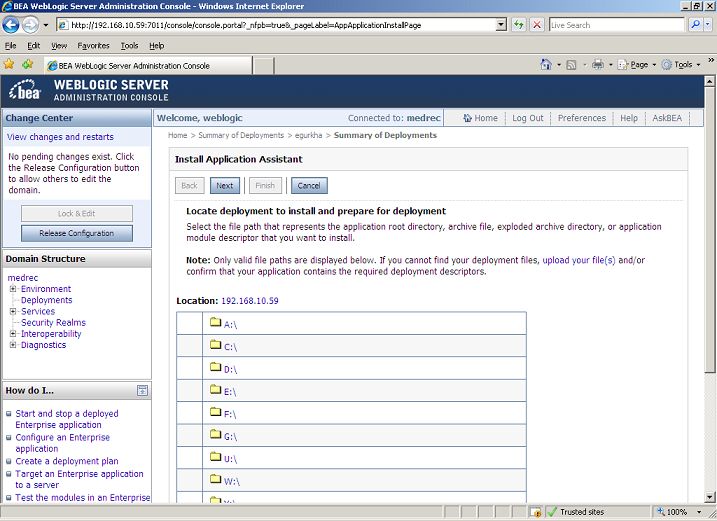
Figure 6 : Specifying the full path to the egurkha.war file
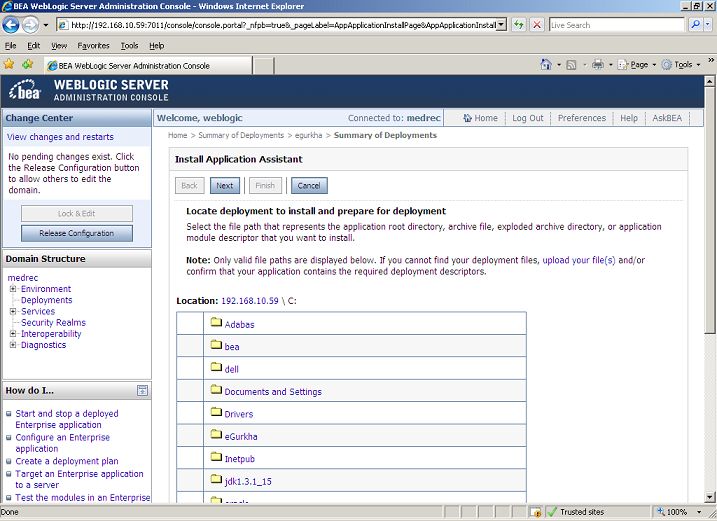
Figure 7 : Specifying the full path to the egurkha.war file
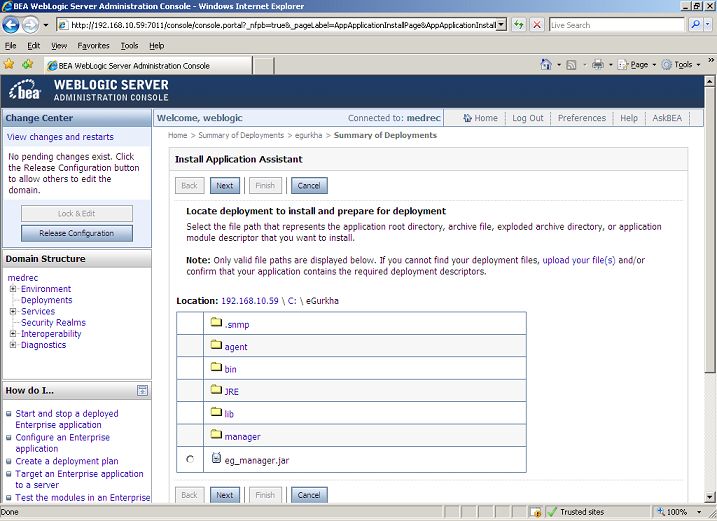
Figure 8 : Specifying the full path to the egurkha.war file
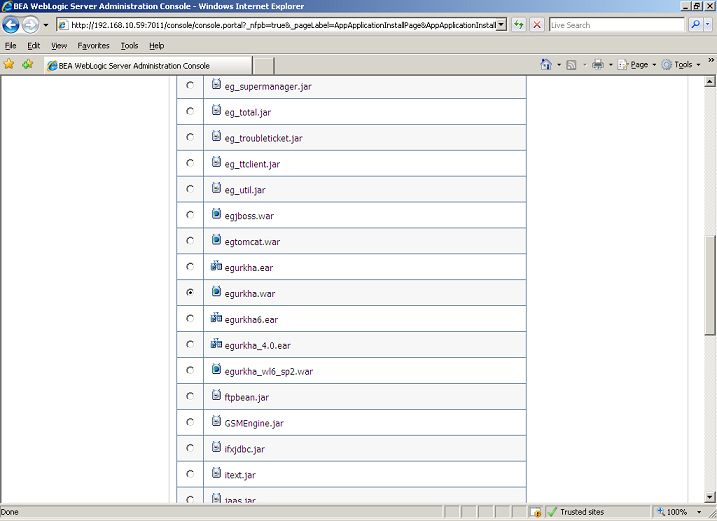
- Once the egurkha.war option is chosen from Figure 9, click the Next button (not visible in Figure 9) to complete the path specification.
-
Select the Install this deployment as an application option in Figure 10 that appears next, and then, click the Next button to move on.
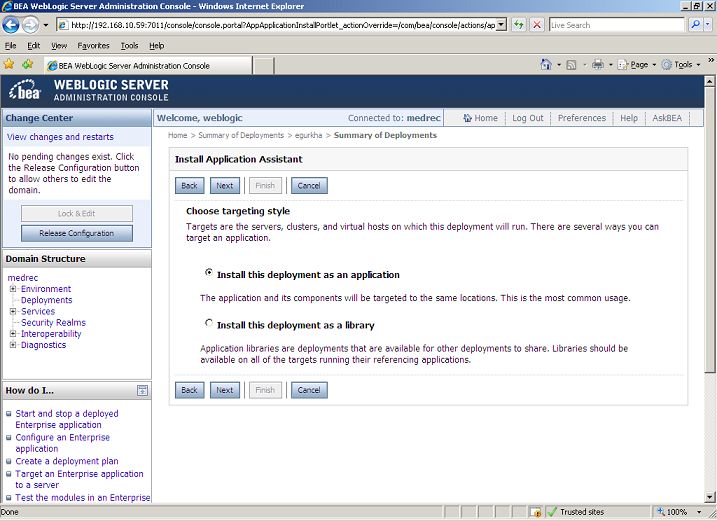
Figure 10 : Choosing to install the deployment as an application
-
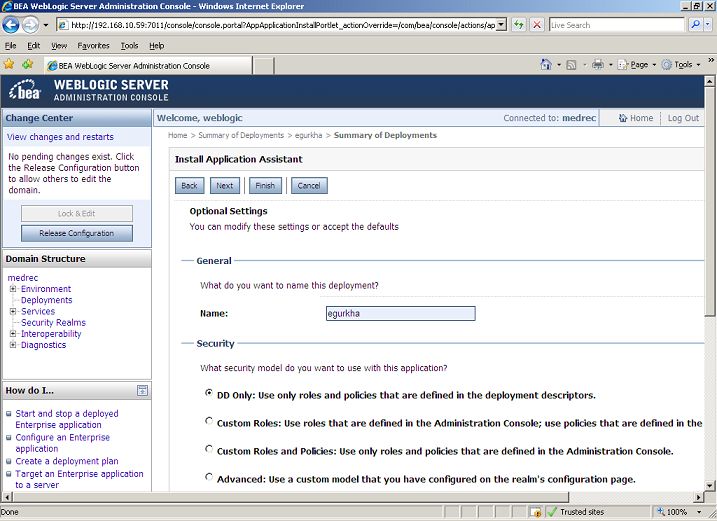
Provide a Name for the new application in Figure 11. By default, egurkha will be displayed therein. Then, click on the Next button to proceed.
-
To complete the application deployment, click on the Finish button in Figure 12.

-
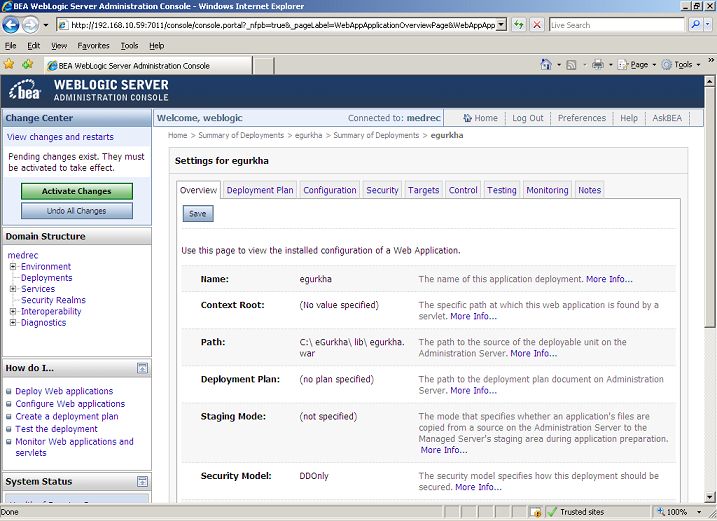
The existing configuration settings for the new application is then made available for review. To save the settings, click on the Save button in Figure 13.
-
Figure 14 then appears, which lists the applications that have been deployed on the WebLogic server. If the egurkha application appears in the list, it is indicative of the successful installation of the egurkha.war file.
-
To ensure that the changes are saved, click on the Activate Changes button under the Change Center section in the left panel of Figure 14. Upon successful change updation, a message to that effect appears at the top of the right panel, as depicted by Figure 15.
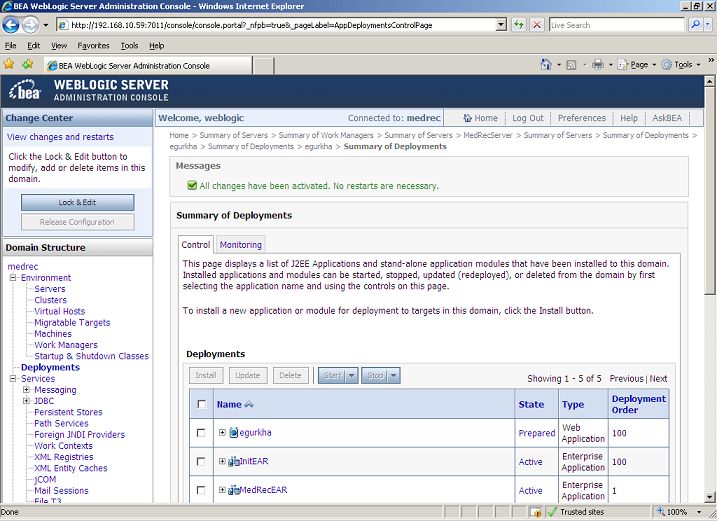
Figure 15 : A message indicating that the changes have been activated
-
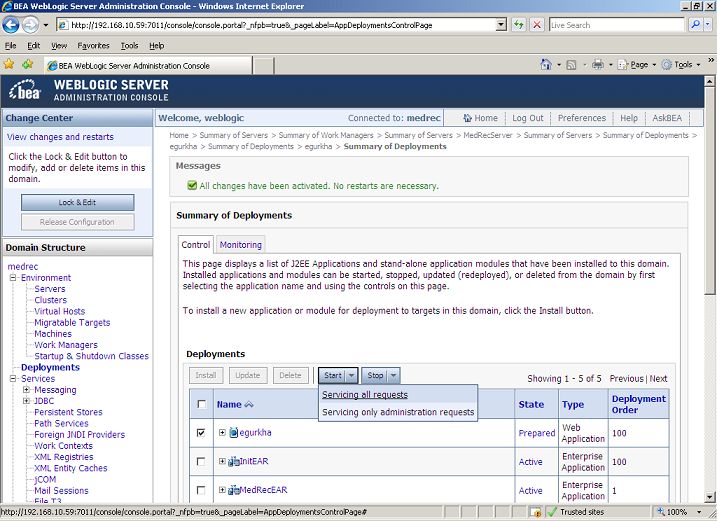
Now, proceed to start the application. To do so, first, click on the check box that corresponds to the egurkha entry in the Deployments list, click on the Start button above, and choose the Servicing all requests option from the drop-down menu (see Figure 16).
-
Click the Yes button in Figure 17 to confirm starting.
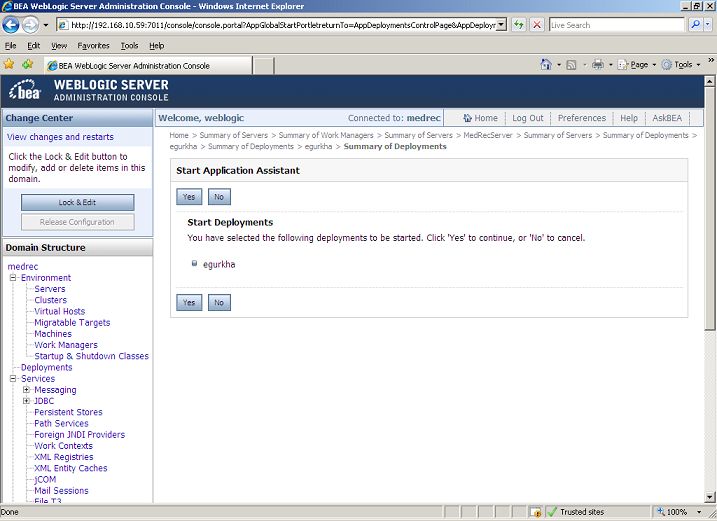
Figure 17 : Providing confirmation for starting the egurkha application
-
If the application starts successfully, then a message to that effect appears, as depicted by the right panel of Figure 18.
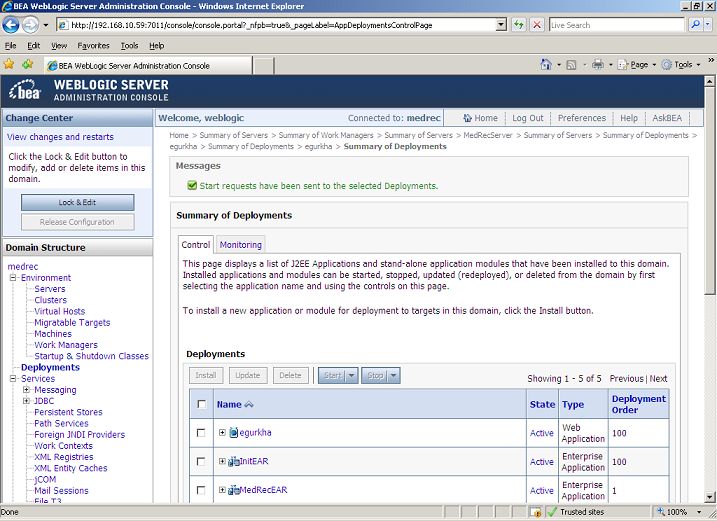
Figure 18 : A message indicating that the application has started