Configuring an Oracle WebLogic Application Server 6 (with SP 2) to work with the eG Agent
The eG agent package contains a web archive file called egurkha_6_2.war. On Unix environments, this file will be available in the /opt/egurkha/lib location. On Windows environment, this file will be available in the <EG_HOME_DIR>\lib directory. This file has to be installed on the WebLogic 6.0 server with SP2, which has to be monitored. Prior to deploying this war file, make sure that you follow the steps below:
- Login to the system hosting the eG agent that is monitoring the WebLogic server.
- Copy the egurkha_6_2.war file from the /opt/egurkha/lib directory to any other directory on the eG agent host.
- Rename the war file as egurkha.war.
-
Next, follow the steps given below to deploy the war file on the WebLogic server version 6.x:
- Go to the following URL: http:\\<WebLogic_server_IP>:<WebLogicPort>/console.
-
Now, an authentication dialog (see Figure 1) that requires a username and password, will appear. By default, the username is system. Specify the same password you gave during the installation of the Weblogic server. If your environment is configured differently, please contact your WebLogic administrator to find out the username and password to use to login to the WebLogic console.
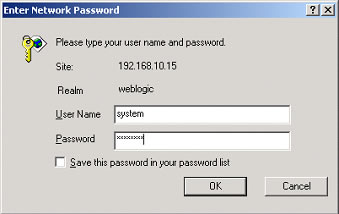
Figure 1 : Specifying user name and password in the authentication dialog box
-
Upon successful authentication, the following WebLogic 6.1 Administration console will appear (see Figure 2).
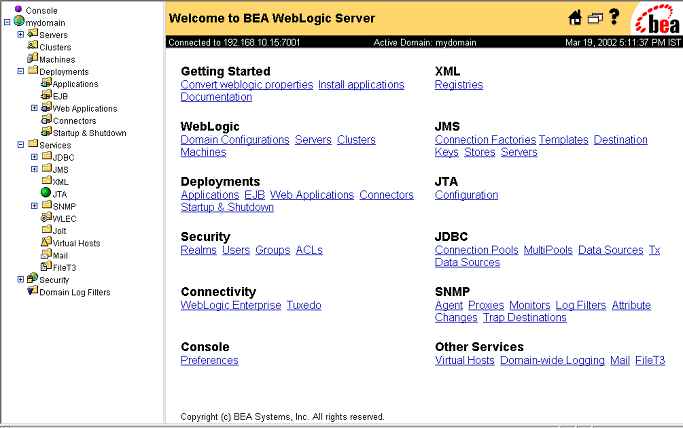
Figure 2 : The Administration Console of the ORACLE WebLogic server 6.x
-
From the right panel, choose the Install Applications link under the Getting Started group. The following screen will then appear:
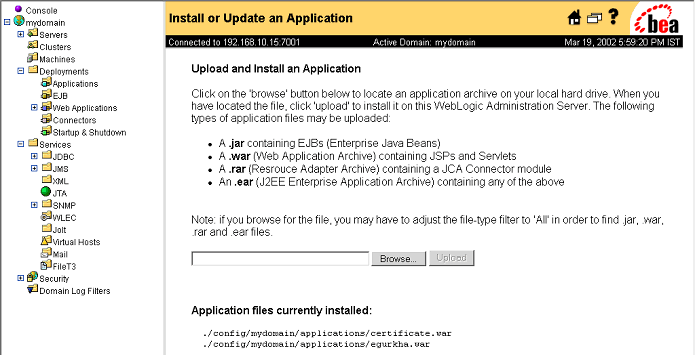
Figure 3 : Screen where you can install or update an Application
- Alternately, the following procedure can also be adopted to access the screen above.
-
Expand the Deployments node in the tree-structure in the left panel, and then, select Web Applications. A screen depicted by Figure 4 below will come up:
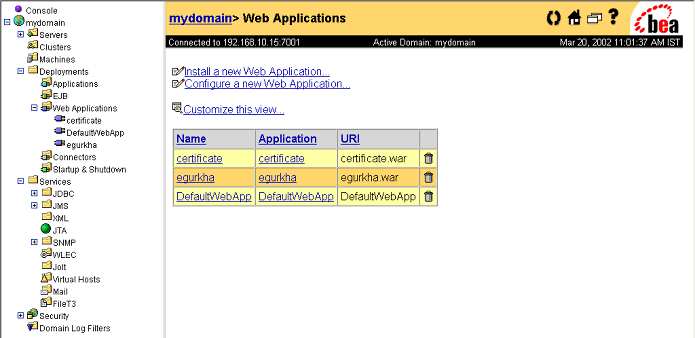
Figure 4 : Viewing the Web Applications that have been deployed
- From the right panel, choose the Install a new Web Application option, which will bring the screen represented by Figure 3 to light.
-
Next, using the Browse button in the right panel, select the egurkha.war file (see Figure 5) from the local directory in which it resides and then, click on the Upload button.
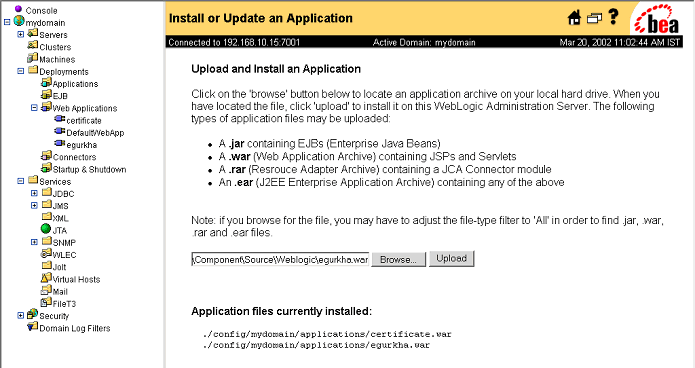
Figure 5 : Specifying the location of the “egurkha.war” file
Note:
By default, the egurkha.war file will be searched for in the local disk of the system from which the browser is launched. Therefore, if you are trying to access the WebLogic console from a system that does not host an eG agent, then, before attempting to deploy the egurkha.war file, do the following:
- Login to any agent host in your environment.
- Copy the egurkha_wl6_sp2.war file in the <EG_AGNT_INSTALL_DIR>\lib directory (on Windows; on Unix, this will be the /optegurkha/lib directory) of the agent host to any other directory on that host.
- Rename the egurkha_wl6_sp2.war file as egurkha.war file.
- Copy the egurkha.war file to the local host from which the browser is launched.
-
Doing so will reveal the following screen, which informs you that the file has been successfully uploaded.
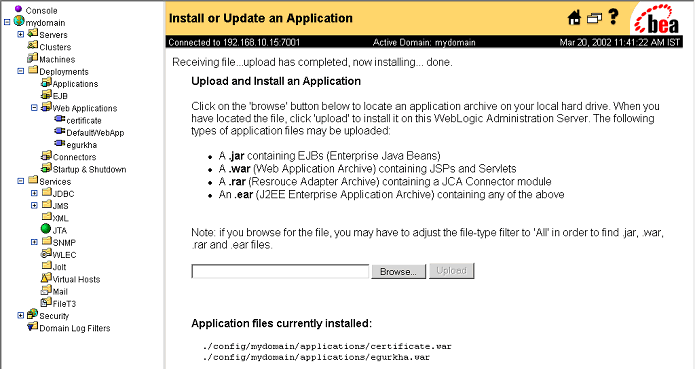
Figure 6 : Screen informing you that egurkha.war file has been successfully uploaded
- Once this is done, eG would appear as a new application under the Web Applications category. Now, the WebLogic server is ready to be used with eG.
-
If multiple instances of WebLogic are executing, then you can associate the egurkha application with specific instances by first selecting the egurkha application from the tree structure in the left pane of Figure 6. From the tabs listed in the right pane, select the Targets tab. The Available list in Figure 7 will display all the existing WebLogic instances that are available for selection, and the Chosen list will display the WebLogic server instances that have already been chosen for association. To associate the egurkha application with a WebLogic server instance, select an instance from the Available list and click on the -> button therein. The selection will automatically move to the Chosen list. Similarly, multiple instances can be added to the Chosen list. Finally, click on the Apply button to apply the changes.
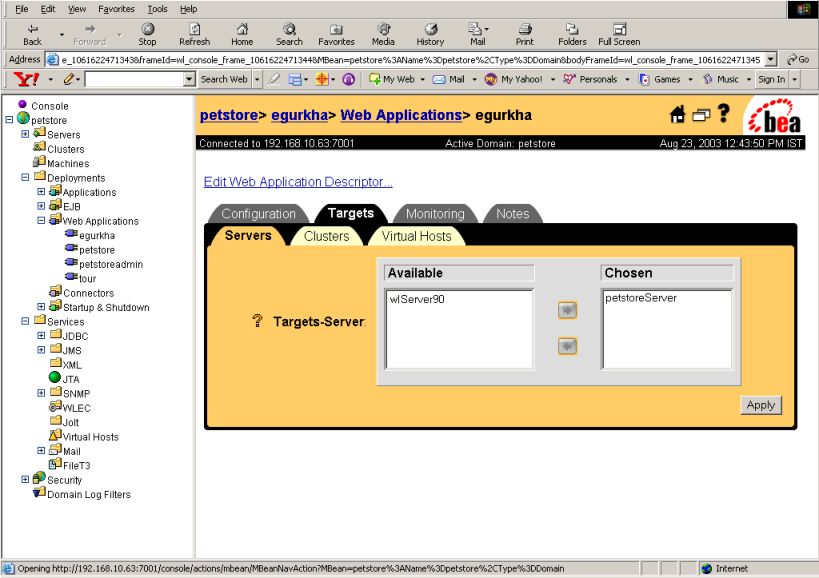
Figure 7 : Associating the egurkha application with specific targets