Managing the Oracle WebLogic Application Server
The configured server should then be discovered and managed. To do so, adhere to the following steps:
- Log into the administrative interface as an administrator.
-
The WebLogic server to be monitored may have been automatically discovered by the eG manager. If it is, use the Infrastructure -> Components -> Manage / Unmanage menu to open the COMPONENTS - MANAGE/UNMANAGE page and manage the WebLogic server as depicted by Figure 1 and Figure 2 below.
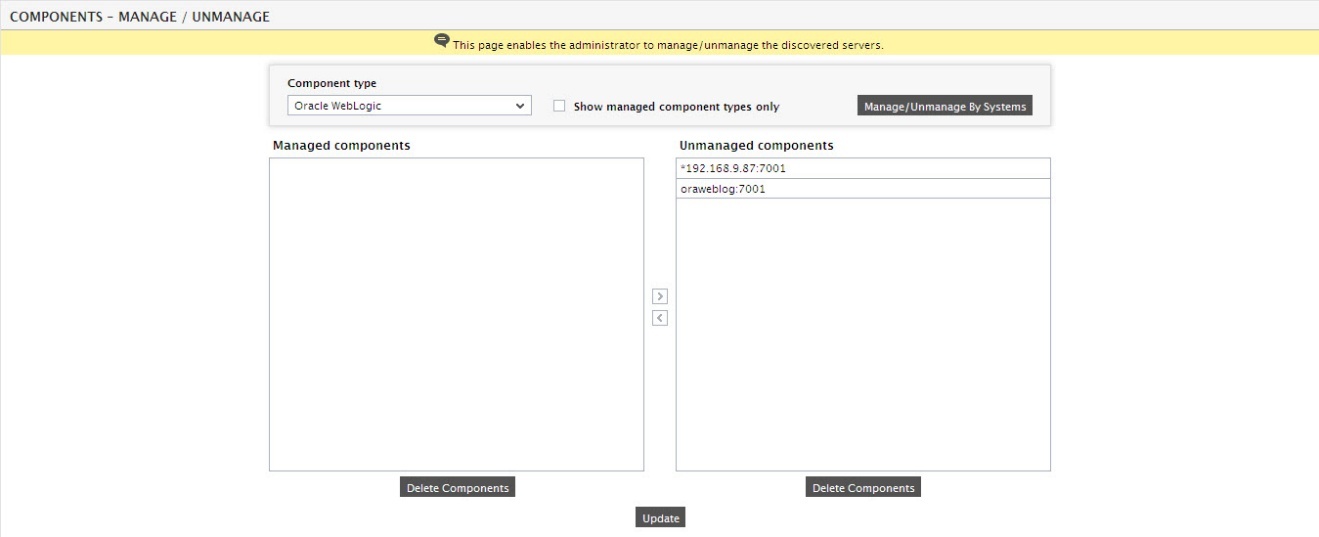
Figure 1 : Viewing the list of unmanaged Oracle WebLogic servers in the COMPONENTS - MANAGE/UNMANAGE page
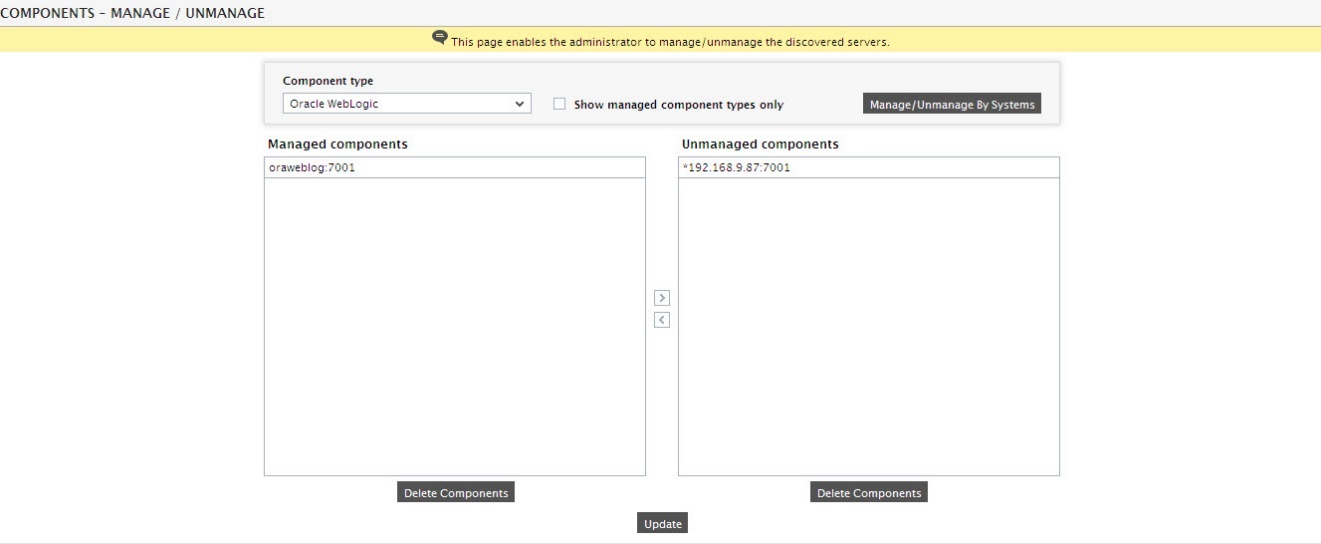
- Alternately, if the WebLogic Server is not discovered, it can be manually added using the components page that can be accessed through the menu sequence Infrastructure-> Add/Modify Servers . Such components will be automatically managed by the eG Enterprise system.
- Now, if you proceed to log out of the administrative interface, a list of unconfigured tests will appear prompting you to configure tests for the WebLogic Server.
-
Click on WebLogic EJB Transactions test to move to the page that facilitates its configuration (see Figure 3).
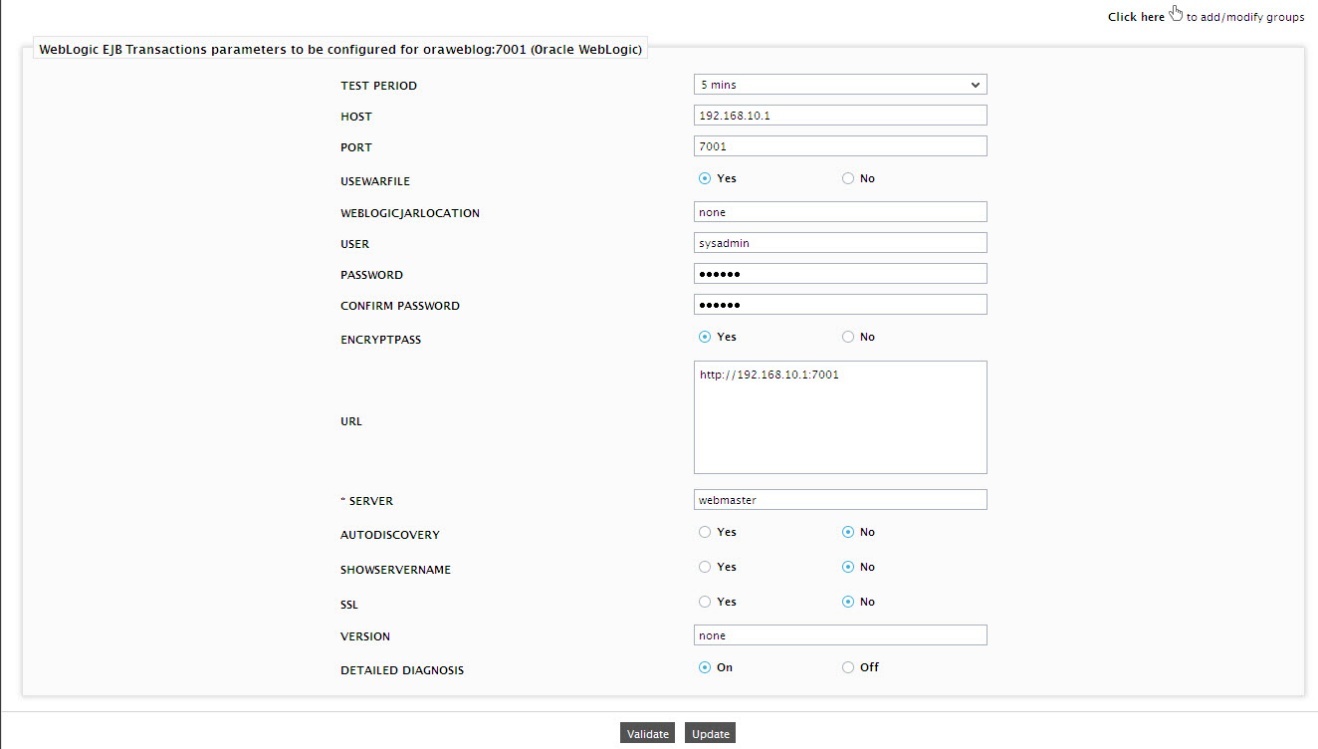
Figure 3 : Configuring the Weblogic EJB Transactions test for a WebLogic server
- The test parameter section that appears (as shown in Figure 3), specify the following:
- Wait for the test to run once, and then proceed to RECONFIGURE the same for creating the EJB groups. eG monitors only those components that belong to an EJB group.
- To begin configuring, first click on the RECONFIGURE button in the test configuration page. This will result in the display of Figure 3 once again.
-
Clicking on the Click here hyperlink in Figure 3 above will take you to a page depicted by Figure 4 below. This page lists the EJB groups that pre-exist (if any), the EJB components that have been added to the group, and allows the administrator to create and configure new groups, or delete/modify existing ones.
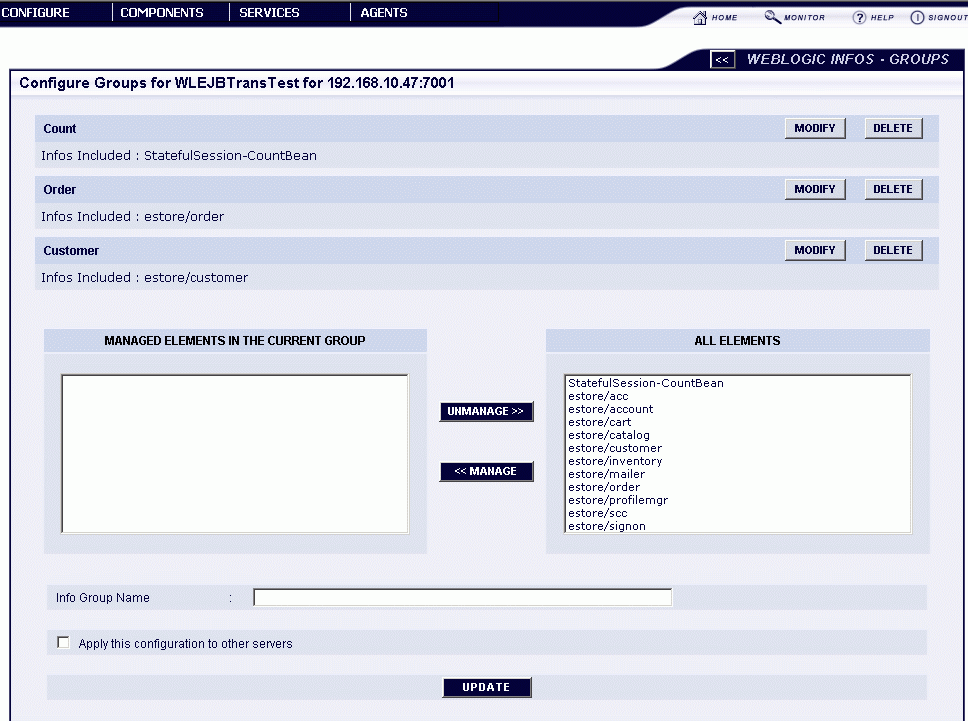
Figure 4 : Figure 1.121: A page listing existing EJB groups (if any)
-
To configure a new EJB group, first select the EJBs to be added to the group from the All Elements list in Figure 5. All the EJBs hosted on a WebLogic server are discovered when the agent starts executing on the WebLogic Server’s host. These discovered EJBs will be listed in the All Elements list. This list will get updated every time the agent is restarted / when the rediscovery scheduled for every four hours occurs.
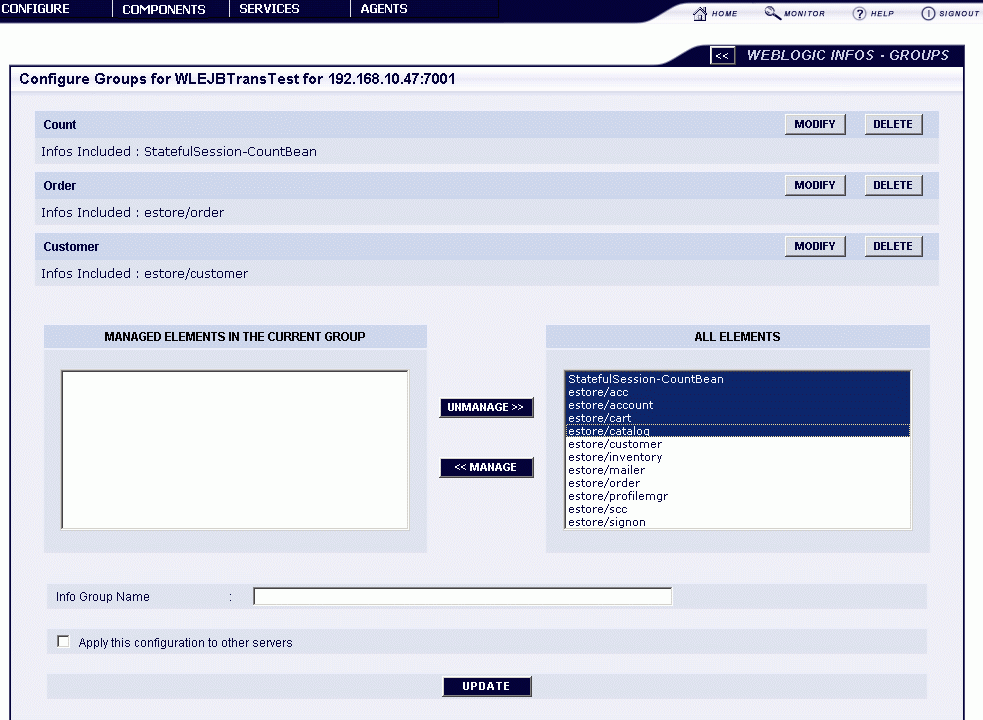
Figure 5 : Selecting the EJBs to be added to the new group
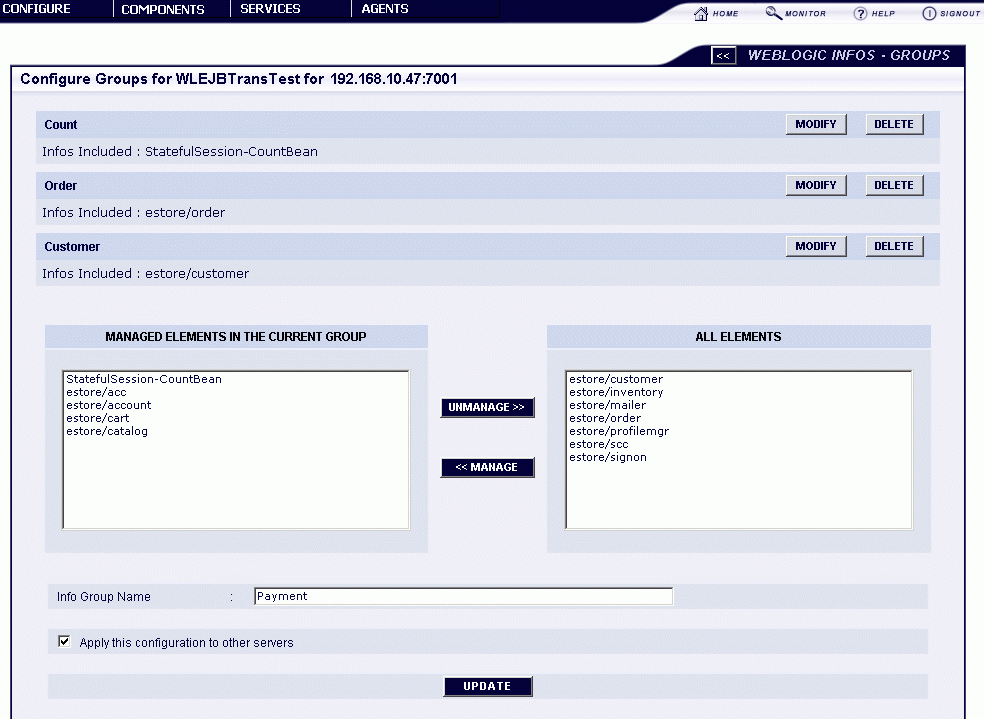
- Next, click on the Manage button and add the selection to the Managed Elements in the current group list (see Figure 5 and Figure 6). Similarly, multiple EJBs can be added to the Managed Elements in the current group list. The EJB components so managed will thus form a part of the new EJB group. On the contrary, to unmanage a managed EJB component, select the component from the Managed Elements in the current group list, and click the unmanage button. This will transfer the selected EJBs back to the All Elements list.
- Then, assign a name to the newly created EJB group in the Info Group Name text box (see Figure 6). If the EJB group so created is to be associated with other WebLogic servers in the environment, then, select the Apply this configuration to other servers check box of Figure 6.
- Finally, click the Update button to register the changes.
-
If the Apply this configuration to other servers check box is selected, then upon clicking the update button, Figure 7 will appear.
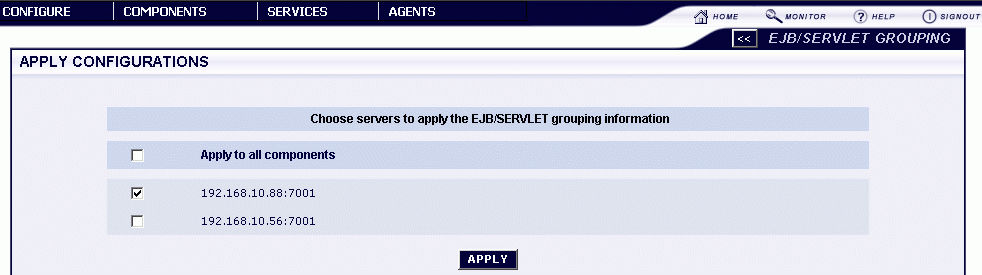
Figure 7 : Associating the EJB group with other WebLogic servers
- Using Figure 7, select the WebLogic servers to which the EJB group configuration is to be applied, by clicking on the corresponding check boxes. To select all the displayed servers, click on the Apply to all components check box. Finally, click the apply button in Figure 7.
-
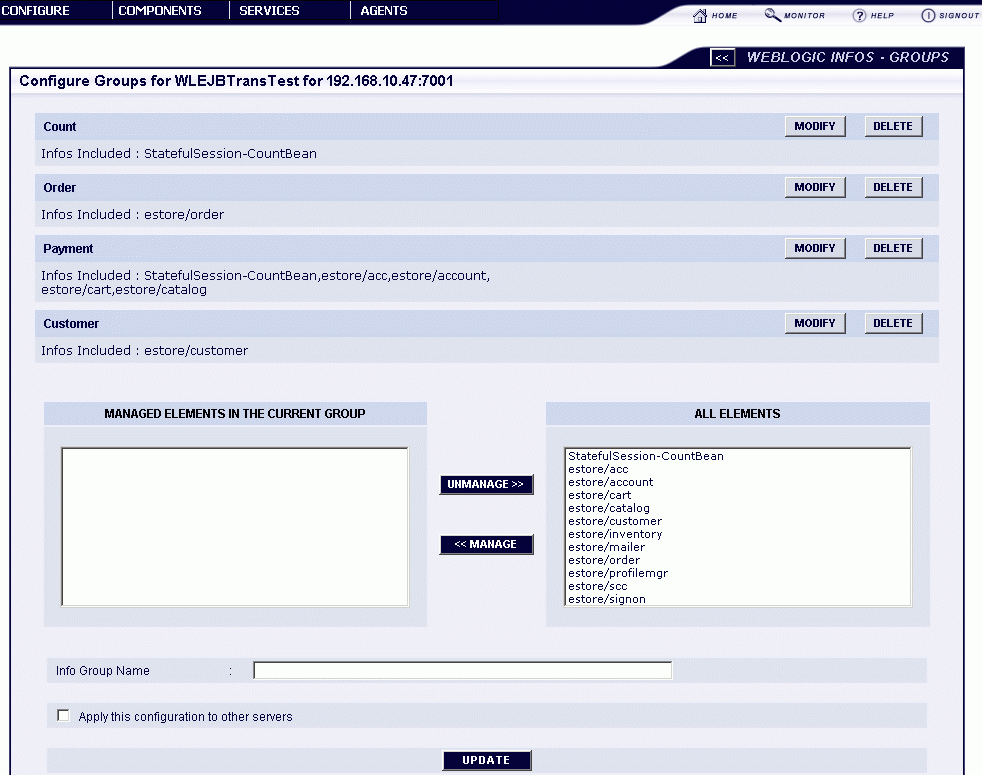
A summary of the selection will then be displayed (see Figure 8). To delete the displayed group, click on the delete button alongside it (see Figure 8). If you had earlier associated the group with other WebLogic servers, then all or a few of these associations can be removed by selecting the Apply configuration to other servers check box before clicking on the corresponding delete button. This will lead you back to Figure 7, where you can select the WebLogic servers for which the EJB group configuration has to be removed. Clicking on the apply button after selecting the servers will ensure that the corresponding EJB group configuration does not apply to the chosen servers any longer. To modify a displayed group, click on the modify button corresponding to the group name (see Figure 8). To return to the WLEJBTrans test configuration page, click the << button in Figure 8.
- Now, attempt to sign out of the admin interface yet again. This time around, you will be prompted to configure the Processes test for the WebLogic server. Configure the patterns of processes that are critical for WebLogic operations to be monitored by this test.
-
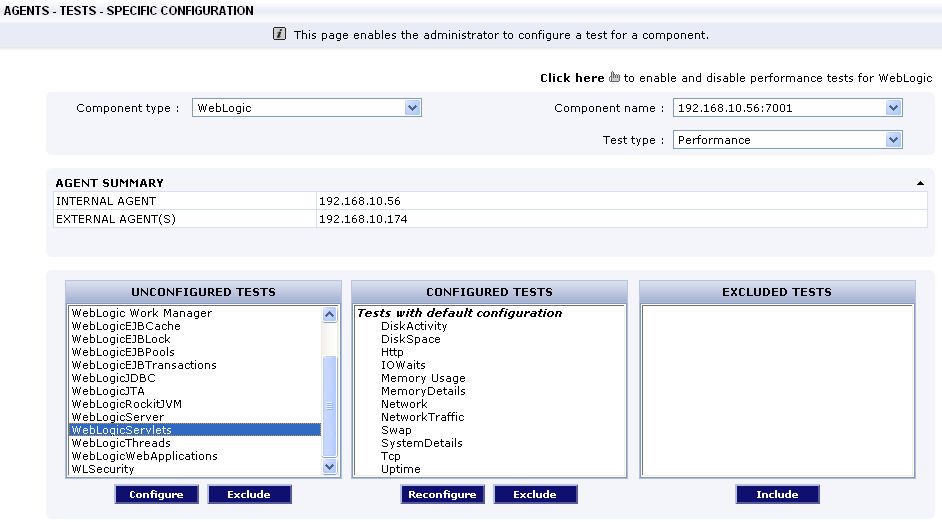
The WebLogicServlets test, by default, auto-discovers all the servlets on the monitored WebLogic server, and reports key statistics pertaining to every servlet. Alternatively, like EJBs, you can configure groups of servlets and monitor every group so created. To create one/more servlet groups, first, open the AGENTS –SPECIFIC TEST CONFIGURATION page following the menu sequence: Agents -> Tests -> Configure -> Specific. In the AGENTS –SPECIFIC TEST CONFIGURATION page, pick WebLogic as the Component type, and a specific component from the Component name list boxes. Next, select Performance from the Test type list box. This will display complete list of unconfigured tests available for the WebLogic server in the UNCONFIGURED TESTS list box. Locate the WebLogicServlets test in the UNCONFIGURED TESTS list and click the Configure button corresponding to that test (see Figure 9).
-
Figure 10 then appears revealing the parameters for the WebLogicServlets test.
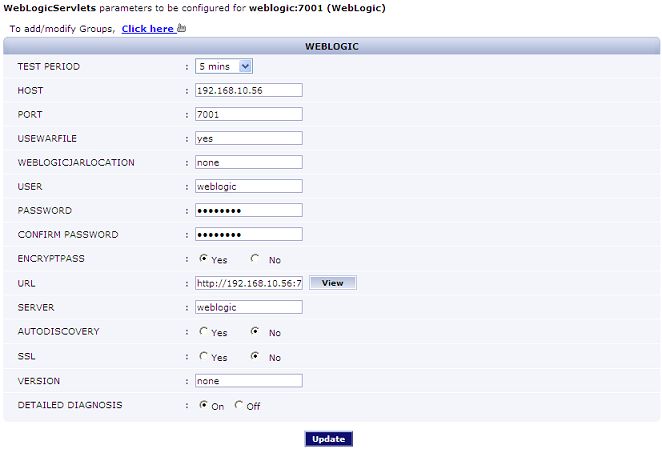
- Configure the WeblogicServlets test (see Figure 10) in the same manner as the WeblogicEJBTransactions test, and click the Update button in Figure 10 to register the changes.
- Allow the test to run once and reconfigure it by clicking the RECONFIGURE button in the test configuration page. Figure 10 will reappear. This time, click on the Click here hyperlink in Figure 10 to configure the servlet groups. The eG Enterprise will monitor only those components that belong to a servlet group.
- Upon clicking the hyperlink, Figure 11 will appear, which will list the servlet groups that pre-exist (if any), the servlets that have been added to the group, and allows the administrator to create and configure new ones, and delete/modify existing ones.
-
To configure a new servlet group, first select the servlets to be added to the group from the ALL ELEMENTS list in Figure 11. All the servlets hosted on a WebLogic server are discovered when the agent starts executing on the WebLogic Server’s host. These discovered servlets will be listed in the ALL ELEMENTS list. This list will get updated every time the agent is restarted / when the rediscovery scheduled for every four hours occurs.
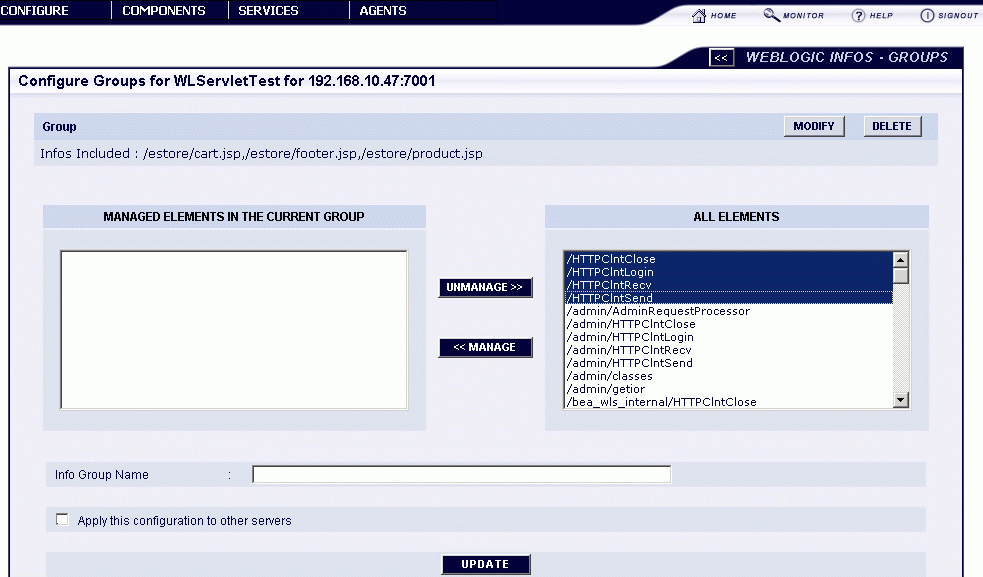
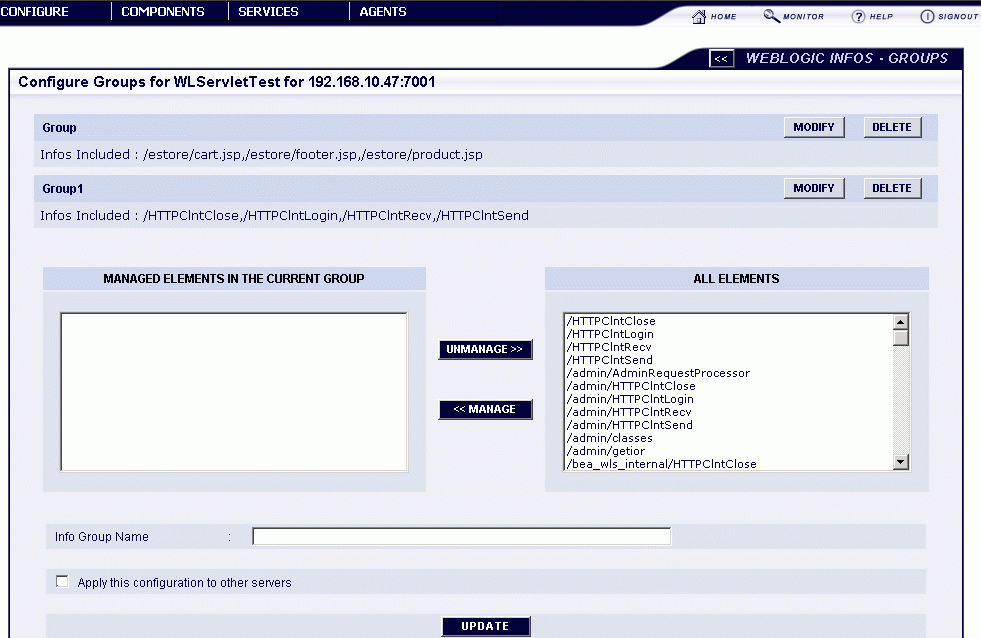
Figure 11 : Selecting the servlets to be added to the new group
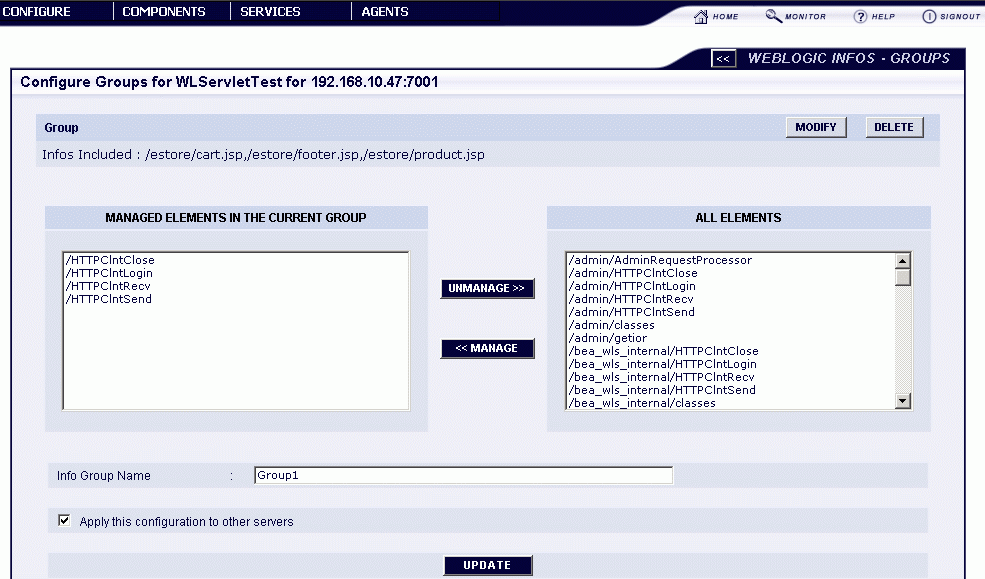
- Next, click on the Manage button and add the selection to the MANAGED ELEMENTS IN THE CURRENT GROUP list (see Figure 11 and Figure 12). Similarly, multiple servlets can be added to the MANAGED ELEMENTS IN THE CURRENT GROUP list. The servlets so managed will thus form a part of the new servlet group. To unmanage a managed servlet, select the component from the MANAGED ELEMENTS IN THE CURRENT GROUP list, and click the UNMANAGE button. This will transfer the selected servlets back to the ALL ELEMENTS list.
- Then, assign a name to the newly created servlet group in the Info Group Name text box (see Figure 12).
- If the servlet group so created is to be associated with other WebLogic servers in the environment, then, select the Apply this configuration to other servers check box of Figure 10.
- Finally, click the UPDATE button to register the changes.
-
If the Apply this configuration to other servers check box is selected, then upon clicking the update button, Figure 13 will appear.
Figure 13 : Associating the servlet group with other WebLogic servers
-
A summary of the selection will then be displayed (see Figure 14). To delete the displayed group, click on the DELETE button alongside it (see Figure 14). If you had earlier associated a group with other WebLogic servers, then all or a few of these associations can be removed by selecting the Apply configuration to other servers check box before clicking on the corresponding DELETE button. This will lead you back to Figure 13, where you can select the WebLogic servers for which the servlet group configuration has to be removed. Clicking on the APPLY button after selecting the servers will ensure that the corresponding servlet group configuration does not apply to the chosen servers any longer. To modify a displayed group, click on the MODIFY button corresponding to the group name (see Figure 14). To return to the WLServlet test configuration page, click the << button in Figure 14.
- Now that the tests are configured, proceed to view the measurements gathered by these tests on monitoring the WebLogic Server.