Configuring the Tests
-
Once the PacketShaper Load Balancer component is added successfully, you will be redirected to the Components page (see Figure 1). Using the options provided in the Components page, you can modify, unmanage or delete the newly added component. In addition, you can also configure the tests, set thresholds and maintenance policies, and change the IP address.

Figure 1 : Listing the newly added PacketShaper Load Balancer component
-
To collect the performance metrics, you may need to configure the tests that are mapped to the PacketShaper Load Balancer component. To configure the tests that need manual configuration, click on the
 icon in Figure 1.
 -
Figure 2 then appears where the list of unconfigured tests will be listed in the UNCONFIGURED TESTS list box.
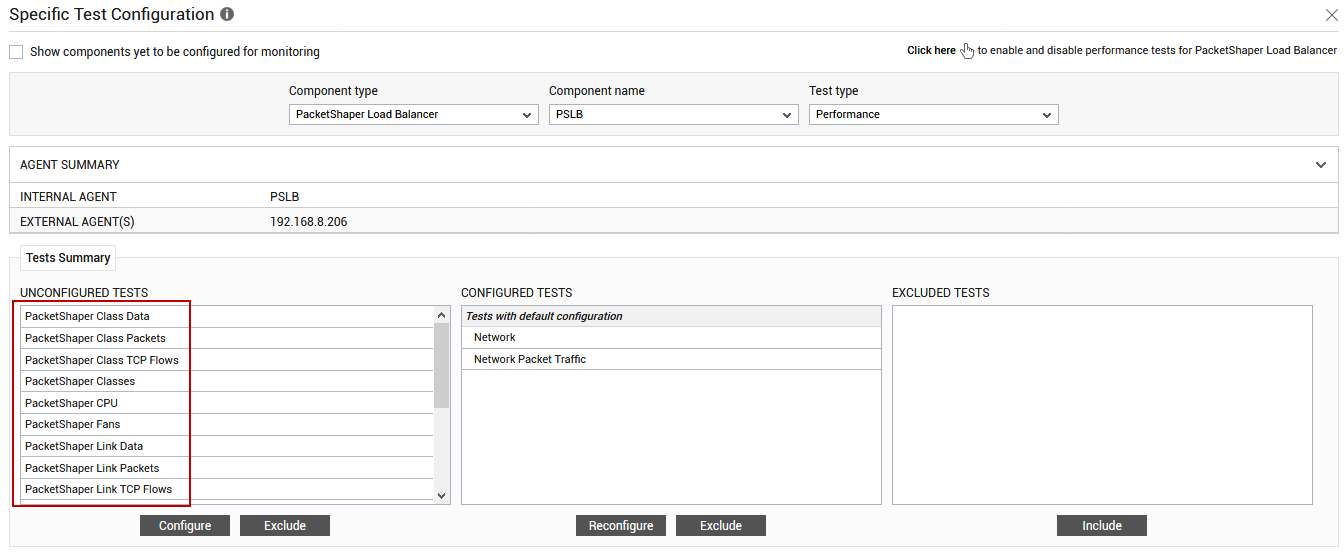
Figure 2 : The list of unconfigured tests for the PacketShaper Load Balancer
Click on any of the tests to configure it. For instance, if you click on the PacketShaper Class Data test, will appear.
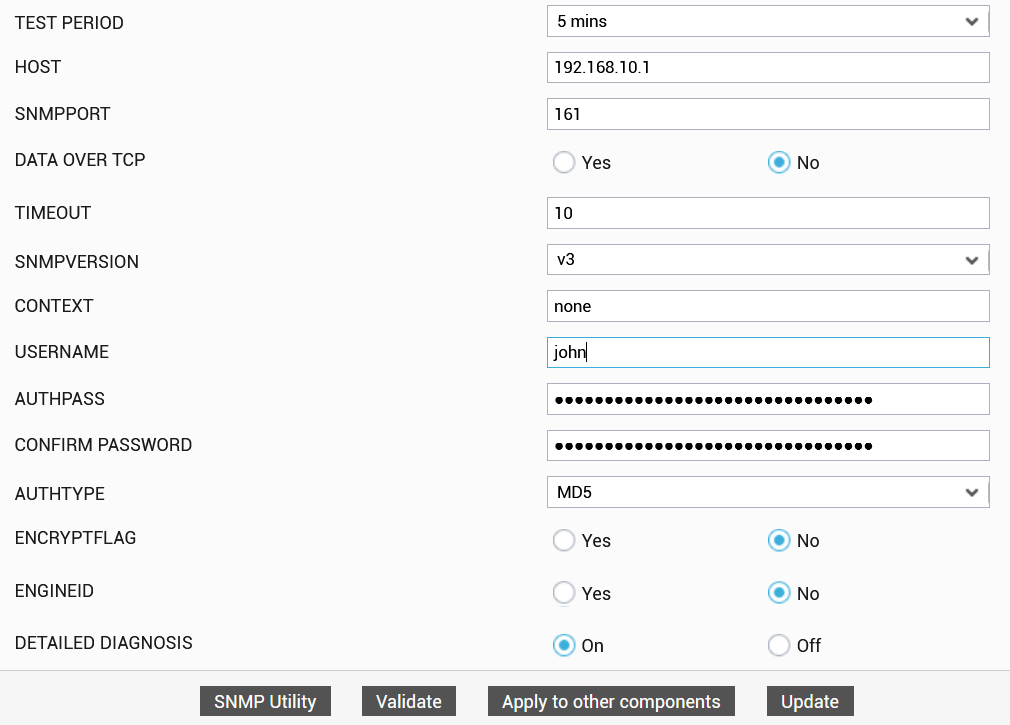
Figure 3 : Configuring the PacketShaper Class Data test
To know how to configure this test, refer to PacketShaper Class Data Test .
Click the Update button in Figure 3 to update the test configuration. This will automatically configure all the other unconfigured tests for the PacketShaper Load Balancer component.