Managing a RabbitMQ Node
eG Enterprise is capable of automatically discovering a RabbitMQ Node in a RabbitMQ cluster, by connecting to that cluster. To manage an auto-discovered RabbitMQ Node, follow the steps below:
-
Login to the eG admin interface as admin with password admin.
-
Follow the Infrastructure -> Components -> Manage/Unmanage/Delete menu sequence in the Admin home page.
-
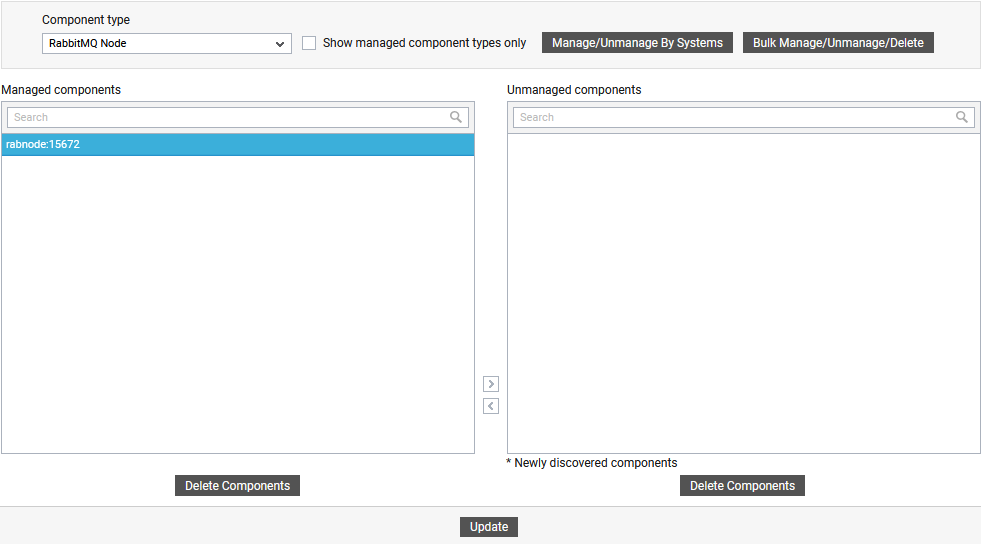
Figure 1 will then appear. Select RabbitMQ Node as the Component type in Figure 1. All auto-discovered RabbitMQ Nodes will be displayed in the Unmanaged Components list, with an asterisk (*) symbol alongside. This 'asterisk' denotes that the RabbitMQ Node has been 'newly' discovered by eG Enterprise. To manage a node, select it from the Unmanaged Components list and click the < button in Figure 1. This will transfer the selection to the Managed Components list (see Figure 2). Finally, click the Update button .
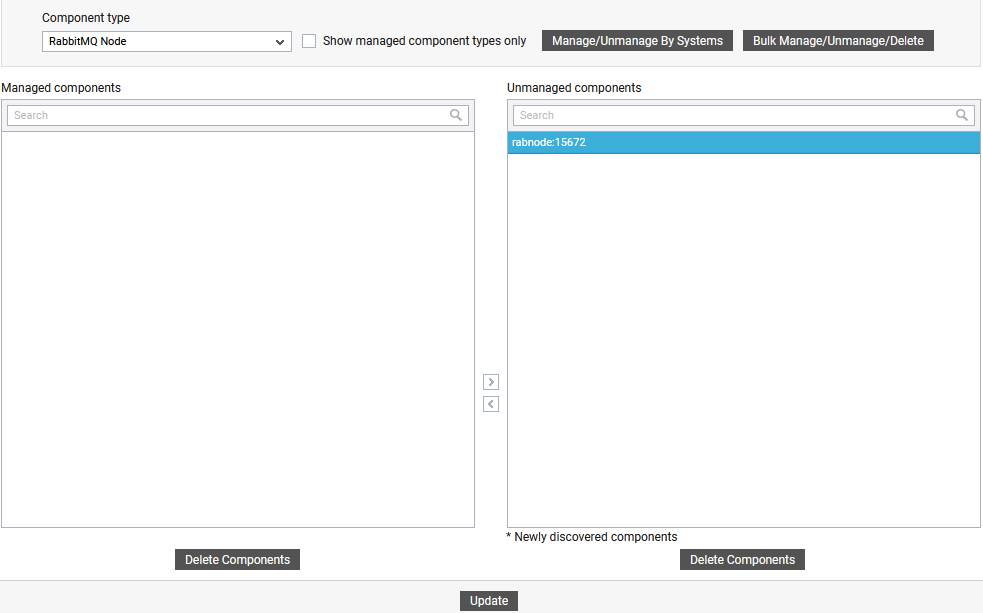
Figure 1 : Newly discovered RabbitMQ Nodes listed in the Unmanaged components list
If for some reason, eG Enterprise is unable to auto-discover the RabbitMQ Node, then, you will have to manually add the node to the eG Enterprise system. For this, follow the steps below:
-
Login to the eG admin interface as admin with password admin.
-
Click on the Add Component button in the right corner of the Components at a Glance page that appeared or follow the Infrastructure -> Components -> Add/Modify menu sequence.
-
In the page that appears next, select RabbitMQ Node as the Component type and click the Add New Component button therein.
-
Figure 3 will then appear.

Figure 3 : Adding a RabbitMQ Node to the eG Enterprise system
-
In Figure 3, provide the Host IP/Name of the target node to be monitored and also assign a unique Nick name for that node.
-
Then, assign an External agent to monitor the network connectivity and traffic to/from the node.
-
Finally, click the Add button to add the node to the eG Enterprise system. Components manually added will be automatically managed by eG Enterprise.
